Axxess Hospice now offers a Bereavement Services Overview page in the Bereavement Center, providing users with a comprehensive view of bereavement service activities for each bereaved individual and a central location to manage and complete required bereavement tasks. The addition of this enhancement streamlines bereavement operations.
To access the Bereavement Services Overview page, users must have permission to view the bereavement center, and view and edit bereavement in Axxess Hospice.
To give users access to view the bereavement center, edit the user’s profile and navigate to the Permissions tab. In the Administration section, select the View checkbox next to the Bereavement Center permission. Next, scroll to the Clinical section and select the View and Edit checkboxes next the Bereavement permission. Click Save to finish granting permissions to the user.
People tab ➜ People Center ➜ Edit ➜ Permissions tab ➜ Administration section ➜ Bereavement Center ➜ View ➜ Clinical section ➜ View/Edit ➜ Save


Once the appropriate permissions are enabled, navigate to the Centers tab and select Bereavement Center to view the Bereavement Services Overview screen.
Centers ➜ Bereavement Center
The Bereavement Services Overview screen includes an active bereavement list on the left side of the page, which is hidden by default and can be displayed by selecting the carat icon.
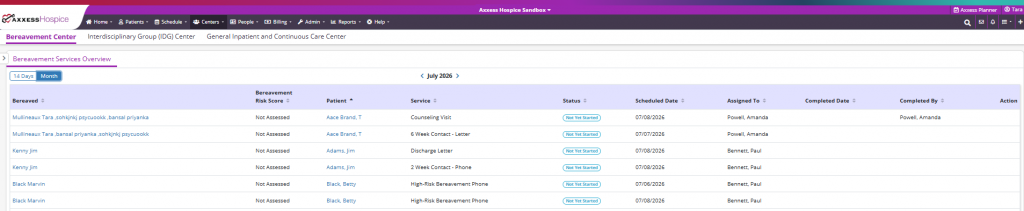
The screen displays a list of bereavement services for all bereaved individuals. By default, the view shows services scheduled within the next 14 days, with the current day appearing as the first date in the list. Users can toggle between a 14-day and monthly view as needed.
To add or update a bereavement service, select the Add Service or Update button in the upper-right corner of the page. The Bereavement Services Overview table also contains the following:
Bereaved
Bereavement Risk Score
Patient
Service
Status
Scheduled Date
Assigned To
Completed Date
Completed By
Actions
Within the Actions column, users can navigate to the ellipsis icon and select the following actions: Complete, Document and Generate Letter.
If a user does not have permission to edit bereavements, the ellipsis menu will not be displayed, and the actions available within that column will be unavailable.
If no bereavement services are due in the timeframe selected, the table will display No Bereavement Services To Display.
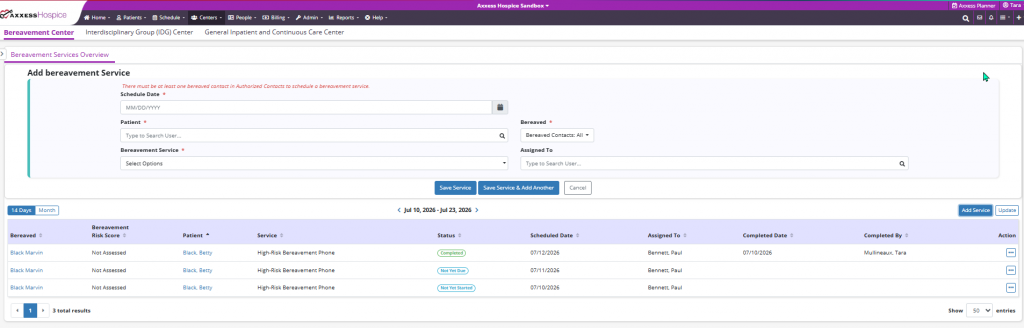
When a user selects Add Service at the top of the screen, an Add Bereavement Service section appears above the Bereavement Services Overview table.
At the top of the section, an instructional message will display, stating: There must be at least one bereaved contact in Authorized Contacts to schedule a bereavement service. This message ensures the necessary contact information is available before a service is scheduled.
The section includes a required Schedule Date field with a standard date picker that supports both direct date entry and calendar selection.
The Patient search field enables users to search for and select any patient, regardless of patient status. The Bereaved search field displays active bereaved contacts. When a patient is selected, the list is filtered to only display bereaved contacts associated with that patient. If no patient is selected, users can search and select from all active bereaved contacts. Multiple bereaved contacts can be selected as needed.
The Bereavement Service field provides a list of available bereavement services, with at least one service required before the record can be saved. An Assigned To field is also available and enables users to search for active employees or volunteers who are active on the scheduled service date.
Once all the required information has been entered, users can select Save Service, Save Service & Add Another, or Cancel.
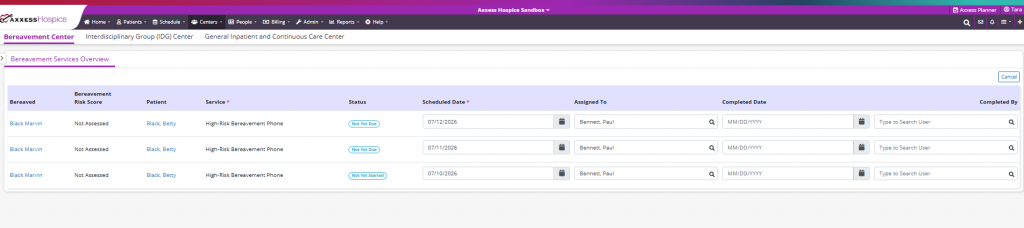
When the Update button is selected, the button changes to Cancel, indicating that the screen is in an editable version. Here, users can modify the Schedule Date, Assigned To, Completed Date, and Completed By fields for any bereavement services that have not yet been completed.
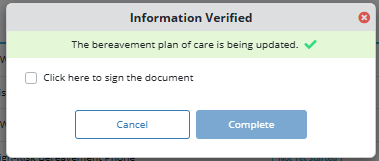
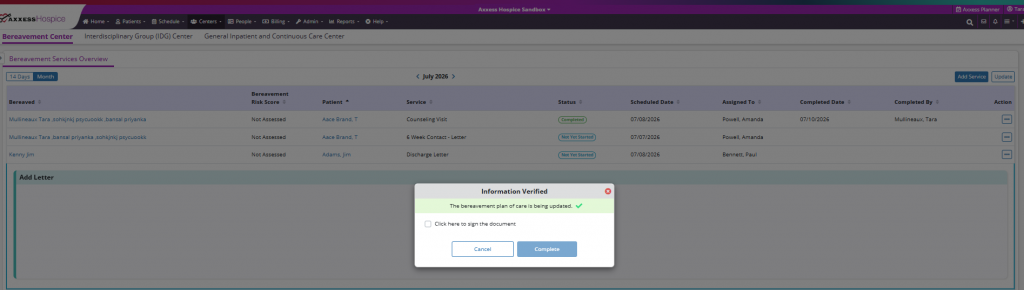
Once changes have been made, a Save Services button will display in the upper-right corner of the report. Selecting Save Services initiates the save process and displays the new Information Verified confirmation box. This includes a green confirmation section with a checkmark and the message The bereavement plan of care is being updated. Users will have the option to digitally acknowledge the update by selecting the Click here to sign the document box. From this screen, users can select Cancel or Complete to finalize the updates.
Additional functionality has also been added to support volunteer activity tracking. When all completed bereavement services in the update contain the same volunteer in the Completed By field, an additional checkbox appears within the signature section of the Information Verified box labeled Are the bereavement services completed by volunteers also volunteer activity? Selecting this option displays a required Volunteer Activity Type field with search capabilities, enabling users to select the appropriate volunteer activity.
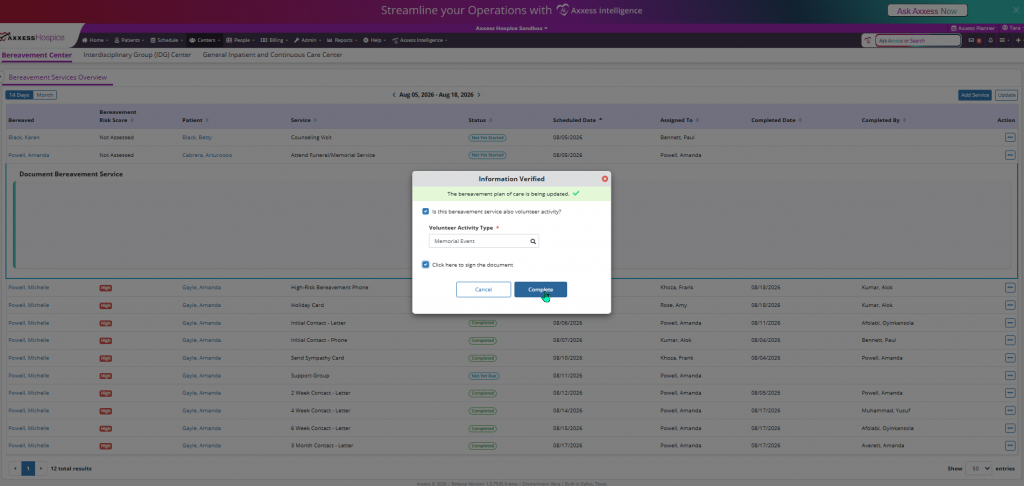
When the Complete button is selected, a new volunteer activity record is automatically created for the volunteer identified in the Completed By field. The activity is then added to the volunteer’s calendar with the Not Yet Started status. Please note: the volunteer activity workflow is only triggered when all completed services are associated with the same volunteer. If the completed services are associated with a combination of employees and volunteers, or if all completed services are associated with employees, the volunteer activity workflow will not be displayed and no volunteer activity records will be created.
When users select Complete from the ellipsis icon under the Actions column, the Complete Bereavement Service window will be displayed. This window includes the Date Completed field, automatically populated with the current date. A Completed By search field is also available and defaults to the name of the user performing the action. Users may search for and select active employees or volunteers based on the selected completion date.
Both the Date Completed and Completed By fields are required before the record can be completed. Users can select to either Save or Cancel their changes. If Save is selected without all required information being entered, the system will display a validation message prompting the user to complete the required fields before proceeding.
When all the required information has been entered and Save is selected, users will be presented with the Information Verified confirmation box.

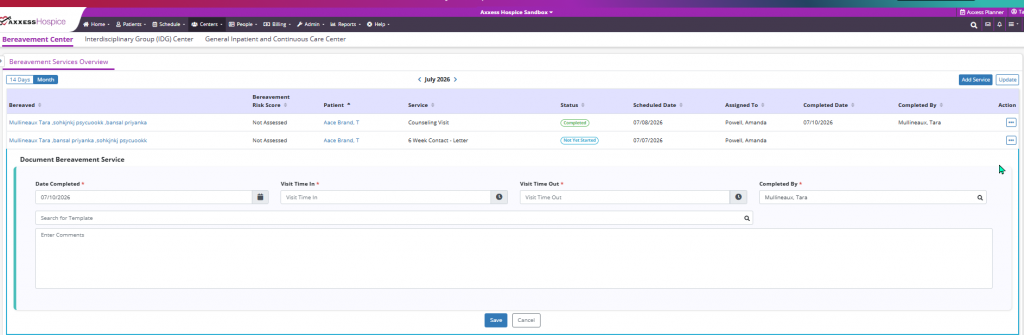
When Document is selected, the Document Bereavement Services section will expand beneath the Bereavement Services Overview table. Users will then be prompted to enter the necessary information in the required fields. A free-text field is also available for documentation.
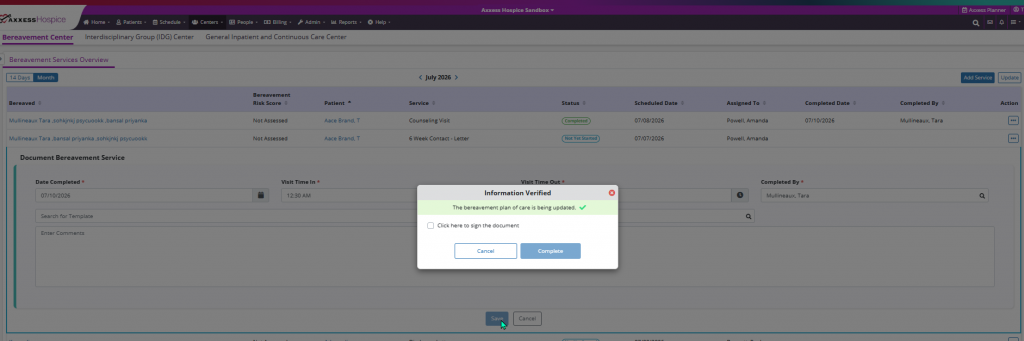
Click Save to save the entered information. Click Cancel to return to the Bereavement Center without saving the documentation. Any unsaved information will be discarded.
When Save is selected, the Information Verified confirmation box will be displayed.
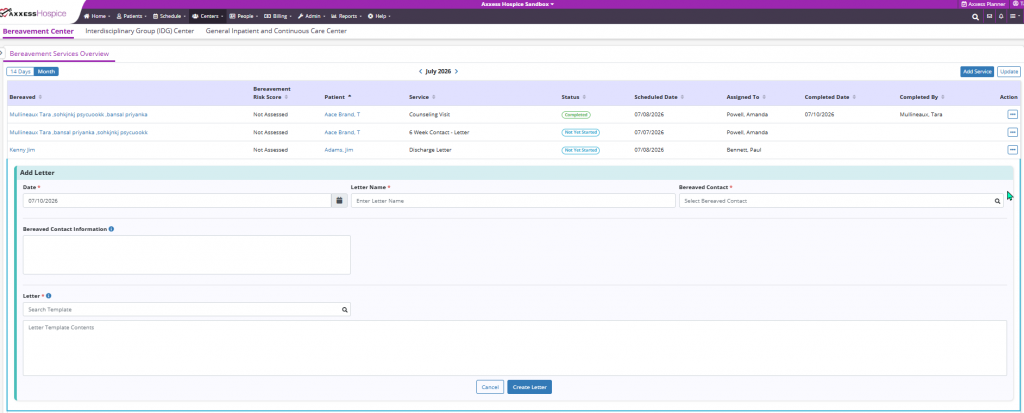
When Generate Letter is selected, the existing letter creation experience within the Bereavement Center is launched. The solution will automatically use the bereavement contact information associated with the selected bereavement record, reducing manual data entry and helping ensure letter details are generated using the appropriate recipient information.
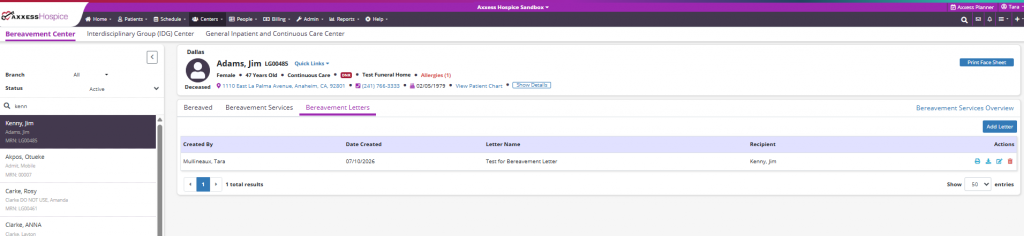
If Cancel is selected, the user is returned to the Bereavement Center without creating a letter. When Create Letter is selected, the letter is generated and automatically added to the Bereavement Letters section of the Bereavement Center for future access and review. Within this workflow, the option to Save and Add Another Letter is not available, creating a more streamlined letter generation process.
Upon successful letter generation, the associated bereavement service is automatically marked as complete. The solution captures the completion date and the user responsible for the action, ensuring a comprehensive audit trail. Successful letter creation also triggers the Information Verified confirmation dialog box.
Updated on 8/12/2026