Axxess Hospice now provides authorization tracking for payers that require authorization for room and board services. This functionality streamlines operations, decreases costs and increases revenue by ensuring the required authorizations are maintained.
To manage room and board authorizations, users must have permission to access insurances/payers and authorizations in Axxess Hospice.
To give a user permission to manage insurances/payers and authorizations, edit the user’s profile and navigate to the Permissions tab. In the Administration section, select View, Add, Edit and Delete next to the Insurance/Payer & Authorizations permission.
People tab ➜ People Center ➜ Edit ➜ Permissions tab ➜ Administration section ➜ Insurance/Payer & Authorization ➜ View/Add/Edit/Delete
These permissions will enable the user to complete insurance/payer setup for payers requiring authorizations and manage authorizations for each patient.

To view the Patient Authorizations Report, users must have permission to access patient reports in Axxess Hospice.
To give a user permission to access patient reports, navigate to the Reports section on the Permissions tab in the user’s profile. Select View and Export next to the Patient Reports permission.
People tab ➜ People Center ➜ Edit ➜ Permissions tab ➜ Reports section ➜ Patient Reports ➜ View/Export

Click Save to finish granting the permissions to the user.
Axxess Hospice now enables users to indicate room and board payers that require authorizations. To indicate that a room and board payer requires authorizations, navigate to the three-line menu (  ) in the top-right corner of the screen and select Insurances/Payers.
➜ Insurances/Payers
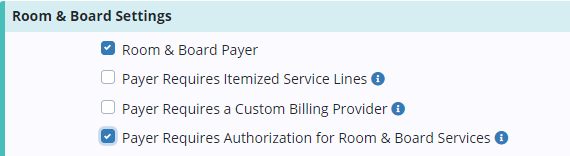
Select Edit next to the appropriate payer and navigate to the Billing Information tab. Under Room & Board Settings, check the box next to Payer Requires Authorization for Room & Board Services. Click Save to confirm the changes.
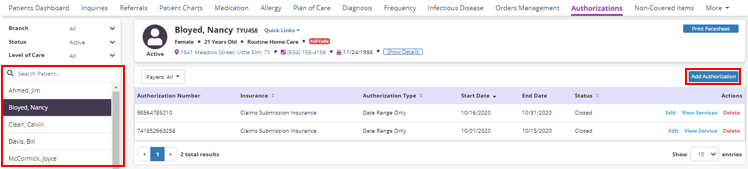
After completing the payer setup, authorizations can be added to room and board payers. To add authorizations to a room and board payer, navigate to the Patients tab and select Authorizations.
Patients tab ➜ Authorizations
Choose the patient from the patient list or use the search section to locate the patient and click Add Authorization on the left side of the screen. If a patient does not have a room and board payer, no authorizations can be added for the patient.
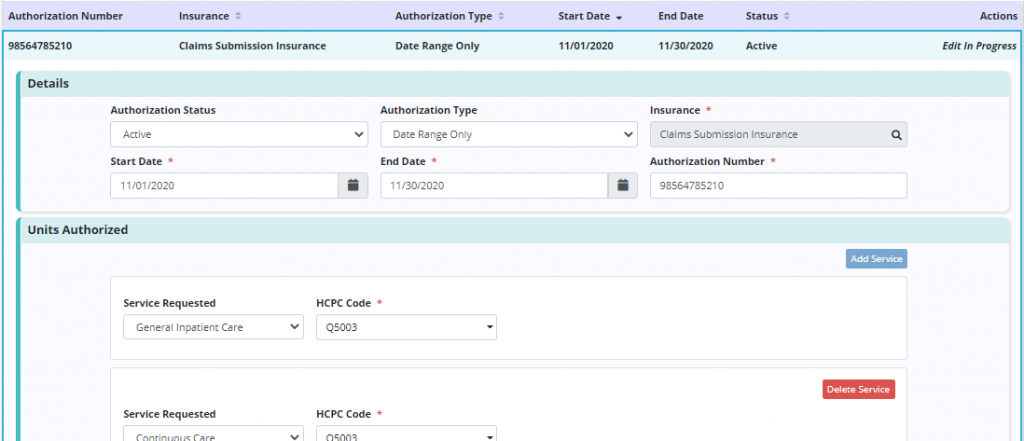
Add the authorization details, including authorization status, authorization type, insurance and authorization number. Based on the authorizations selected, a start date and end date may be required.

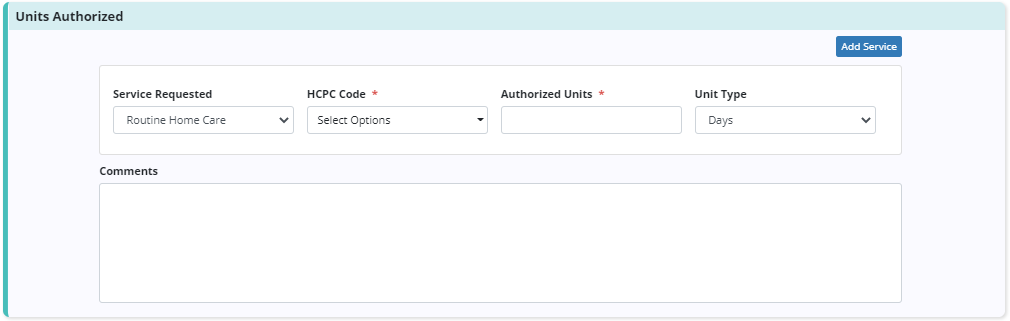
Once all fields in the Details section are complete, enter the services authorized or requested by the payer. In the Units Authorized section, select the HCPC code based on the service location (Q code). If Authorized Units is selected as the authorization type, the number of authorized units and unit type will be added to the service requested. If more than one service is authorized or requested, click the Add Service button.
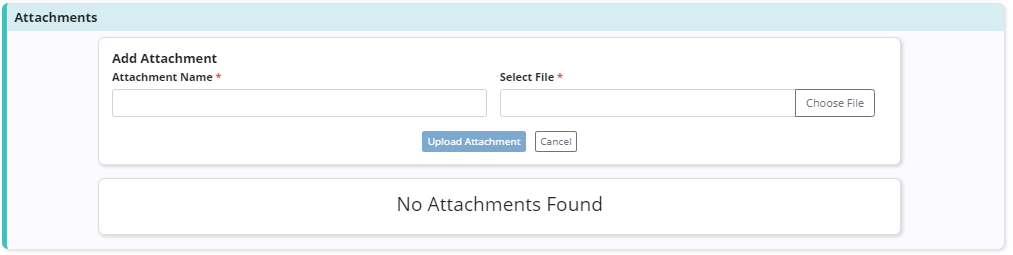
Finally, authorization documents can be added to each authorization. To attach authorization documents to an authorization, click Add Attachment in the Attachments section. Enter the name of the file and select a file to attach. Click Upload Attachment to finish adding the attachment to the authorization.
To edit an existing authorization, navigate to the Authorizations page under the Patients tab and click Edit.
Patients tab ➜ Authorizations ➜ Edit
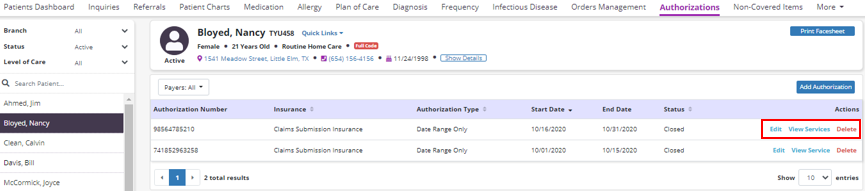
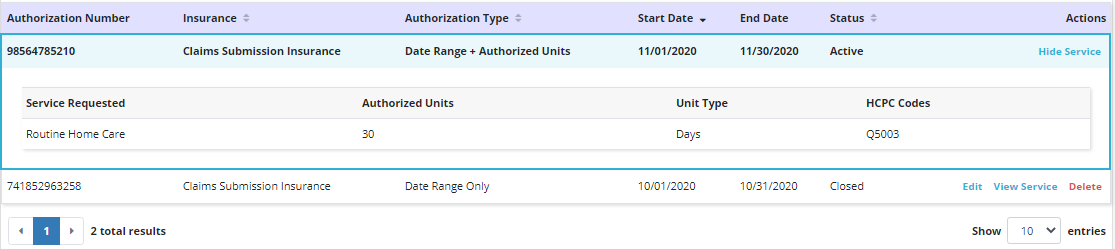
Click View Service to view the services included in the authorization. To remove an authorization, click Delete.
To view the Patient Authorizations Report, navigate to the Report Center under the Reports tab. In the Patient Reports section, select Patient Authorizations Report.
Reports tab ➜ Report Center ➜ Patient Reports ➜ Patient Authorizations Report

Updated on 03/30/2022
