The Comprehensive Plan of Care (POC) enables hospice clinicians to access and review pertinent information in one convenient document. The Comprehensive POC consolidates physician orders, discipline frequencies, demographic information, supplies, emergency preparedness, advance directives, and medical equipment needs.
Users can view, download, and print the Comprehensive Plan of Care for documentation purposes and to ensure seamless communication between clinicians and other hospice providers to facilitate appropriate changes and overall coordination of care on an ongoing basis.
Create the Comprehensive Plan of Care by assessing and documenting patient needs in the Initial Assessment or Initial/Comprehensive Assessment. Once created, document all updates and changes in the Updated Comprehensive Plan of Care. All users can view, download, and print the Comprehensive Plan of Care as needed.
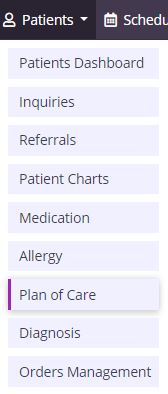
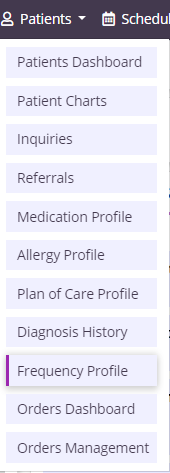
To access a patient’s Comprehensive Plan of Care, navigate to the Patients tab and select Plan of Care from the drop-down menu.
Patients tab ➜ Plan of Care
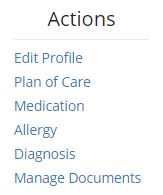
Users can also access the Comprehensive Plan of Care through the Patient Charts.
Patients tab ➜ Patient Charts ➜ Actions menu ➜ Plan of Care
The Plan of Care Profile displays the patient’s active problem statements and the Comprehensive Plan of Care.
To print or download the Comprehensive Plan of Care, navigate to the patient’s chart and click the printer icon next to the Plan of Care under Actions. The Plan of Care will open in a PDF that users can print and/or save electronically.
Patients tab ➜ Patient Charts ➜ ![]()
To update clinical aspects of the Comprehensive Plan of Care, a physician order must be in place.
Physician orders can be created through any of the following locations:
For instructions on creating a physician order, visit the Physician Orders page of the Help Center.
The Plan of Care Profile can be updated through a physician order that was created through a clinical document or scheduled through the Patient/Employee Schedule.
To update the Plan of Care Profile, click the Plan of Care button under Order Types in the physician order.

The Plan of Care Profile can also be updated by selecting Update Plan of Care in the Plan of Care Profile.

When the Update Plan of Care button is selected, the system prompts the user to select or add a physician order to link the updates. To add a new physician order, click Create on the right side of the New Physician Order tile and enter a date for the new order in the Date field.


Once a physician order has been selected or created, a blue confirmation message appears at the top of the screen with the order’s date and assigned user.

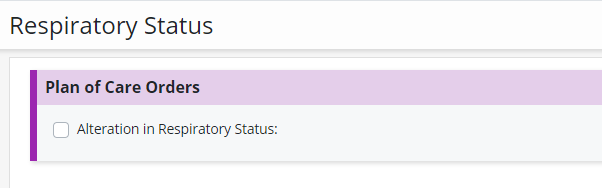
In the editable Plan of Care Profile, users can update problem statements and add problems using the corresponding buttons:

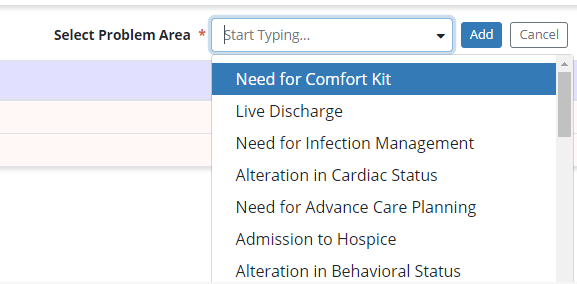
To add a new problem, click Add Problems. Select a problem area in the Select Problem Area drop-down menu and click Add. Problem areas that are not currently on the Plan of Care Profile appear in the menu for selection.
Enter the problem statement, goals, and interventions. All sections are editable, so users can fully customize the Plan of Care Profile based on the specific needs of each individual patient and family.
Replace any text that appears between **double asterisks** with individualized patient information to customize the Plan of Care.
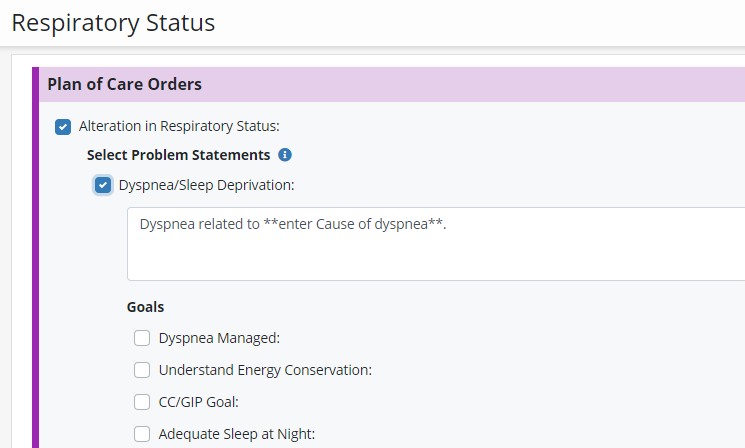
Under each selected goal, select one of the following options to identify the goal length:
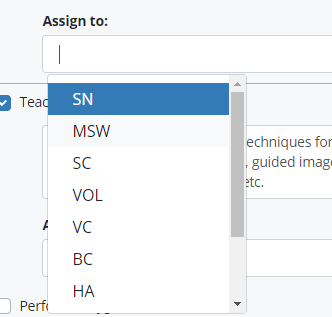
When entering interventions for a goal, identify which of the following disciplines is responsible for completing the intervention:
Once all problem statements, goals, and interventions have been entered, click Complete at the bottom of the screen. The problem statements, goals, and interventions will update in the Plan of Care Profile and flow to the physician order document.

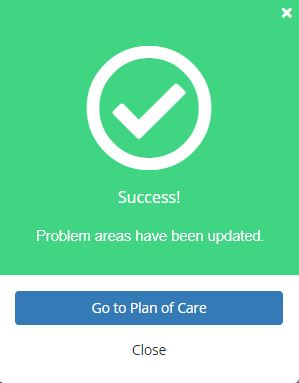
A green success message will confirm that the problem was added.
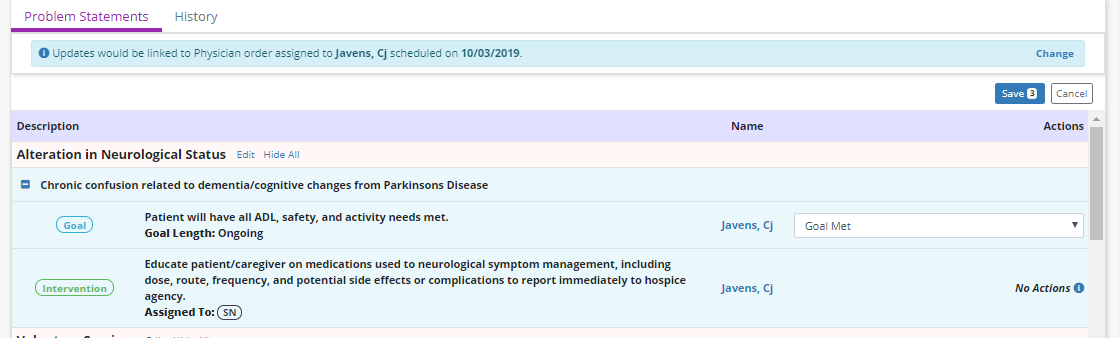
To discontinue interventions and resolve goals, select Update Problem Statements in the Plan of Care Profile. The Plan of Care Profile will open in this view:
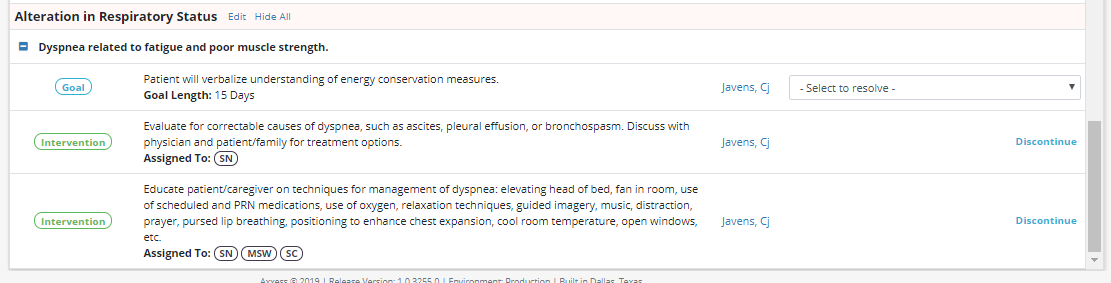
To resolve a goal, select one of the following options from the Select to Resolve drop-down menu:
To discontinue an intervention, select Discontinue to the right of the intervention. Marked to Discontinue will appear in black text. Click the blue Save button to finish discontinuing the intervention.
If you hit the Discontinue button inadvertently, or decide not to discontinue the intervention, click the red Cancel button.

An intervention cannot be discontinued if it is the only intervention associated with a goal. Every goal must have at least one intervention. The Discontinue option will not appear for an intervention unless at least one other intervention is associated with the goal. When only one intervention is associated with a goal, No Actions will appear in the Actions column.

Each intervention must be associated with a goal. If you select to resolve the only goal associated with a problem statement, the problem area and all associated interventions will be marked to discontinue.
The Save button in the top right of the Plan of Care Profile shows the number of problem statements, goals, and interventions impacted. Click Save to complete the actions (or Cancel to stop the actions).
Once saved, a green success message will confirm that the Plan of Care was updated successfully.

Updates to the problem statement, goals, and interventions will appear in the Plan of Care Profile and flow to the physician order.
To add new goals and interventions to an existing problem area, select Edit next to the problem area in the Plan of Care Profile.

Level of care can only be updated through a physician order document. To update the level of care:

Once the physician order is complete, the new level of care will replace the previous level on the Comprehensive Plan of Care and in the Patient Chart header.

Discipline frequency is updated through the physician order to ensure that all frequencies have a corresponding order. In the physician order document, click the Frequency button to update visit frequencies.
The patient’s Frequency Profile will open to display the discipline, visit frequency, PRN status, start date, and end date for the patient’s active and discontinued frequencies.
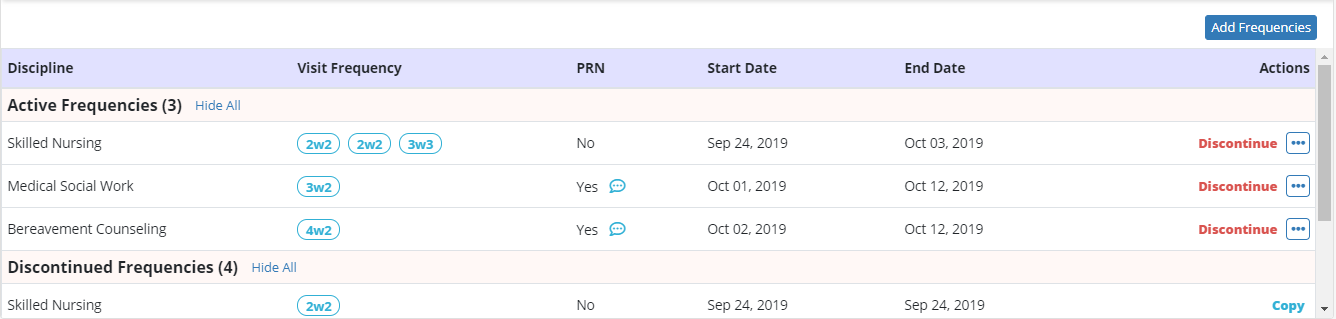
To add a new frequency, click the Add Frequencies button in the top right corner. Complete the fields under Add Frequencies:
Actions for existing frequencies include Discontinue, Discontinue and Copy, and Copy. Selecting Discontinue will prompt you to enter a discontinue date for the frequency. If you click this by mistake, click Cancel and the frequency will not be discontinued.

Select Discontinue and Copy to update an existing frequency by creating a discontinue order for the frequency and copying it so that only the necessary changes need to be documented. Selecting Discontinue and Copy will prompt you to first enter a discontinue date. Once entered, the visit frequency, start date, PRN, and reason for PRN can be updated as needed.
Discontinued frequencies can be restarted using the Copy action. To restart a discontinued frequency, click Copy and enter a new start date. The visit frequency, PRN, and reason for PRN will pre-populate with data from the copied frequency. Update these fields as needed and click Save.

Frequencies can also be updated directly through the Frequency Profile. Navigate to the Frequency Profile through the Patients tab.
Patients tab ➜ Frequency Profile
When updating frequencies in the Frequency Profile, select or create a physician order to attach your updates, and follow the process above to update the visit frequency as needed.

Once the physician order is complete, the new frequency updates will appear in the Frequency Profile and on the Comprehensive Plan of Care.
To update diagnoses, click the Add Orders button in a clinical document to create a physician order. In the physician order, select the Diagnoses button under Order Types.
Diagnoses can also be updated through the Patient Profile. To access the Patient Profile, select Edit Profile from the Actions menu in the Patient Chart.
Navigate to the Clinical Information tab in the Patient Profile. Select the Update Diagnoses button.
Patients tab ➜ Patient Charts ➜ Actions menu ➜ Edit Profile ➜ Clinical Information tab ➜ Update Diagnoses
Selecting Update Diagnoses will prompt you to select or add a physician order to link the diagnoses changes. A blue confirmation message will appear at the top of the screen with details on the physician order you selected/created.
Update the diagnoses as needed, and click Save at the bottom of the screen to save your changes. Diagnoses updates will generate in read-only format in the Diagnoses Updates section of the physician order and flow to the Comprehensive Plan of Care.
Additional information on documenting diagnoses is provided on the Diagnoses Documentation page in the Help Center.
To update supplies, create a physician order through the Patient/Employee Schedule or the Add Orders button in a clinical document. In the physician order, select the Supplies button under Order Types.
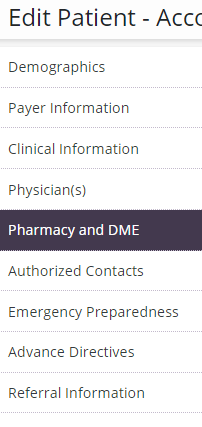
Supplies can also be updated through the Patient Profile. To access the Patient Profile, select Edit Profile from the Actions menu in the Patient Chart.
Navigate to the Pharmacy and DME tab in the Patient Profile.
Click the Update Supplies button.
Patients tab ➜ Patient Charts ➜ Actions menu ➜ Edit Profile ➜ Pharmacy and DME tab ➜ Update Supplies
Selecting Update Supplies will prompt you to select or add a physician order to link the supplies updates. A blue confirmation message will appear at the top of the screen with details on the physician order you selected/created.
Update the supplies as needed, and click Save at the bottom of the screen to save your changes.
To add a new supply to the Patient Profile, start typing in the Select Supply box. Supplies will appear in the drop-down menu as you type. The supplies you can choose from are generated from your agency’s Supplies list. If a supply you need is not in the list, contact your agency administrator or manager and request the supply be added to the Supplies list.
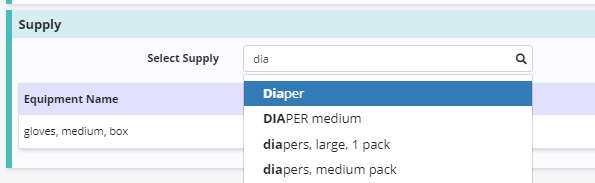
Select the desired supply from the drop-down menu and enter a start date in the Start Date field. Click the green Save button under Actions to finish adding the new supply.

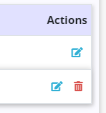
To discontinue a supply, click the blue edit icon under Actions on the right side of the Patient Profile.
Enter a date to discontinue the supply in the End Date field and click Save.

Supplies updates will generate in read-only format in the Supplies Updates section of the physician order and flow to the Comprehensive Plan of Care.
To update DME, create a physician order through the Patient/Employee Schedule or the Add Orders button in a clinical document. In the physician order, select the DME button under Order Types.
DME can also be updated through the Patient Profile. To access the Patient Profile, select Edit Profile from the Actions menu in the Patient Chart.
Navigate to the Pharmacy and DME tab in the Patient Profile.
Click the Update DME button.
Patients tab ➜ Patient Charts ➜ Actions menu ➜ Edit Profile ➜ Pharmacy and DME tab ➜ Update DME

Selecting Update DME will prompt you to select or add a physician order to link the DME updates. A blue confirmation message will appear at the top of the screen with details on the physician order you selected/created.
Update the DME as needed, and click Save at the bottom of the screen to save your changes.
To add new DME to the Patient Profile, start typing in the Select DME box. Equipment will appear in the drop-down menu as you type. The DME you can choose from are generated from your agency’s DME list. If an item you need is not in the list, contact your agency administrator or manager and request the item be added to the DME list.

Select the desired DME from the drop-down menu and enter a start date in the Start Date field. Click the green Save button under Actions to finish adding the new DME.

To discontinue DME from the Patient Profile, click the blue edit icon under Actions on the right side of the Patient Profile.

Enter a date to discontinue the supply in the End Date field and click Save.

DME updates will generate in read-only format in the DME Updates section of the physician order and flow to the Comprehensive Plan of Care.
To update activity, create a physician order through the Patient/Employee Schedule or the Add Orders button in a clinical document. In the physician order, select the Activity button under Order Types.
Select the an activity under Activity Order.

Once the physician order is complete, the new activity order will replace the previous activity order on the Comprehensive Plan of Care.
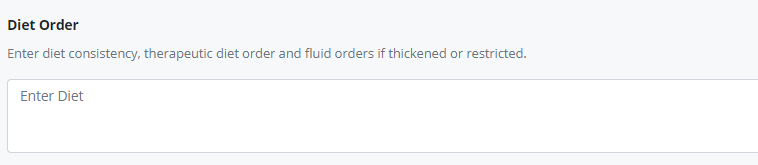
To update diet, create a physician order through the Patient/Employee Schedule or the Add Orders button in a clinical document. In the physician order, select the Diet button under Order Types.
Enter details of the ordered diet in the Diet Order text box.
Once the physician order is complete, the new diet order will replace the previous diet order on the Comprehensive Plan of Care.
To update non-clinical aspects of the Comprehensive Plan of Care, update the Patient Profile or Allergy Profile. Sections of the Comprehensive Plan of Care that must be updated in the Patient Profile are:
The Allergy Profile can be updated from the Patients tab or the Actions menu in the Patient Chart.
Patients tab ➜ Allergy
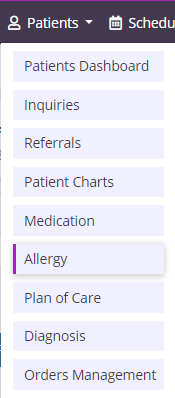
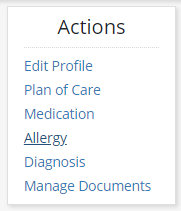
Patients tab ➜ Patient Charts ➜ Actions menu ➜ Allergy
Add a new allergy by selecting the +New Allergy button in the Allergy Profile.

To update the attending physician, navigate to the Patient Charts and select Edit Profile from the Actions menu. Navigate to the Physicians tab and select +Add Physicians.
Patients tab ➜ Patient Charts ➜ Actions menu ➜ Edit Profile ➜ Physicians tab ➜ +Add Physicians

To update the legal representative, navigate to the Patient Charts and select Edit Profile from the Actions menu. On the Authorized Contacts tab, complete the contact information fields, check the Legal Representative box, and click Save.
Patients tab ➜ Patient Charts ➜ Actions menu ➜ Edit Profile ➜ Authorized Contacts tab ➜ Legal Representative check box

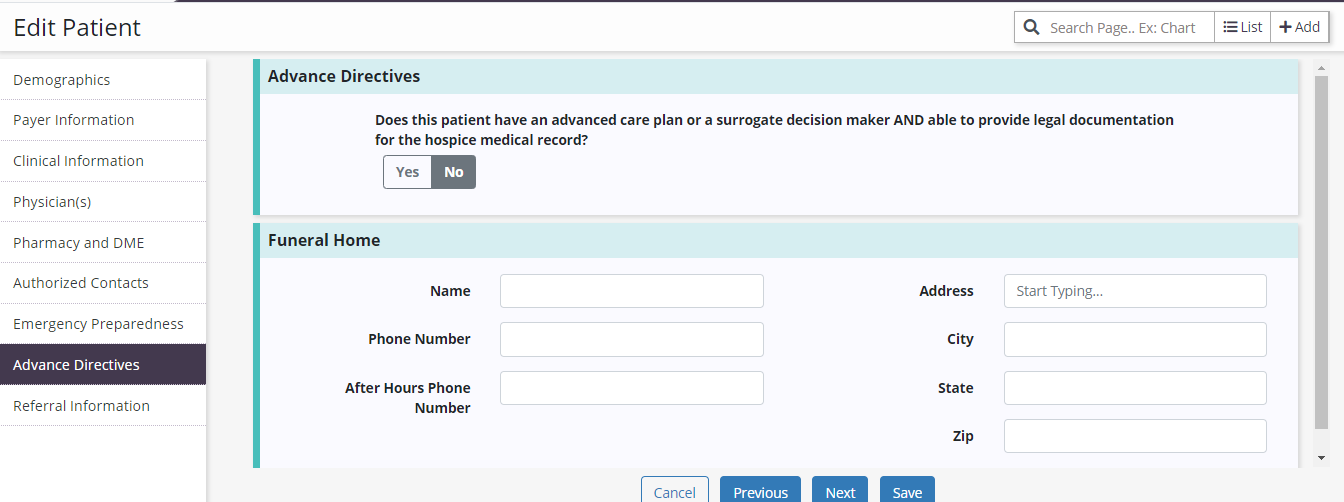
To update advance directives, navigate to the Patient Charts and select Edit Profile from the Actions menu. On the Advance Directives tab, select Yes or No under Advance Directives, complete the subsequent fields, and click Save.
Patients tab ➜ Patient Charts ➜ Actions menu ➜ Edit Profile ➜ Advance Directives tab ➜ Yes/No