Axxess Hospice now enables users to track and bill room & board claims for facility-based hospice patients. By seamlessly tracking claim creation and rates for room & board, agencies can streamline billing operations and optimize vendor relationships to gain referrals and grow business.
To complete room & board setup and billing, users must have permission to access vendors, patient charts and claims.
To give a user permission to set up room & board rates at the facility level, apply rates to a patient, and/or create and submit room & board claims, navigate to the People Center under the People tab. Edit the user’s profile and navigate to the Permissions tab.
People tab ➜ People Center ➜ Edit ➜ Permissions tab
|
To give a user permission to set up facility room & board rates: Administration section ➜ Vendors ➜ View/Add/Edit |
 |
|---|---|
|
To give a user permission to apply rates to a patient: Clinical section ➜ Patient Chart ➜ View/Edit |
 |
|
To give a user permission to create and submit room & board claims: Billing section ➜ Claims ➜ View/Add/Edit |
 |
Once the desired permissions have been selected, click Save to finish granting the permissions to the user.
Insurances and payers in Axxess Hospice can now be identified as room & board payers. To mark an existing payer as a room & board payer, navigate to the lists menu  in the top right corner of the screen and select Insurances/Payers. On the Insurances/Payers list, click Edit under Actions to add room & board information for the payer.
To create a new payer, navigate to the add menu  and select Insurance/Payer. In the new insurance/payer form, document the payer details.
On the Billing Information tab, check the box for Room & Board Payer. Select Primary, Secondary or Tertiary from the Payer Type menu to specify the sequence that the room & board claim will be billed. Click Save to finalize changes to the payer.
The payer type will appear on patient charts and on claims created for the payer, and can be updated at the patient level to accommodate any patient-specific billing needs.

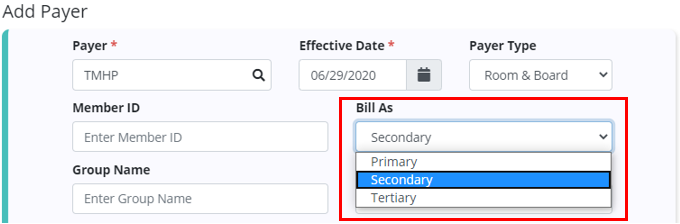
When adding a room & board payer for a patient, a new Bill As menu has been added to correspond with the Payer Type selected for the payer. If the payer type was selected during the payer setup, this information will pre-populate when the payer is selected for the patient, and can be edited if the patient needs to have room & board claims billed in a different sequence.
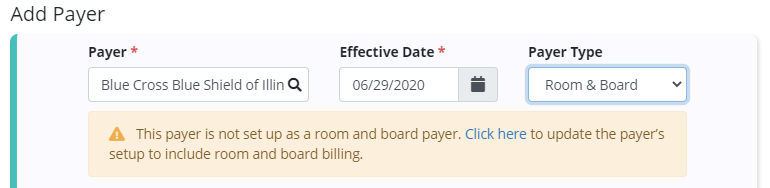
If a payer has not been previously set up as a room & board payer, users are notified and can click the hyperlink to complete the payer changes in a new browser tab. The payer must be updated before it can be saved as the patient’s payer.
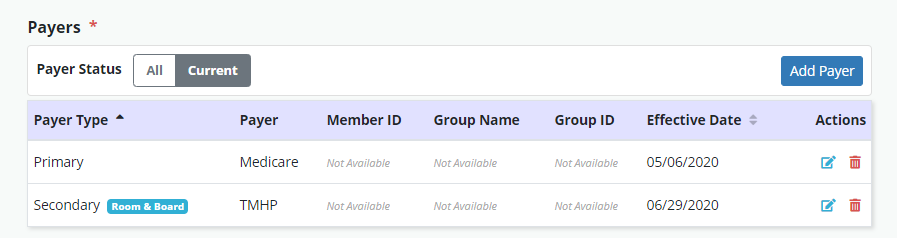
In the patient’s chart, the Payer Type column under the Payers section will indicate the selected payer type corresponding with the billing sequence of each payer for the patient. A Room & Board badge will appear next to room & board payers in the Payers list.
To create a room & board claim, navigate to the Claims page from the Billing tab and select New Claim. Enter the patient’s name, claim date range, and type of bill. The new Payer Type field will automatically populate to Primary and will create a claim for the selected patient’s primary payer. Select Room & Board and click Create to create the claim.
Billing tab ➜ Claims ➜ New Claim ➜ Complete fields ➜ Room & Board in Payer Type field ➜ Create

Room & board claims are identified with a Room & Board badge on the Claims page.

To verify claim details, click on the claim or select Verify to view the claim details.
Each of the patient’s active payers will appear in the Payers and Codes section of the claim. Based on the payer type selected during claim creation, one payer will be marked Bill to Payer. This is the payer to which the claim will be sent. To update this payer, select Mark as Bill to Payer next to another payer. Only one payer can be marked as the bill to payer.

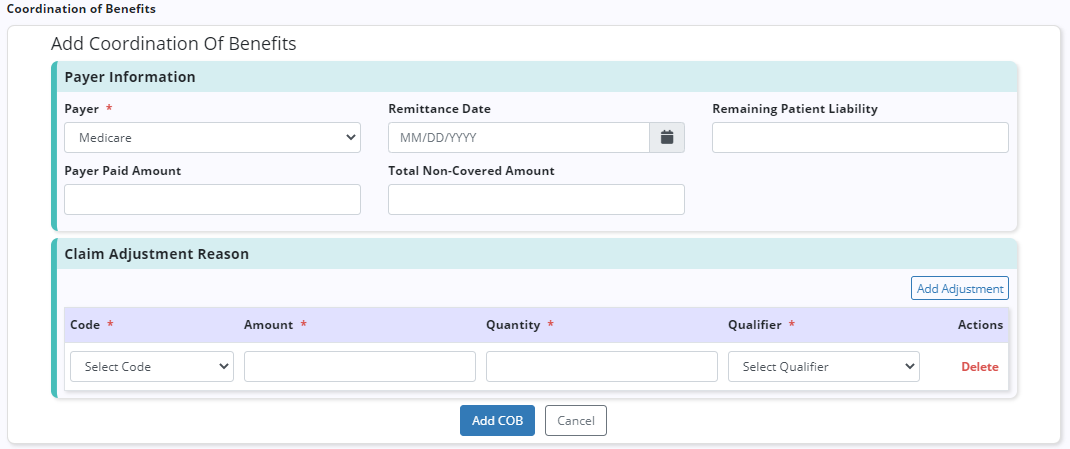
When a non-primary payer has been marked as the bill to payer, Coordination of Benefits (COB) details can be added for each additional payer. To add COB details, click Add COB and complete the following sections:
| Field | Description | ||
|---|---|---|---|
| Payer | Select a payer from the list of associated payers that have a higher payer type (e.g., if you are working on a claim for a secondary payer, you can enter the patient’s primary payer). | ||
| Remittance Date | Enter the date that a remittance advice was received from the selected payer. | ||
| Remaining Patient Liability | Enter the remaining amount that the patient owes after the initial claims were billed. | ||
| Payer Paid Amount | Enter the payment amount from the remittance advice for the selected payer. | ||
| Total Non-Covered Amount |
Enter the total amount that was not covered by the payer and is the patient’s responsibility on the remittance advice for the selected payer. |
| Field | Description | ||
|---|---|---|---|
| Code | Select the appropriate claim adjustment reason code from the drop-down menu. To prevent unacceptable codes, only accepted codes are listed. | ||
| Amount | Enter the total dollar amount for each adjustment code on the remittance. | ||
| Quantity | Enter the total number of times the same adjustment code was used on the remittance. | ||
| Qualifier | Select the appropriate qualifier based on the type of claim adjustment:
|
Updated on 6/29/2020
