Axxess enables agencies to streamline claims processing for accurate and timely claim submissions to protect revenue.
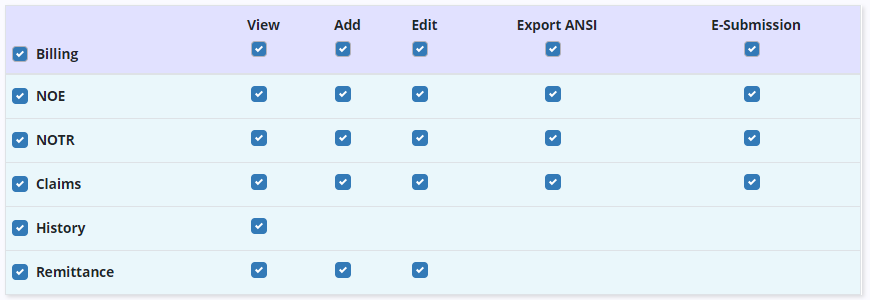
Billing features are permission-based in Axxess Hospice.
Billing permissions can be enabled when creating a new user or by editing an existing user.
To grant billing permissions to an existing user, edit the user and navigate to the Permissions tab. Scroll to the Billing section and check the boxes next to the appropriate permissions.
People tab ➜ People Center ➜ Edit ➜ Permissions tab ➜ Billing section
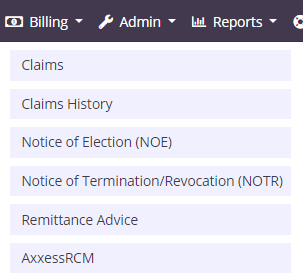
The Billing tab in Axxess Hospice includes the following menu items:
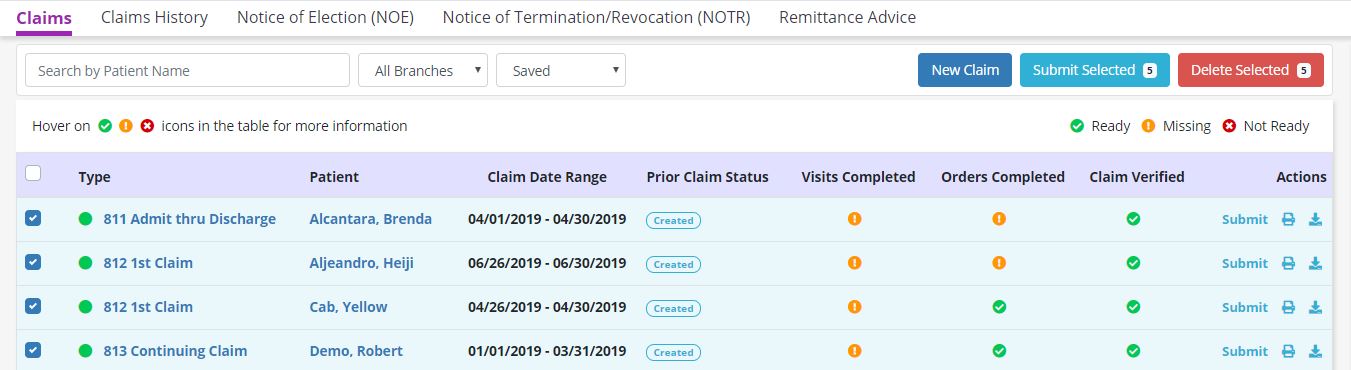
Claims displays the readiness and details of claims sorted by patient.
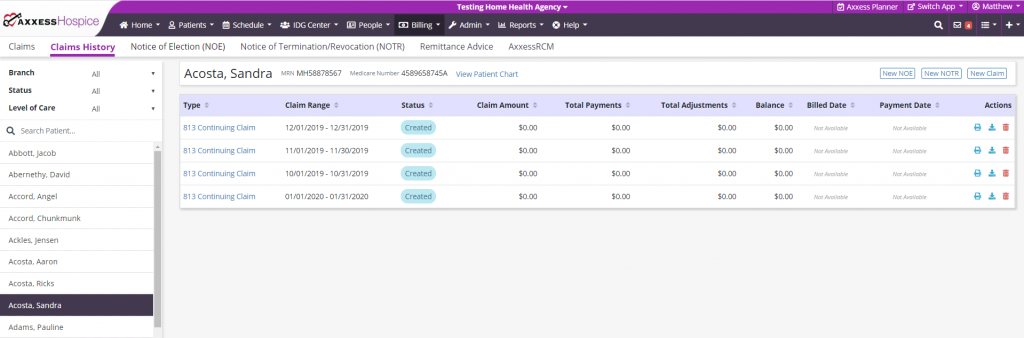
Claims History displays submitted claims sorted by patient.
Notice of Election (NOE) displays recently admitted patients who are in Active status in the software.
Notice of Termination/Revocation (NOTR) displays patients who were recently discharged live and are in Discharged status in the software.
Remittance Advice displays remittance advice for all payers. On this screen, users can search by Electronic File Transfer (EFT) number or date range.
Agencies with subscriptions to AxxessDDE and/or AxxessRCM will also see the respective links in the Billing tab menu.
The Claims page shows claims that are pending verification and/or submission. Claims are listed with the following information:
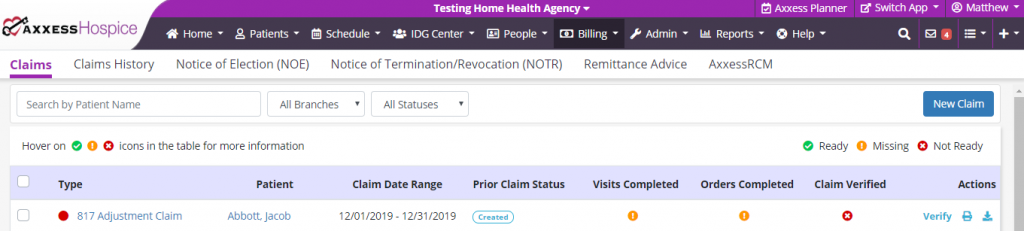
The software automatically generates claims and checks each patient’s chart to ensure that all visits and orders within the claim date range are completed.
Claims are ready in the software once each column on the Claims screen has a green check mark. To verify a claim, select Verify under Actions.
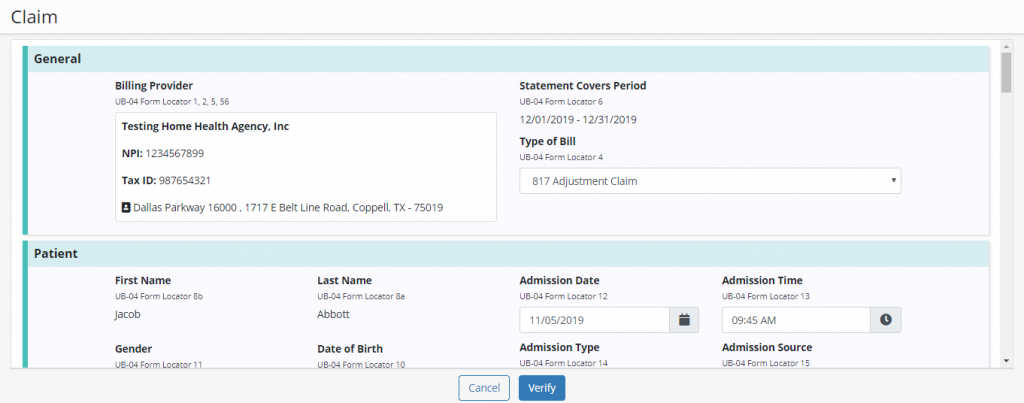
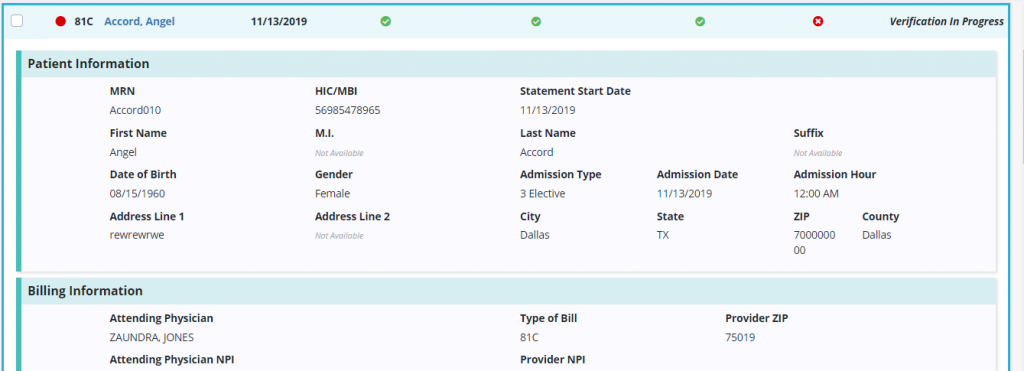
When the claim opens, confirm that the following information is signed, dated, and available as an attachment:
Once all information is entered, click Verify.
Once verified, a green check mark appears in the Claim Verified column. Click Submit to submit the claim to the patient’s payer.
The print and download icons enable users to print and download claims as documentation.

Batch billing enables agencies to bill multiple claims simultaneously. Once claims have been verified, users can submit multiple in a single batch.
To submit multiple claims in a single batch, navigate to the Claims page. Billing tab ➜ Claims
Check the boxes next to desired claims and click Submit Selected in the top right corner of the Claims screen.
Select Claims History under the Billing tab to view a list of the following information:
Find claims for specific patients using the following filters on the left side of the screen:
Once a patient has been selected, view the NOE, NOTR, or claim by selecting the respective hyperlink on the left side of the screen. Create a new NOE, NOTR, or claim by selecting the appropriate button in the top right corner of the screen.
Download, print, or delete billing items by selecting the corresponding icons under Actions. To navigate to the patient’s chart, select View Patient Chart in the header next to the patient’s Medicare Number.
Select Notice of Election (NOE) under the Billing tab to view a list of the following information:
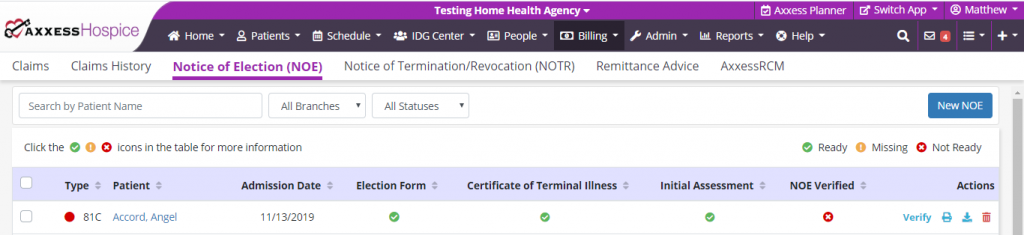
When a patient changes from Pending to Active status, the software automatically generates a Notice of Election and checks the patient’s chart to ensure that all required documents have been completed.
NOEs are ready in the software once each column on the NOE screen has a green check mark. To verify an NOE, select Verify under Actions and confirm that all information is correct.
Once all information is entered and accurate, select Verify. Once verified, a green check mark appears in the Claim Verified column. Click Submit to submit the NOE to the patient’s payer.
The print and download icons enable users to print and download NOEs as documentation.
Select Notice of Termination/Revocation (NOTR) under the Billing tab to view a list of the following information:
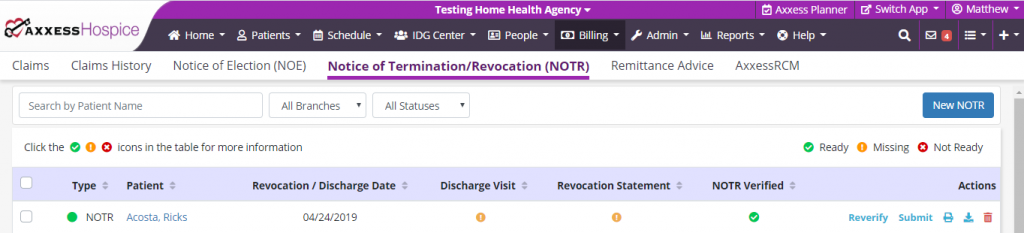
When a discharge visit or unattended discharge note is scheduled for a patient, the software automatically generates an NOTR and checks each patient’s chart to ensure that all required documents are completed.
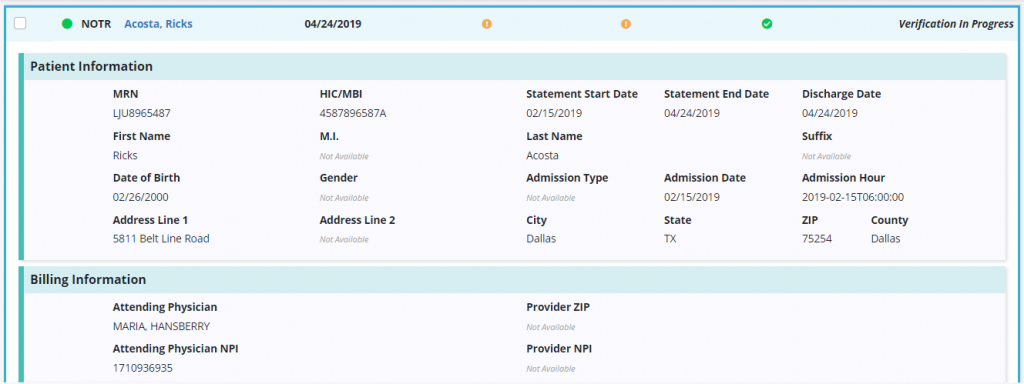
NOTRs are ready in the software once each column on the NOTR screen has a green check mark. To verify a NOTR, select Verify under Actions and confirm that all information is correct.
Once all information is entered and accurate, select Verify. Once verified, a green check mark appears in the Claim Verified column. Click Submit to submit the NOTR to the patient’s payer.
The print and download icons enable users to print and download NOTRs as documentation.
Select Remittance Advice under the Billing tab to view a list of the following information:
Users can search the list of remittances by EFT number or date range.

If you have elected Axxess to receive Electronic Remittance Advices (ERAs) for your organization, they will populate here and automatically post. If remittance advice does not appear on the list, click Add Remittance to add a remittance manually. Once all required information has been entered, select Create to add the remittance advice to the list. Select Create and Link to link the new remittance advice to existing claims for your organization.

Select View Details to see the details of a specific remittance advice, including:

Below these details, claims linked to the remittance advice are listed with the following information:

For remittances with remaining balances, users can select claims and click Auto-Adjust to automatically post payment amounts to the selected claims. To link additional claims to a remittance, select Link Claims and a list of available claims will appear for linking to the remittance. Each claim on a remittance can be viewed and edited using the buttons in the Actions column.
