Axxess Hospice now provides additional claim validations based on the rules engine available in our clearinghouse, Axxess RCM. As users validate claims in Axxess Hospice, the system now automatically runs them through Axxess RCM clearinghouse validations.
By facilitating seamless claim validation, this functionality streamlines the claim submission process and ensures that payers accept all claims upon submission.
To validate claims in Axxess Hospice, users must have permission to view and edit Notices of Election (NOEs), Notices of Termination/Revocation (NOTRs) and claims.
To give a user permission to view and edit NOEs, NOTRs and claims, edit the user’s profile and navigate to the Permissions tab. In the Billing section, select View, Add, Edit, E-Submission and Delete next to the NOE, NOTR and Claims permissions. Click Save to finish granting the permissions to the user.
People tab ➜ People Center ➜ Edit ➜ Permissions tab ➜ Billing section ➜ NOE/NOTR/Claims ➜ View/Add/Edit/E-Submission/Delete ➜ Save

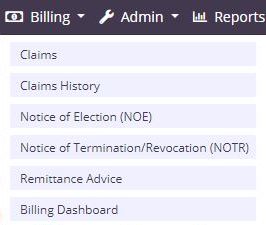
To begin automatic claim validation, navigate to the Billing tab and select Claims, Notice of Election (NOE) or Notice of Termination/Revocation (NOTR) based on the type of claims being verified and submitted.
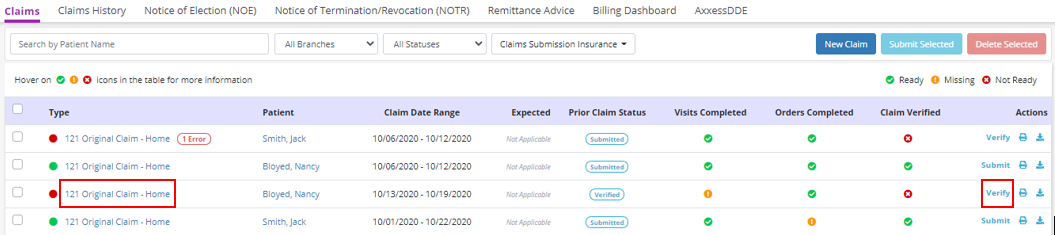
Select a claim from the list by clicking on the claim title or selecting Verify under Actions.
Review the claim details and update information as needed. Click Save to save your changes or Verify to approve the claim.
When Verify is selected, the system will check that all required information has been added to the claim. If any information is missing, the user will be prompted to add the missing information.
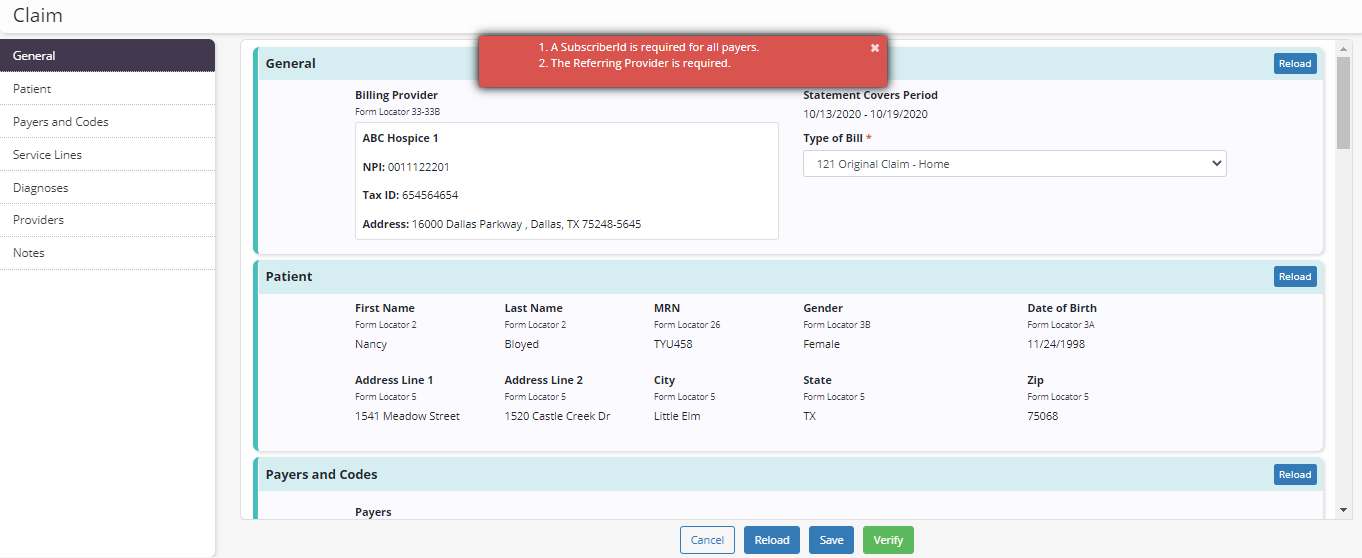
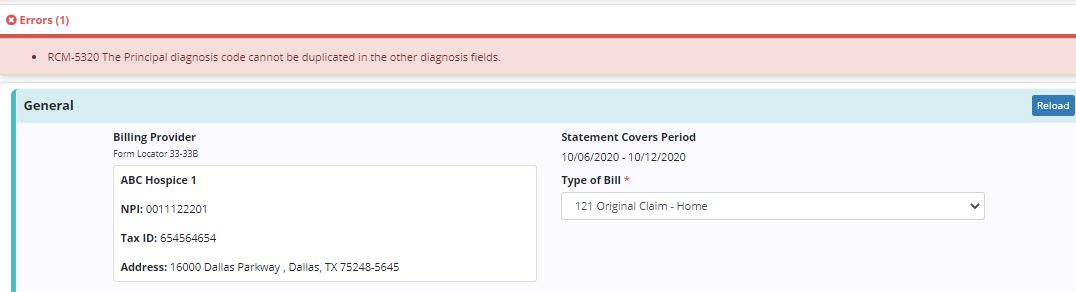
Once all the required fields have been entered, the software will automatically run Axxess RCM clearinghouse validations. Any errors that are found will appear at the top of the screen to be corrected before submitting the claim.
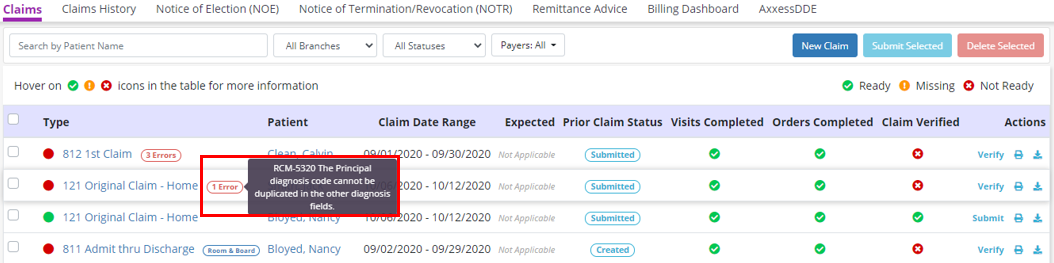
In the list of claims, claims with errors will have a badge identifying the number of errors in the claim. To view the errors, hover over or click the error badge.
Once all errors have been resolved, the claim will be verified and ready to submit. To submit a claim, click Submit under Actions or select multiple verified claims and click Submit Selected to submit in bulk.
Updated on 10/29/2020
