Axxess Hospice now enables users to upload, manage and track electronic consent forms and other important documents that the patient/caregiver must sign before starting hospice care.
Patients can also sign hospice election statements electronically from a clinician’s mobile Android device. By enabling users to seamlessly manage electronic consent documentation, this functionality streamlines intake processes and helps organizations stay compliant.
To manage consent forms, users must have permission to view, add, edit and delete consents in Axxess Hospice.
To give a user permission to manage consents, edit the user’s profile and navigate to the Permissions tab. In the Administration section, select View, Add, Edit and Delete next to the Consents permission. Click Save to finish granting the permissions to the user.
People tab ➜ People Center ➜ Edit ➜ Permissions tab ➜ Administration section ➜ Consents ➜ View/Add/Edit/Delete ➜ Save

In Company Setup, users can upload PDF files of your organization’s consents, for clinicians to review with patients/caregivers from their mobile device. After reviewing the documents with a patient/caregiver, the patient/caregiver can sign a paper copy of the consent, and the clinician can upload and attach the signed copy of the consent and mark it as signed from their device.
To upload electronic consent forms, navigate to Company Setup under the Admin tab. On the Operations tab, select Add Consent under the Consents section.
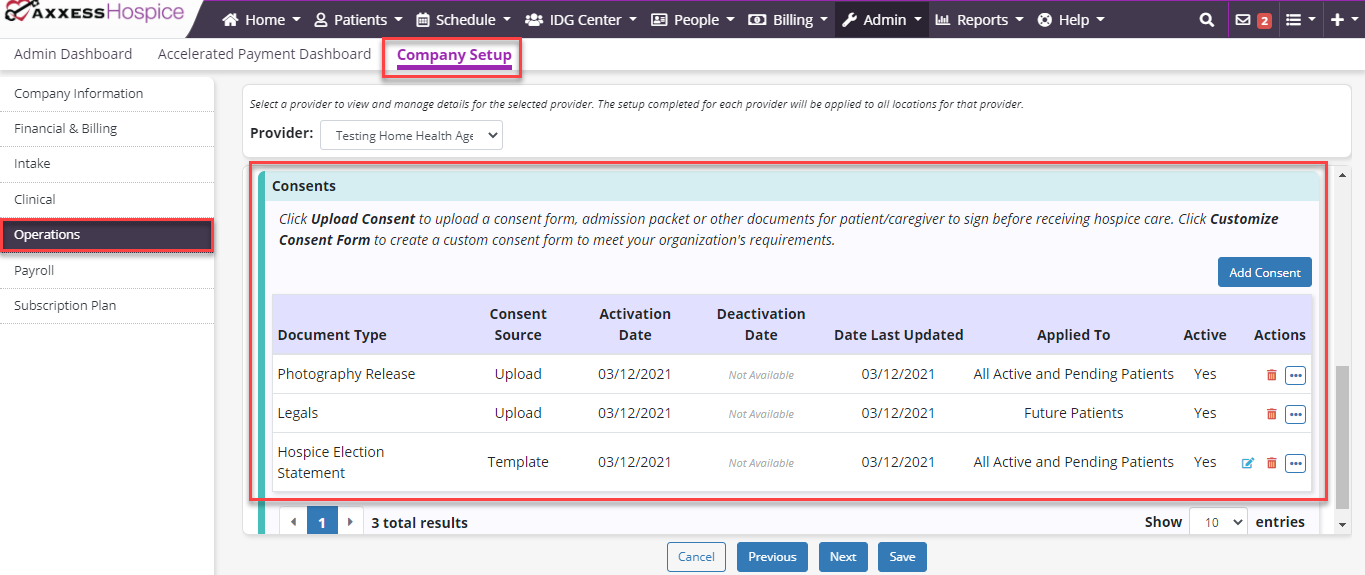
Click Upload Consent to upload your organization’s consent forms, admission packet or other documents for the patient/caregiver to sign, or click Select Consent Template to select a built-in consent template to customize.
Admin tab ➜ Company Setup ➜ Operations tab ➜ Consents section ➜ Add Consent ➜ Upload Consent or Select Consent Template

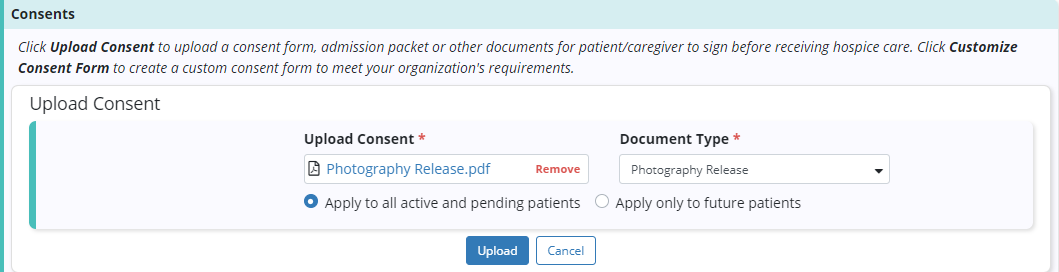
After selecting Upload Consent, click Choose File and select the appropriate PDF file from your computer.
Select the document type* and click Apply to all active and pending patients or Apply only to future patients.
If you select Apply to all active and pending patients, the consent form will immediately appear under the Consents section of all active and pending patients’ charts.
If you select Apply only to future patients, the consent form will only be available to patients entered in the system after the consent was uploaded.
Click Upload to finish uploading the file.
*Several documents types are built in to Axxess Hospice by default. Additional document types can be added by navigating to Document Types under the lists menu ( ). On the Document Types page, click Add Document Type to add custom document types for your organization.
To upload a hospice election statement, click Add Consent on the Operations tab in Company Setup and click Select Consent Template.
Admin tab ➜ Company Setup ➜ Operations tab ➜ Consents section ➜ Add Consent ➜ Select Consent Template
From the Consent Template drop-down menu, select Hospice Election Statement.
Select the document type and click Apply to all active and pending patients or Apply only to future patients.
Click Customize to open and review the template. Edit the template as needed to accommodate your organization’s preferences and procedures.

The language in the Hospice Election Statement template is taken directly from the example statement provided by CMS. Each organization is responsible for reviewing the language in the hospice election statement to ensure it meets your legal needs and Medicare standards.
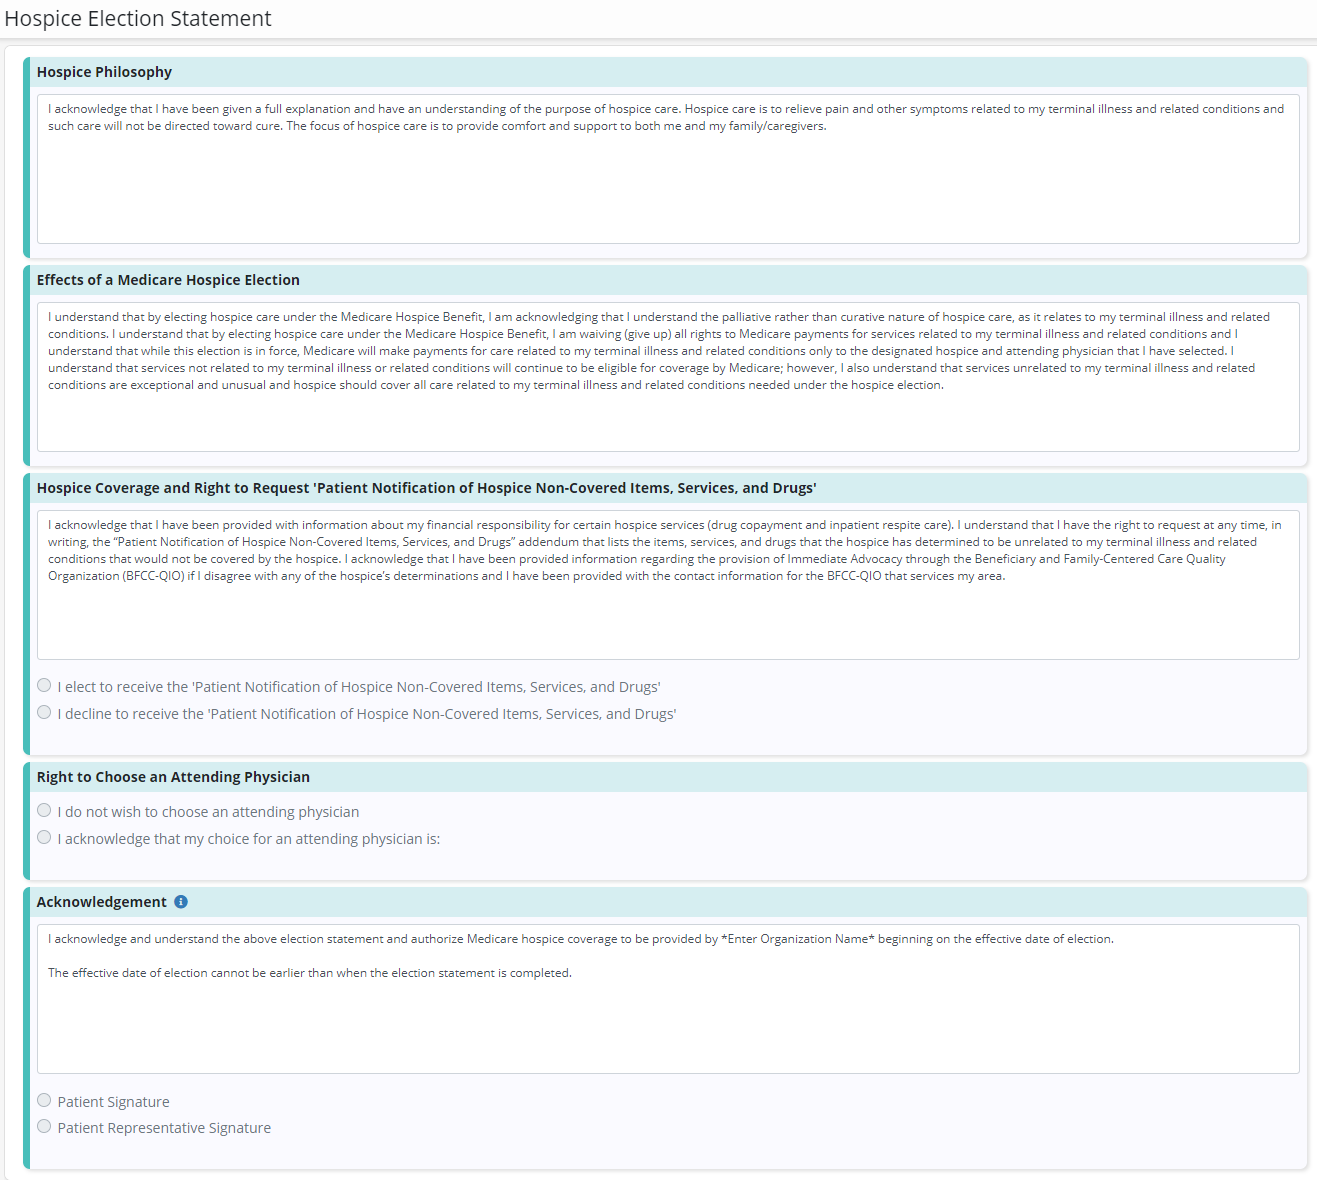
The Acknowledgement section must be edited to include the name of the organization providing hospice care, as required by CMS in Chapter 9 of the Medicare Benefit Policy Manual (sec. 20.2.1).
Delete the asterisks in the Acknowledgement section and enter the name of the hospice organization providing care. Failure to provide the hospice organization’s name may result in a claim denial.
After and reviewing and editing the Hospice Election Statement template, click Save & Activate to finish uploading the form. The consent will then be added to the consents table in Active status.
To view, track and complete patient consents, navigate to the Patients tab and select Consents.
Patients tab ➜ Consents
On the Consents screen, search for and select the desired patient to view a list of the patient’s consents and their statuses.
|
Consents in Signed status will display a green status bubble with a checkmark. |
|
|
Consents in Not Signed status will display a yellow status bubble with an exclamation point. |
|
|
Consents in Refused status will display a red status bubble with an X. |
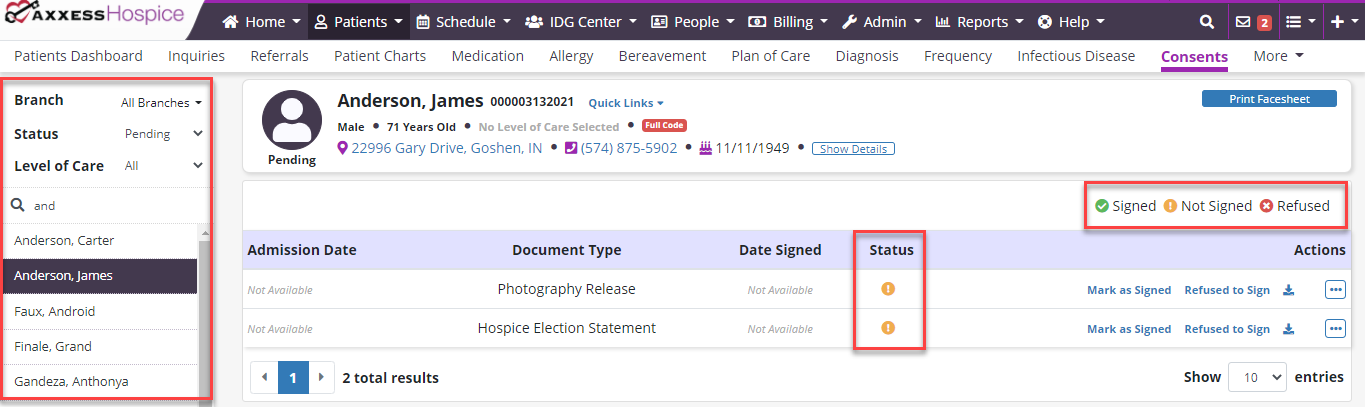
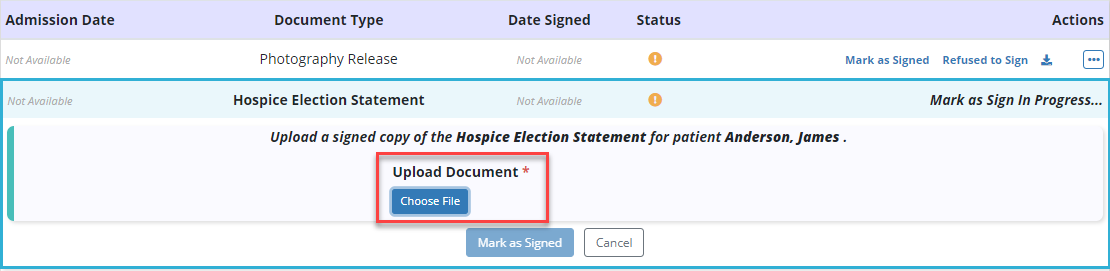
To complete consents on the web, download and print the consents in Not Signed status to review and collect signature from the patient/patient’s representative.

Once the patient/representative signs the consent, scan the consent, save it to your computer, and select Mark as Signed.
Click Choose File to upload a copy of the signed consent from your computer and select Mark as Signed to finish uploading the signed form.
All signed consent files should be saved as a PDF, JPG or PNG.
Once the consent is marked as signed, the status will automatically change from Not Signed to Completed.
To view a signed consent form, click the download icon ( ![]() ) under Actions.
) under Actions.
If you attached the wrong file in error, click the trashcan icon ( ![]() ) to delete the file.
) to delete the file.

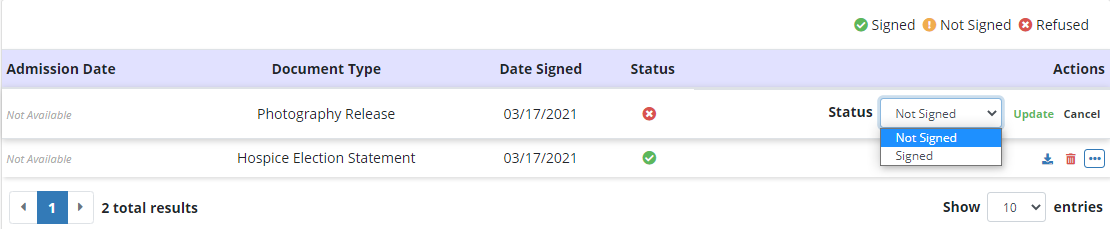
If a patient/caregiver refuses to sign a consent, click Refused to Sign.

When a Refused to Sign is selected, the status will automatically change from Not Signed to Refused.
If you accidentally click Refused to Sign, select the three-dot menu under Actions and click Update Status.

From the Status menu, select Not Signed or Signed as appropriate. Click Update to finish updating the consent status.
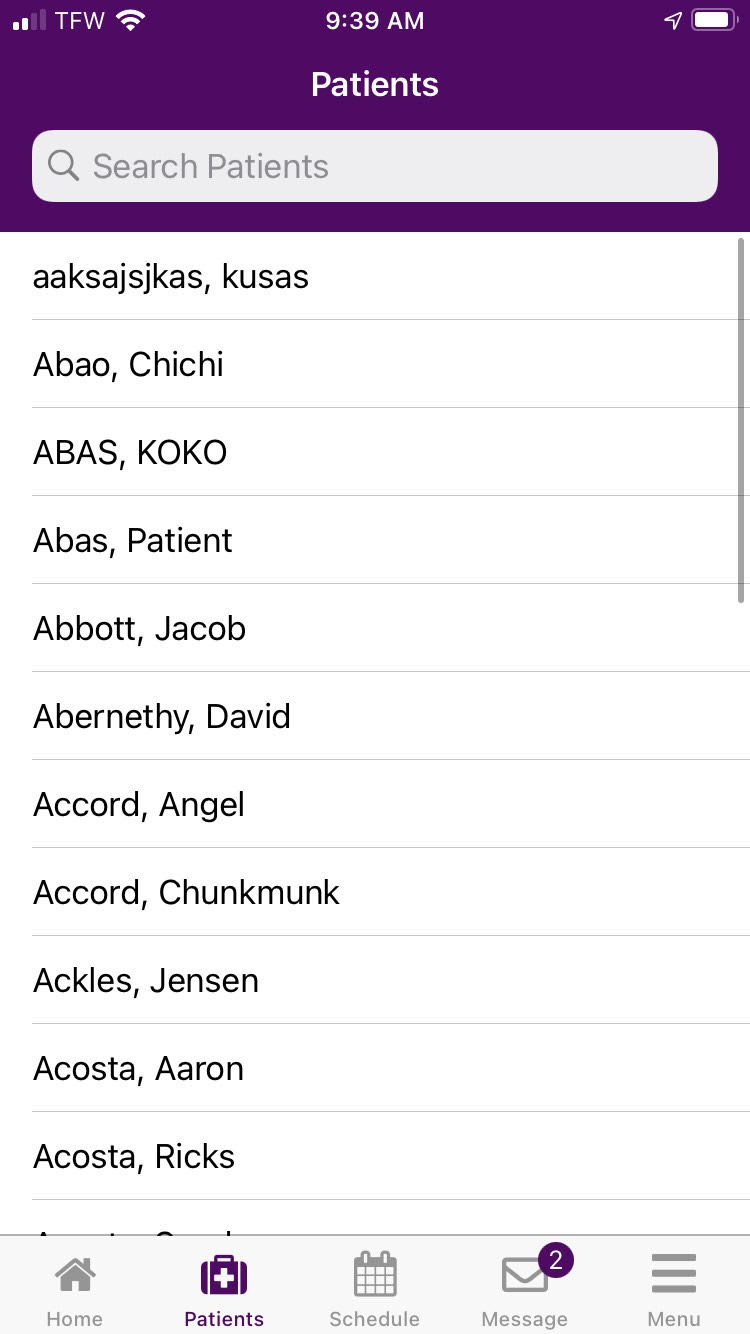
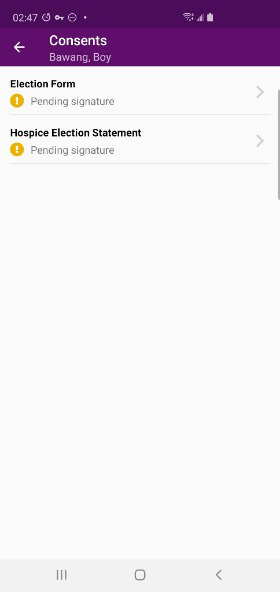
To view, track and complete patient consents on the Axxess Home Health mobile app, navigate to the Patients menu to search for and select a patient. Patients in Active and Pending status are searchable.
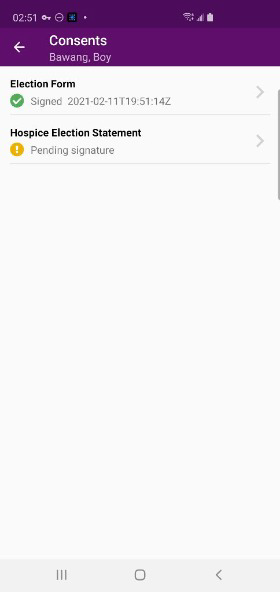
From the patient’s chart, tap on the Consents tile.
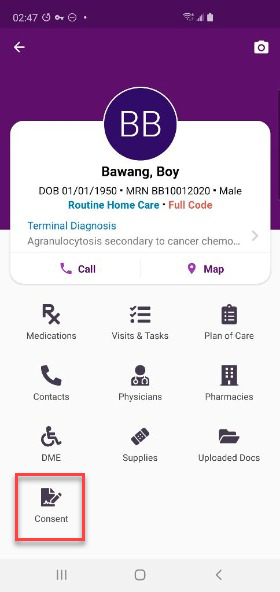
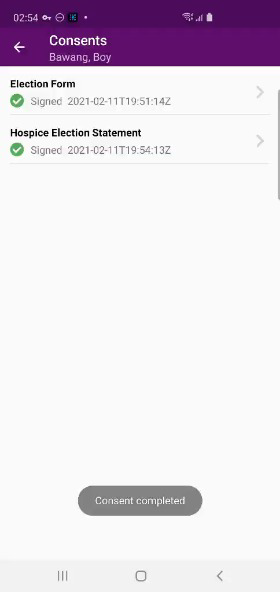
A list of the patient’s consents will display, along with the status of each consent.
|
Consents in Signed status will display a green status bubble with a checkmark. |
|
|
Consents in Not Signed status will display a yellow status bubble with an exclamation point. |
|
|
Consents in Refused status will display a red status bubble with an X. |

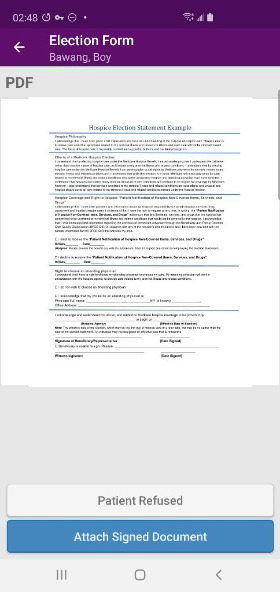
Tap on a consent to mark the consent as signed, collect signatures, or mark the consent as refused.
Consents From Upload:
If the consent was uploaded by your organization in Company Setup, you can review a read-only copy of the consent form with the patient/representative and provide a paper copy for them to sign.
After the patient/representative signs the consent, tap Attach Signed Document.
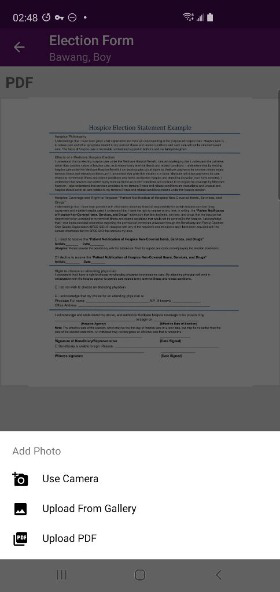
Tap Use Camera to take a photo of the signed consent form, or select Upload from Gallery or Upload PDF to upload a copy of the form from your device.
All signed consent files should be saved as a PDF, JPG or PNG.
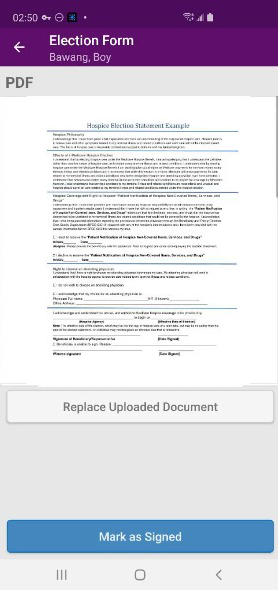
A preview of the signed consent will appear after it is photographed or selected from the phone gallery or files.
Verify that the consent form is signed and is for the correct patient.
If there are any errors or inaccuracies in the preview, tap Replace Uploaded Document.
If there are no errors or inaccuracies in the preview, tap Mark as Signed.
Once a consent is marked as signed, the status will automatically change from Not Signed to Completed.
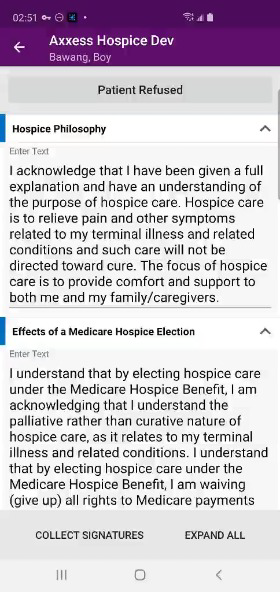
Consents From Templates:
If the consent is from a customized template set up by your organization in Company Setup, you can review the consent and electronically collect signatures on your mobile device.
Tap Expand All at the bottom of the screen to view all sections and locate the required fields for the patient/representative to complete.
Review the consent with the patient/representative.
The patient/representative is required to elect or decline receipt of the Patient Notification of Hospice Non-Covered Items, Services, and Drugs in the Hospice Coverage and Right to Request ‘Patient Notification of Hospice Non-Covered Items, Services, and Drugs’ section.
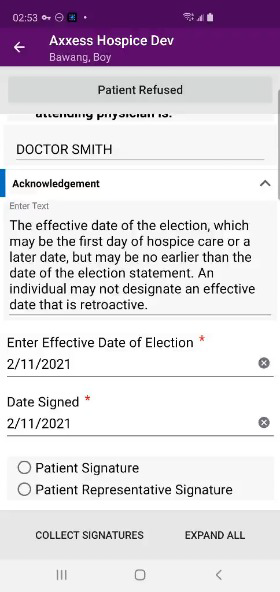
The patient/representative is also required to acknowledge their choice of physician or decline choosing an attending physician.
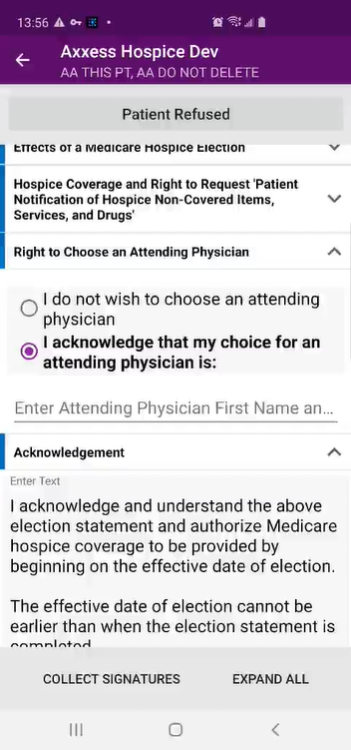
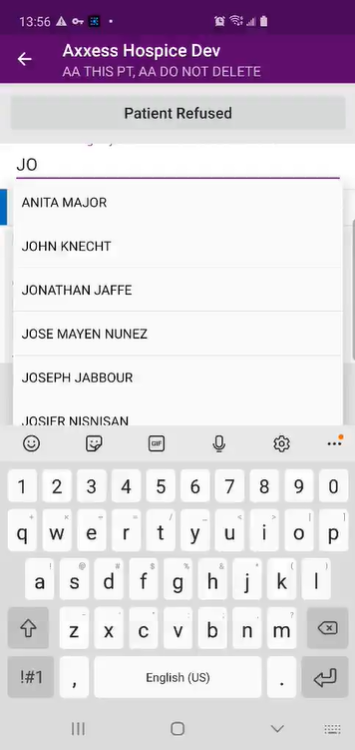
If the patient/patient’s representative elects to choose an attending physician, type the physician’s name in the Attending Physician field. As you type, the list of physicians will filter to match your search.
Select the physician that the patient/representative wants to elect as the attending physician. The physician named/selected here will be identified as the attending physician in the patient’s chart.
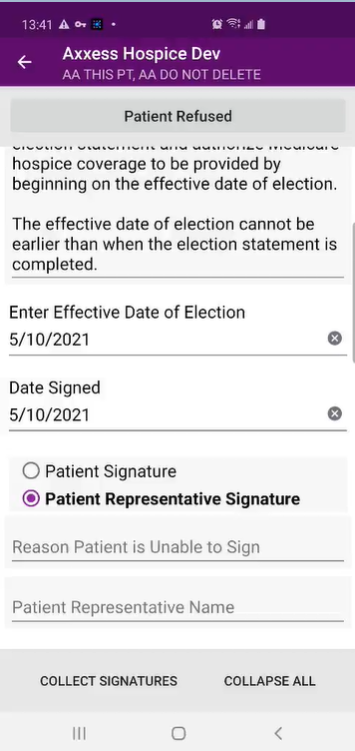
In the Acknowledgement section, the Effective Date of Hospice Election and the Date Signed fields will default to today’s date. The user or patient/representative can edit these dates if necessary.
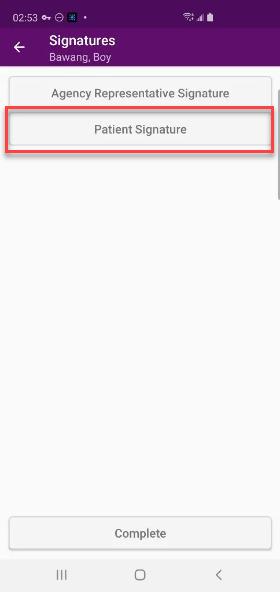
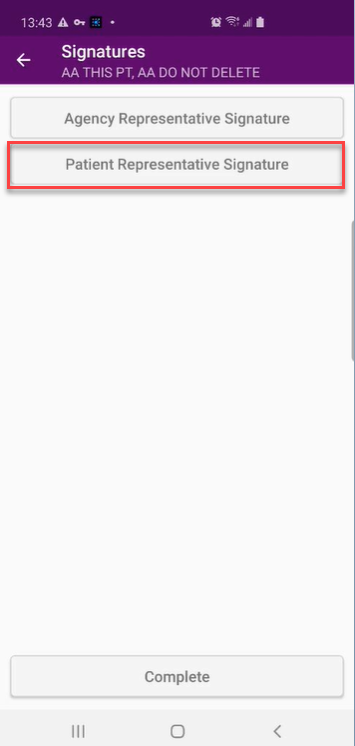
When all required fields are completed, select Patient Signature or Patient Representative Signature to begin the signature collection process.
If Patient Representative Signature is selected, the user must enter the reason that the patient is unable to sign and the name of the patient’s representative.
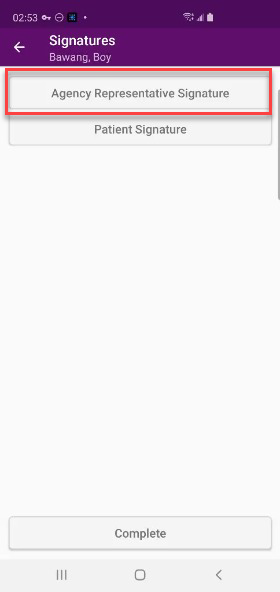
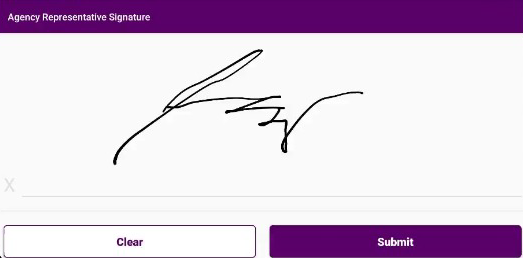
Tap Agency Representative Signature to collect the organization representative’s signature.
Tap Submit to confirm the organization representative’s signature.
Tap Patient Signature or Patient Representative Signature to collect the patient or patient representative’s signature.
Tap Submit to confirm the patient’s or patient representative’s signature.

Once the agency representative signature and patient/patient’s representative signature have been collected, tap Complete.
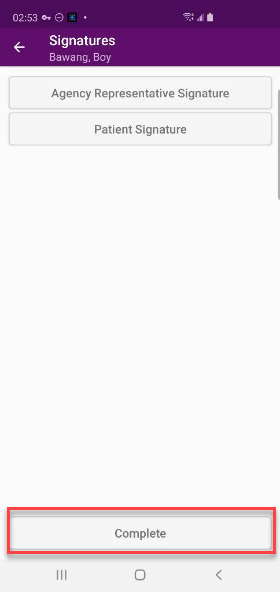
The consent status will automatically update from Not Signed to Completed.
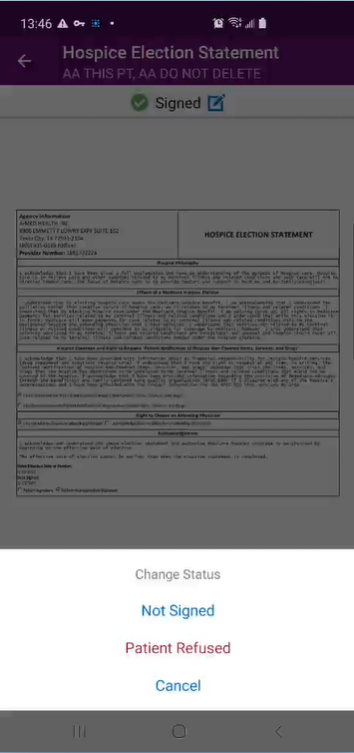
If the status of a consent needs to be changed after the consent has been signed, select the consent and click the edit icon at the top of the screen.
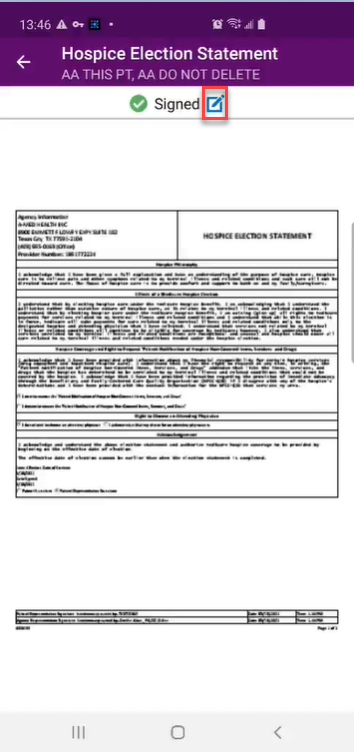
Select Not Signed or Patient Refused to change the status of the consent.
In the confirmation pop-up, click Update to finish updating the status of the consent.
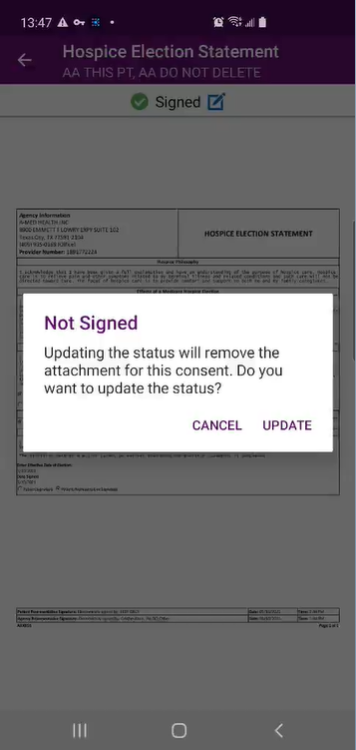
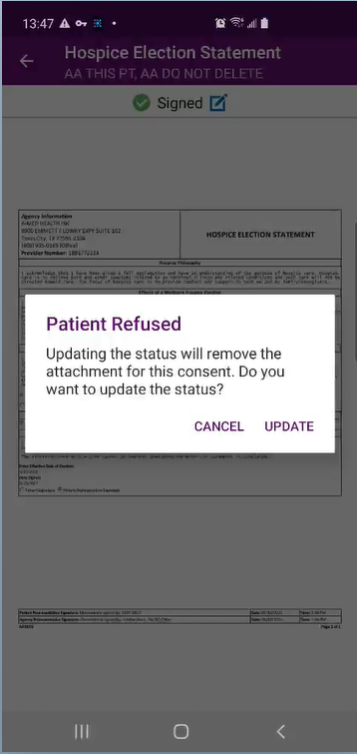
Once Update is selected, the consent list will automatically update to reflect the status change.
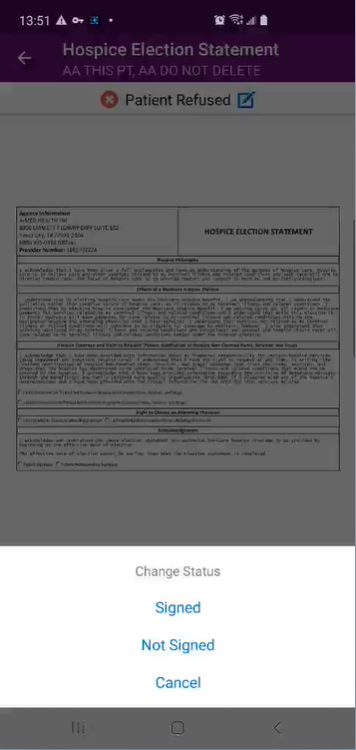
If the status of a consent needs to be changed after a consent has been refused, select the consent and click the edit icon at the top of the screen.
Select Signed or Not Signed to change the status of the consent.
Selecting Signed will initiate the signature process for the specific document type.
When Not Signed is selected the following message will display. Click Update to finish updating the status of the consent.

Once Update is selected, the consent list will automatically update to reflect the status change.
