Axxess Hospice now enables users to generate private pay invoices to bill patients/guarantors for services provided. This enhancement streamlines billing processes and protects revenue by helping organizations ensure patient/guarantor payment obligations are fulfilled.
To set a payer up to generate private pay invoices, users must have permission to view, add and edit insurances/payers in Axxess Hospice.
To give a user permission to view, add and edit insurances/payers, edit the user’s profile and navigate to the Permissions tab. In the Administration section, select View, Add and Edit next to the Insurance/Payers and Authorizations permission. Click Save to finish granting the permissions to the user.
People tab ➜ People Center ➜ Edit ➜ Permissions tab ➜ Administration section ➜ Insurance/Payers and Authorizations ➜ View/Add/Edit ➜ Save

To set a payer up to generate private pay invoices, navigate to the three-line menu (  ) in the top-right corner of the screen and select Insurance/Payers.
Select Edit under Actions next to the desired payer.
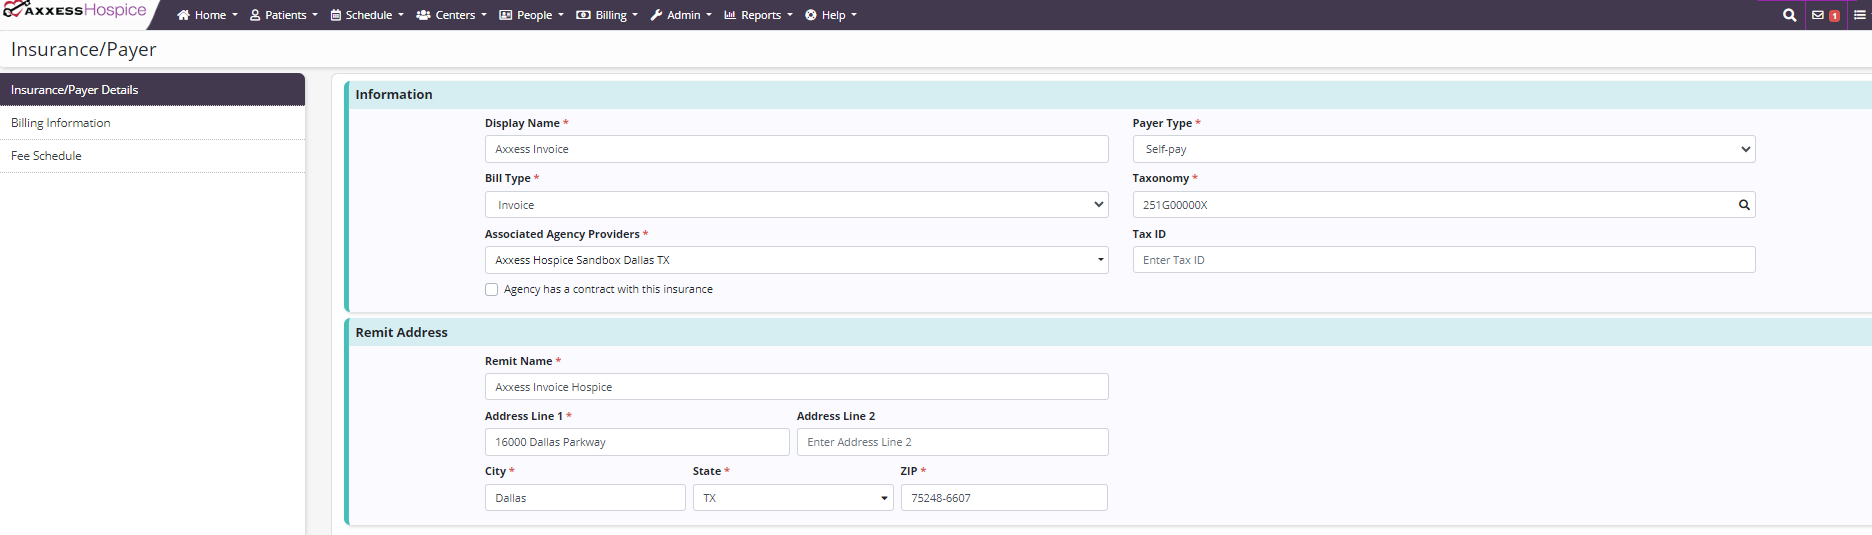
On the Insurance/Payer Details tab, navigate to the Information section and select Invoice from the Bill Type drop-down menu.
Complete the remaining required fields and click Next. The address you enter in the Remit Address section is where payments will be sent.
On the Billing Information tab, complete the following fields under Invoice Settings:
Invoice Start Number: Invoices are numbered chronologically beginning with the number you enter in the Invoice Start Number field. If you do not enter a number here, the first invoice will default to 1.
Payment Terms: Payment terms indicate when your organization should receive payment. To receive payment 15 days after the last day of the billing cycle, select Net 15. To receive payment 30 days after the last day of the billing cycle, select Net 30. To receive payment 45 days after the last day of the billing cycle, select Net 45. To receive payment at another time, select Other and enter the number of days after the last day of the billing cycle that your organization should get paid.
Invoice Comments: Comments entered here will appear on every invoice.
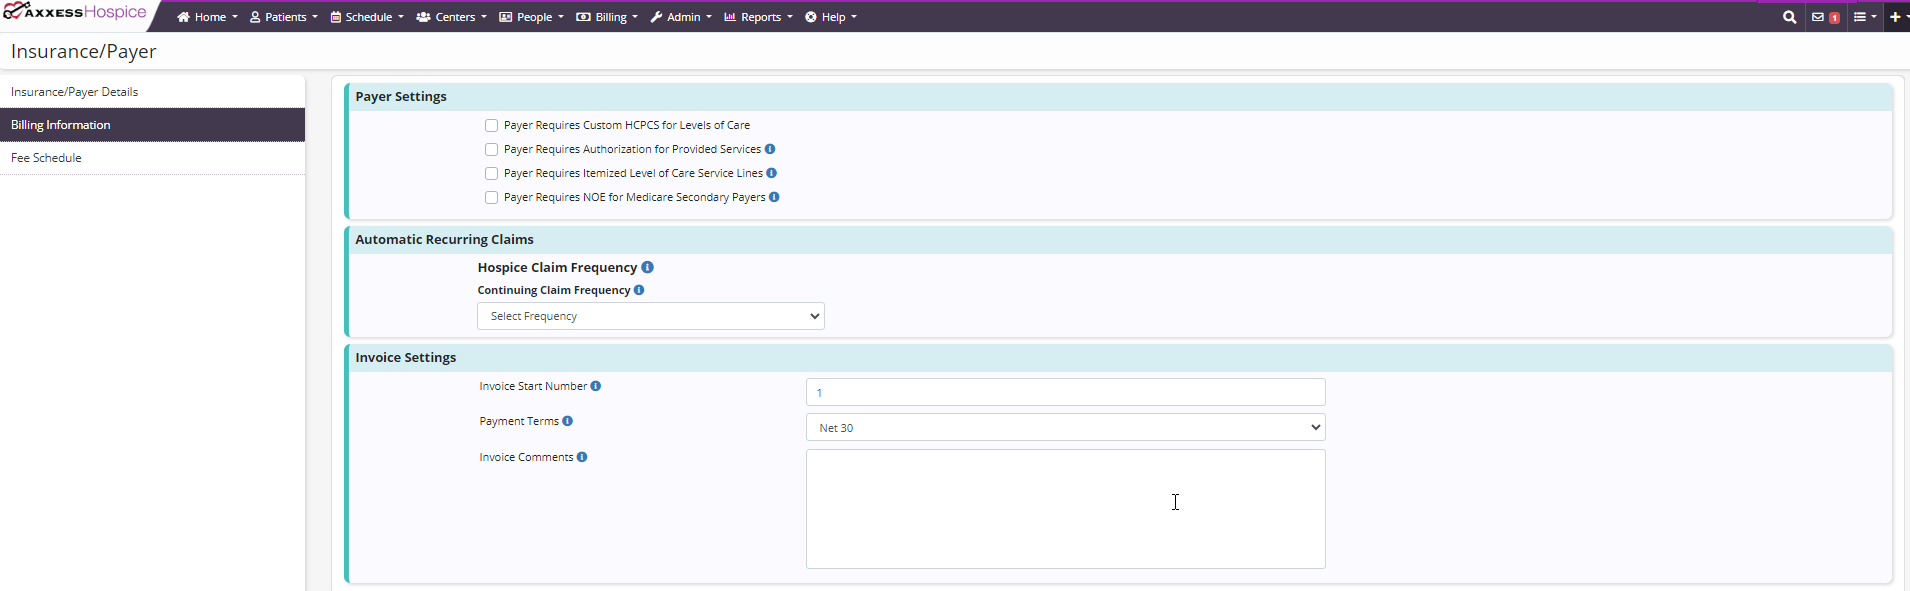
Once the required information has been entered, click Save.
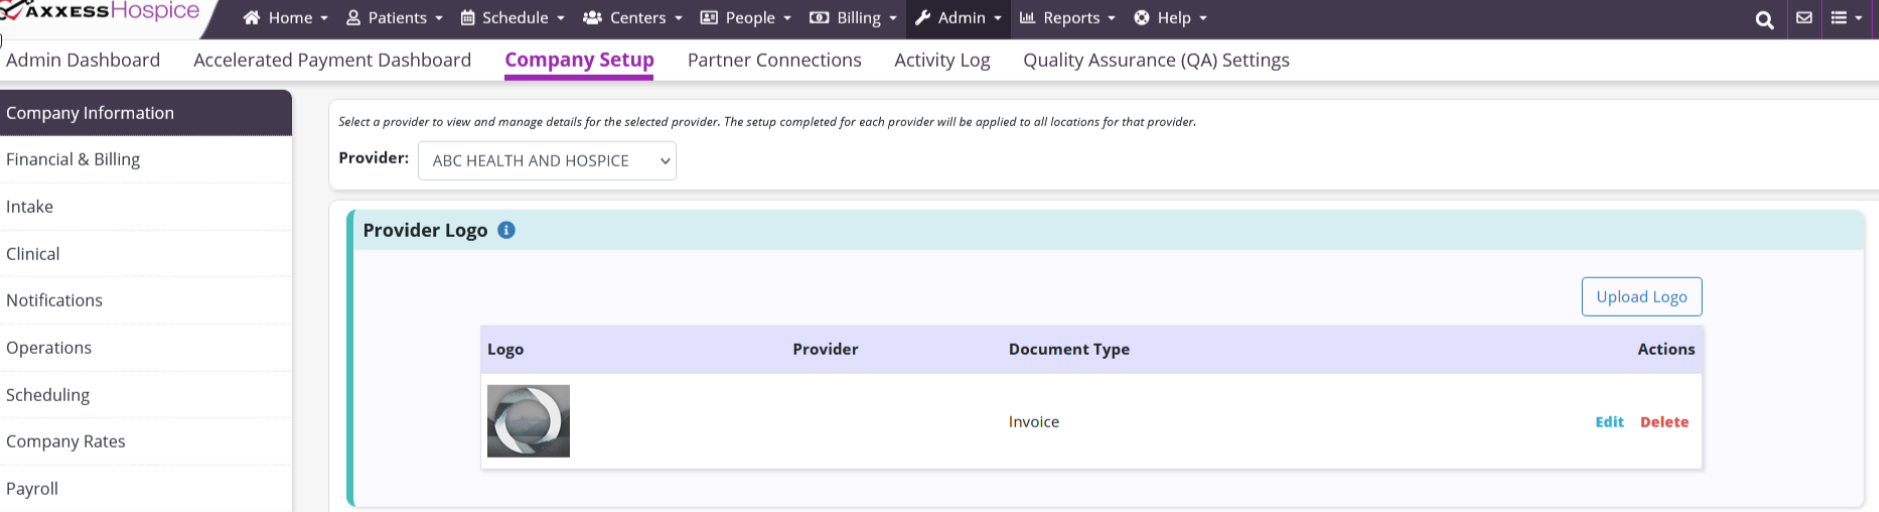
To add your company logo to invoices, navigate to Company Setup under the Admin tab. On the Company Information tab, navigate to the Provider Logo section and click Upload Logo.
Admin tab ➜ Company Setup ➜ Company Information tab ➜ Provider Logo section ➜ Upload Logo
In the Upload Logo window, click Choose File to upload your logo, select the applicable provider, select Invoice from the Document Type menu and click Save to finish uploading the logo.
Once saved, the logo will automatically appear on all invoices.
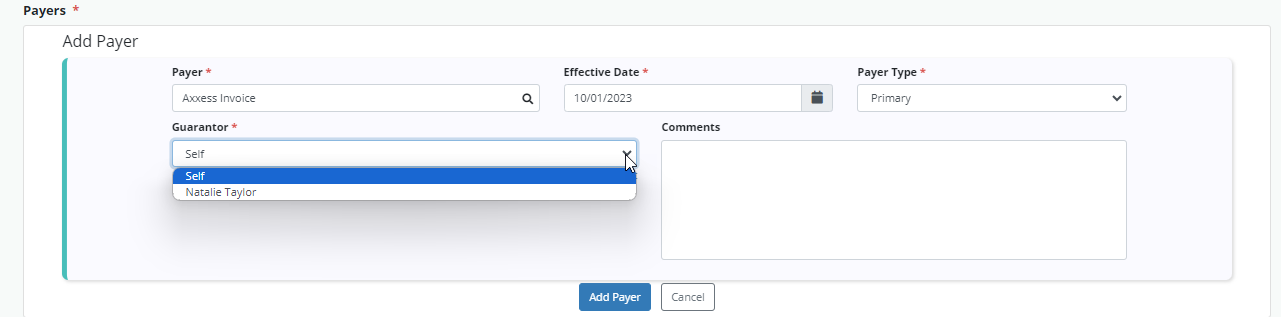
To set a patient up to receive invoices, navigate to the patient’s chart and click Edit Profile. On the Payer Information tab, navigate to the Payers section and select Add Payer.
Patients tab ➜ Patient Charts ➜ Edit Profile ➜ Payer Information tab ➜ Payers section ➜ Add Payer

In the Add Payer window, select the appropriate payer, enter an effective date, select the payer type and guarantor, enter any applicable comments and click Add Payer.
The options listed in the Guarantor field populate from the authorized contacts entered on the Authorized Contacts tab in the patient’s chart. This field will default to Self.
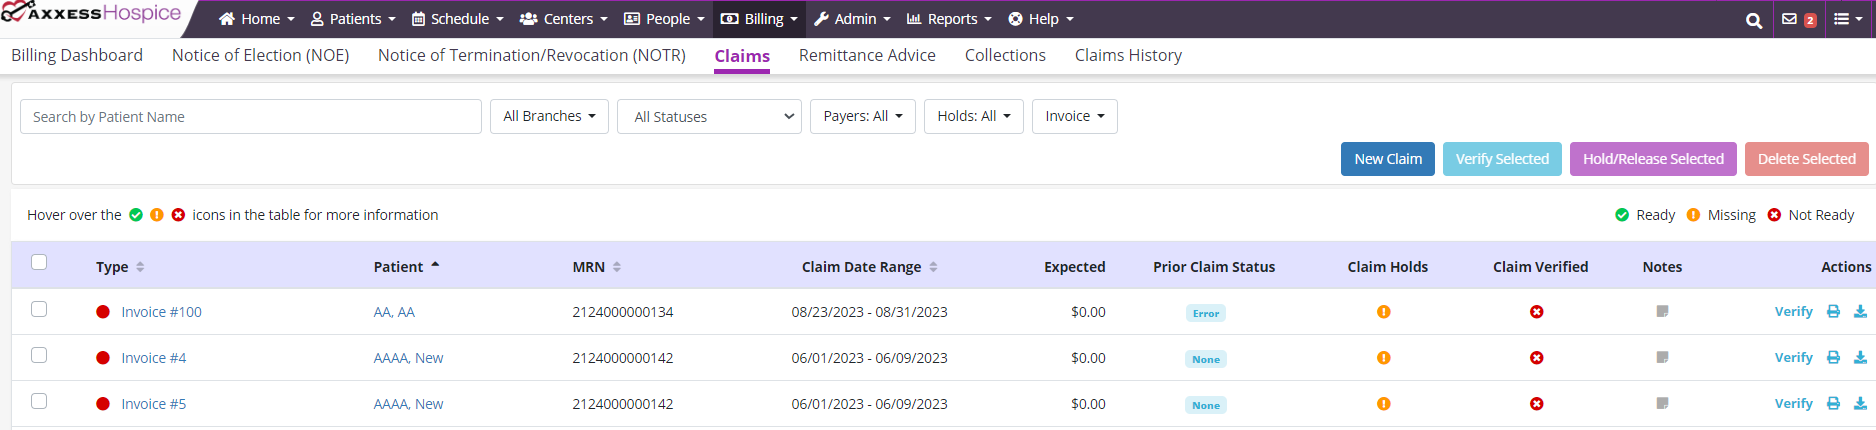
To manually create an invoice, navigate to the Claims screen under the Billing tab and select New Claim. In the New Claim window, select the patient’s name, enter the claim date range, select the appropriate payer and select Invoice from the Type of Bill menu. Click Create to finish creating the invoice.
Billing tab ➜ Claims ➜ New Claim ➜ Type of Bill: Invoice ➜ Create
To submit an invoice, users must have permission to view and edit claims.
To give a user permission to view and edit claims, edit the user’s profile and navigate to the Permissions tab. In the Billing section, select View and Edit next to the Claims permission and click Save.
People tab ➜ People Center ➜ Edit ➜ Permissions tab ➜ Billing section ➜ Claims ➜ View and Edit ➜ Save

To submit an invoice, navigate to the Claims screen under the Billing tab and select the desired invoice.
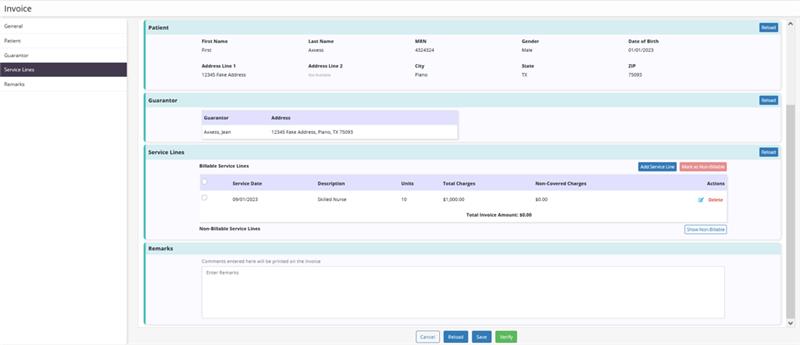
The General section will display the due date and invoice number based on the settings you established in the payer’s setup.
The authorized contact designated as the patient’s guarantor in the patient’s chart will appear in the Guarantor section. To change the guarantor, update the Authorized Contacts tab in the patient’s chart and reload the claim.
Comments entered in the Remarks section will appear only on the current invoice.
Invoices cannot be submitted electronically, but can be printed. To move the invoice from the Claims tab to the Claims History tab, select the invoice and click Submit Selected.
Updated on 11/16/2023
