Co-signing clinical documents enables users to stay compliant with the state’s Nurse Practice Act and adhere to internal agency policies. The process of co-signing documents can be individualized to meet users’ specific needs and streamline agency operations.
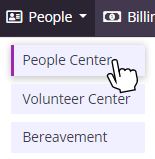
To co-sign documentation, users must have permission granted by an agency administrator. To give a user co-signing permissions, navigate to the People Center under the People tab.
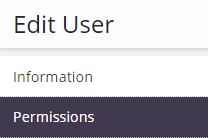
Locate the employee using the left-side search/filter. Click Edit in the top right corner of the user’s profile. Select the Permissions tab on the left side of the Edit User screen.
Give a user the ability to co-sign documents by selecting:
These permissions give users the ability to co-sign orders/notes that are in Pending Co-Signature status.
Require a user to get co-signatures on documents by selecting:
These permissions require users to have orders/notes co-signed by another user. When these permissions are selected, the user’s completed tasks will go to the Pending Co-Signature page in the Patient Chart and Schedule Center.
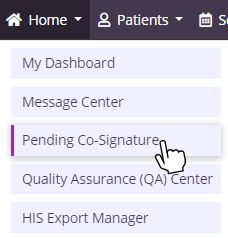
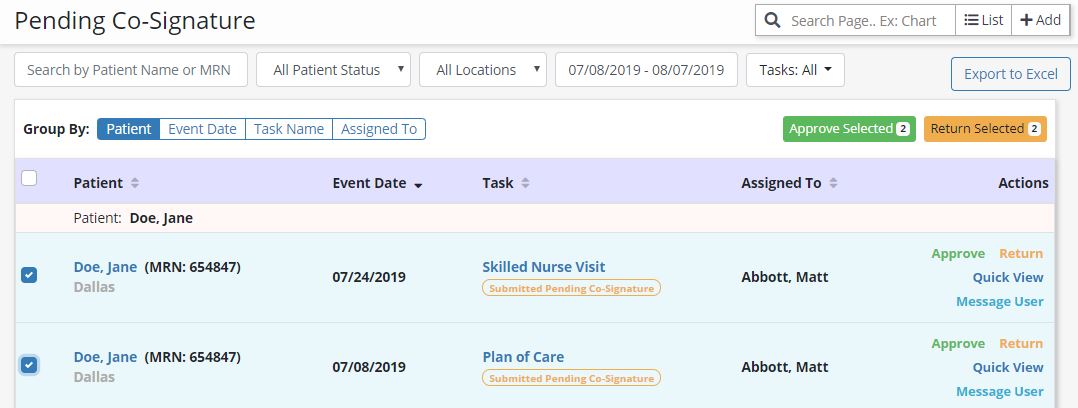
Users with the ability to co-sign orders/notes can review all documents that need to be co-signed by selecting Pending Co-Signature under the Home tab.
On the Pending Co-Signature screen, users can search by patient name or MRN, and filter by patient status, location, date range, or task type. Users can also group search results by patient, event date, task name, or assigned user.
Documents are listed in the following columns: Patient, Event Date, Task, Assigned To, and Actions. Each patient name is a hyperlink that goes directly to the corresponding Patient Chart. Each task name is a hyperlink that opens the task in a read-only view so users can review it in a separate tab before selecting an action from the Actions column.
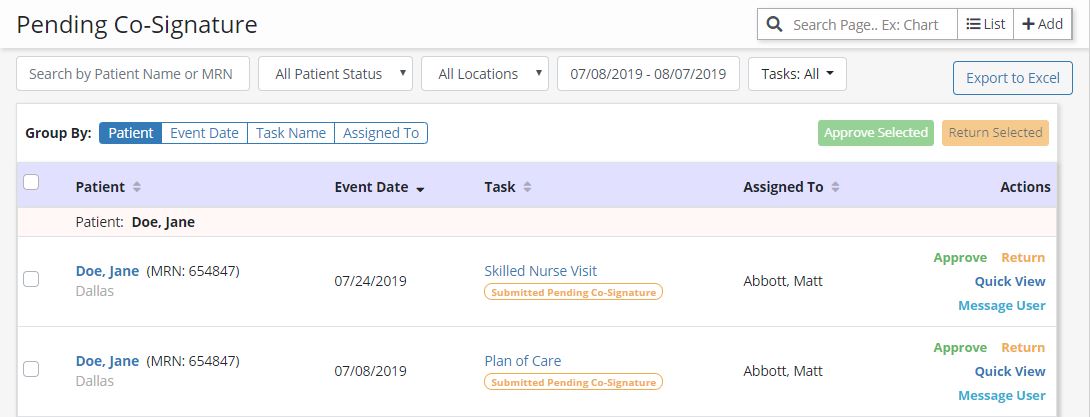
The Quick View button in the Actions column enables users to open the document in a split screen view (whereas selecting the task name opens the document in a separate tab).
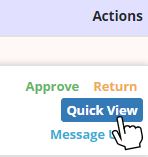
Once the document has been reviewed, use the buttons in the Actions column to approve or return the document.
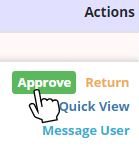
To approve and co-sign the document, click Approve in the Actions column.
Your name and credentials will be reviewed by the system and attached to the document, and a notification will appear confirming that your information was verified. In the Information Verified box, check Click here to sign the document and Complete to finish co-signing the document.
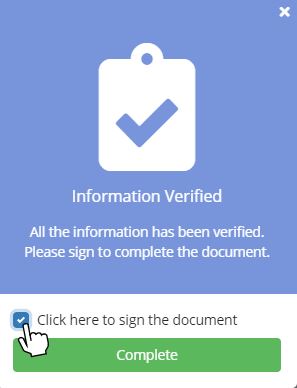
Your co-signature will be applied and date stamped, and a green message will appear confirming that the document was successfully co-signed.

Once a document has been co-signed, its status in the Patient Chart will change from Pending Co-Signature to Submitted with Signature.
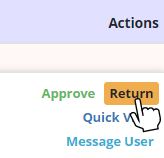
To return the document to the user who completed the task, select Return or Message User from the Actions column.
Message User enables you to send a message to the user who completed the task. In the message, indicate the necessary adjustments and click the blue send icon in the bottom right corner. The message will go to the assigned user’s Message Center with a link the user can click to navigate directly to the task that needs updates.
Documents can also be approved or returned in bulk by checking the boxes to the left of the documents and clicking the green Approve Selected or yellow Return Selected buttons in the top right corner of the screen.
Updated on 8/22/2019
