Axxess Hospice now enables users to identify in Company Setup which tasks should be available for scheduling. Organizations can set different task lists for each provider at their organization to accommodate their respective program needs.
To access this feature, users must have permission to edit Company Setup information in Axxess Hospice.
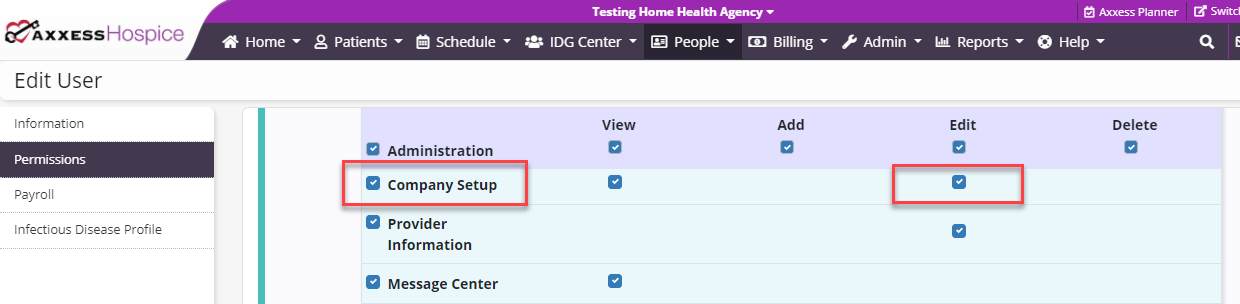
To give a user permission to identify tasks in Company Setup, edit the user’s profile and navigate to the Permissions tab. In the Administration section, select Edit next to the Company Setup permission. Click Save to finish granting the permission to the user.
People tab ➜ People Center ➜ Edit ➜ Permissions tab ➜ Administration section ➜ Company Setup ➜ Edit ➜ Save
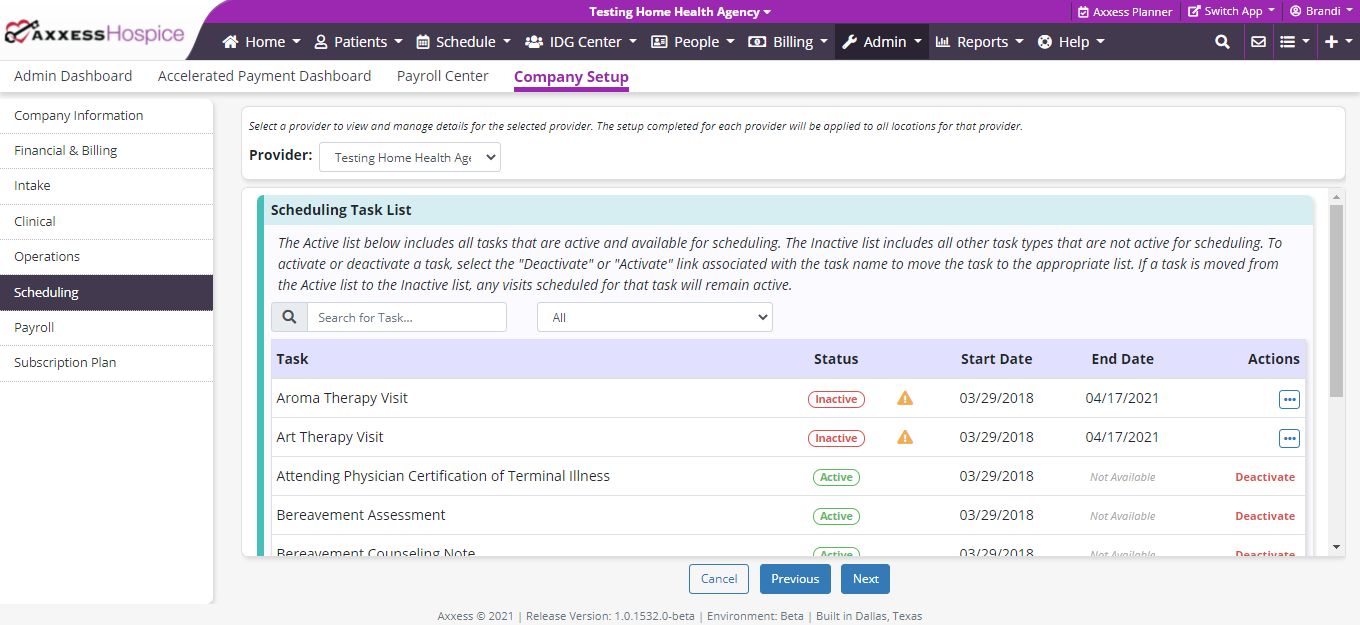
To identify tasks for scheduling, navigate to Company Setup under the Admin tab. On the Scheduling tab in Company Setup, navigate to the Scheduling Task List section.
Admin tab ➜ Company Setup ➜ Scheduling tab ➜ Scheduling Task List
The Scheduling Task List section provides a list of all tasks that are available for scheduling. Users can search for tasks using the search box and filter tasks by status using the filter at the top of the list.
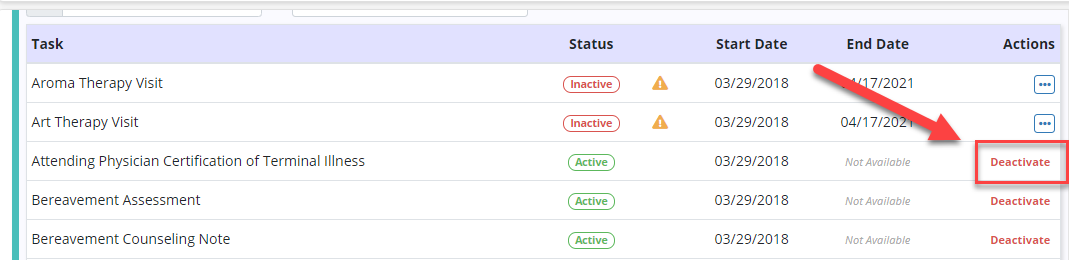
To deactivate a task, click Deactivate under Actions and enter the date on which the visit will no longer be active. The task will be deactivated at midnight (CST) on the selected date. Tasks can only be deactivated for future dates.
Once a date has been selected and saved, a yellow caution sign (  ) will appear next to the task status. Hover over the caution symbol to view the date that the task will be inactive. Tasks that are already scheduled at the time a task is deactivated will remain on the schedule and can be manually deleted if necessary.
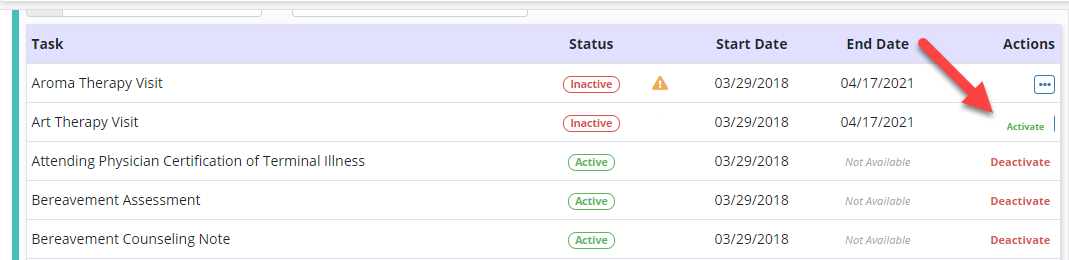
To activate a task, click Activate under Actions and enter the date on which the task will be active. The task will be activated at midnight (CST) on the selected date. Tasks can only be activated for future dates.
Once a date has been selected and saved, a yellow caution sign ( ) will appear next to the task status. Hover over the caution symbol to view the date that the visit will be active for scheduling.
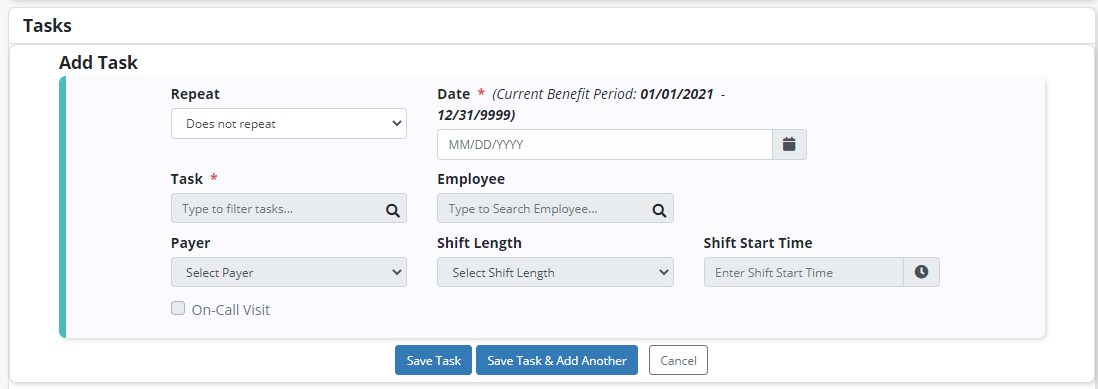
When adding a task at the patient or employee level, the date of the task must be selected first to ensure that the selected task will be available for scheduling on the date selected. Once the date has been selected, tasks will become available for the user to select. Once the task has been selected, the remaining fields will be available to complete.
In addition to these changes, users will now see a new Payer field in the Add Task window. This field will default to the primary payer that is set up in the patient’s chart but can be edited at any time.
Updated on 04/21/2021
