The Pre-Claim Review (PCR) Center enables agencies to efficiently and seamlessly collect and track their PCR submission documents.
Agencies that have chosen the Pre-Claim Review option from the available Review Choice Demonstration (RCD) options can use the PCR Center to:
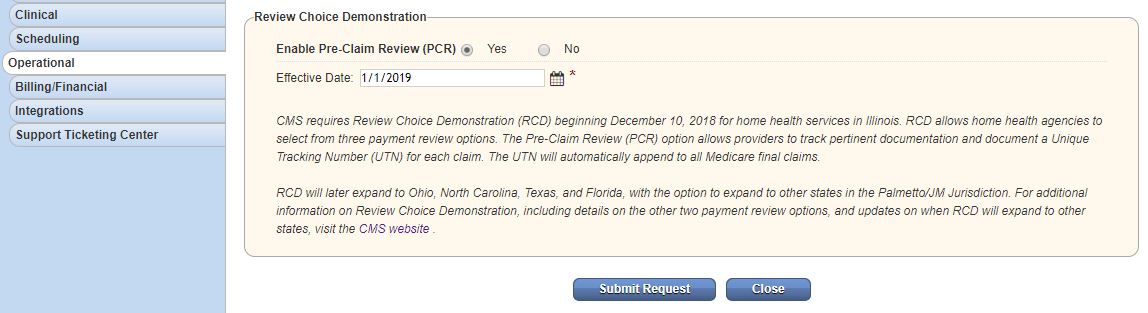
Note: To submit pre-claim review requests for two 30-day periods simultaneously, orders must cover the entire 60-day care period. If a second 30-day period is not affirmed during the initial submission of both billing periods, the second 30-day period must be submitted as an initial submission in the Palmetto GBA provider portal.
In the future, Axxess will release functionality that eliminates the need to manually upload PCR submissions to the Palmetto GBA eServices Portal, enabling total automation of PCR submission processes through Axxess systems.
Any users that need access to the Pre-Claim Review Center will need the Manage Pre-Claim Review (PCR) permission.

Once this permission is enabled, users can access the Pre-Claim Review Center under the Patients tab.
In the center, you will default to the Create PCR section, which displays all PCRs in need of submission. A PCR is provided for every patient episode that has Medicare set as their insurance and an episode start date on or after the PCR effective date entered in Company Setup.
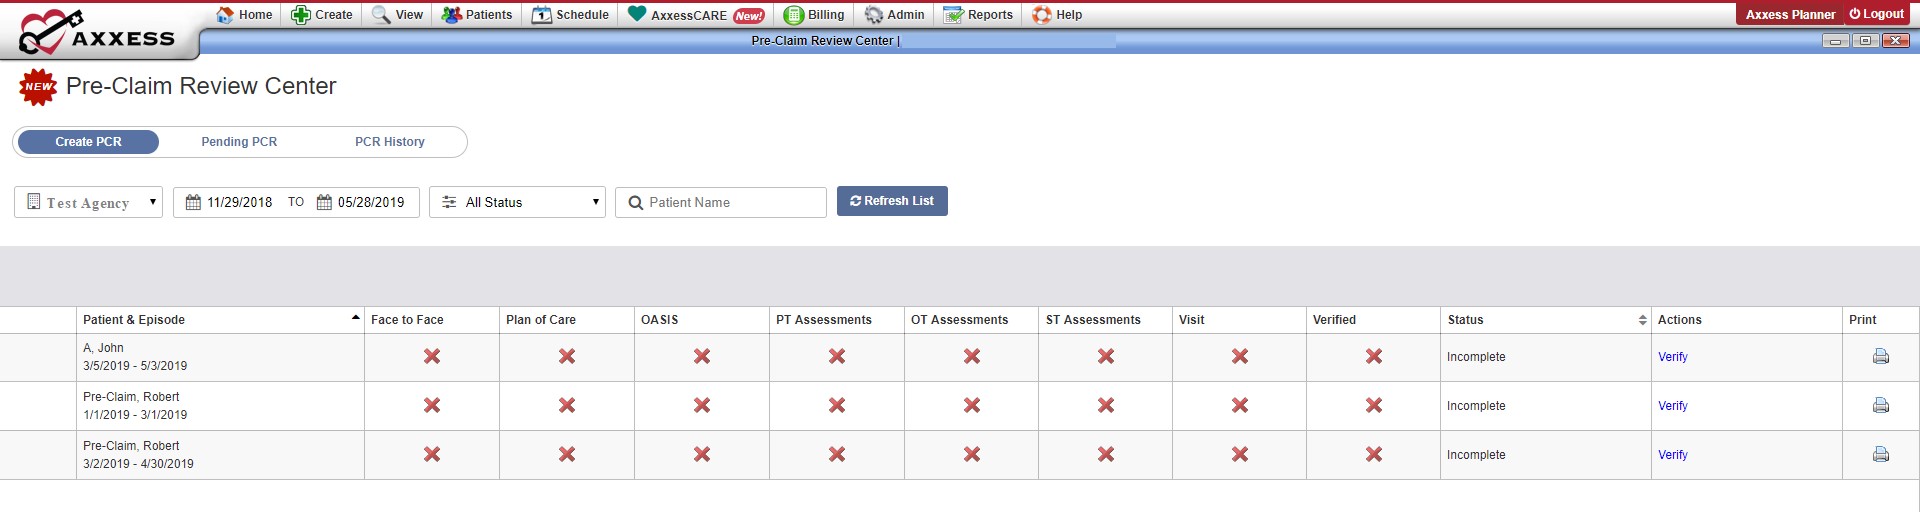
Click Verify in the Actions column to load the Pre-Claim Review Details page.
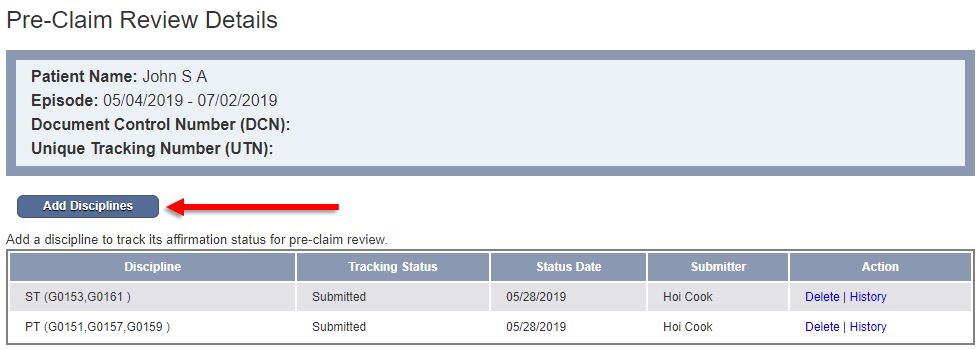
On the Pre-Claim Review Details page, you can add disciplines and corresponding G-codes to include in the PCR submission. Click Add Disciplines in the top left.
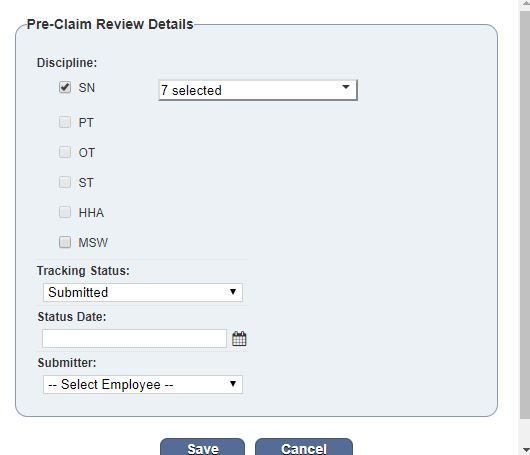
Check all disciplines that apply and select the appropriate G-codes in the drop-down menu that appears when the discipline is selected.
Complete the remaining fields and click Save.
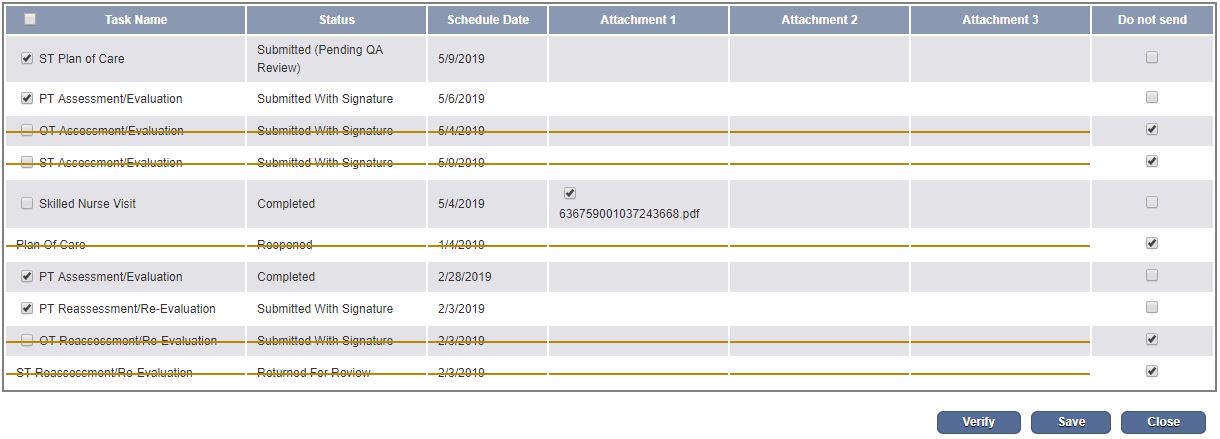
After adding the disciplines, you can navigate to the table below to select the task documents you want to include in the PCR submission.
Documents available for initial episodes:
Documents available for subsequent episodes:
The Task Name column gives you access to the printable version of the document completed in the Schedule Center. (The check box will not be available if the task is still open.)
Additionally, you can select and include any files that have been attached to the tasks. This enables you to include any paper notes or additional documentation in the submission.
If paper notes are completed and the task is manually marked Completed in the Schedule Center, uncheck the Task Name box and check the Attachment box only.
At least one box must be checked for each task. To send a task and associated attachments, check the box next to the task name and next to each attachment. To send an attachment only, check the box next to the desired attachment (or multiple attachments) and de-select the box next to the task name on the left side. If you do not want to submit any documentation for a task, check the box under Do Not Send on the right side. Once a box has been selected for each row, you can verify.
After verifying the PCR details, you will be redirected back to the Create PCR screen. A green check will now appear in the Verified column and the Mark as Sent option will appear in the Actions column.
To submit your documents, click the printer icon on the far right column. Clicking print will combine all previously selected documents and attachments into a single PDF. You can now send your documents through the CMS-approved methods: Palemetto GBA’s eServices portal, fax, or mail. After you submit your PCR request, mark the PCR as sent by clicking Mark as Sent in the Actions column on the Create PCR screen.

PCR requests that have been marked as sent will appear in the Pending PCR section of the Pre-Claim Review Center. On the Pending PCR screen, you can add document control numbers by clicking the plus sign (+) icon.

After entering the document control number, a pencil icon will appear. Click the pencil icon to make any modifications to the control number.
![]()
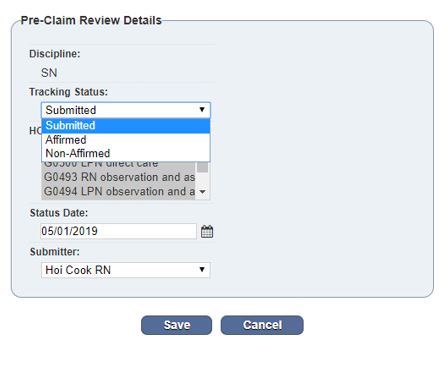
Once you have obtained an affirmation status, click the Enter Response in the Actions column on the Pending PCR screen.

Click Edit next to the appropriate discipline and change its Tracking Status to the correct option in the drop-down menu. Click Save.
Once you have added and saved statuses for each discipline, you can close the page to return to the Pending PCR screen and mark the PCR as Received.

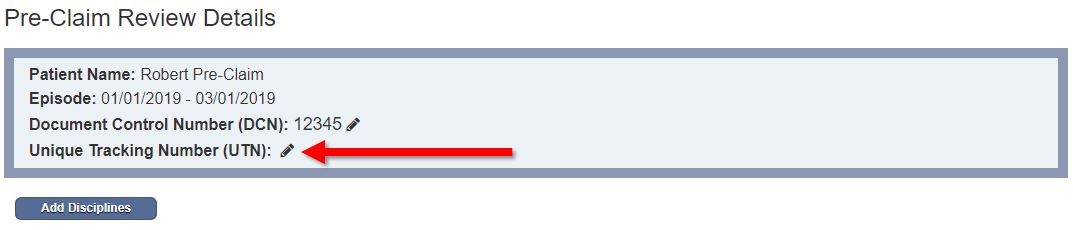
The PCR will move to the PCR History page. You can add a Unique Tracking Number (UTN) by clicking the plus sign (+) icon on the PCR History page, or the pencil icon to edit the UTN.
You can also update the UTN by clicking the pencil icon at the top of the Pre-Claim Review Details page.
If you need to re-open a PCR for any reason, click the Re-Open button on the PCR History page to move the PCR back to the Create PCR screen.
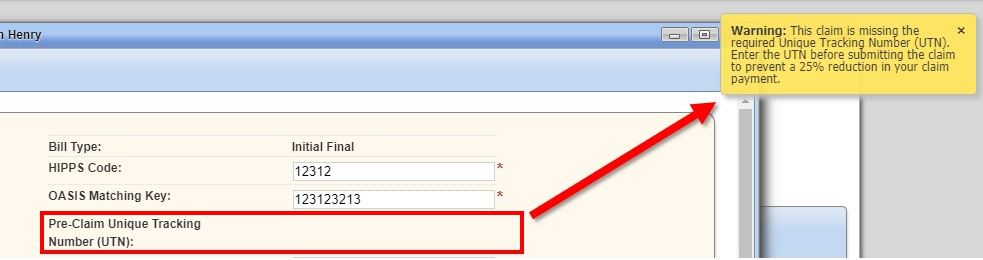
Once the final claim is generated, the UTN will automatically populate on the claim. If the UTN was not entered, a warning message will appear, reminding the biller of a possible 25% reduction in claim payment. The biller may choose to continue with completion of the claim with no further warnings.
Click the links below for additional information on Review Choice Demonstration:
CMS Review Choice Demonstration Guidance
Palmetto GBA Review Choice Demonstration Resources
CMS Review Choice Demonstration Operational Guide
Ten Things To Know About Review Choice Demonstration
Review Choice Demonstration: Home Health Operational Considerations
Updated on 5/30/2019
