The Payroll Export Center enables users to generate robust payroll reporting, export ADP (.csv) and Paychex (.txt) vendor files, and streamline payroll processing and operations overall.
Agencies have the option of using the Payroll Export Center or the Payroll Summary in the Home Health solution for processing payroll. If you choose not to enable the Payroll Export Center, you will still have the full functionality of the Home Health Payroll Summary. If you enable the Payroll Export Center, you will no longer process payroll under Payroll Summary. Complete the instructions below to enable the Payroll Export Center. Once enabled, update user profiles for each of your agency’s users. Instructions for updating user profiles are also provided below. Once your updates are done, you will be able to generate more robust Excel reporting and vendor exports for seamless payroll processing.
If your agency does not process payroll for ADP or Paychex, you can still choose to opt-in and process your payroll. Upon generating the export file, save or discard the file (since the format will not apply to your agency). Processing payroll this way will require you to manually generate an export file for your vendor, but you will be able to do so in a more efficient manner because of the robust Excel reports provided.
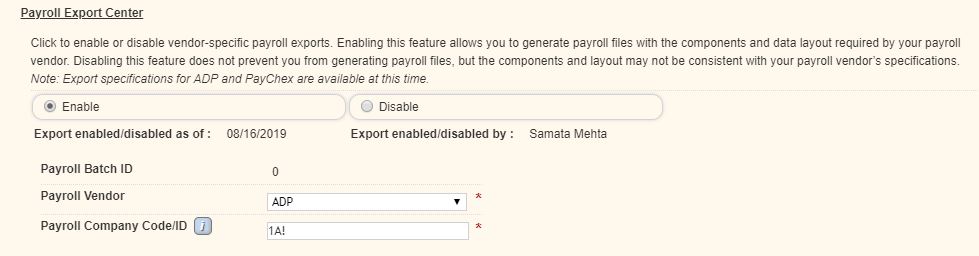
Payroll Batch ID – Auto-generated by the system. The ID will always be updated to reflect the next batch ID you run.
Payroll Vendor – Select ADP or Paychex as your vendor.
Payroll Company Code/ID – Enter the Company Code or ID given to you by your vendor.
To Update User Profiles:
Pay Type – Based on the Employment Type field. Select Salary, Hourly, or Per Visit based on how a user is paid.
Payroll File #/Worker ID – Enter the ID established and given to the user by the payroll vendor. This ID enables vendors to identify users for which payroll is being processed.
Visit Activity Pay Rates:
To create a new visit pay rate, create a new non-visit pay rate, or edit an existing pay rate, select the Visit Activity Pay Rates tab from the left-side menu and complete all the required components:
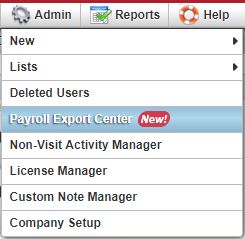
To access the Payroll Export Center, hover of the Admin tab and select Payroll Export Center from the drop-down menu.
Complete the payroll parameters and click Generate to view payroll details.

Required filter parameters:
Click the More Filters button in the top right corner to view the following additional filters:

Click Hide Filters to collapse the five additional filters.

Under the payroll parameter filters, the Additional Columns menu enables users to generate more robust payroll data. Users can select any or all of the 16 additional column options:
| Column | Description | ||
|---|---|---|---|
| Associated Mileage | Generates the value noted in the visit documentation. | ||
| Auto Calc. Mileage | Displays the number of miles driven, as determined by the system’s automated calculation of the distance between the starting and ending visit address. (This calculation only populates for visits with completed statuses.) | ||
| Auto Calc. Mileage Amount | Displays the mileage reimbursement amount, as determined by the auto-calculated mileage above and the reimbursement rate entered in the user/company profile. | ||
| Auto Calc. Travel Hours | Displays the average travel time to and from the point of care, based on the user and patient addresses in the system. (This calculation only populates for visits with completed statuses.) | ||
| EVV Hours | Displays the total number of EVV hours. | ||
| EVV Time | Displays total EVV time. | ||
| Employee Credentials | Displays employee credentials entered in the user profile. | ||
| Employee Pay Type | Displays employment type entered in the user profile. | ||
| Insurance/Payer | Displays insurance/payer affiliated with the episode and visit information. | ||
| Patient MRN | Displays patient Medical Record Number (MRN) entered in the patient profile. | ||
| Pay Rate | Displays pay rate entered in the user profile. | ||
| Pay Type | Displays pay type entered in the user profile. | ||
| Payroll File/Worker ID | Displays payroll file/worker ID entered in the user profile. | ||
| Travel Hours | Generates the value noted in the visit documentation. | ||
| Visit Hours | Payroll hours calculated based on the visit time in and visit time out components entered in the visit documentation. | ||
| Visit Status | Displays the visit’s current status in the Schedule Center. |
Edit functionality enables the payroll processor to change values in specific fields as needed. Modifications can be made in the following four fields:
| Field | Description | ||
|---|---|---|---|
| Visit Time | Displays the visit time in and visit time out as noted in the visit. Any edits made to these times in the Payroll Export Center will automatically update the visit time information in the visit and visit log (both of which can be accessed through the Schedule Center). | ||
| Travel Time | Displays the number of miles driven, as determined by the system’s automated calculation of the distance between the starting and ending visit address. (This calculation only populates for visits with completed statuses.) | ||
| Associated Mileage | Displays the mileage reimbursement amount, as determined by the auto-calculated mileage above and the reimbursement rate entered in the user/company profile. | ||
| Surcharge Amount | Displays the average travel time to and from the point of care, based on the user and patient addresses in the system. (This calculation only populates for visits with completed statuses.) |
Click on the pencil icon to edit a field and the save icon to save changes.
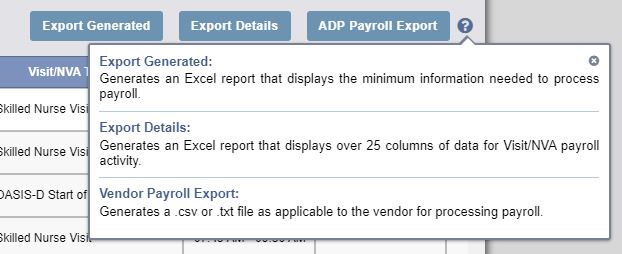
Reports can be generated in the Payroll Export Center using the following buttons:
| Export Generated | Generates an Excel file with basic payroll information for the selected time frame. This report provides a summary overview, rather than a detailed report. It does not include any information from the Additional Columns menu. | ||
| Export Details | Generates an Excel file with over 25 columns of data, including items selected from the Additional Columns menu. Agencies that do not use ADP or Paychex as a payroll vendor can use this report to manually create an export file that meets their vendor’s specific requirements. |
Generate the above reports by selecting the respective Export Generated or Export Details button on the right side of the screen.
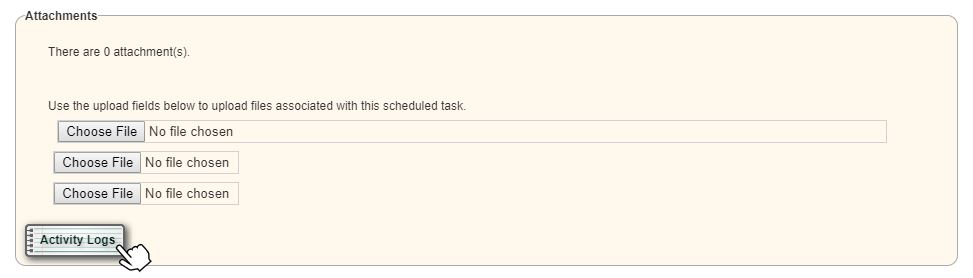
The Activity Logs feature enables users to track all changes made to a visit. To view a visit’s Activity Logs, navigate to the Schedule Center and find the visit. Select Menu under the Action column and click Details from the drop-down menu. Select Activity Log in the bottom left corner of the visit details window in the Attachments section.
Schedule Center ➜ Menu (in the Action column) ➜ Details ➜ Activity Logs (in the bottom left corner of the task details window)