Forcura streamlines document management and simplifies care coordination for providers across the continuum. Its direct integration with Axxess Home Health helps organizations reduce administrative expenses, optimize revenue cycle management and deliver better clinical outcomes.
Reduce Administrative Expenses
|
Enable cross-functional teams to collaborate and manage workflow through one cloud-based, integrated platform |
|
|
One full-time employee (FTE) can accurately manage documentation for 800 patients |
|
|
Eliminate hard costs such as paper, ink, printing, postage, faxing and storage |
Optimize Revenue Cycle Management
|
Reduce patient onboarding time by as much as 50% |
|
|
Capture more reimbursable conditions at the start of care |
|
|
96% of documents returned and signed in 30 days |
Improve Patient Outcomes
|
Coordinate care among remote and multidisciplinary care teams with 24/7, HIPAA-secure, real-time communication |
|
|
Extend and scale clinical expertise from the office to the field with one app to support both office and clinical staff |
|
|
Monitor patient wounds and document patient progress from the point of care |
Forcura’s referral automation identifies referrals as they come in for easy processing and attachment in Axxess. Patient and physician data are synced from Axxess to Forcura, so referrals can be processed faster and patients can be onboarded sooner. Orders can automatically be sent to physicians from Axxess, giving users transparency into what is outstanding and which providers hold the oldest or highest volumes of claims.
Once an organization enables the Forcura integration, approved orders can automatically be sent from Axxess Home Health to Forcura to be faxed for physician signatures, signed, and returned to the Axxess Home Health solution. The Forcura integration streamlines document tracking and enables users to attach returned orders directly to their corresponding Axxess patient records.
To activate the Forcura integration, Axxess Home Health clients should contact sales@forcura.com and integrations@axxess.com to set up agreements with each software vendor for the integration.
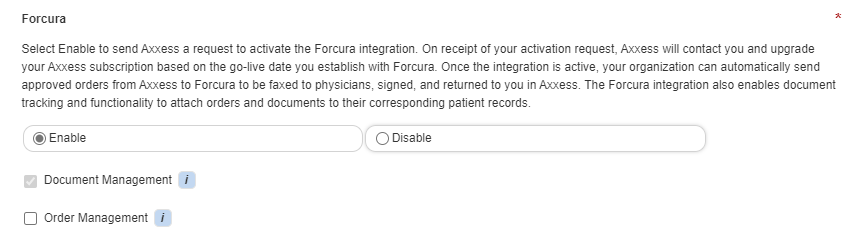
Clients will then need to submit a request to enable the Forcura integration in Axxess Home Health. To submit a request to enable the Forcura integration, navigate to Company Setup under the Admin tab in Axxess Home Health. On the Integrations tab, navigate to the Orders/Document Management section and click Enable under Forcura. Make the preferred selections and click Submit Request.
Admin tab ➜ Company Setup ➜ Integrations tab ➜ Orders/Document Management section ➜ Forcura ➜ Enable ➜ Submit Request
|
The Document Management functionality is automatically activated when the Forcura integration is enabled. This item enables documents that flow in from Forcura to be attached to patient charts in Axxess. |
|
|
The organization can choose to enable the Orders Management feature by checking the box next to Orders Management. This feature enables users to electronically send approved orders from the Orders To Be Sent screen to Forcura for managing and tracking in the Forcura application. |
|
|
The organization can choose to automatically send approved orders by checking the box next to Automatically send approved orders to Forcura. If this setting is not selected, the organization manually sends approved orders to Forcura through the Orders To Be Sent screen under View ➜ Orders Management. If this box is selected, orders that have been approved in the Quality Assurance Center (or set to bypass QA) will be automatically sent to Forcura for managing and tracking. |
When an administrative user selects Enable ➜ Submit Request under the Forcura integration in Company Setup, Axxess receives an activation request. On receipt of the request, Axxess contacts the organization to discuss and identify a go-live date.
The established go-live date displays in the Effective Date field in Company Setup, and the integration is activated and added to the organization’s Axxess subscription based on the date.
When Forcura is enabled, a predefined list of document types populates in the Documents list. Admin tab ➜ Lists ➜ Documents
The predefined list includes standard Forcura document types for indexing purposes. If a user attempts to edit or delete one of these document types using the buttons under Actions, the system will trigger the following message and prevent editing/deletion: This document type is associated with an active interface and cannot be edited or deleted.
Managing Patient Documents:
When a document is indexed from Forcura, the document attaches to the Documents tab in the patient’s chart.
Select the Documents tab at the top of a patient’s chart to navigate to the Documents screen. Patients tab ➜ Patient Charts ➜ Documents tab

On the Documents screen, the Attached By column enables users to identify documents attached by Forcura.

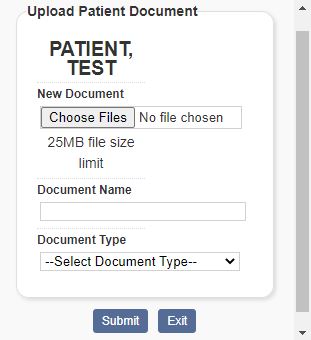
To add a new document, click Add Document in the top-right corner of the Documents screen. In the New Document window, select the name of the document from the Document Name field and click Choose File to upload a file from your device. Click Upload to finish uploading the document.
New Document button ➜ Upload New Document ➜ Enter Document Name ➜ Select Document Type ➜ Submit
When adding, editing or deleting patient profile information in Axxess, the patient profile information in Forcura will automatically update to ensure consistency and accuracy.
Accessing Orders To Be Sent:
Once orders are generated and ready to be sent for physician signatures, they appear on the Orders To Be Sent screen.
View tab ➜ Orders Management ➜ Orders To Be Sent
A Delivery Method filter appears on the Orders To Be Sent screen to optimize orders management processes. The Delivery Method column enables users to identify orders that are set to go to Forcura. When the Forcura integration is enabled, all orders with Electronic selected in the Delivery Method field will be sent to Forcura.

When Forcura is enabled and a delivery method is not selected, the box in the far-left column will be grayed out. When the user hovers over the box, a message will inform the user that an order delivery method is required to send an order.
The user can click the hyperlinked physician’s name in the Physician column and select an order delivery method on the Edit Physician screen to enable sending or follow the steps below.
Adding a Physician’s Order Delivery Method:
To identify a physician’s order delivery method, navigate to the Edit Physician screen under the View or Admin tab.
View tab ➜ Lists ➜ Physicians ➜ Edit ➜ Order Delivery Method
Admin tab ➜ Lists ➜ Physicians ➜ Edit ➜ Order Delivery Method
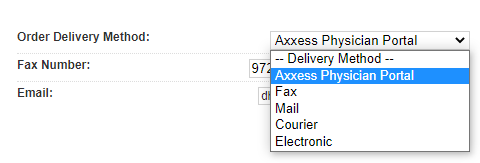
Users should select Axxess Physician Portal in the Order Delivery Method field for physicians who sign orders electronically through the Axxess Physician Portal. If this option is selected, a valid physician’s email address must be provided. Physicians should regularly monitor the portal to minimize delays in signed orders.
When Mail or Fax is selected without the Forcura integration enabled, users will be required to manually download the PDF files and fax or mail items to physicians for signature. The Orders To Be Sent screen will help users select orders and mark items as sent using the Send button in the top-right corner of the screen.
When the Forcura integration is enabled, all orders with Mail or Fax selected in the Delivery Method field will be sent to Forcura to send to physicians via mail or electronic fax (eFax). Administrators should make sure the most up-to-date physician mailing addresses and fax numbers are saved on the Edit Physician screen.
When adding, editing or deleting physician profile information in Axxess, the physician profile information in Forcura will automatically update to ensure consistency and accuracy.
Viewing and Receiving Orders Pending Physician Signature:
To view orders pending MD signatures, navigate to the View tab, hover over Orders Management and select Orders Pending MD Signature.
View tab ➜ Orders Management ➜ Orders Pending MD Signature
Columns on the Orders Pending Signature screen indicate age and delivery method.

Viewing Orders History:
The Orders History screen enables users to track manually received and electronically received orders. To view orders history, navigate to the View tab, hover over Orders Management and select Orders History.
View tab ➜ Orders Management ➜ Orders History
The Received By column on the Orders History screen enables tracking and streamlines orders management processes.
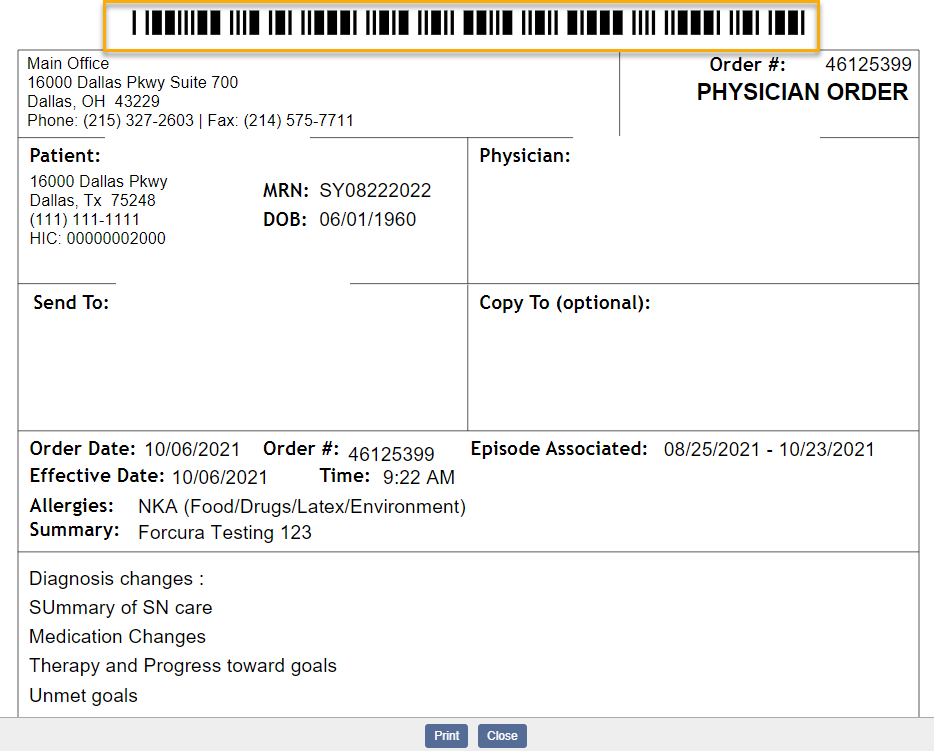
When an order is signed and returned from Forcura, the order attaches to the order task with a unique bar code and signature. To view an order, click the printer icon on the order task.