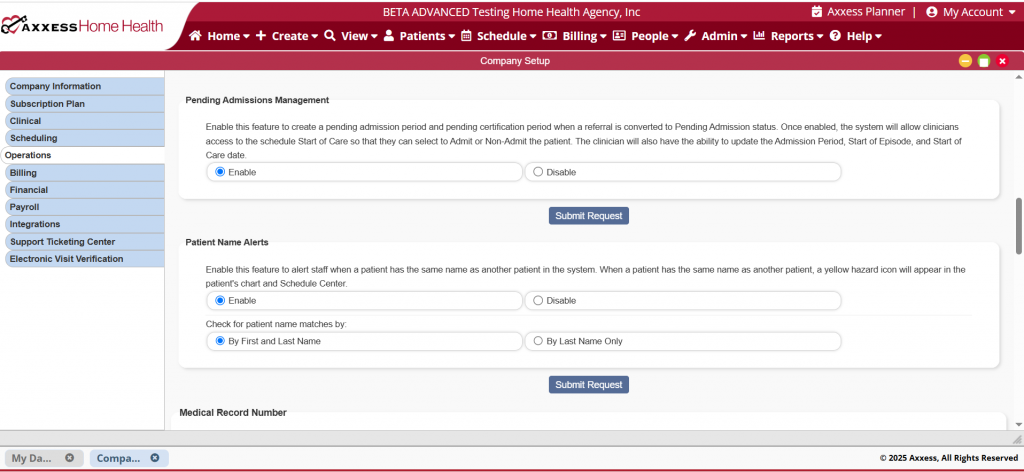
Axxess Home Health now provides a setting in Company Setup that enables organizations to create a pending admission and certification period when a referral is converted to a pending status. When enabled, this feature allows users to schedule the Start of Care visit while the patient is still pending admission.
This feature streamlines operations and ensures compliance by removing the need to manually update admission periods and start of care and episode dates, saving time and eliminating the risk of errors.
To enable automatic pending admissions management, navigate to Company Setup under the Admin tab. On the Operations tab, navigate to the Pending Admissions Management section and select Enable. Click Submit Request to save. Please note that this feature must be enabled for each branch location individually.
Admin tab ➜ Company Setup ➜ Operations tab ➜ Pending Admissions Management section ➜ Enable ➜ Submit Request
Once the changes are saved in Company Setup, Axxess Home Health will automatically apply this feature to the selected branch and to referrals that are converted to pending admission.
To create a pending admission, navigate to the View tab and select Lists from the drop-down menu, click Referrals to view the referral list. On the Referral List screen, navigate to the Actions column and select Admit next to the desired referral.
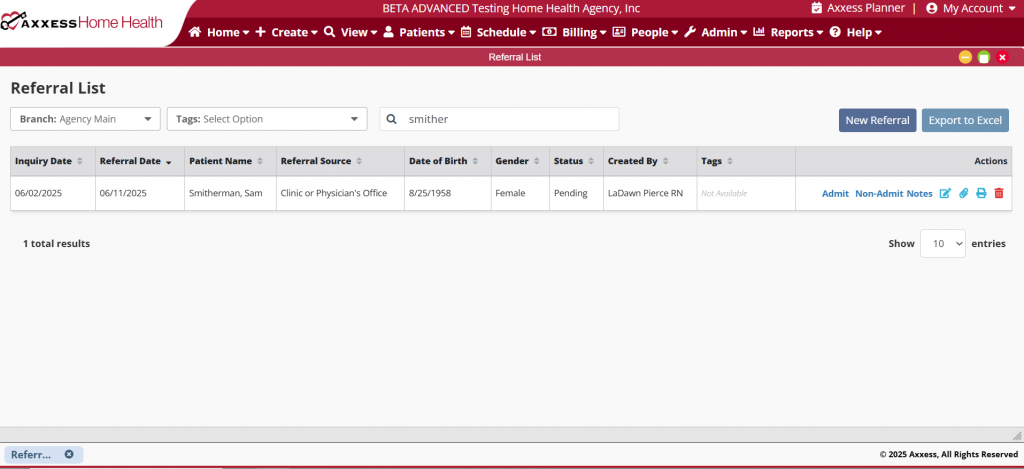
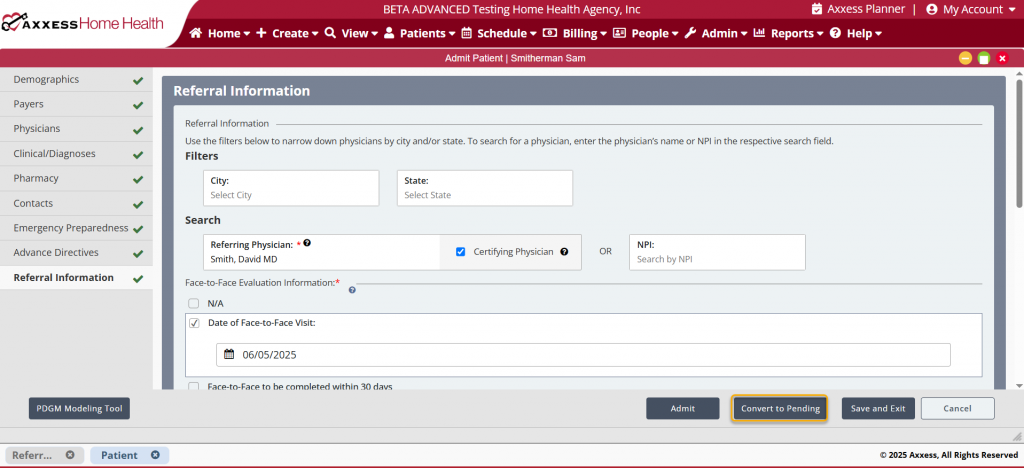
Once selected, click Convert to Pending at the bottom of the screen.
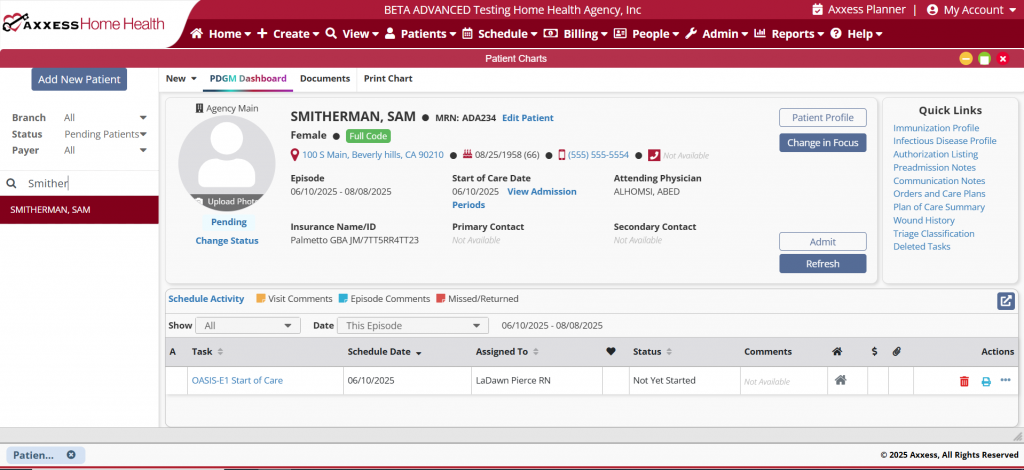
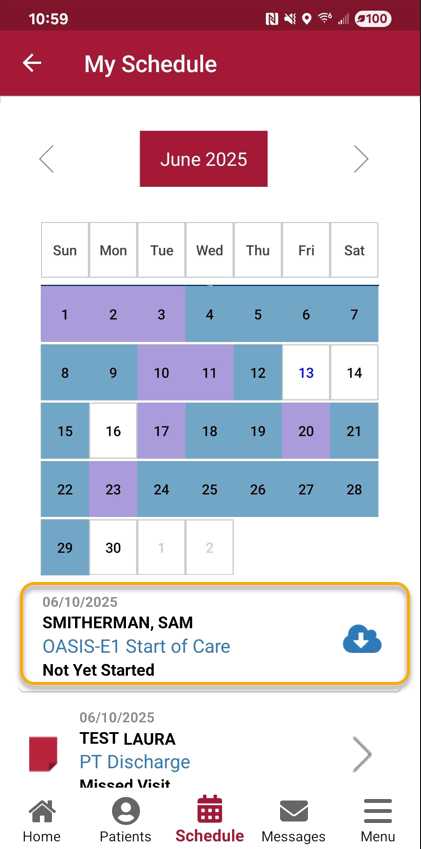
After converting the referral to pending, the pending patient’s start of care date, admission periods and episode are displayed on the patient card. Please note, the start of care is the only task displayed on the clinician’s schedule while patient is listed as pending.
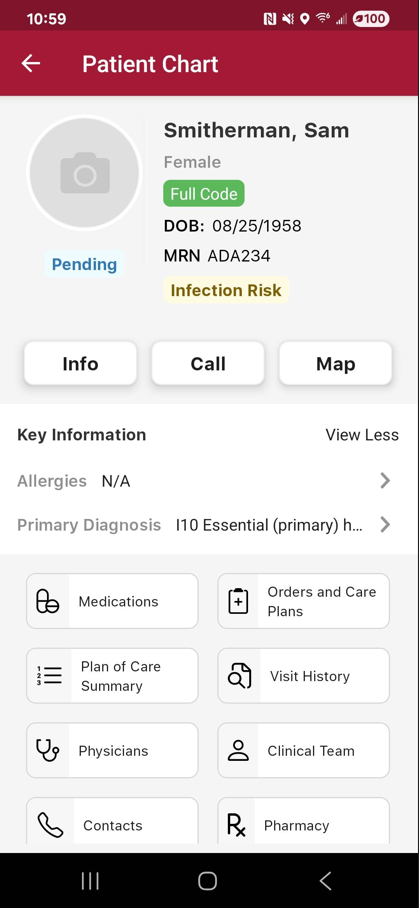
The scheduled start of care visit is then displayed on the assigned clinician’s schedule in both the desktop version and the mobile app.
Click the visit hyperlink to access the assessment. When selected, a message will display, prompting next steps. The user can then select Admit, Non-Admit or Cancel.
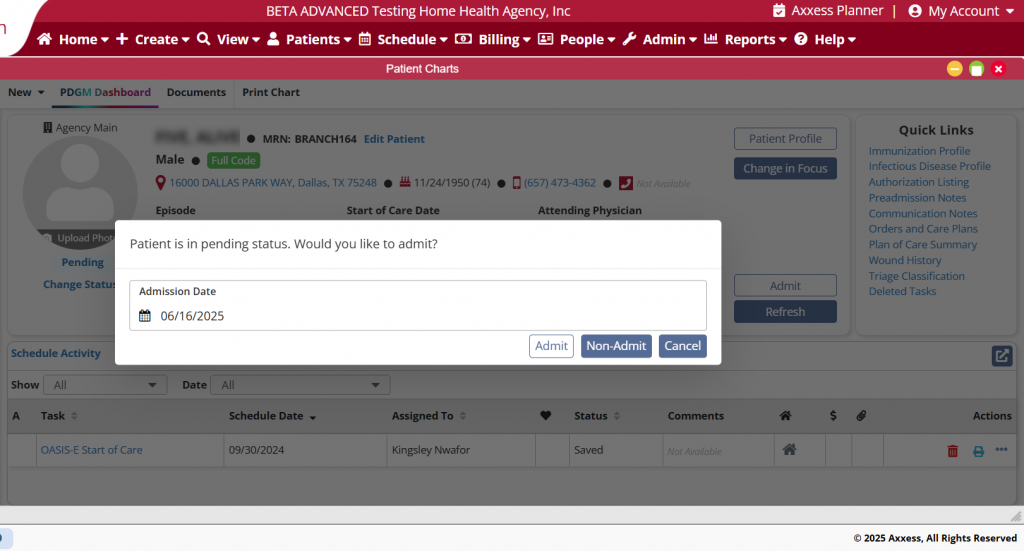
When Admit is selected, the user can enter the desired Admission Date from the date picker. Once a date is selected, the Start of Care date, Episode date and Admission Period will update to match the date entered by the user.

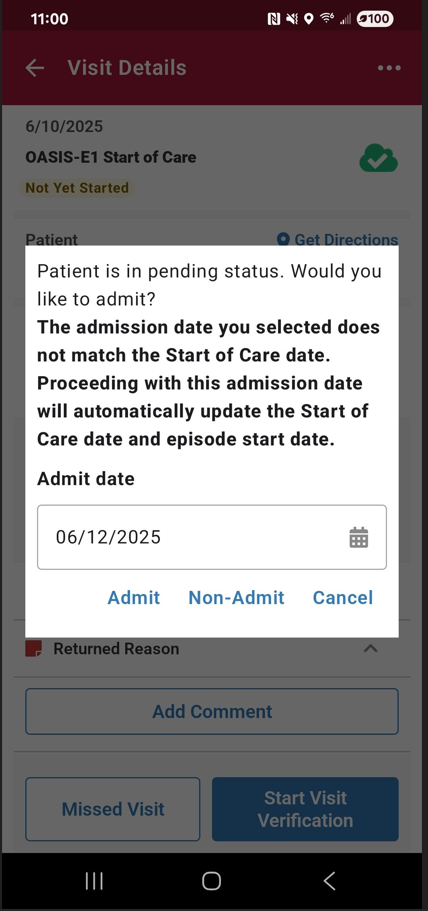
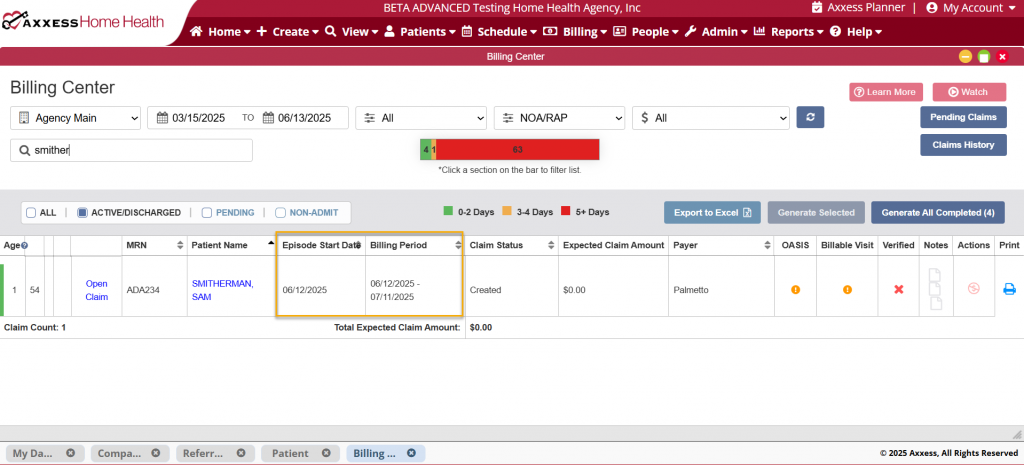
Selecting a new date will also update the Episode Start Date, Billing Period and any created claims in the Billing Center so that no manual adjustments need to be made.
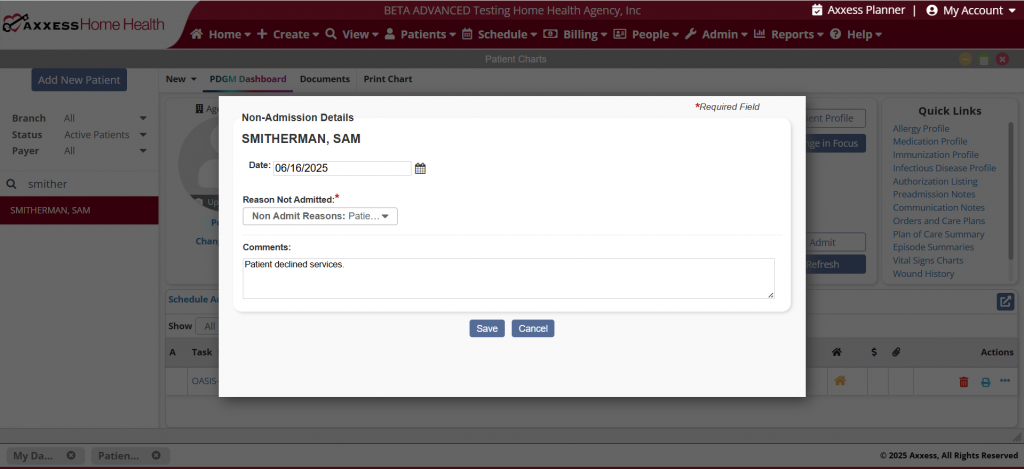
If the user selects Non-Admit, they will be directed to select a date from the date picker and a reason for the non-admission. Click Save to complete.
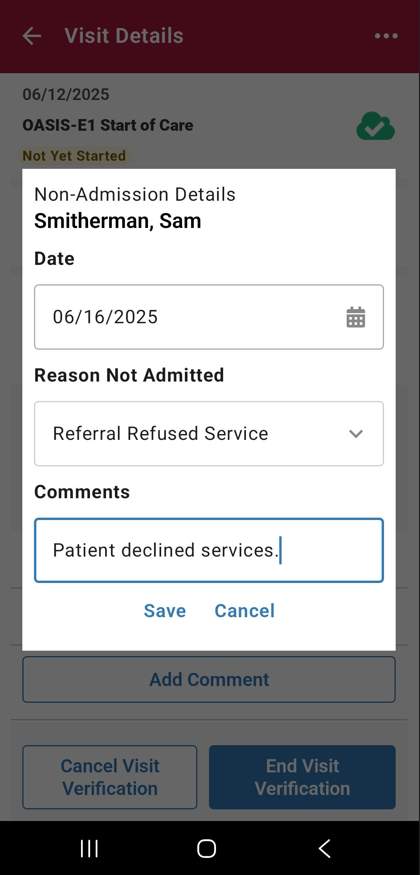
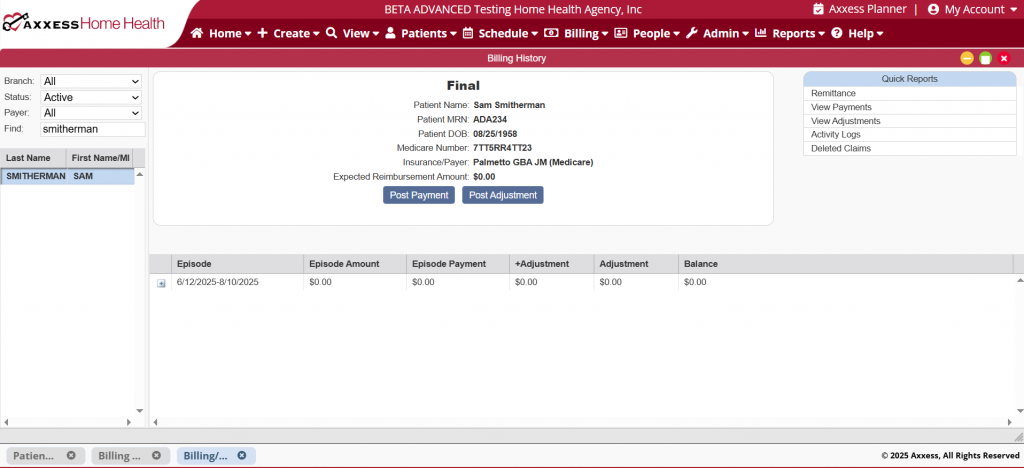
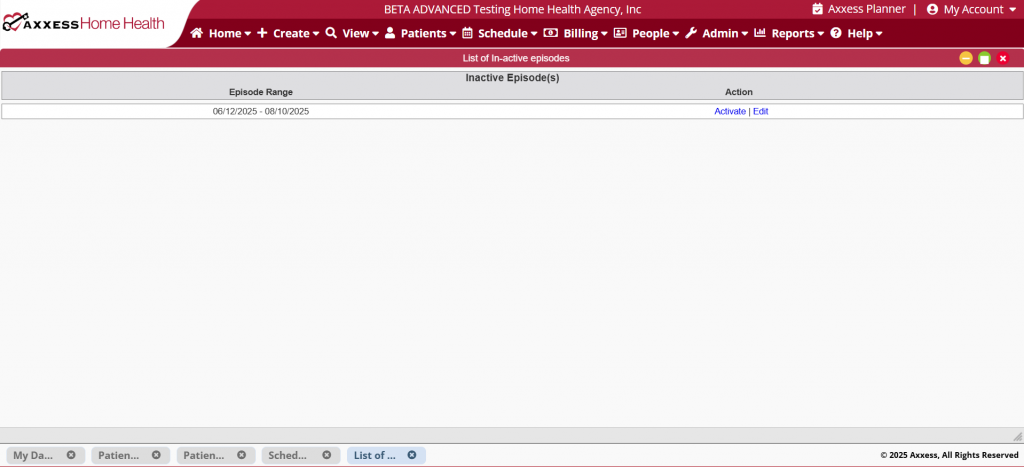
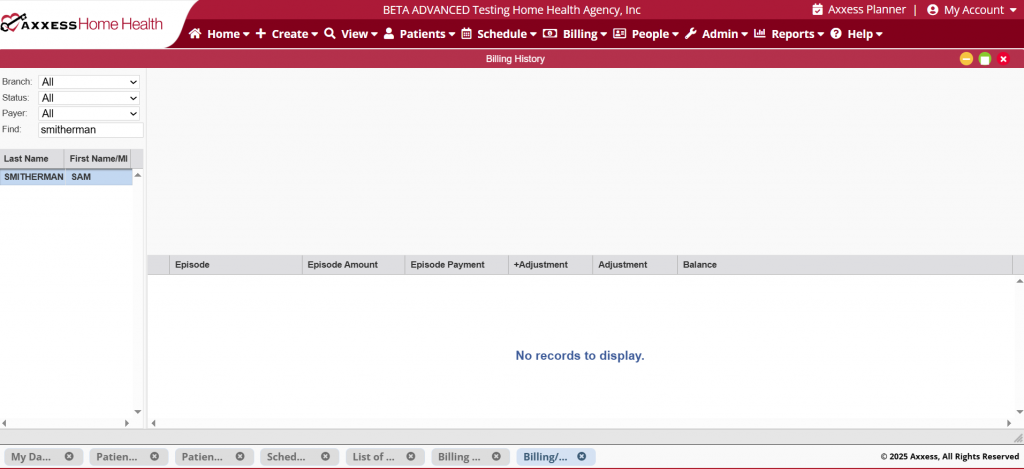
Once the non-admission has been saved, the pending episode will be inactivated and any associated claims will be removed from the Billing Center and Claims History. If the patient becomes readmitted at a later time, the solution will generate a new Admission Period, Episode, Start of Care date and claims.
If Cancel is selected, the Start of Care assessment will still open so the user can begin documentation. If the user completes the assessment and submits it with their signature, the solution will admit the patient on the date that the assessment was scheduled. If the clinician saves and exits the assessment, they will again see the message prompting them to Admit, Non-Admit or Cancel.

Updated on 06/17/2025
