Due to the nature of managed care and other insurance billing the process of creating claims requires action from you. While some payors may require monthly or weekly invoicing others leave it up to your agency to decide what the invoicing process will be. Since there isn’t a standard time-frame for invoicing, AgencyCore doesn’t automatically create claims for patients. You must actively partake in the creation of the claims. This is a two part process.
Once the claim is created, you can validate and bill the claim via the Create Claims Menu.
To Run the Unbilled Visits for Managed Claims go to Reports and choose Report Center.

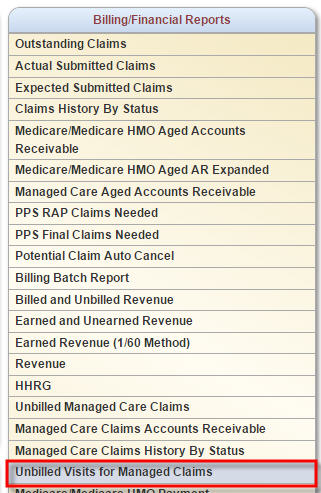 Once in the Report Center, find the Unbilled Visits for Managed Claims report located in the Billing/Financial Reports section.
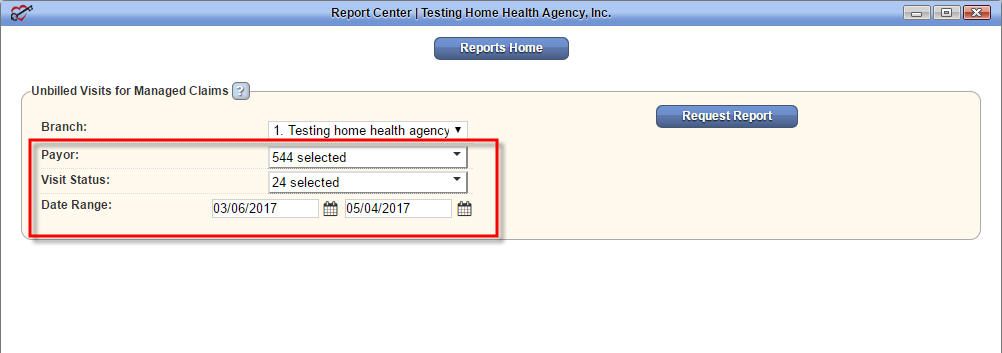
The Unbilled Visits for Managed Claims Report contains 4 parameters:
Branch: defaults to your primary branch
Insurance: set to Select an Insurance
Visit Status: defaulted to All
Date Range defaults to a 60-day range in which the “from” date is 60 days prior to the current calendar date.
You can update the parameters to reflect information you wish to see and select Request Report.
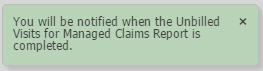 You will receive a message that states you will be notified when the report is completed. The notification occurs through AgencyCore’s message system.
 Once notified, you can view your report through the Completed Reports menu found via the Reports tab and choose Completed Reports.
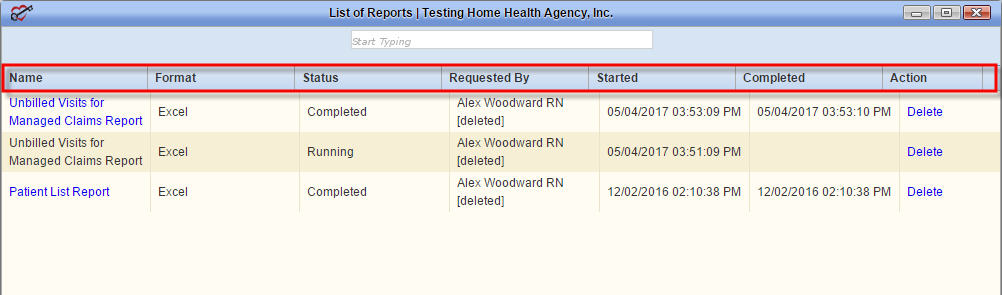
The completed reports menu contains the list of all completed reports for your agency. Seven columns are shown: The Name of the report, the report Format, Status, who requested (Requested By), when the report was requested (Started) and finalized (Completed), as well as an Action column. In addition to searching the list for the report, you can filter the list by using the start typing field located above the column headers.
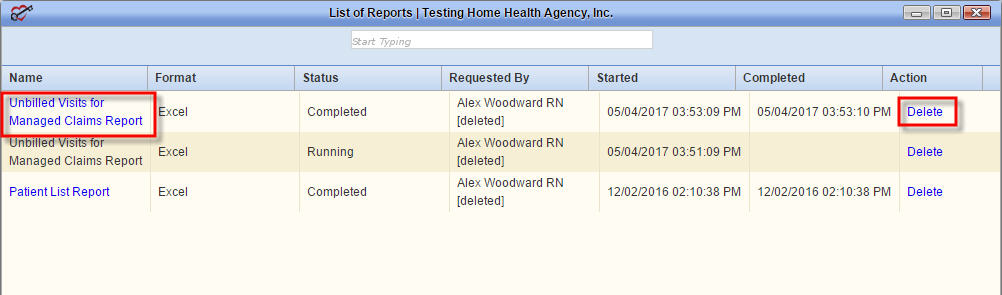
Once the report is located, click on the report name, which is in a blue hyperlink, to view the report or delete the report, which is located under the action column on the right.
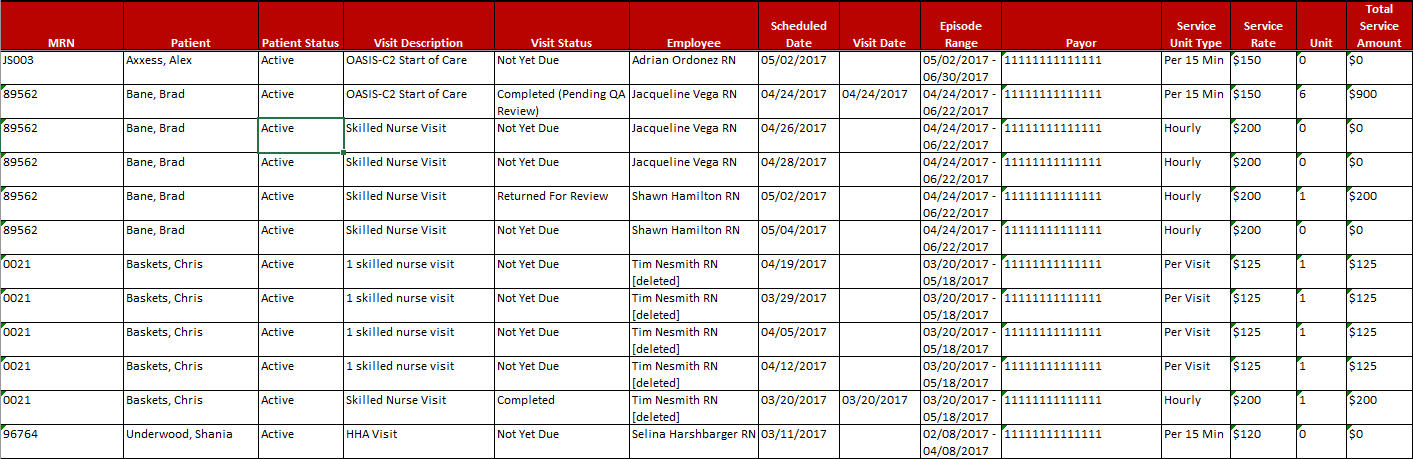
Selecting the report opens it in an excel format. The title of the report is located at the top of the report along with the parameters selected. Information provided in the results include the name of the patient, the type of visit, the status of the visit, the employee who completed the visit, the visit date and the episode the visit is attached to.
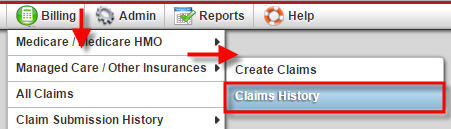 This information informs you which patients require claim generation. To create a claim for the unbilled visits go to the Billing tab, toggle over Managed Care/Other Insurances and select Claims History.
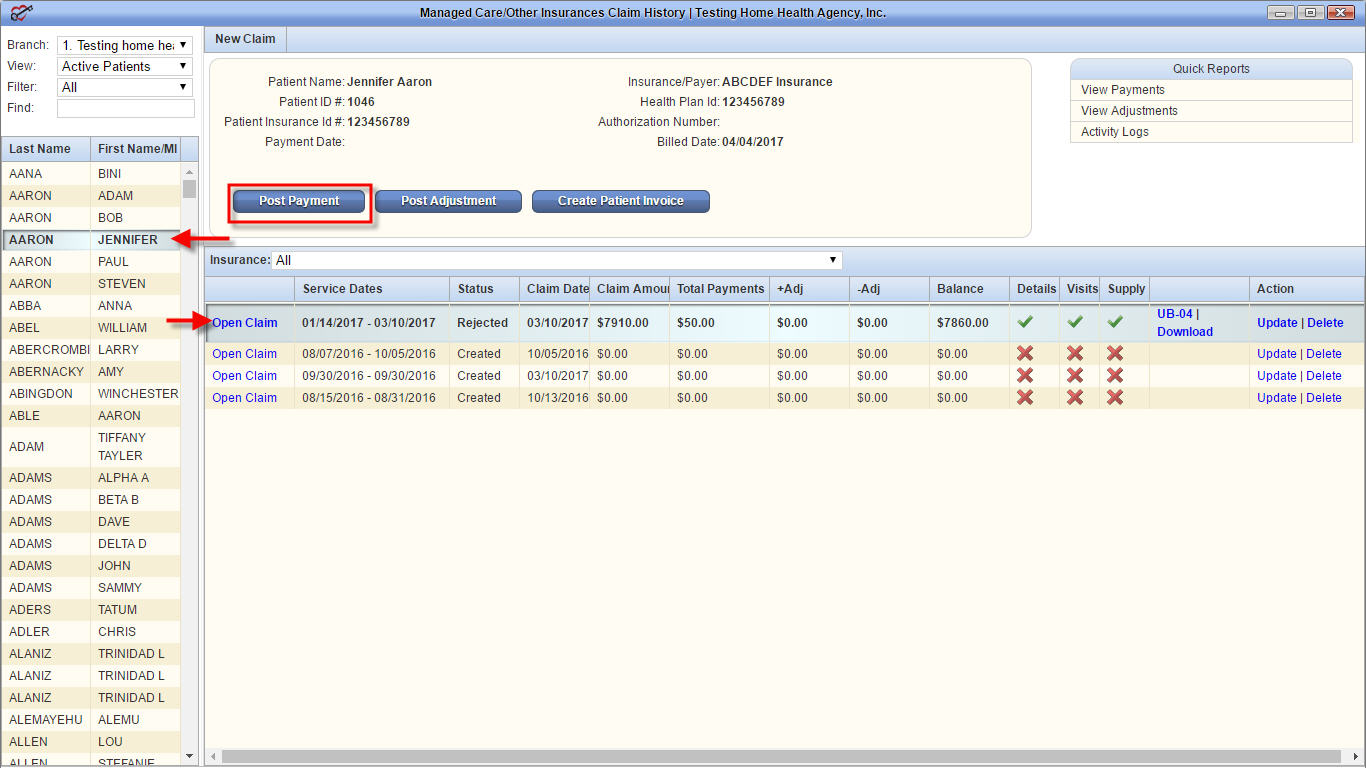
Select a patient that is on the unbilled visits report.
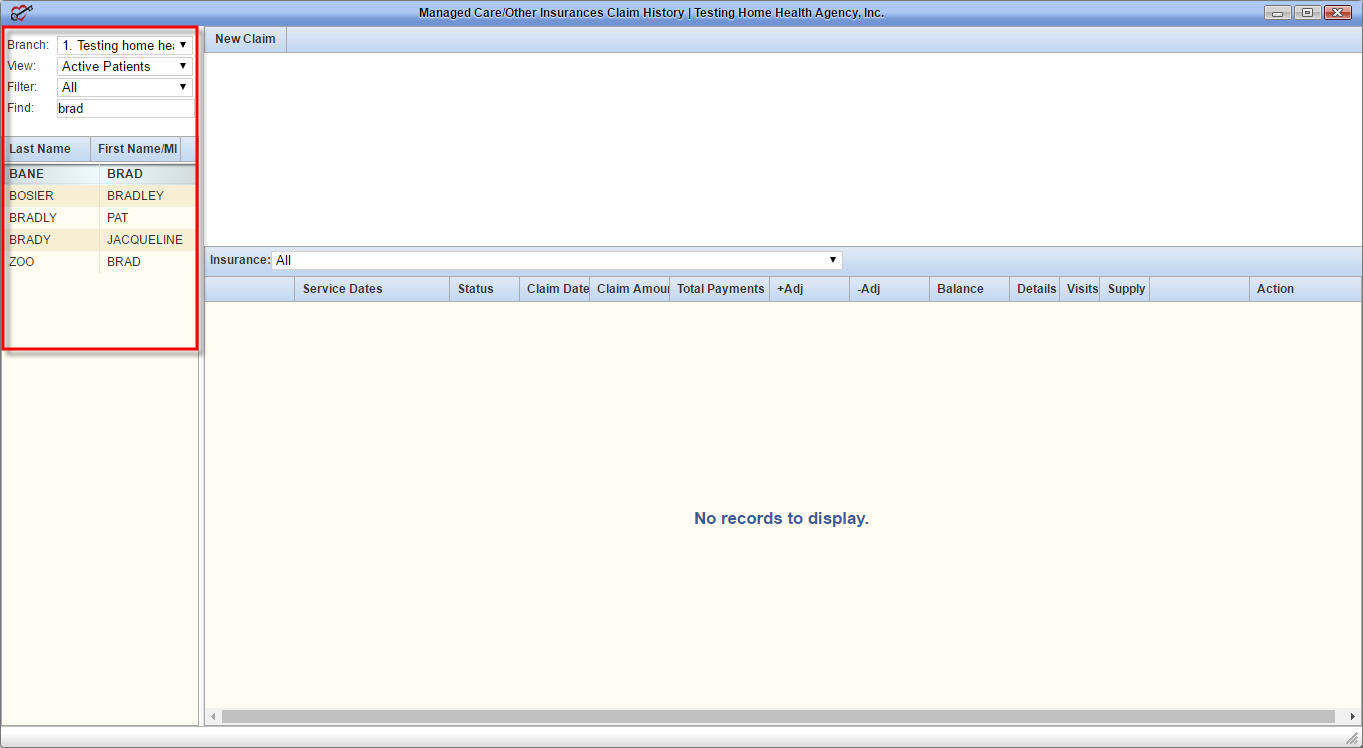
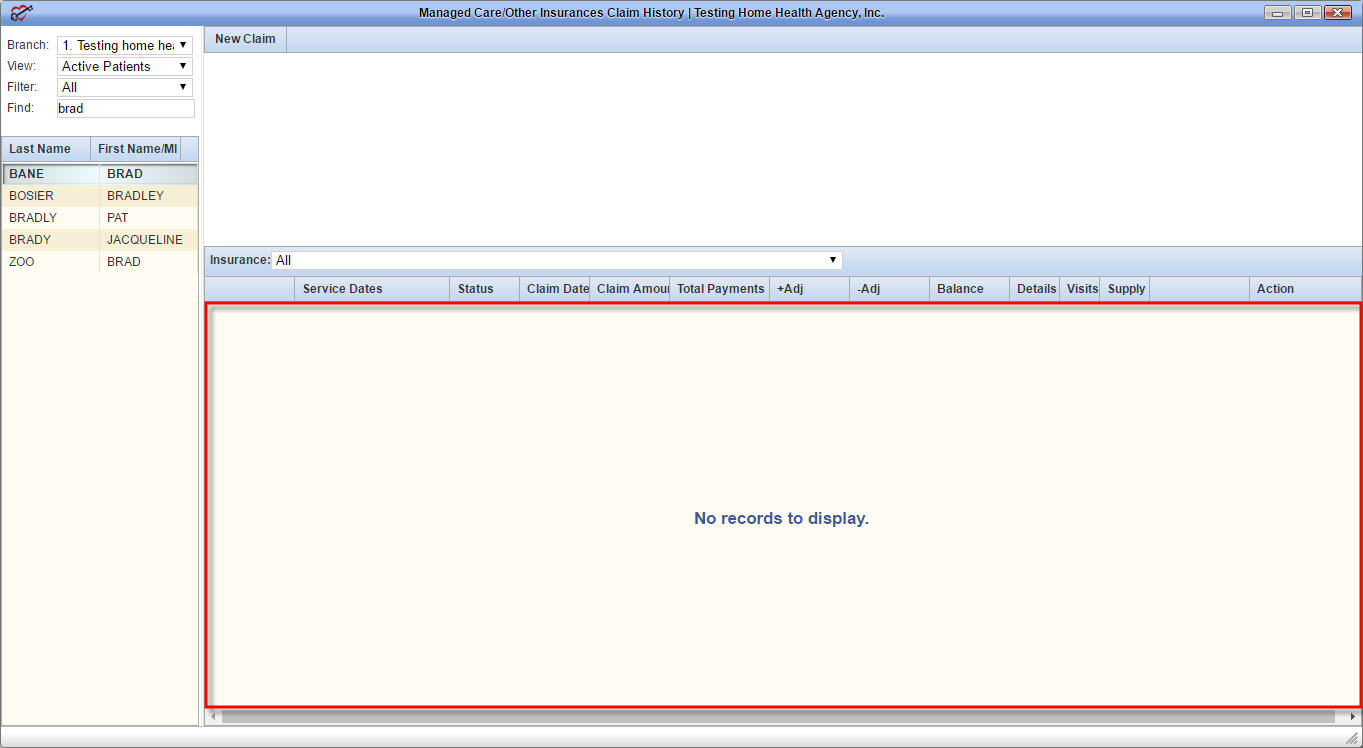
Identify if a claim has already been created for the time-frame of the visits by viewing the lower section of the claims history page. All existing claims for a patient will be listed in this area. In this example, there are no existing claims for the patient.
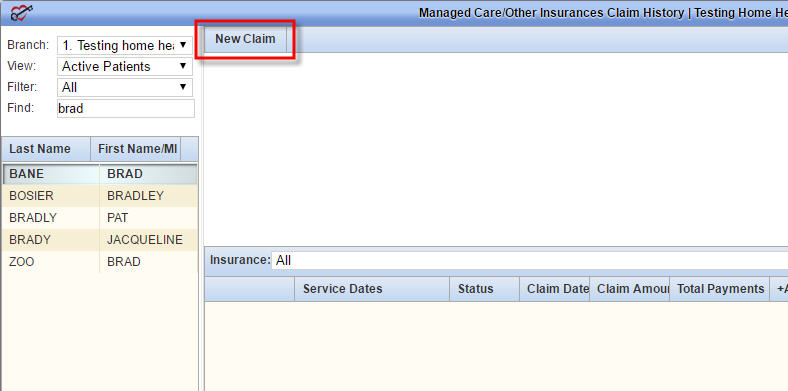
Since there isn’t a created claim for this time-frame, a claim needs to be created by selecting New Claim located at the top of the page.
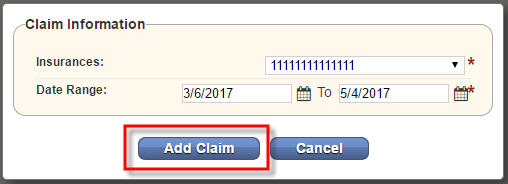 Selecting New Claim presents a pop up window, which allows you to enter the insurance and date range for the claim. The default date range is 60-days from the current calendar date. Update information as needed, then select Add Claim to create the claim or Cancel to disregard the information.
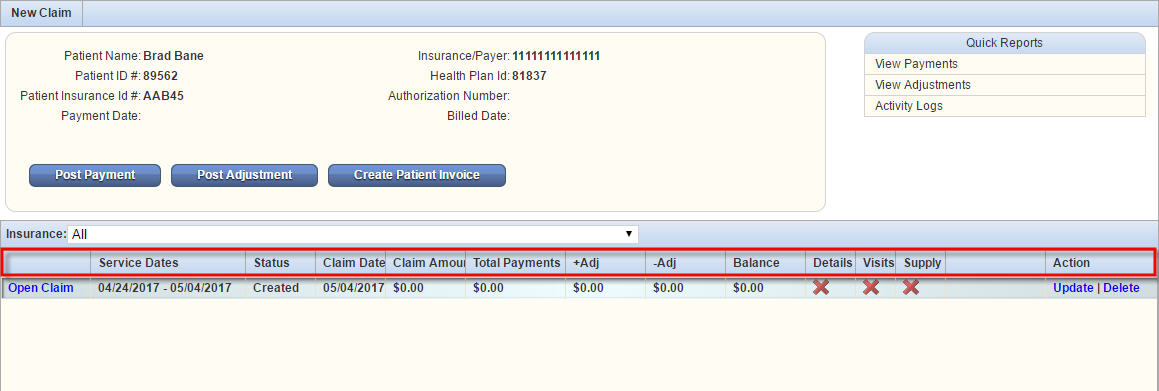
Once the claim is added, it appears in the lower half of the Claim History page for the patient. The information displayed in the claim line item includes: Claim Date Range, Claim Status, Total Payments, Total Adjustments, Balance, Details, Visits, Supply and Action.
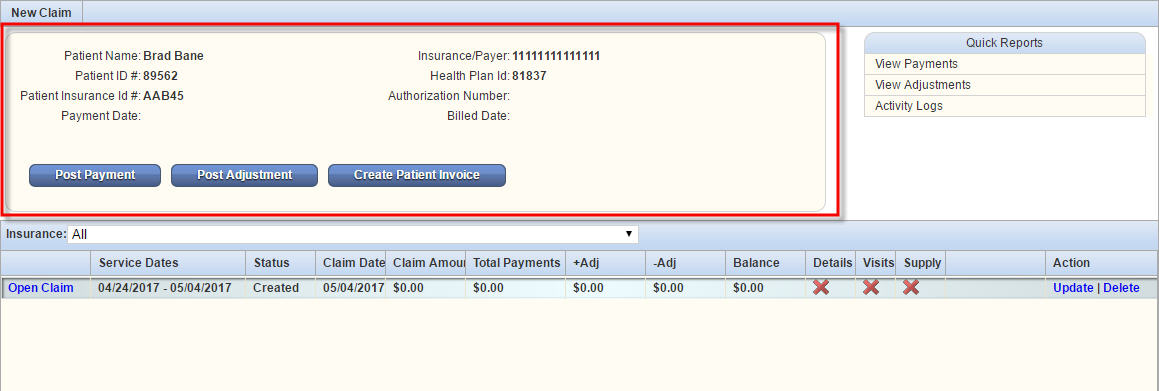
The upper portion of the claims history page displays information for the selected claim. It includes the patient name and medical record number (patient id#), insurance/payer information, and billing/payment information. This section also allows you to easily post a payment or adjustment or create the invoice using the buttons presented in the information screen.
The post payment and post adjustment options will be further explained in the Managed Care/Other Insurance Claim Follow-up tutorial.
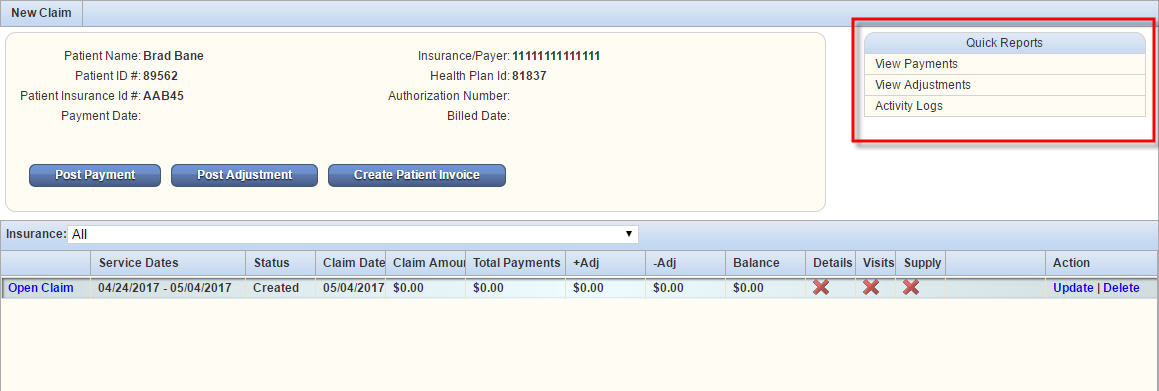
To the right of the patient information are quick reports associated to the claim selected, providing a quick way to view payments and adjustments posted to the claim as well as an activity log showing who and when the claim was updated.
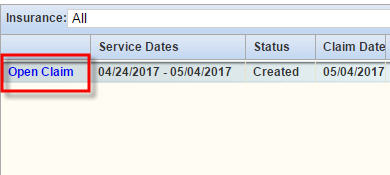 The next step in the process is to validate the claim. To complete this process select the Open Claim hyperlink located in the very left-hand column of the claim line.
This action opens the claim and allows for completion of the five-step verification process. This process must be completed prior to invoicing the claim.
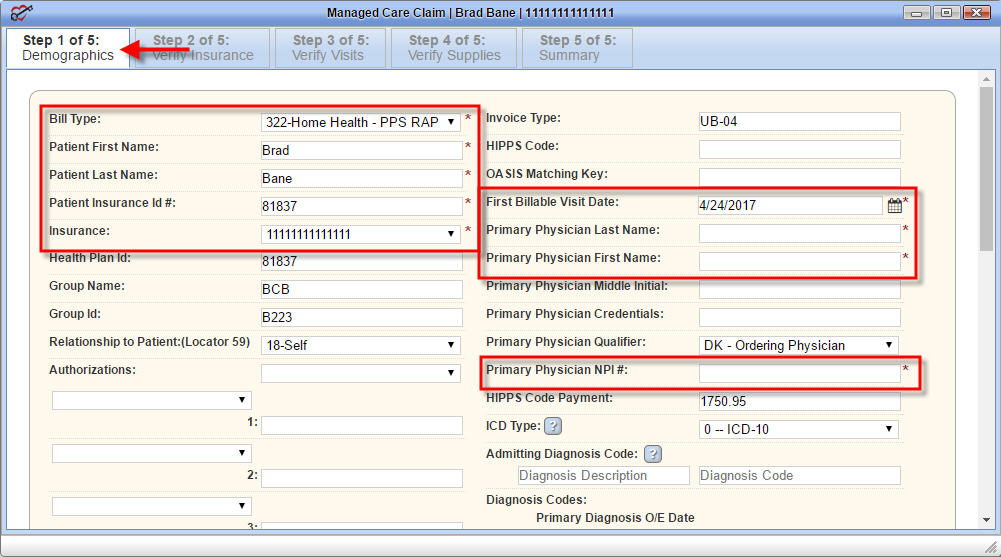
Step 1 (Demographics): required field completion includes:
Bill Type: this defines what type of bill the invoice is. For example: First claim, continuing claim.
Patient First and Last Name: name of the patient.
Patient Insurance Id #: the number that identifies the patient to the insurance company.
Insurance: Name of the insurance payor.
First Billable Visit Date: Date of the first billable visit on the claim.
Physician First and Last Name: name of the patient’s primary physician.
Physician NPI #: physician national provider identification number.
Non required fields include additional health plan information, authorization information, HIPPS and OASIS key information as well as diagnosis code input fields.
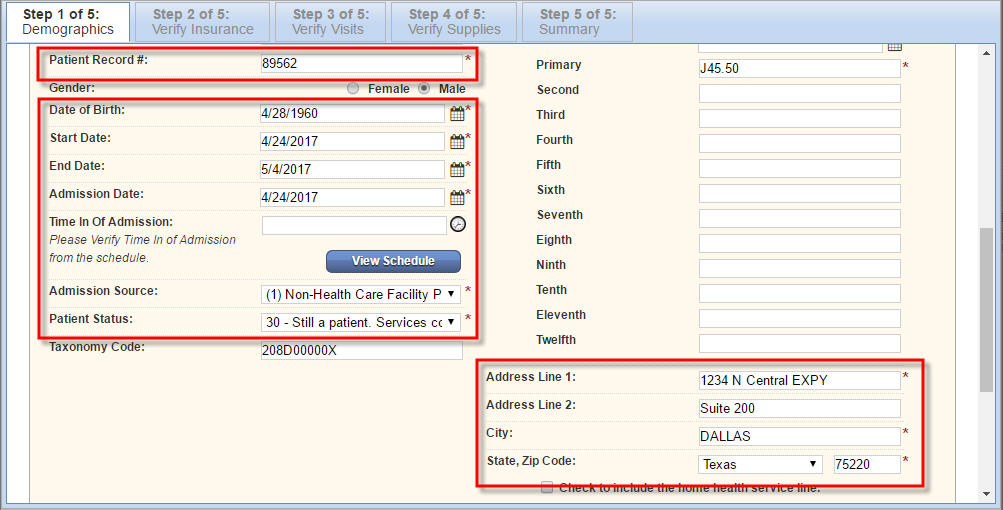
Scrolling down the page the next set of required fields include:
Patient record number: how the patient is identified with the agency (MRN).
Date of Birth: patient’s date of birth.
Start and End Date: date range of the claim.
Admission Date: date the patient was admitted to home care services.
Admission Source: identifies the type of entity the patient was referred from.
Patient Status: the current status of the patient within the agency.
Address: the patient address.
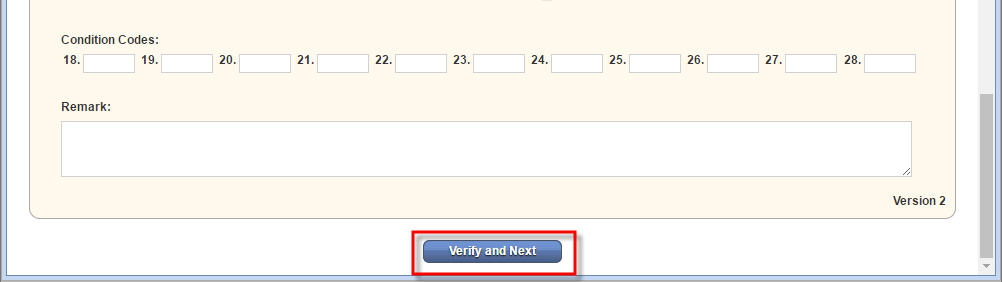
Located beneath the admission information you can enter condition codes if needed as well as any remarks you want to add to the bill. Once all information is updated/verified, select Verify and Next.
Now you can start Step 2 (Verify Insurance) in the verification process. This step allows you to add locator information as needed. Selecting Reload Insurance will reset the locators according to the insurance defaults.
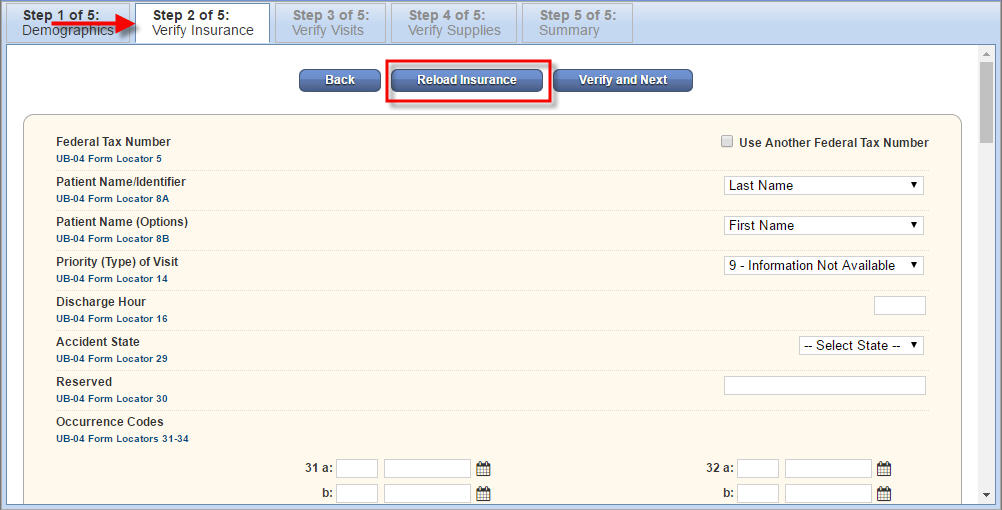
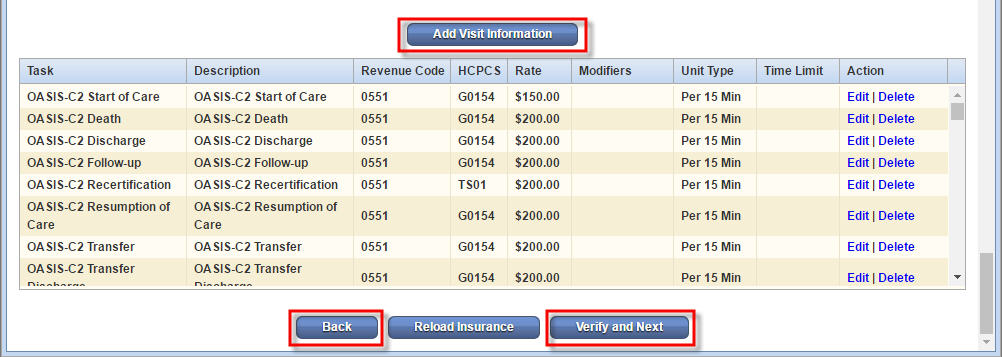
The lower half of the screen displays all rates that have been loaded into AgencyCore for the insurance. You can Add Visit Information or edit/delete existing visit information. Once completed, select Back to go to the demographics page or Verify and Next to go to Step 3 of the process.
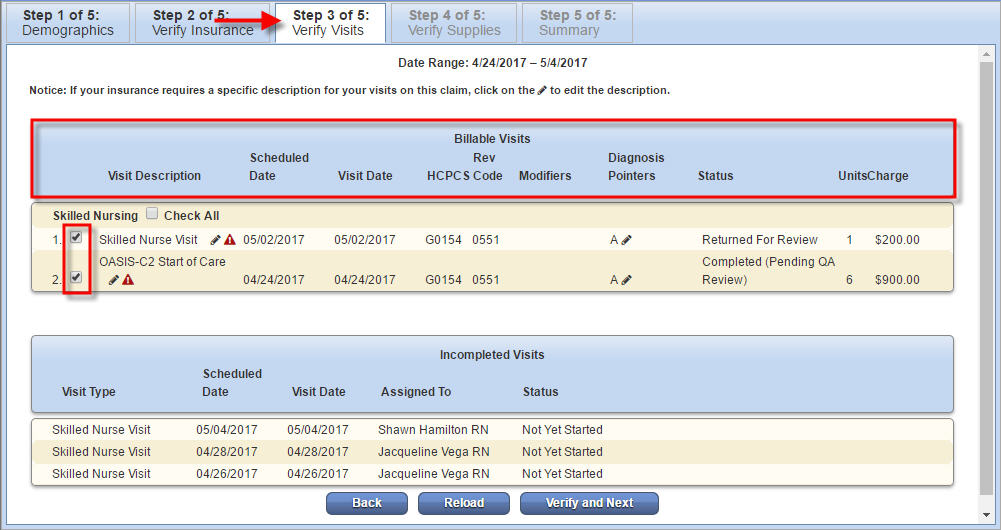
Step 3 (Verify Visits) displays the date range for the claim and all visits associated to the claim. The visits list by discipline in descending date order. Each visit line item indicates the Visit Type, Scheduled Date, Visit Date, HCPCS code, and modifiers, visit Status number of Units and Charge rate for the visit. All billable visits are defaulted with a check mark in the Billable check box. Deselect any visit/s you do not wish to bill. Once this is completed select Back to go to the Verify Insurance page or Verify and Next to move to Step 4.
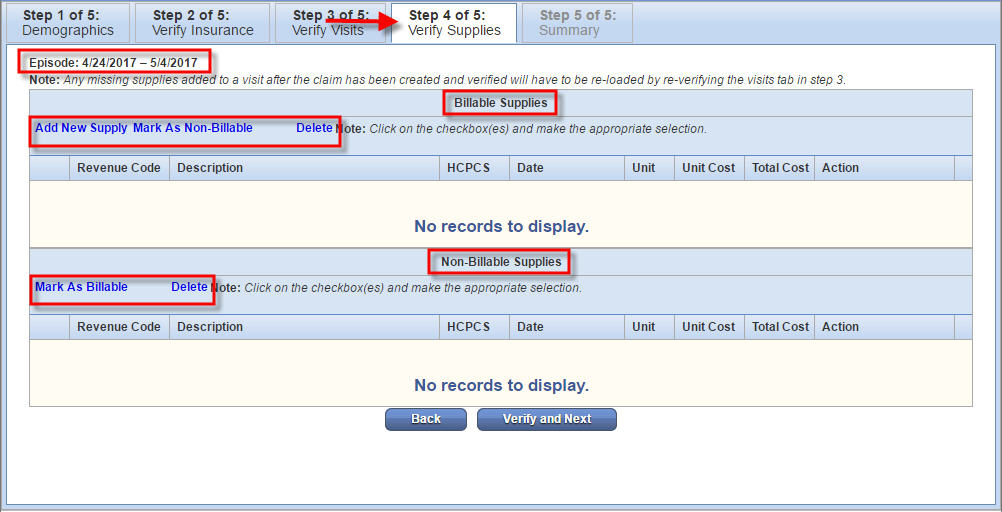
Step 4 (Verify Supplies) gives you the opportunity to review, add, edit, delete supply items from the bill. Most insurance companies include supply cost in the visit rate and thus most supplies are non-billable unless your agency received authorization to bill supplies or has a contract specifying supplies may be billed. Once supplies are listed appropriately select Back to review Step 3 or Verify and Next to move on to Step 5.
Step 5 (Summary) is the final step in the verification process. This step provides a summary of the claim and is broken down into sections. The first two sections display the demographic information for the patient.
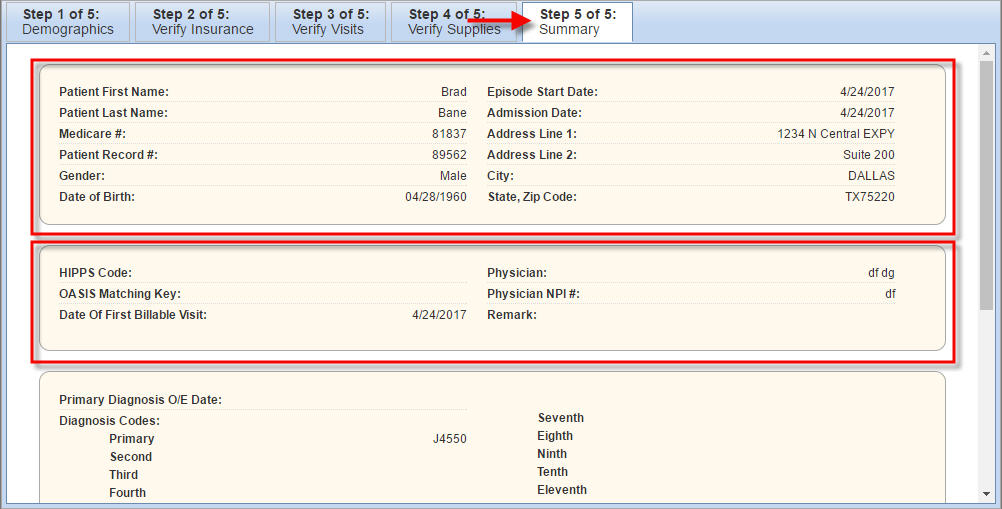
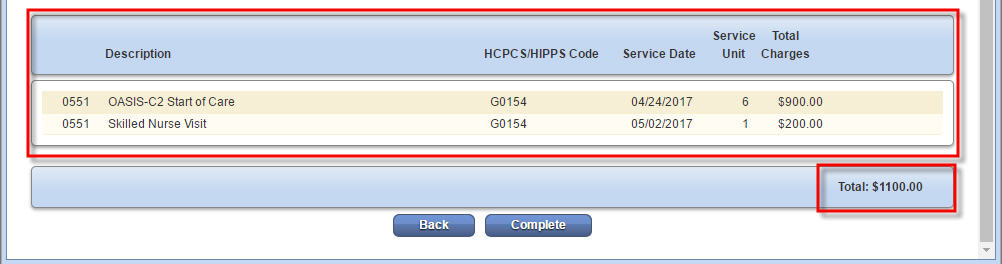
Visits and any Supplies are listed below the demographic information. The total claim charges are presented at the bottom of the page. Once everything is verified and deemed accurate select Complete to finalize the verification process. You can also select Back to return to Step 4 of the process.
Note: You can exit the verification process at any time by simply closing the verification window.
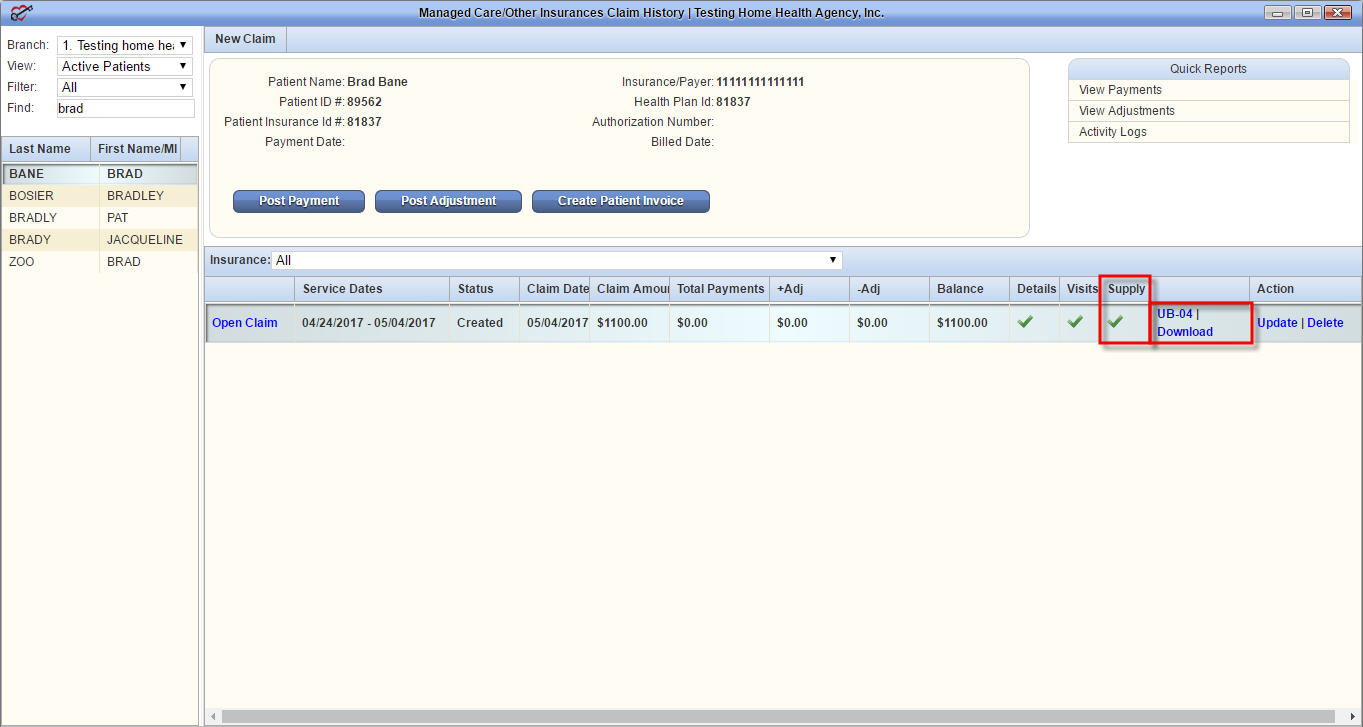
Upon Completion, you are taken to the Claim History page for the patient. All steps that were verified within the 5 step process will have a green check mark. Two new fields are now present: the claim type and Download. In this example, the claim type is a UB-04. Selecting the UB-04 hyperlink opens the claim with the UB-04 formatting. The claim may be printed and mailed if the agency chooses to bill in this manner. The Download hyperlink opens the claim in a text format for uploading to a payor website.
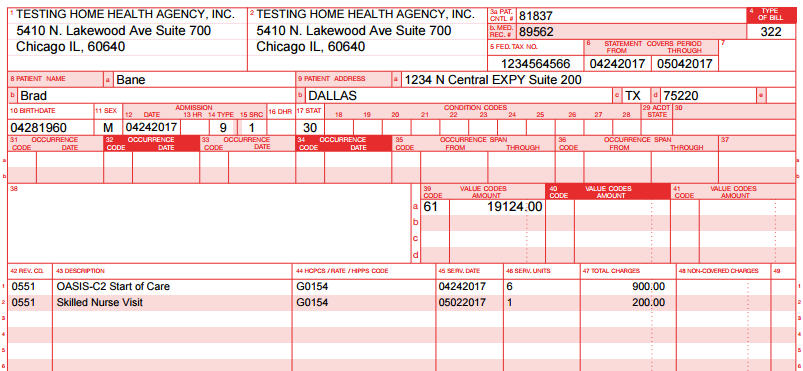
UB-04 form snapshot.
 If your agency chooses to electronically bill through AgencyCore or you wish to download several claims at one time you can do so through the Billing tab, hover over Managed Care/Other Insurances, select Create Claims.
Your branch information and your agency’s first alphabetical insurance will be defaulted in the selection fields. Select the insurance you wish to bill via the drop-down selection field.
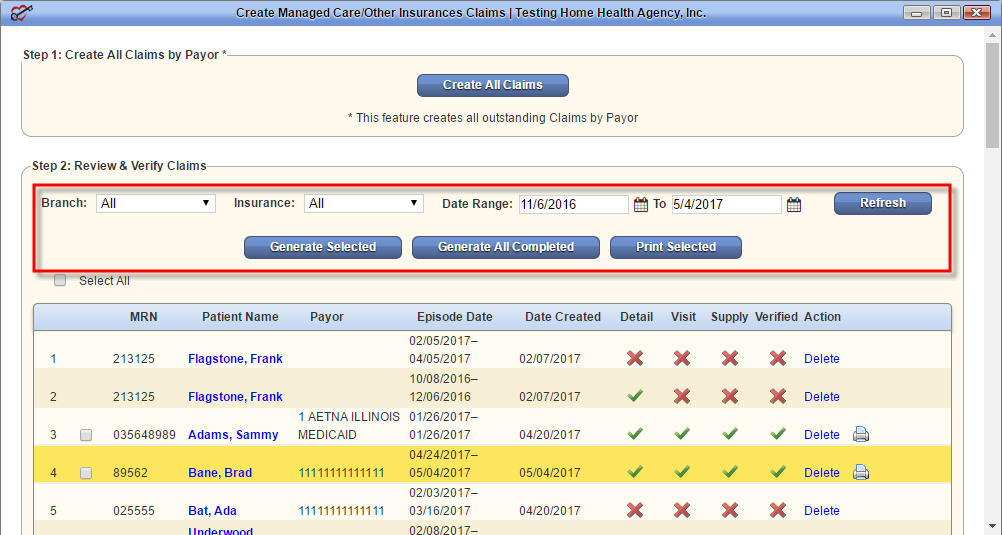
Once the insurance is selected, the screen will update with results for that payor. If the screen does not automatically update, click the Refresh button to update the page.
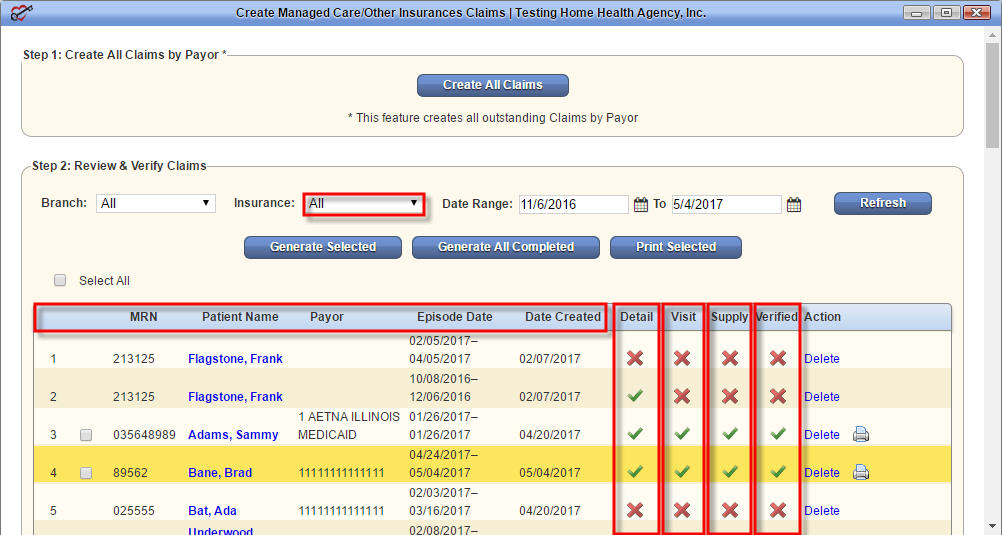
The lower half of the screen contains the list of patients for the selected payor where claims have been created, but have not yet been billed. The first three columns of the list consist of the patient name, patient id/medical record number and the episode period associated to the unbilled claim. The patient list is presented in alphabetical order by last name as a default. You can sort by Patient Id/MR number or Episode period by clicking on the associated column name.
The next three columns Detail, Visit and Supply, represent the demographics, Verify Visits and Verify Supplies steps within the 5 step verification process outlined earlier in this tutorial. The Verified column indicates if all 5 steps were completed within the verification process. A red X will be present for the columns that have not been completed while a green check mark will be present for the steps that have been completed.
Note: The screenshot below was taken prior to verifying all of the claim information for our patient. A red X is present under the Visit, Supply and Verified columns.
Once all items are verified and the columns are updated to all check marks, a selection box will show in-front of the patient name. At that point, the claim can be billed and you have two options to do so.
Choosing either Generate button takes you to the Managed Claim Summary page, which allows you the ability to review all patients that will be processed with that particular claim submission. The summary page displays the patient name and episode date (claim date range).
Once reviewed, choose from two submission options available: Download Claim(s) or Submit Electronically.
![]() Download Claim(s): is present if your agency has chosen not to electronically submit claims through AgencyCore. Select the Download Claim(s) button, save to your computer, and then upload to the payor. Once the download and subsequent upload is completed be sure to select to Mark Claim(s) as Submitted. Marking the claims as submitted removes the claim from the Create Managed Care/Other Insurance Claim screen.
Download Claim(s): is present if your agency has chosen not to electronically submit claims through AgencyCore. Select the Download Claim(s) button, save to your computer, and then upload to the payor. Once the download and subsequent upload is completed be sure to select to Mark Claim(s) as Submitted. Marking the claims as submitted removes the claim from the Create Managed Care/Other Insurance Claim screen.
 The Submit Electronically option is available if your agency opted to electronically submit claims through AgencyCore. Axxess creates an account for your agency and sets you up with electronic billing. Your agency will then have the Submit Electronically button available. Selecting the Submit Electronically button sends the claim/s to the clearinghouse and removes the claim from the create claims page.
![]() Note: If you are billing electronically AgencyCore, you will need to select the electronic submission checkbox under the EDI Information section when creating the insurance payor. Prior to selecting the electronic submission, please ensure that an account has been created for your agency.
Note: If you are billing electronically AgencyCore, you will need to select the electronic submission checkbox under the EDI Information section when creating the insurance payor. Prior to selecting the electronic submission, please ensure that an account has been created for your agency.
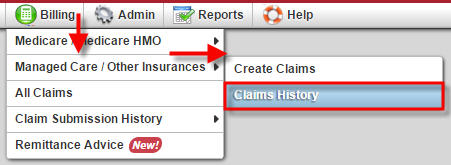 Postings of non-Medicare claims will be manually posted. You can do this by toggling over the Billing tab, choosing Managed Care/Other Insurances and selecting Claims History.
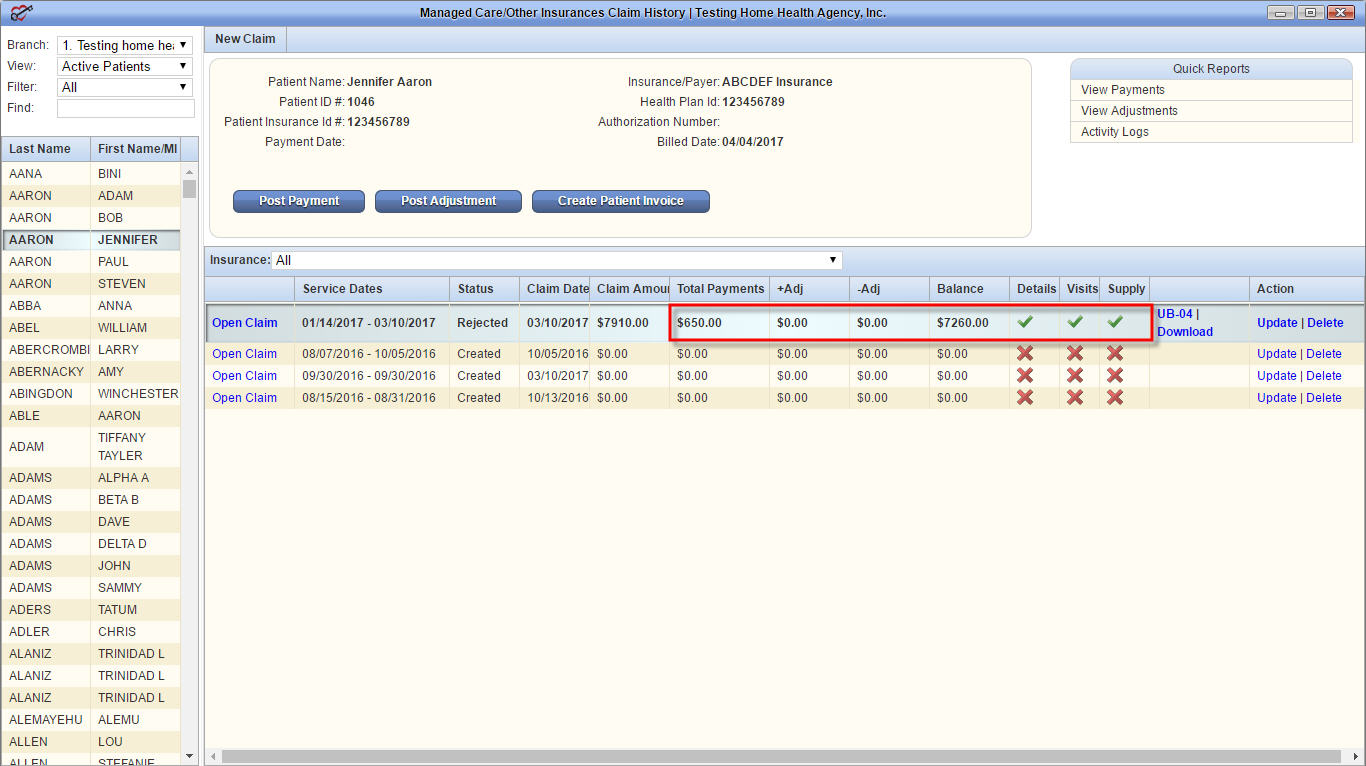
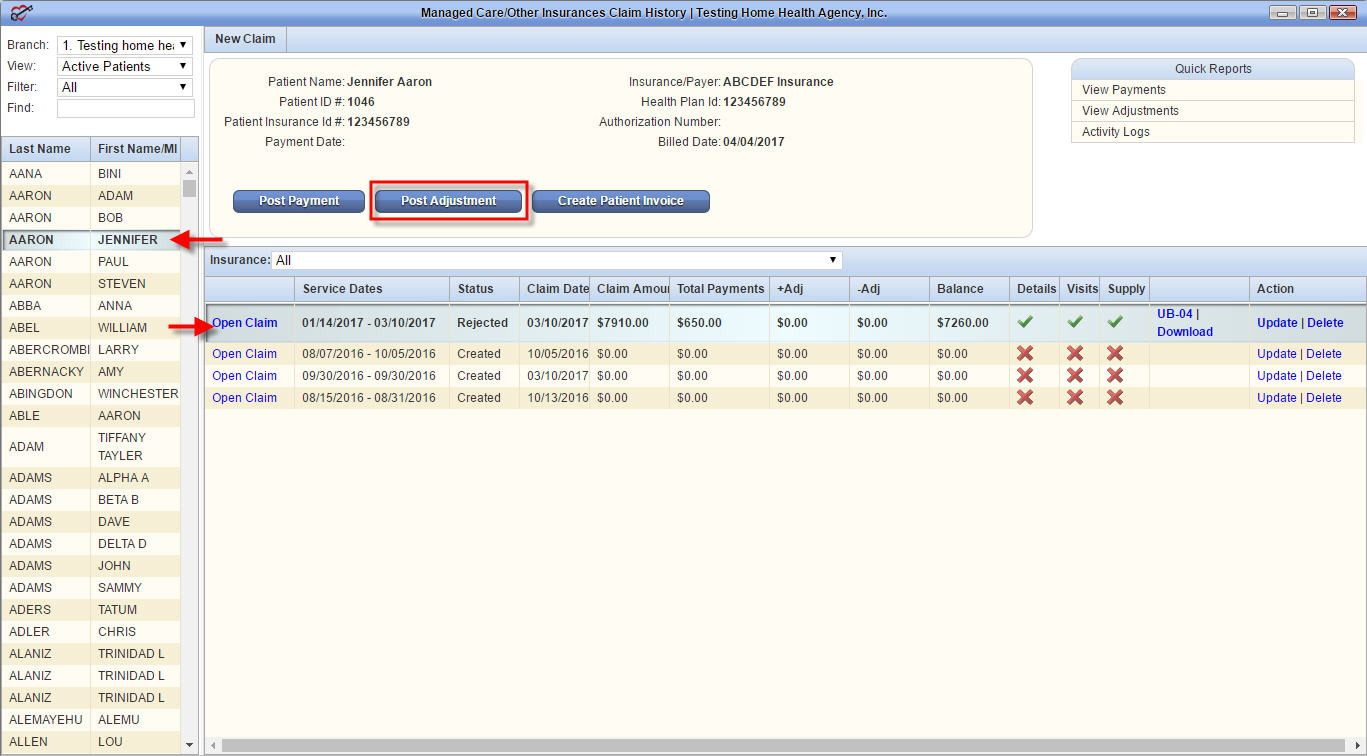
Once in the Claims History, locate your patient and the claims for that patient will be listed. Select the specific claim that needs to be posted, and then click Post Payment option.
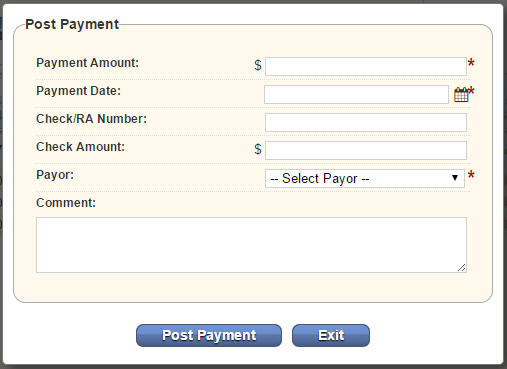
The pop up box to post payment will open. There are several options to include information, but the only required fields are the payment amount and the payor to select.
Once the payment is posted, you will see the payment in the Total Payment column.
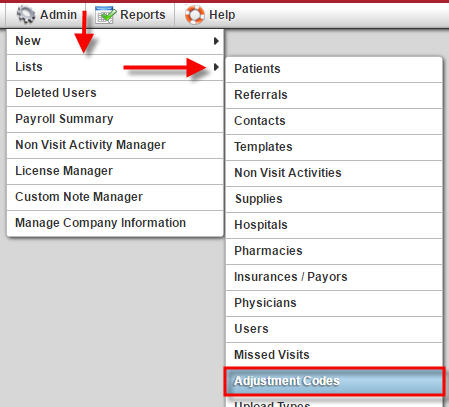 You can also post an adjustment from the Claims History. In order for that option to be available, adjustment codes will need to be added. To add an adjustment code, go to the Admin tab, find Lists and choose Adjustment Codes.
If this is the first time you are adding adjustments, the page will be blank. To add an adjustment code, click on New Adjustment Code in the top left of the screen.
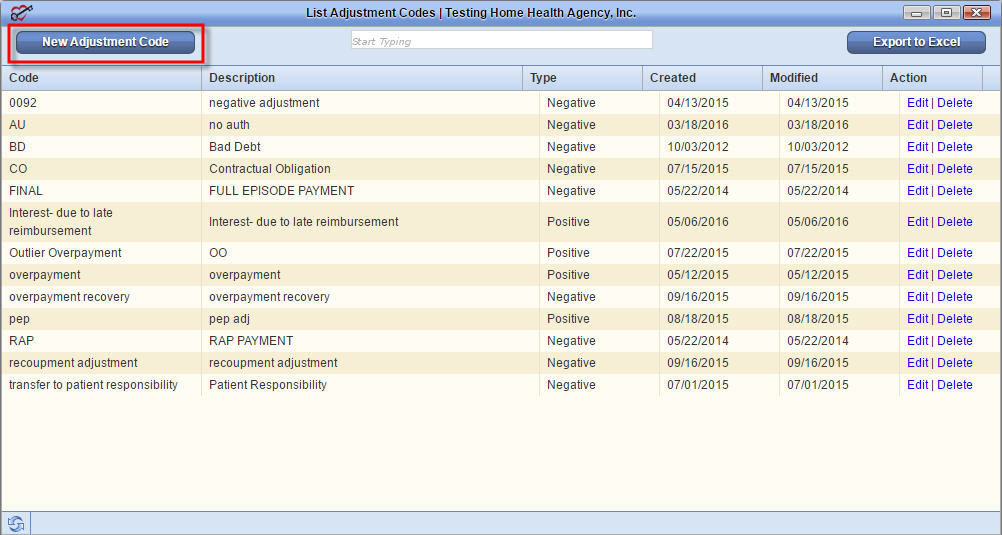
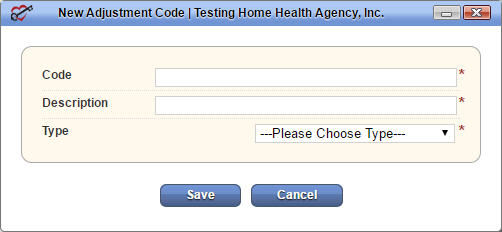 From here, you will be able to create your own code and description as well as choose if this adjustment should be positive or negative.
To post the adjustment click on Post Adjustment.
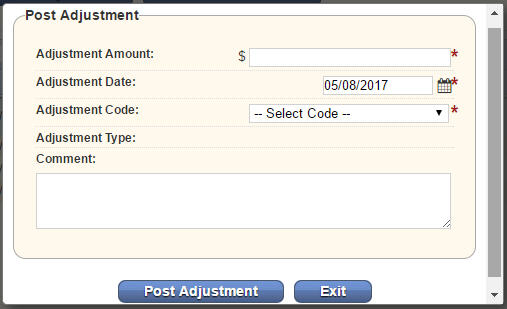 The post adjustment pop up will open where you can include your adjustment amount and code.
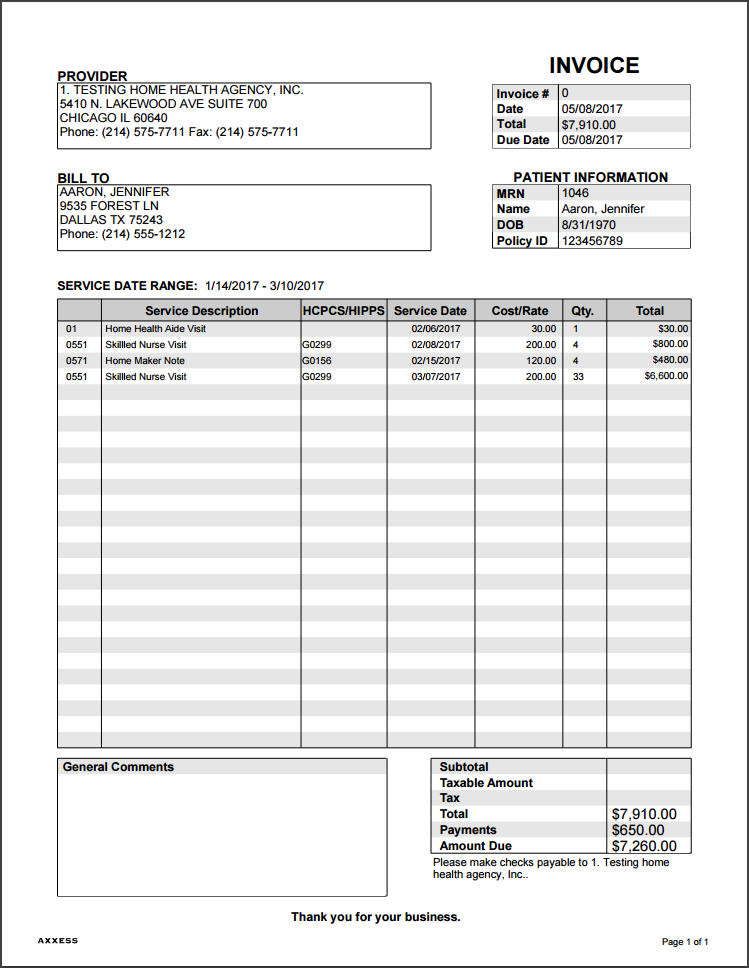
Lastly, you can generate an invoice to send to the patient directly from the Claims History. When you click on Create Patient Invoice, a PDF of the invoice will open. Any payments received from the patient can be posted the same as insurance. If you need a payor to select when posting a payment, you can create a new insurance payor for example named Patient Payment or Co-payment.
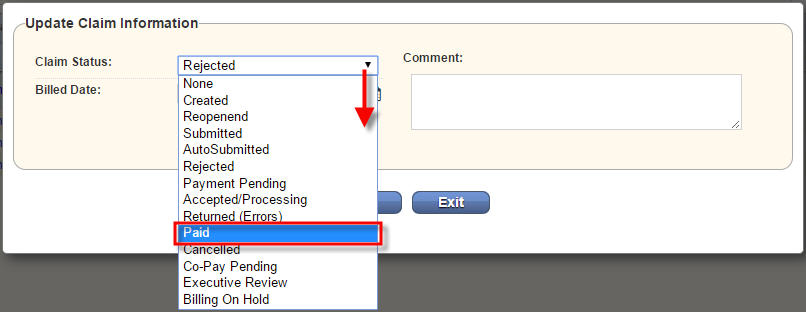
Once the balance has been zero’ed out, the status will need to be changed to Paid. To change the status on a claim, on the far right of the line item you will see Update. Click Update and the box will come up for you to change the status to paid.