*Access to the Payroll Menu is Permission based
Initial Payroll Setup
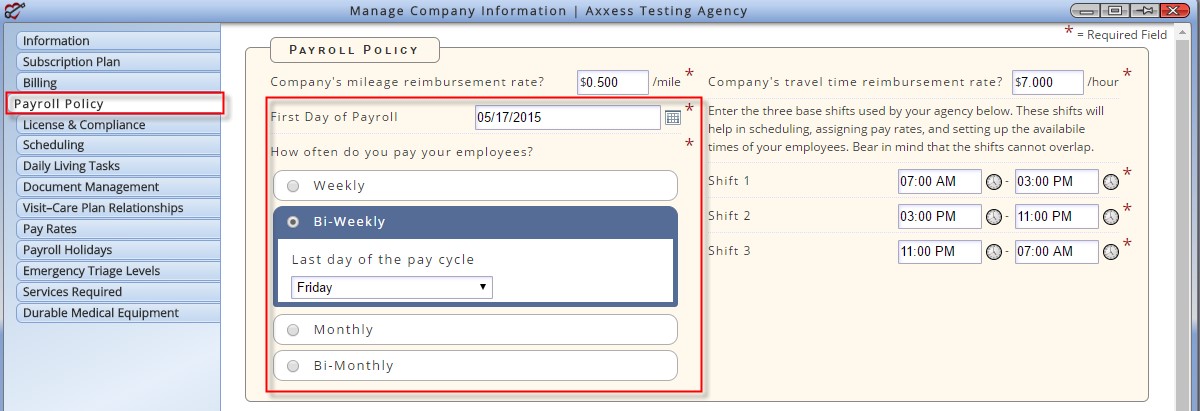
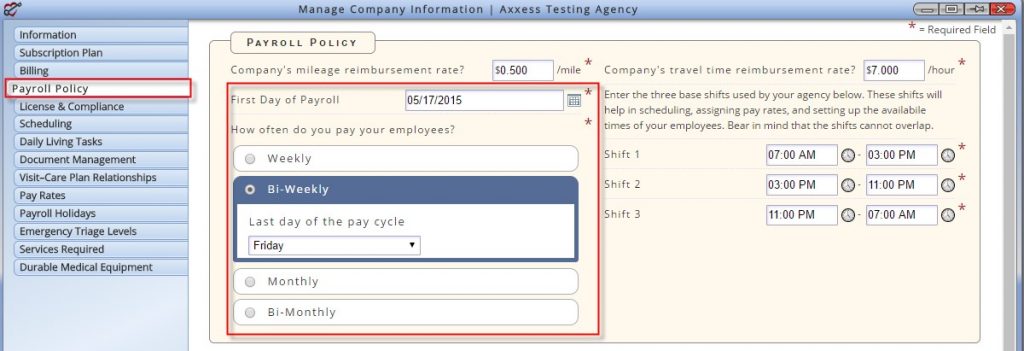
The first step in using the payroll module is to complete the payroll tab in Admin-Manage Company Information. Once the Payroll Tab has been completed Pay Periods can be created in the payroll module.
Employees-Payroll
Payroll Parameters
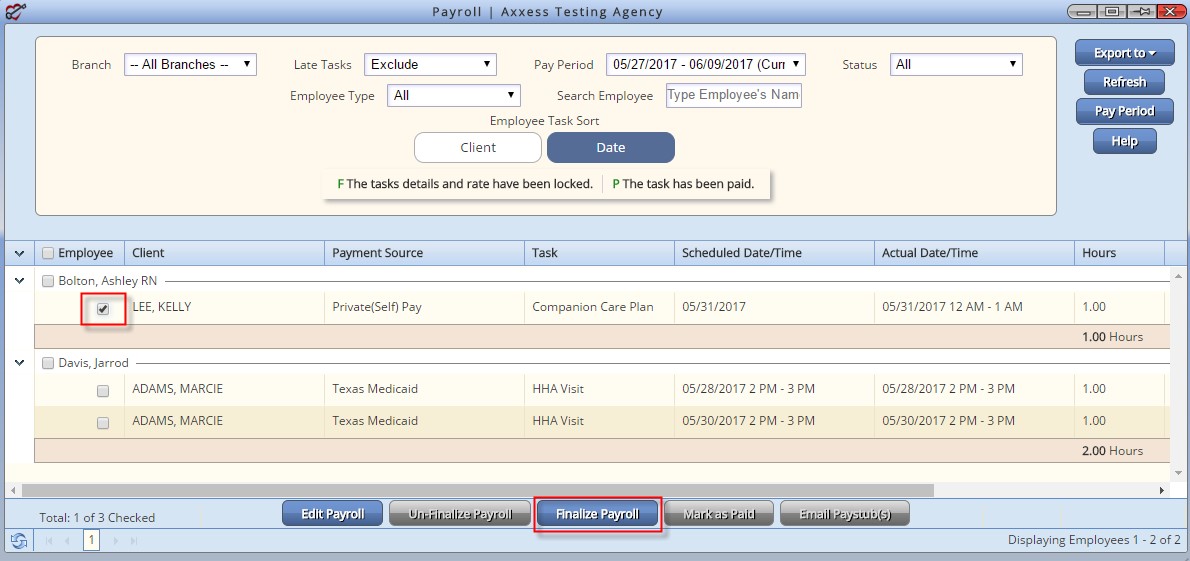
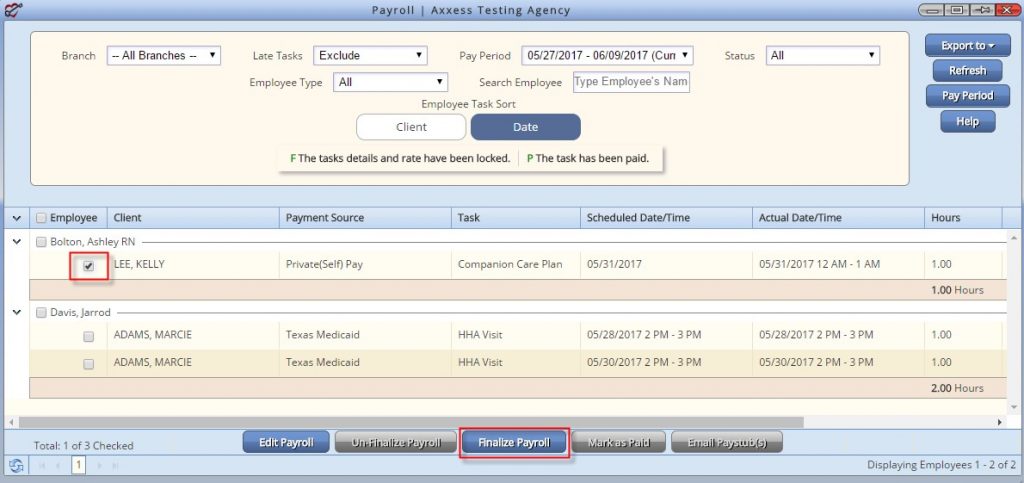
- Branch: Select the location you are processing payroll for.
- Late Tasks: Are defined as, unpaid tasks whose service date is prior to the start of the selected pay period. This parameter provides the ability to include/exclude/show only tasks that fall within this category. If selected to include, late tasks are highlighted in yellow to assist in the identification.
- Pay Period: This contains a drop-down list of the agency created pay periods. To create a pay period select Pay Period button located in the upper right-hand side of the page. The system will display the next pay period based on the information set up in Manage Company Information. Select Create If the date range is correct. Upon creation, the pay period is available for selection in the pay period parameters. The Pay Period list also contains a Custom option. This option is available for viewing purposes only. A date range is displayed to allow users to view payroll tasks for a selected date range.
- Status: The Payroll Status parameter allows users to view tasks by a specific status if desired. This parameter is a useful tool while processing payroll. The available options are: All/Not Finalized/Finalized/Not Paid/Paid
- Employee Type: Provides the ability to view all employee types or view by contractor or employee.
- Search Employee: Typing in an employee name will filter to that employee
- Employee Task Sort: This option sorts user’s payroll tasks in either Client or Date order.

Processing Payroll
Completing payroll is a two-step process: Finalize and Pay. This feature allows agencies to review and finalize payroll on a daily basis instead of trying to complete all in one day.
- Finalized: Tasks that have been reviewed and deemed as ok to pay.
- Paid: At the end of the payroll cycle mark all the finalized tasks as paid.
After inputting the desired parameters select Refresh to pull the requested tasks into the page. Now, the user may begin to review and process their payroll.
The user begins to review the tasks line by line.
- If the task is clean and okay to process for payroll the user may select the task. The task selection can be done at the location level, employee level or task level.
- Once selected the Finalize Payroll button at the bottom of the page activates. And the task/s may be marked as finalized.
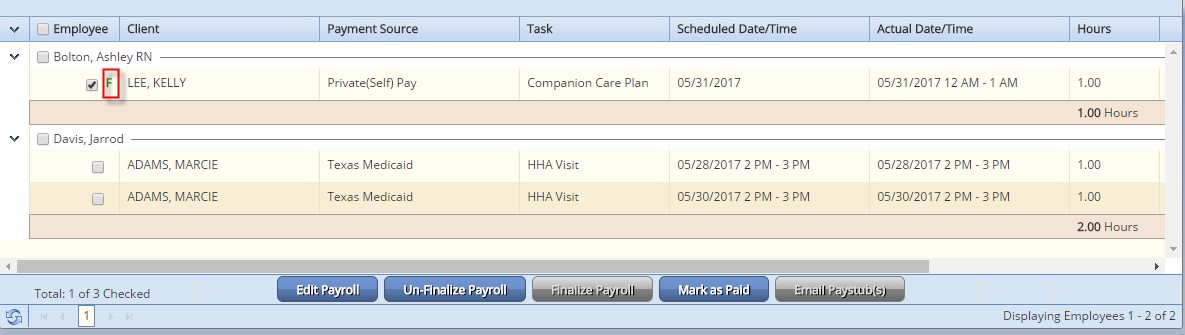
- Once a task is marked as Finalized an F is displayed in front of the task.
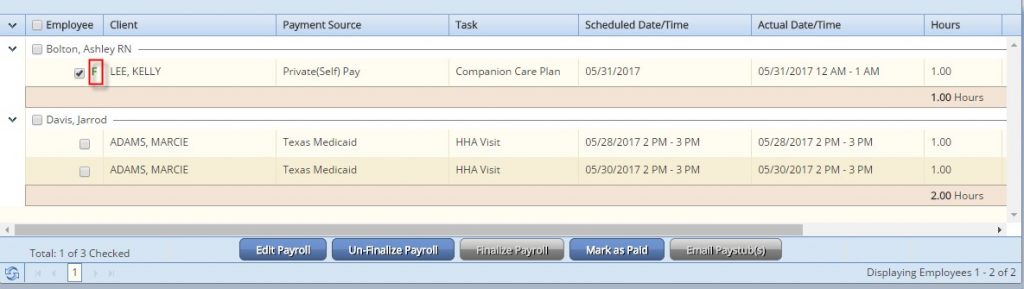
Available options once a task is finalized include:
- Unfinalize: This is used if the task was marked in error. When a task is marked as unfinalized the F is removed at the beginning of the line item.
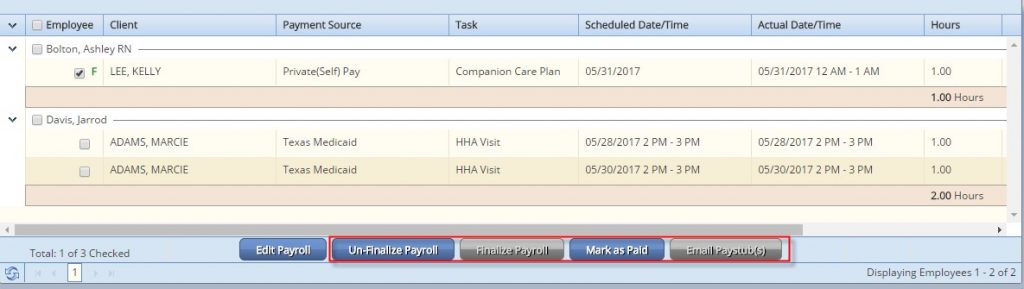
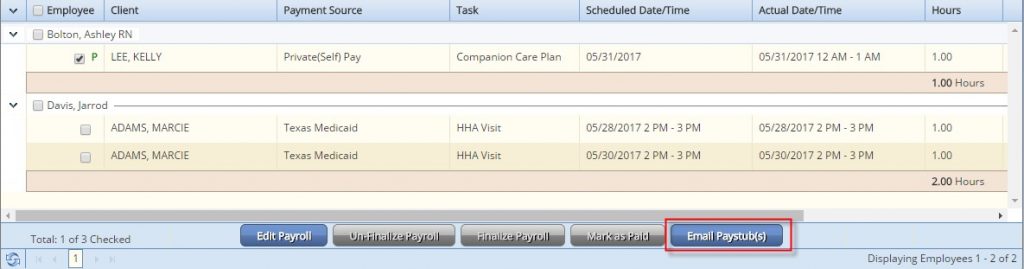
- Mark as Paid: Once a task has been marked as paid a P is displayed in front of the task and it is locked. A paid task cannot be marked as unpaid.

Email PayStubs
Users have the ability to email staff their pay stubs. The pay stub is sent to the message center within Axxess HomeCare. We create a file in completed reports that can be printed for non-system users. To activate this option the payroll status parameter must be set to paid.
Edit Payroll
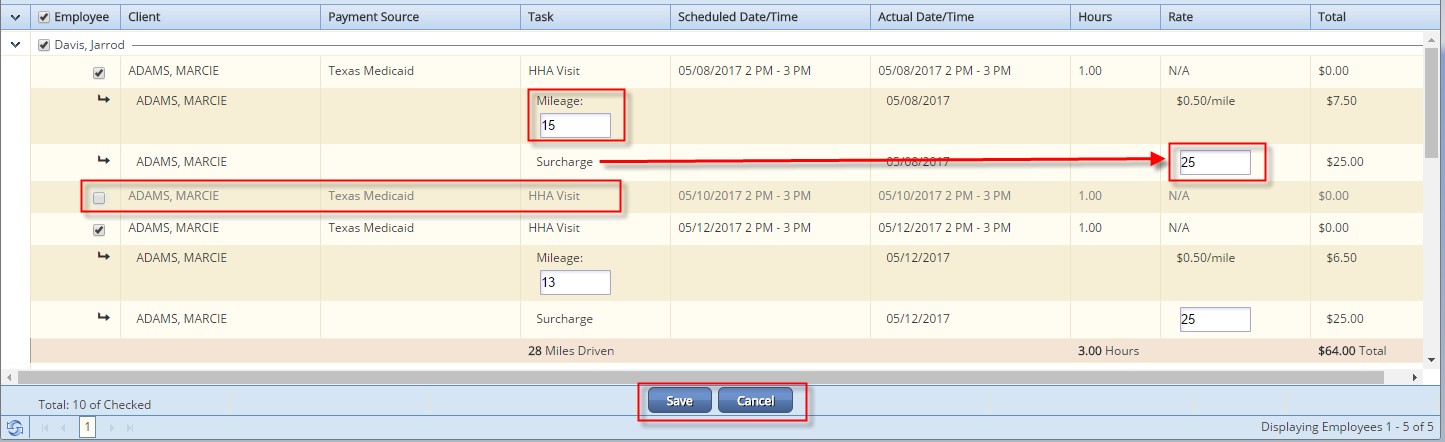
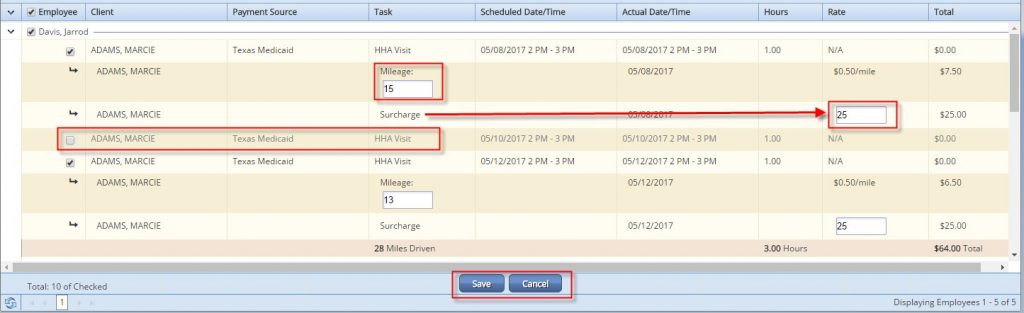
Users may edit payroll tasks/subtasks that have not been finalized or paid. Upon selecting ‘Edit’ all finalized and paid tasks are hidden from view and the remaining tasks are defaulted to checked.
- To mark a primary task as non-payable simply uncheck the task. Upon saving this will mark the task (and any subtasks) as non-payable. To make the task payable again, go to task details (from the schedule or client center) and update the payable button back to payable.
- Subtask (mileage, surcharge) unit fields become modifiable. To mark a subtask as non-payable either remove all data or enter a zero in the unit field.
- Upon saving, a task that is marked as non-pay will be removed from the payroll list.
- Non-pay subtasks of payable tasks are greyed out
This concludes the payroll tutorial.