Logging in to Axxess
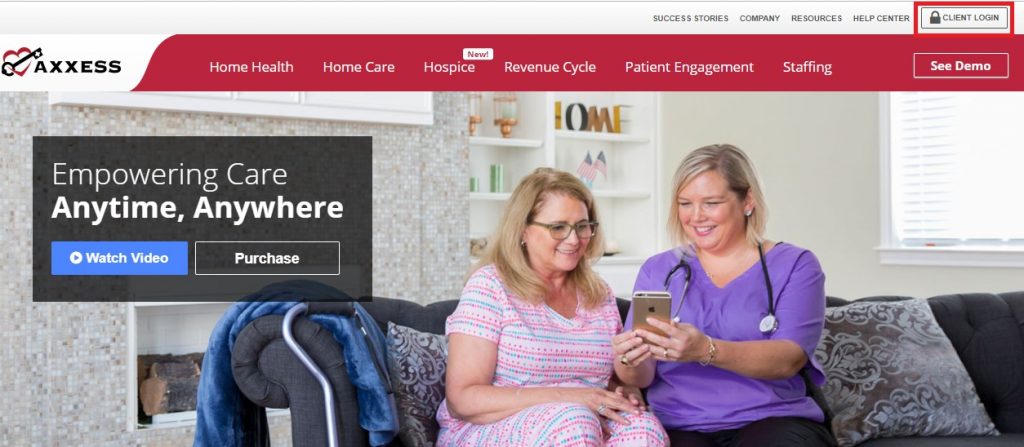
To access AgencyCore, open the Internet browser (Chrome and Firefox recommended) and type in the address www.Axxess.com When the Home screen appears, select the “Client Login” button at the top right-hand side of the webpage.
Next, the sign-in page will appear where the username and password fields are required. The username is the email address associated with the AgencyCore user account. Once the username and password have been entered, select “Secure Login” to enter Axxess’ software.
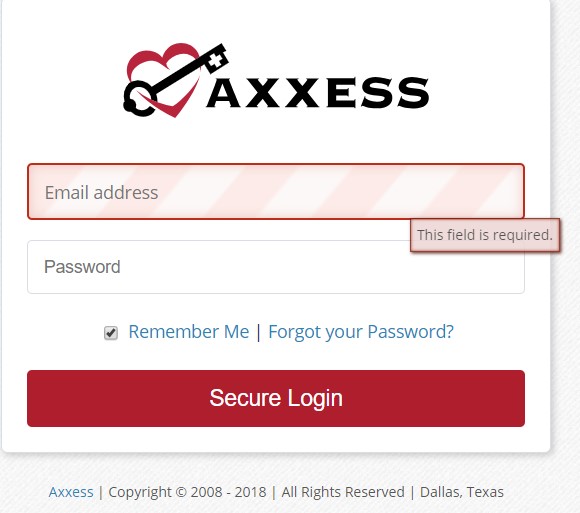
NOTE: For resetting the password, see Overview.
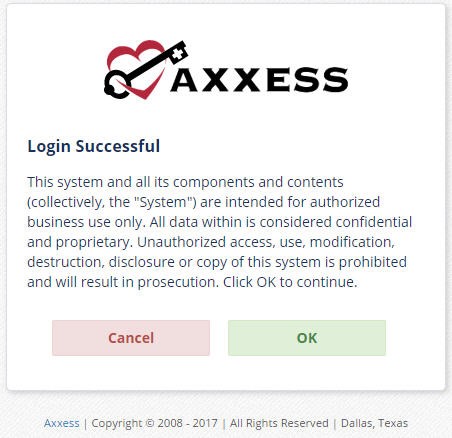
After successfully logging in, a user acceptance message will display. Select “OK” to accept the message or “Cancel” to exit the application.
The Clinician Planner displays. Select the appropriate Axxess application on the left side of the page to perform the Intake and Scheduling process.
Dashboard
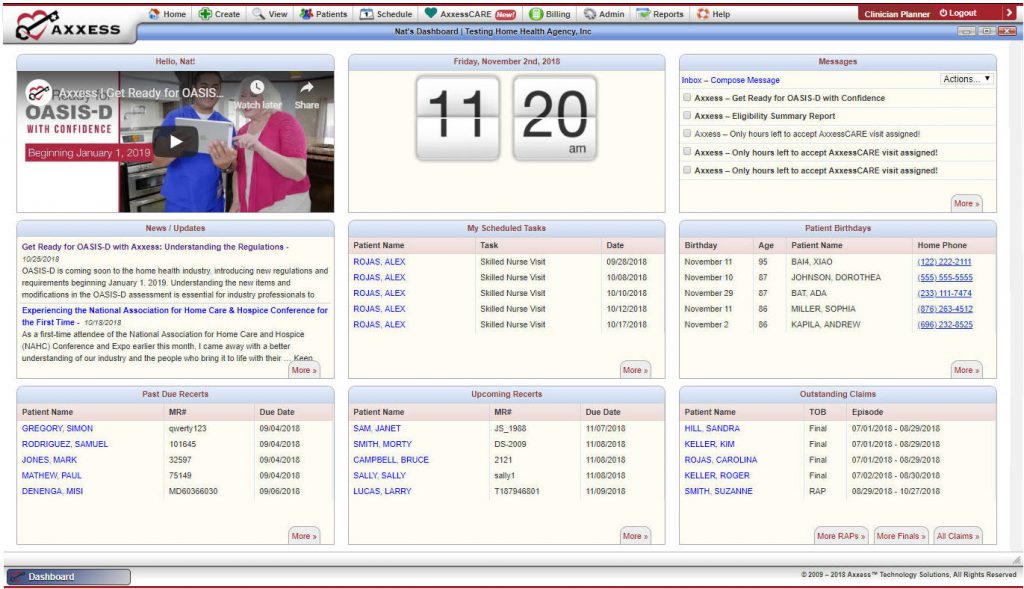
The dashboard can display up to nine tiles. Five of these tiles are default and the remaining four are based on user permissions. The intake/scheduler will usually see the top eight tiles:
- Welcome Panel – The center of the screen will display items for subscribers to Axxess products. Items will consist of everything from interactive announcements to in depth training videos.
- Date/Time – This box will display the current date and time for the current location.
- Messages – HIPAA-compliant email messaging center, allowing all agency users to communicate in a secure manner. When the user receives messages, notifications will be sent to the user’s email assigned to their account.
- News/Updates – Links to Axxess-generated blog posts, educational articles, regulatory updates, and other important information.
- My Scheduled Tasks – Electronic “To-Do” list. Quickly access a patient chart and tasks. The tile will display the five most recent patients and their tasks.
- Patient Birthdays – This is a quick reminder of the patients who will celebrate birthdays in the upcoming week/month, so that birthday cards can be sent out, optimizing positive patient/provider relationships.
- Past Due Recerts – This allows those with permissions a quick view of recertifications that are past due and need immediate action. Select the hyperlink to access the patient record.
- Upcoming Recerts – To assist in preventing patients from showing up in the overdue recertification panel, AgencyCore provides quick access to view Upcoming Recerts with permissions that are due within the next 30 days. Selecting “More” opens the panel which allows you to see the entire list and provides the ability to export the list to an Excel spreadsheet.
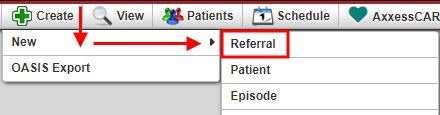
Referral Entry
Create/New/Referral
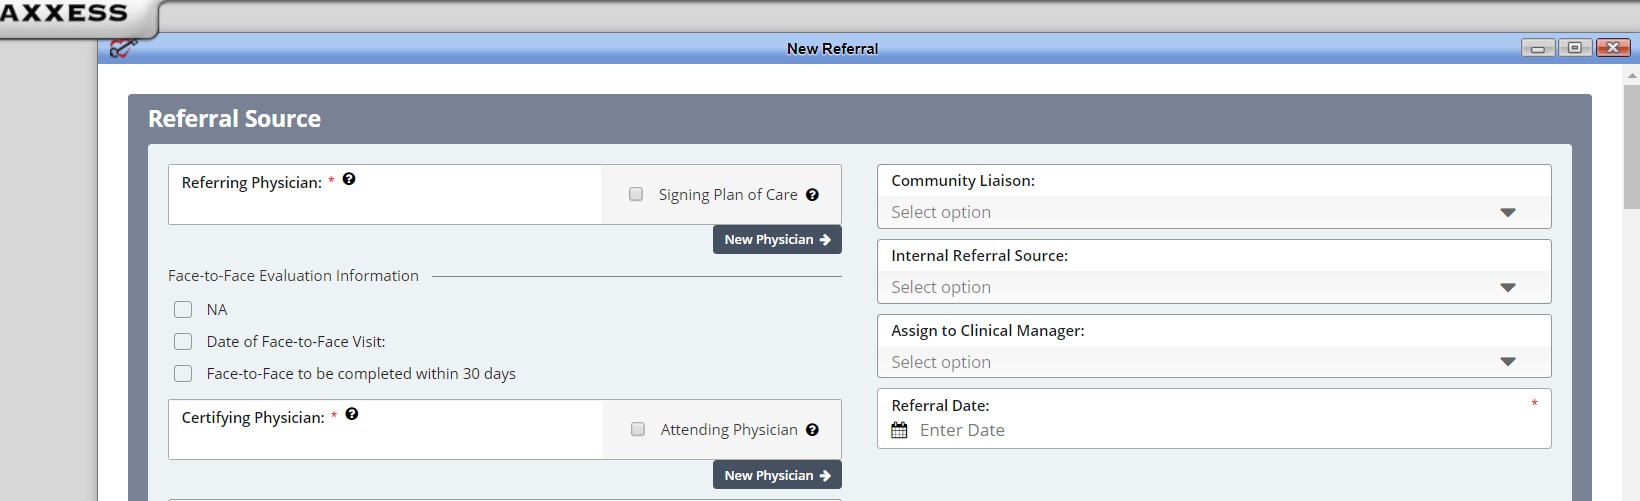
The referral entry details page will populate. Sections with a red asterisk* indicate that the information is required to save the page.
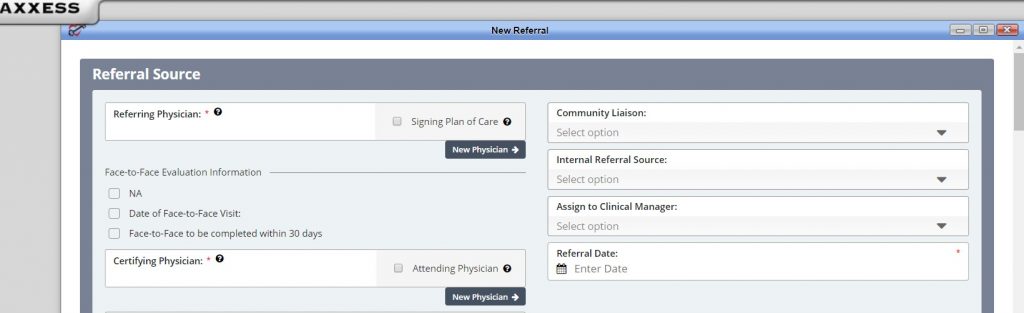
NOTE: Portions with the Question Mark Symbol  contain additional information for further clarity.
- Referral Source – Contains details of the source involved in referring the patient to the agency.
- Referring Physician – The Referring Physician or allowed non-physician practitioner (NPP) is the person primarily providing the face to face information for this admission.
- Face to Face (F2F) Evaluation if it is not applicable, mark it as NA.
- Enter F2F date. If date is not known, check “F2F completed within 30” box: This is a Medicare requirement.
- Certifying Physician – The certifying physician is the physician who certifies that a patient is eligible for Medicare home health services. This physician may be the same as the referring and/or attending physician.
- Name of Referral Source – In this section, indicate if a clinic, hospital or person referred the patient.
- Facility Referral Source – Enter this if the agency has a contract with a facility who provides referrals.
- Admission Source – This is a default list to select where the patient was referred.
- Priority Type of Visit – This is based on agency policy of how visits are prioritized.
- Community Liaison – This section is to indicate the marketer who promotes agency.
- Internal Referral Source – This is entered if an agency staff member brings on the referral.
- Assign Clinical Manager – Patients must have a clinical manager assigned who oversees patient care.
- Referral Date – This is the date the patient was referred to the agency. It is a required field.
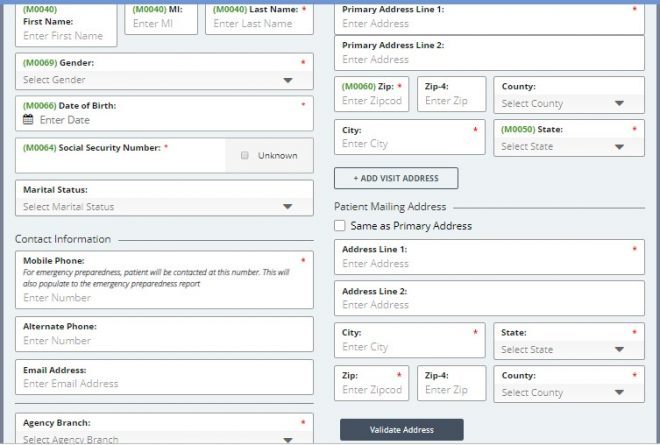
- Demographics – Patient details, contact information and address will be entered in this section.
-
- If the patient has more than one address, the “Add Visit Address” button is available to add an additional address.
- If the patient’s mailing address differs from the physical address, both must be entered. If the address is the same for both sections, an option to check “Same as Primary Address” is available.
- Once the patient’s address is entered, “Validate Address” can be selected to verify that the details entered are for a valid address.
- Payer – Encompasses details of how the patient will be billed.

-
- The Medicare Number (HIC) or the Medicare Beneficiary Identifier (MBI) can be entered in this section. If either one is not appropriate, the “NA – Not Applicable” check box is available.
- After entering the Medicare Number or Medicare Beneficiary Identifier, the “Verify Medicare Eligibility” button can be selected. Please note, the patient’s name, gender and date of birth sections must also be completed for results to generate the patient’s eligibility details.
- Additional sections for a primary, secondary and tertiary Insurance are provided.
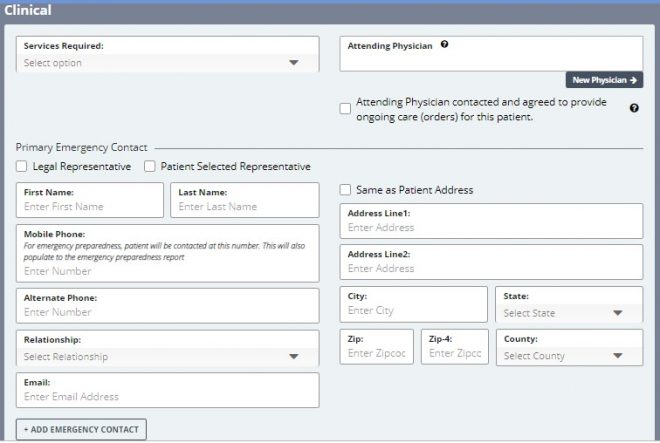
- Clinical – Encompasses patient care information and contact details.
-
- Services Required: Indicate the disciplines needed to care for the patient.
- One or more disciplines may be selected in this section.
- Attending Physician: The primary physician is the physician that is providing care plan o
- This physician could be the same as the referring and/or the certifying physician.
- If the physician is not already in the system, the option to add “New Physician” is available.
- In the case where the referring physician will not provide ongoing orders, the attending physician must be contacted in advance of care. A checkbox indicating this has been addressed is available in this section.
- Primary Emergency Contact: Indicate if the patient has a legal representative or if the patient selected someone to be their legal r
- An option to add additional contacts is available by selecting “Add Emergency Contact.”
- If the individual entered has the same address as the patient, select the “Same as Patient Address” checkbox. Otherwise, the legal representative’s address will need to be entered.
- Checking the box will automatically populate the patient’s address to this section.
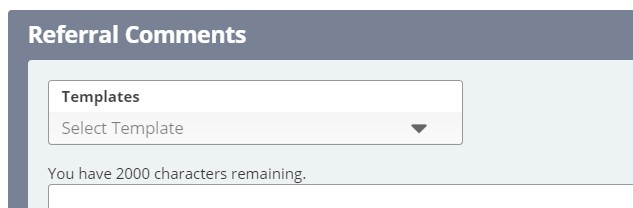
- Referral Comments – The final section of the referral process is the Referral Comments section. This free text box is for narratives, teaching, guides, goals and any other details pertaining to the referral.
-
- An option to select a template to complete is available.
After all the Referral sections have been entered, select the “Add Referral” button to save all details entered into the system.
Viewing Existing Referrals
View/Lists/Referrals or Patients/Existing Referrals
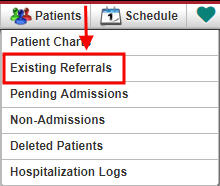
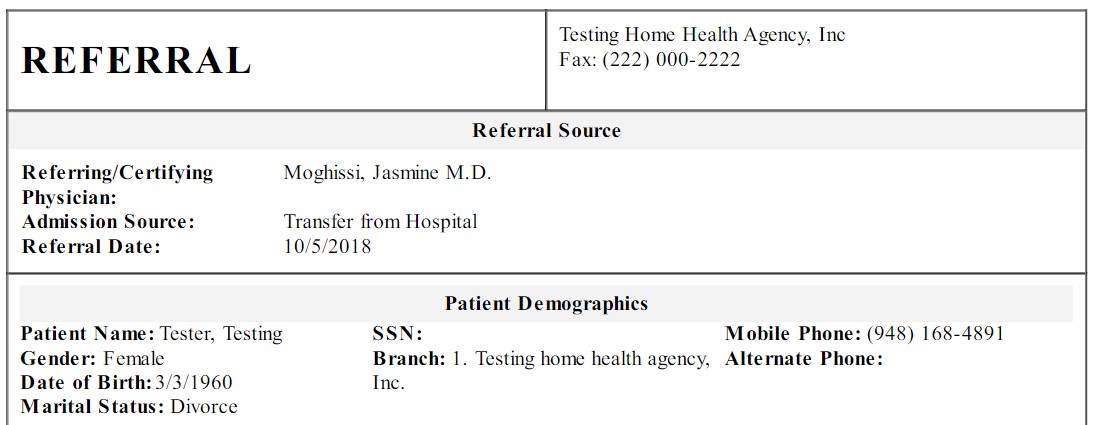
After the patient’s referral has been created, the next step is admitting the patient. The “Existing Referral List” will appear with patient’s referral date, referral source, gender and name of the person who entered the initial referral.

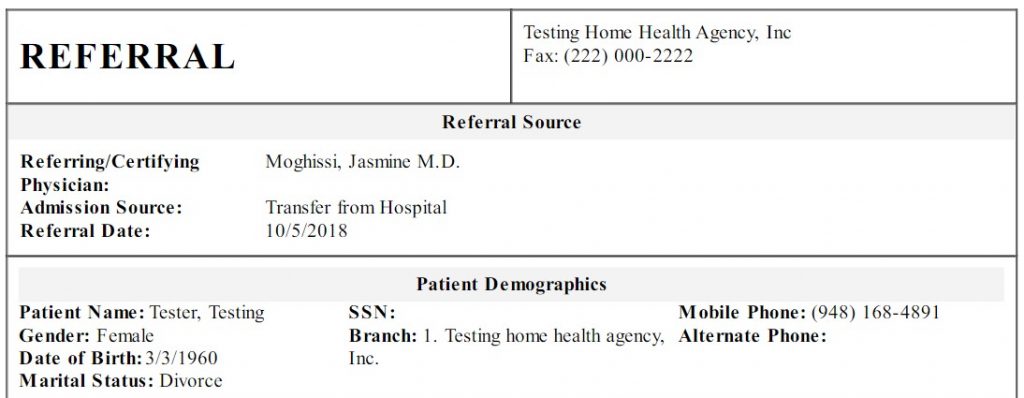
The option to add a new referral is available in this window by selecting the “New Referral” button. The Printer icon  gives a preview of the referral document. It is the patient’s Face Sheet, which is only available in this format prior to admitting the patient. The document can be printed or saved.
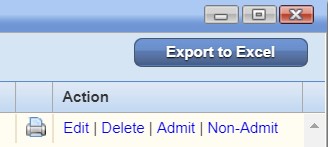
The Action column contains a variety of action items for the patient’s referral.
-
- Edit – Enables the ability to modify referral details prior to admitting the patient.
- Delete – Removes the patient from the system completely. Please note, deleting the referral means the patient will not be visible in any reports in the database.
- Admit – Generates all required information required to admit the patient.
- Non-Admit – This removes the patient from the list of referrals available for admission.
Admitting a Referral
In the Existing Referral List, select the “Admit” hyperlink under the Action column to admit the patient. The Admit Patient window will appear with sections on the right side that are pertinent to the admission process.
Demographics section will contain a lot of information that was entered during the referral process. Below are sections that were not in the referral process and need to be addressed:
- Clinical Manager – This role manages all clinical documentation in the database.
- Case Manager – This role oversees the patient’s chart.
- Assign to Clinician – This clinician will complete the Start of Care visit.
- Patient ID – This Medical Record number is specific to the patient within the agency.
- Default Service Location – This is tied to the Q-code which impacts billing.
- Race/Ethnicity – Enter the patient’s biological traits.
- Primary Language – Enter the primary verbal communication source.
- Payment Source – This is where the insurance/payer type is identified.
- Start of Care Date – This date is when the patient officially began services.
- Episode Start Date – This date is when the patient begins.
In addition to the Demographics section, the sections listed below will also need to be completed prior to admitting the patient:
- Payer – This section requires the Medicare number, MBI (Medicare Beneficiary Number) and/or Medicaid number to be entered, if there were not entered during the New Referral process.
- Physicians – If the certifying physician was identified as the Attending Physician during the New Referral process, the physician’s name will automatically populate in this field. If the Attending Physician field is blank or needs to be modified, type in the free text box.
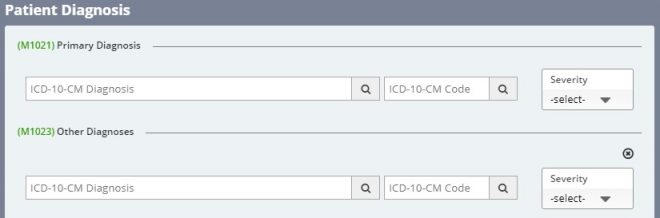
- Clinical/Diagnosis – This section encompasses various clinical details, including the anticipated type of services that patient will require. The discipline list will appear to multi-select the services the patient should receive. These details will populate from the New Referral process.
- Additionally, the OASIS-based Diagnosis questions requiring a Primary and Other Diagnosis will be included in this Clinical/Diagnosis section. There are two options for searching for the diagnosis: by the ICD Diagnosis Name or by the ICD Diagnosis code. Once the diagnosis is entered, the severity must be selected.
- Pharmacy – This section allows the user to add the pharmacy where the patient will be receiving medications. Multiple pharmacies may be entered from this window.
- If the pharmacy is not listed in the system, the option to add a new pharmacy is available by selecting the “New Pharmacy” button.

- Emergency Contact – At least one emergency contact must be entered in this section. If an emergency contact was added during the New Referral process, the details of that contact will populate in this window.
- Also included in Emergency Contact is the CAHPS Survey section. If CAHPS services are enabled with Axxess, the user will indicate if this patient should or should not be contacted for CAHPS. If the patient should be contacted for CAHPS, reasons behind this decision must be indicated.

-
- If the CAHPS services are enabled and the contacted did not deny services, the contact details should be verified. If the contact is the same as the Emergency Contact, a check “Same as” box.
- If additional CAHPS contacts need to be added, the “Add Additional CAHPS Contacts” button will be available to select.
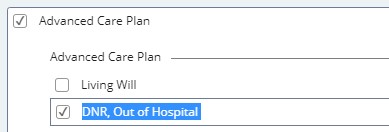
- Advanced Directives: If the patient has an advanced care plan or a surrogate decision maker and can provide legal documentation for the home health medical record, the options are available to enter those details.
- If Advanced Directive option “DNR, Out of Hospital” (Do Not Resuscitate) is selected, the patient will have a DNR indicator next to the name listed in the Patient Charts window.

- Referral Information – This section allows the agency to review physician assignments and confirm referral details entered during the New Referral process.
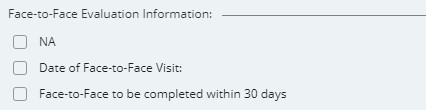
- If the patient’s Face-to-Face Evaluation Information has been obtained, a section is available to enter that information.
Introduction to Patient Charts
Patient/Patient Charts
The main section of the patient charts window will contain a brief synopsis of the patient’s details:
- The agency can upload the patient’s picture as a form of visual reference.
- The patient’s name is next to the picture. It will be viewed as Last name, First name.
- If the patient is a Do Not Resuscitate, an indicator will be visible next to the name.
- The agency-assigned Medical Record Number (MR#) will be visible after the patient’s name.
- The Birthday, Start of Care Date and Mobile Phone number will also be visible in the middle of the Patient Chart so that they may be referenced easily.
- The Attending Physician and Primary Insurance will be listed as well.
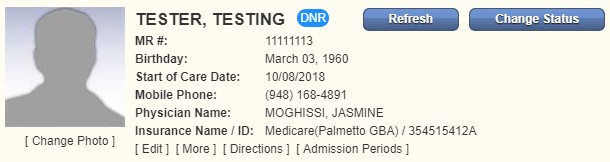
- Below the patient’s details are some hyperlinks:

- Edit – This hyperlink will open the patient’s chart which contains the referral and admission details that were entered.
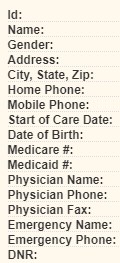
- More – This hyperlink will produce additional patient details at a glance.
- Admission Periods – If the patient was discharged and readmitted, the admission periods will be listed in this window.
- Directions – A map to the patient’s house will appear when this link is selected.

- Selecting the “+” icon beside the Admission Date will generate more details pertaining to that admission period.

- In the Actions column, access to “Edit Episode” will be visible for users with the corresponding permissions.
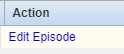
- Select “Edit Episode” to generate a window with details for managing the episode.
- For more details, please reference Managing Episodes in the Schedule Center section within this document.
Patient Chart Filters
On the right-hand side of the Patient Charts window, there are some parameters available to further narrow the selection when searching for a patient.
- “Add New Patient” button – This is an alternative route for adding a new patient to the database.
- Branch – This option allows the user to pick the patient’s branch.
- View – This option is for filtering by patient status.
- Filter – This option allows the user to narrow down the by the payer.
- Find – Search patient’s name & list will appear when typing in letters by first or last name.

Patient Chart Top Menu
The Patient Charts window has tabs at the top of the window that can be selected when adding details to the patient’s record.

- New Order – This tab provides the option to add a new order to the patient’s chart. An alternative route is Create/New/Order.
- New Communication Notes – This tab allows a coordination note to be entered in to the patient’s chart. This note can be sent to another user within the agency by selecting “Send Note as Message.”
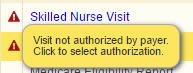
- New Authorization – This tab is used for patients with Per Visit insurance payers and authorization is needed to proceed with patient care.
- The patient’s name will automatically appear when inside that patient’s chart. The authorization options and start/end date ranges will be required, depending on the type of authorization the patient has.

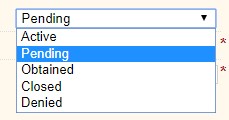
- The Status of the authorization can be indicated by selecting the options provided.
- The Patient’s Insurance Name and Authorization number are required fields which must be addressed prior to saving the new authorization.
- Once the top section is completed, the Visits or Hours Authorization section must be addressed by indicating the discipline type, authorized units and the authorization type.

NOTE: If the patient’s insurance does not require authorization, the following notification will display. The insurance should be verified in the patient’s profile to proceed.

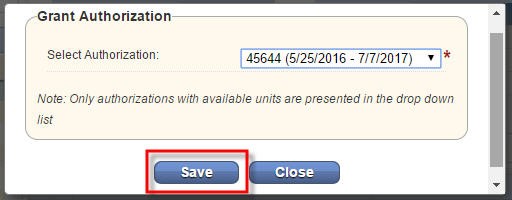
Authorize multiple tasks at one time. Select “Edit” on the right for the appropriate authorization.

Once in the edit screen, scroll down, select “Show Unauthorized Visits.”

Once in the edit screen, scroll down, select “Show Unauthorized Visits.”
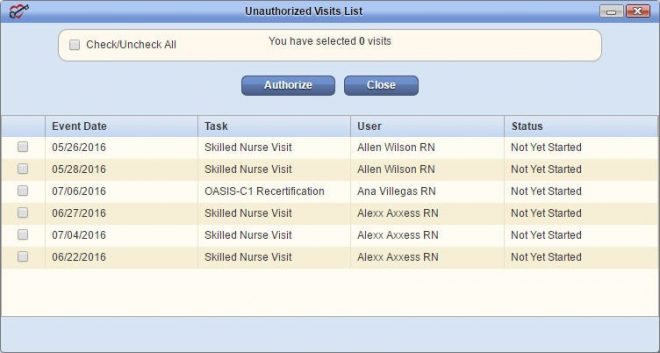
Verify all authorized visits are included and select “Save.”
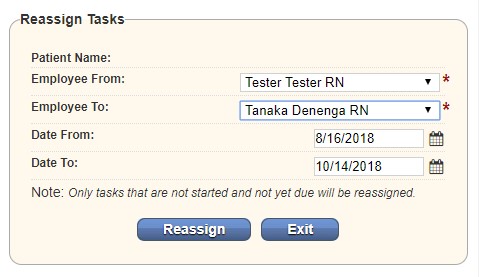
- Reassign Schedules – This tab provides the ability to reassign schedules from one worker to another.
- Select “Reassign Schedule” to redistribute multiple tasks by date range. Choose the employees who are being reassigned from and to, choose a date range, select “Reassign.”
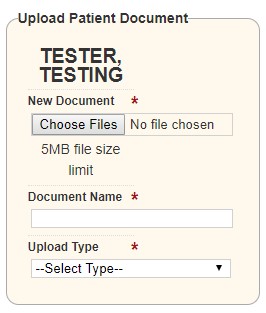
- Upload Document – This tab allows a user to view or add attachments to the patient’s chart.
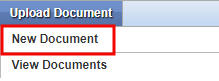
- “New Document” will generate a new window where the user can select a file to upload in to the chart. The document’s name and type are required fields that must be indicated prior to selecting the “Submit” button.
-
- “View Documents” will generate a window that will list all the patient’s attachments.
Patient Chart Quick Reports
- Patient Profile – This section is the patient’s face sheet. It is a PDF synopsis of the patient’s profile.
- Medication Profile – This section contains details of the patient’s Medication Profile. New medications can be added, discontinued and drug interactions can be run from this window.
- Allergy Profile – This section contains a list of allergies added to the patient’s chart.
- Immunization Profile – This section contains immunization details inside the patient’s chart.
- Communication Notes – This section will house all the communication notes that have been entered into the patient’s chart. New notes can be added by selecting the “New Communication Note” button.
- Orders and Care Plans – This section shows Orders and Care Plans for the desired date range.
- Plan of Care Summary – This section contains details of the evolving Plan of Care Summary for the patient. It will be visible if the system setting is enabled.
- 60-Day Summaries – This section provides a quick review of the patient’s progression if a 60-Day Summary was completed.
- Vital Signs Charts – This section indicates the changes in patient vitals during the episode if documented.
- Triage Classification – This section contains information based on answers from the patient’s profile Emergency Preparedness section.
- Deleted Tasks/Documents – Axxess is a cloud-based software so most deleted data will remain in the system. Deleted tasks will be found in this section.
The patient’s scheduled visits will appear at the bottom of the Patient Charts window. The best way to review patient tasks and schedule further visits is from the Schedule Center.
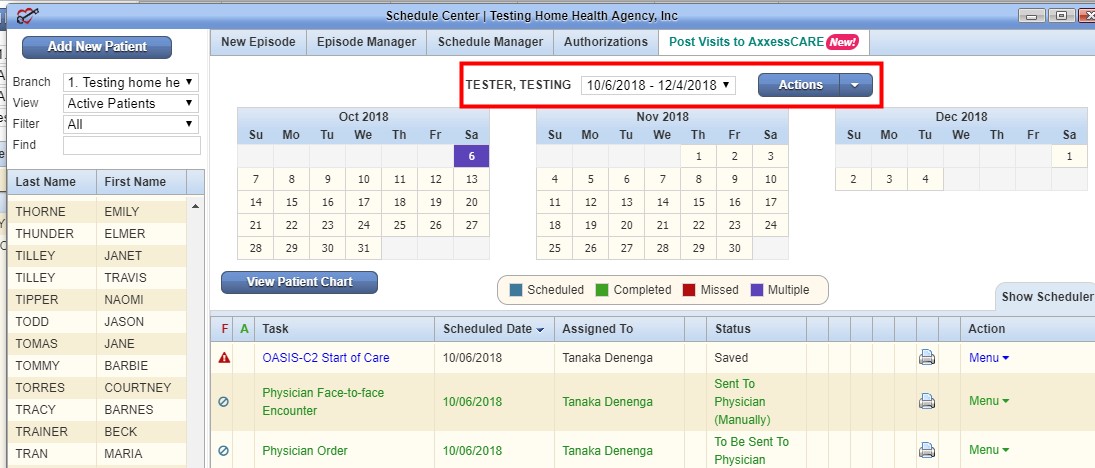
Introduction to the Schedule Center
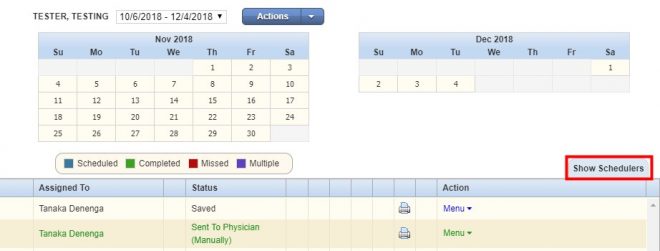
The Schedule Center is an episodic view of the patient’s calendar. The calendar displayed will match the episode populated in the episode field, located directly above the calendar.

The color legend is located below the calendar for easy reference:
- Blue – Scheduled task
- Green – Completed task
- Red – Missed visit
- Purple – Multiple tasks on one day

If a task exists and is scheduled on a particular date, that date will be highlighted in blue. It will stay blue until the task is either updated to a completed (green) status or marked as missed (red). If there are multiple items scheduled on a particular day, those days are highlighted in purple. Dates with multiple tasks are not updated to another color as tasks change status. They remain purple.
Schedule Center Filters
The filters on the right-hand side of the Schedule Center provide the opportunity to narrow down the search for patients.
- “Add New Patient” button – This is an alternative route for adding a new patient to the database.
- Branch – This option allows the user to pick the patient’s branch.
- View – This option is for filtering by patient status.
- Filter – This option allows the user to narrow down the by the payer.
- Find – Search patient’s name & list will appear when typing in letters.
Scheduling Visits for a Patient
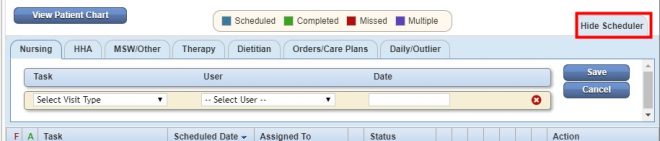
When scheduling individual visits for a patient, use the “Show Scheduler” to quickly schedule those single task items. Select a date on a calendar and the scheduler will open. Likewise, open the Scheduler by selecting “Show Scheduler” on the right side of the Schedule Center.
Tabs will appear with Discipline categories to select for the appropriate task. The task list loads according to the discipline selected. Discipline options are as follows:
- Nursing
- HHA
- MSW/Other
- Therapy
- Dietician
- Orders/Care Plans
- Daily/Outlier
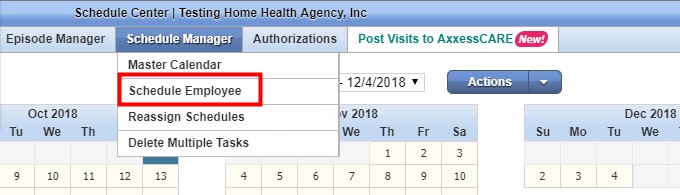
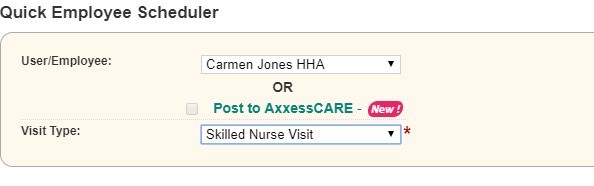
When scheduling multiple tasks to a patient, the “Schedule Employee” feature is the best source for quick episode scheduling. Select Schedule Employee under the Schedule Manager tab to begin multi-date task scheduling.
A new window will appear with options to select the clinician to schedule visits to and the list of the Visit Types.
NOTE: Only agencies in specific states will have the option to “Post to AxxessCARE.” Other states are coming soon.
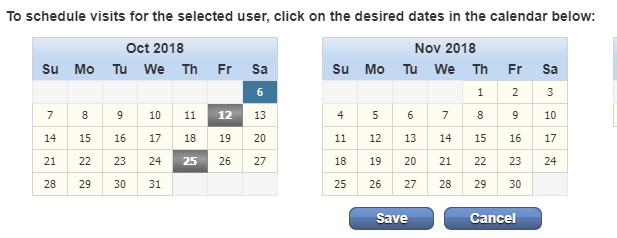
Once the user and visit type has been chosen, select the calendar dates when visits will be scheduled. To deselect the visit date, select date again and the grey selection box will be white.
To reassign just one visit to another user, select the Menu drop down on the right-hand side of the visit.
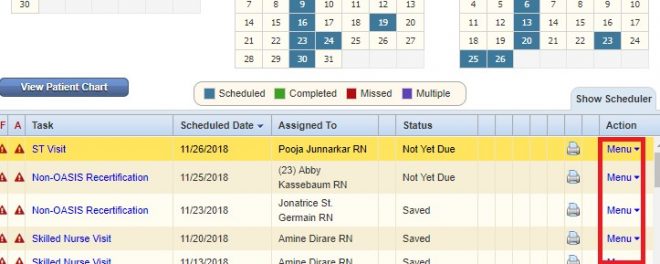
After selecting Menu, select Reassign and the box below will appear:
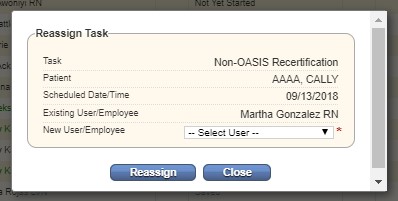
Select the user to reassign the visit to, select “Reassign” and then the new user will appear.
Authorizations
Select the Authorizations tab and a new window will open. To add a new authorization, select “Add Authorization” in the top left. To edit an existing authorization, select “Edit” on the right under the Action column.

After adding / updating the authorization, the visit can now be linked to the appropriate authorization. Select the Warning symbol to view and attach to a new authorization.

After the visits have been attached to an Authorization, the warning will go away. To keep track of authorizations, go to Reports/Report Center.
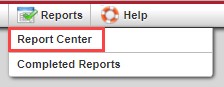
Scroll down to the Schedule Reports located in the middle column at the bottom. Choose “Authorization Utilization.”
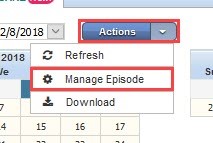
Managing Episodes
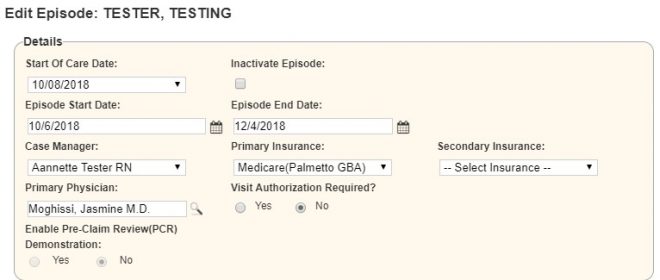
The “Manage Episode” feature allows users, with certain permission, the ability to update the episode information.
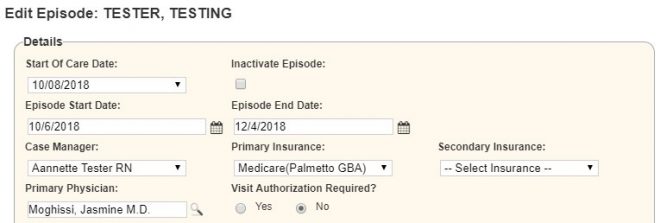
A window will appear with options to modify the following sections:
- Start of Care date
- Episode End date
- Primary Insurance
- Secondary Insurance
- Case Manager
- Primary Physician
Users can also inactivate the episode. When inactive, the episode does not show up in the episode list for the patient. Possible reasons to inactivate the episode include:
- Episode was entered in error.
- Patient is discharged prior to a first billable visit in the episode.
View all inactive episodes for a patient by selecting the “Episode Manger” tab on top of the patient’s calendar. Then select Inactive Episodes and the list below will appear:
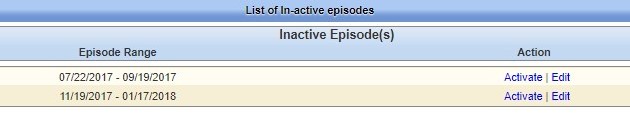
“Activate” or “Edit” these episodes by selecting the hyperlink on the right-hand side. Once activated, the episode will then appear on the patient’s schedule.
NOTE: For date selections, select the calendar to view the dates in a calendar format.
Additionally, there is a Comments section found in the Manage Episode page. Information entered in this section will attach to each scheduled task item as a blue sticky note. This is a useful tool to notify staff of important information such as: gate codes, animals in the home, any vital pre-visit patient needs, etc.

Hovering over the sticky note from the Schedule Center will show its contents.
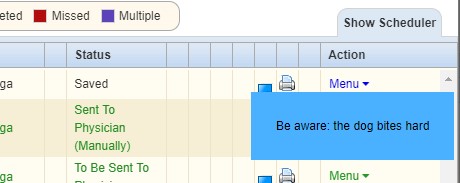
Select the sticky note to enlarge.

At the bottom of the Manage Episode window will be the “Activity Log” button. This button is permission-based and will contain details of changes made inside the episode.
“Activity Log” buttons will be visible throughout different sections of the database and will provide audit trail data.

New Episode
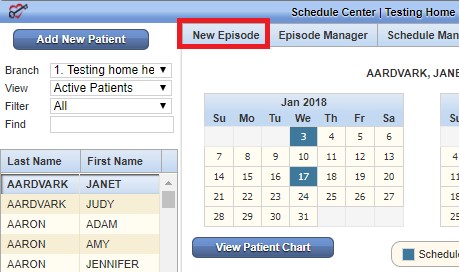
The window below will appear:
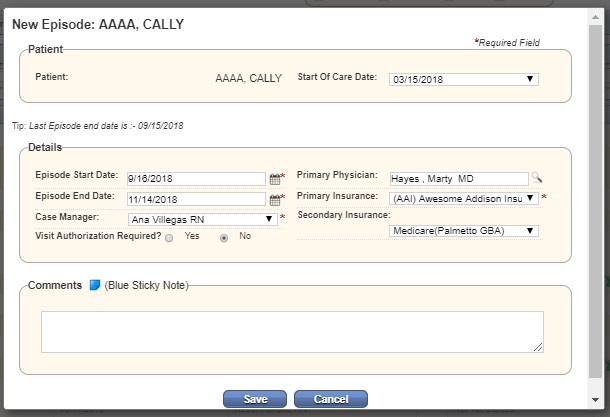
This window will default the following information (updates can still be made):
- Start of Care Date – The Start of Care from the OASIS for this admission period.
- Episode Start Date – Autogenerates with the day immediately following the past episode.
- Episode End Date – Autogenerates date to 60 days after the episode start date.
- Primary Physician – Autogenerates the physician in the chart.
- Primary Insurance – Autogenerates the primary insurance in the chart.
- Secondary Insurance – Autogenerates the secondary insurance in the chart.
- Case Manager – Autogenerates the Case Manager from the chart.
- Visit Authorization Required – Autogenerates based on the answer in the payer setup.
- Comments – Free text space available to enter information for this episode that needs to display on all visits in the episode.
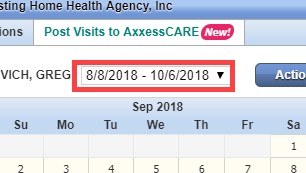
Once a new episode has been created, or if there is more than one episode for a patient, they will display at the top of the calendar. Select the specific episode to schedule by selecting the drop-down menu.
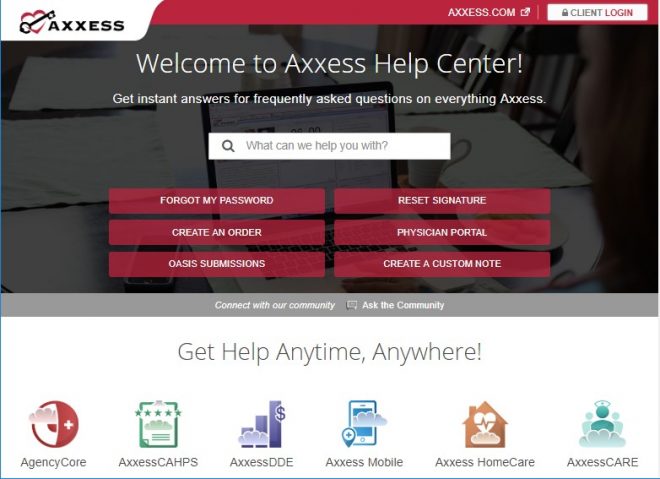
Help Center
Help/Support & Training/Help Center
A great resource that is available 24/7 is our Help Center. It is a place to get answers to frequently asked questions or watch videos of all Axxess products. It can be accessed by going to:
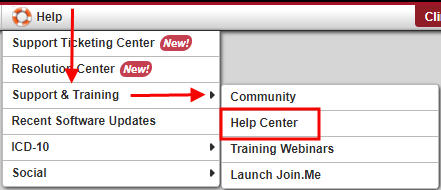
Or also available at https://www.axxess.com/help/