Users with billing permissions may access the Billing center from the main menu.
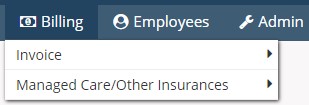
The Billing Menu contains two main categories:
- The Invoice menu which allows users to bill and manage Invoice payors.
- Managed Care/Other Insurances allows for the creation, billing and updating of all managed care payors.
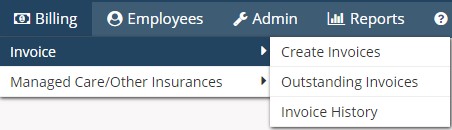
The Invoice Menu contains three submenus.
- Create Invoices: Used to create invoices for private pay and payors billing on invoices.
- Outstanding Invoices: Once invoices are created they move into the outstanding invoice page for review and submission.
- Invoice History: is used to view and update invoices. Features include the ability to view existing client invoices; post and view payments and adjustments.
Create Invoices
Billing-Invoice-Create Invoices
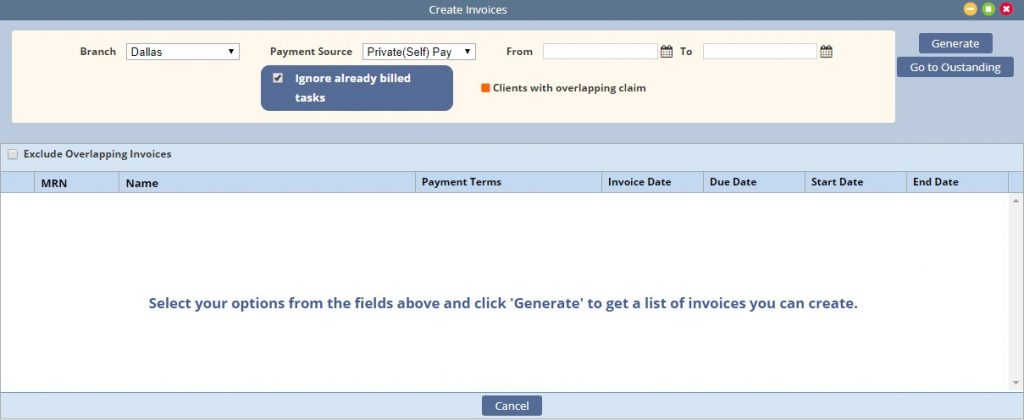
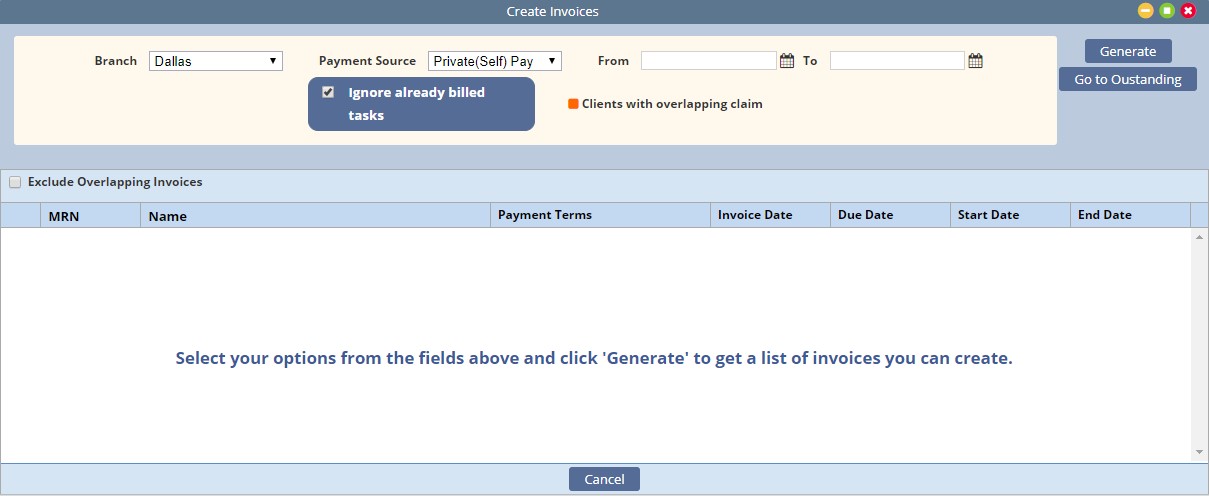
Indicate the parameters for the invoice creation:
- Branch: Select the branch wishing to generate invoices for
- Payment Source: Select the payment source to generate invoices
- From and To Date: Enter the date range to pull completed tasks
- Ignore already billed tasks: removes tasks that may be associated to another invoice
- Generate: Select Generate once parameters are entered. This generates a list of all clients with tasks that meet the criteria.
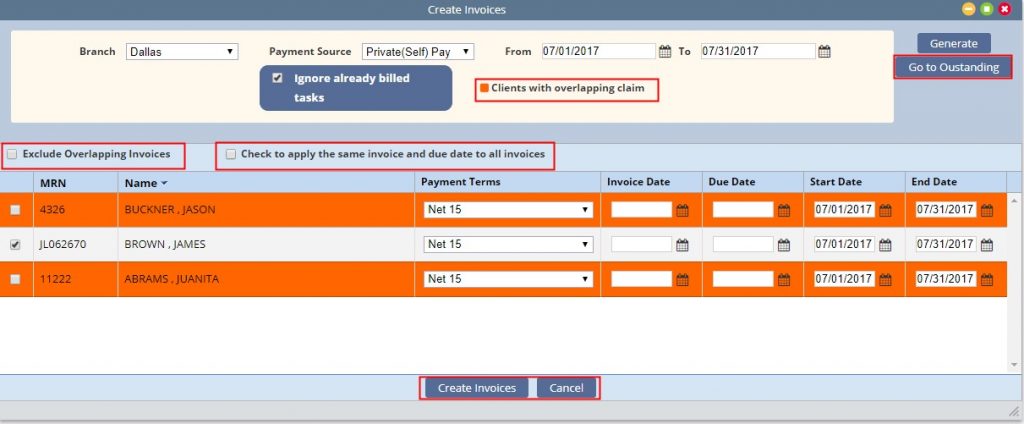
Client invoices that contain an overlapping date range will appear in Orange within the list.
- By default, only the invoices that do not have an overlapping date range will be selected. Overlapping invoices may be manually selected for invoice creation.
- Users have the option to hide overlapping invoices by checking the exclude box.
- Billers may individually enter the Invoice Date, Due Date or select to apply the same dates to all selected invoices.
- Payment Terms default to the payment source set up but may be adjusted.
- Once all desired invoices are selected click Create Invoices. This creates and moves the invoices to the Outstanding Invoice page.
- Select Go to Outstanding to quickly maneuver to the outstanding page.
Outstanding Invoices
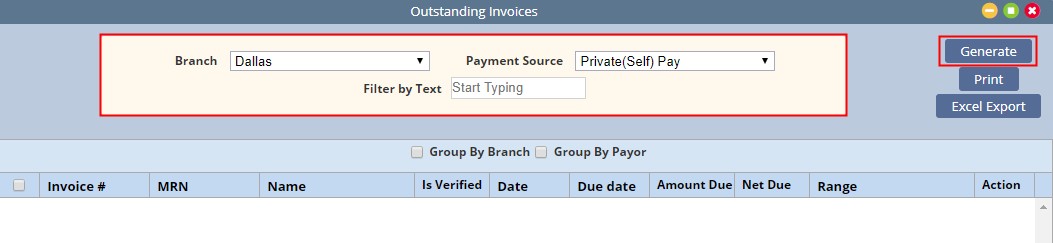
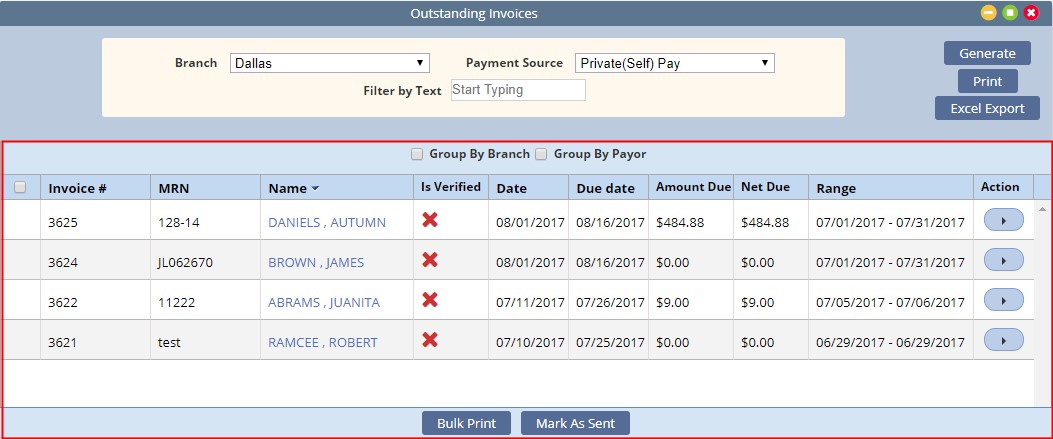
Once invoices are created from the Create Invoice page they move to the Outstanding Invoices.
- Select the Branch and Payment Source and select Generate to pull the created Invoices.
- Filter by Text will filter the generated list.
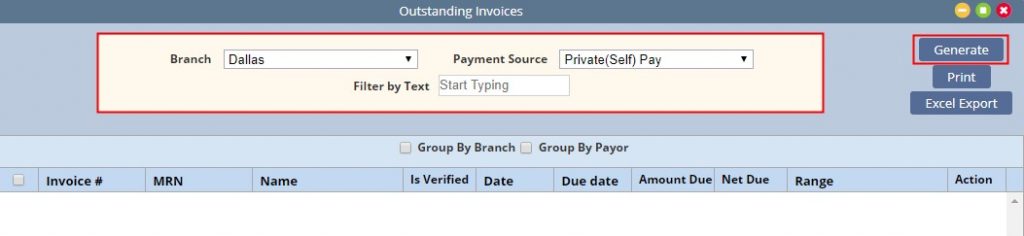
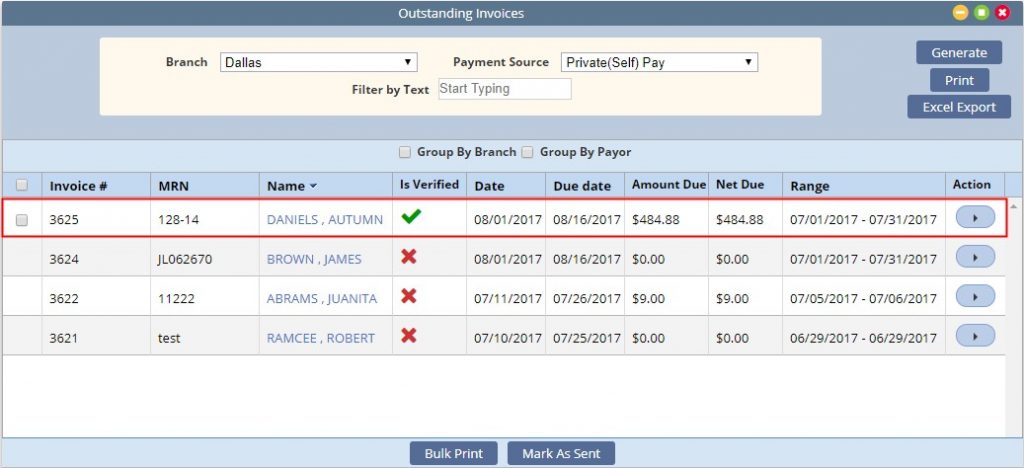
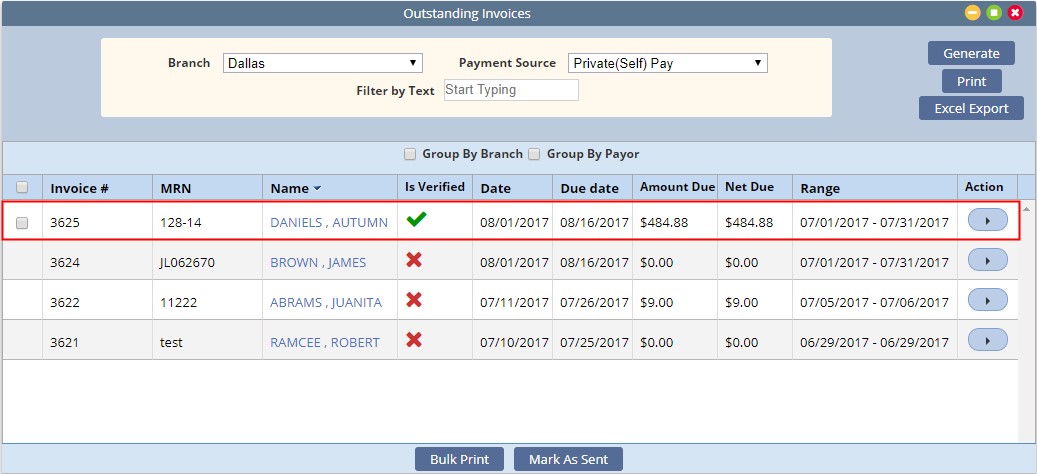
The generated invoices display the following summary information:
Invoice #, MRN, Client Name, Is Verified, Invoice Date, Due Date, Amt Due, Net Due, and the Invoice date range.
In addition, options to Print the Outstanding Invoice List or Export the list to excel exist.

Invoices that are unverified have the following actions: the ability to Print, Verify/Edit the Invoice or Delete
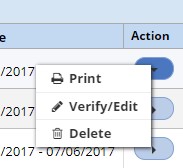
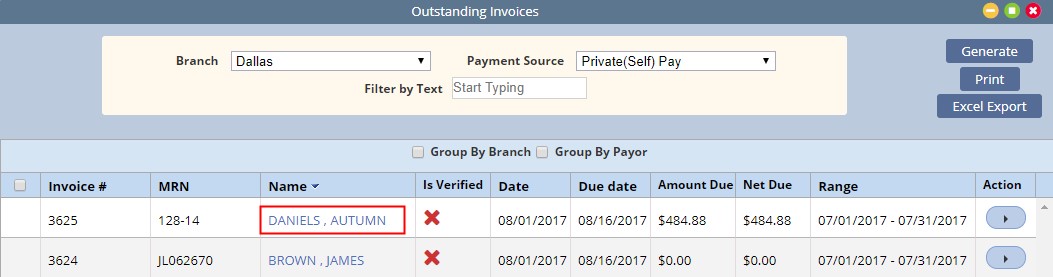
Click on the client name to open the Invoice for verification.

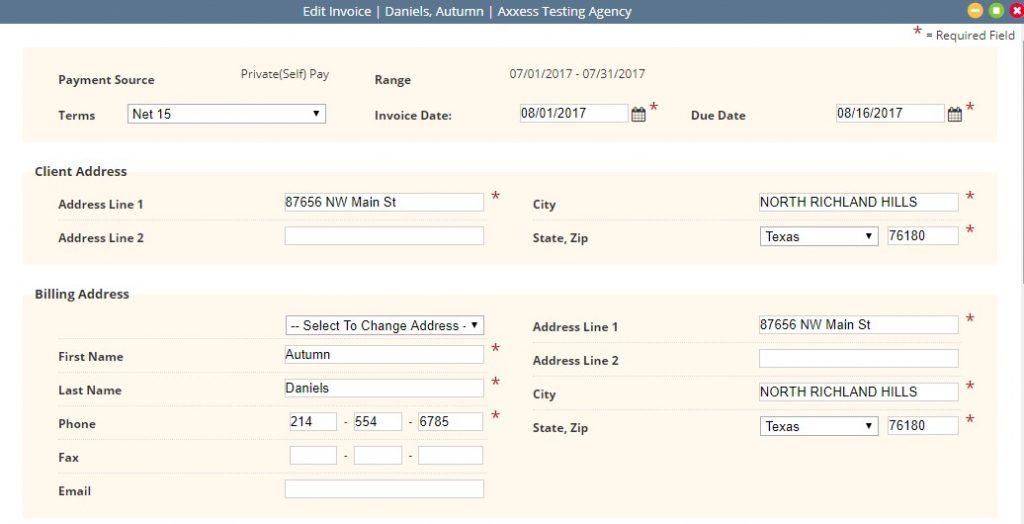
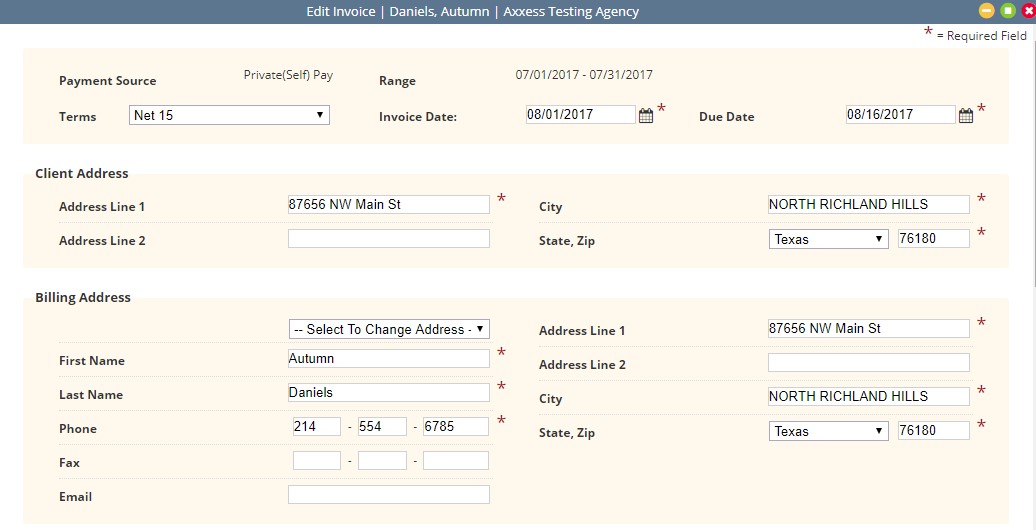
The Edit Invoice page displays the details of the invoice and provides editing as needed. Required fields are indicated with a red asterisk.
- The top sections display the payment source and date range of the invoice along with modifiable input of terms, date and due date.
- The Client Address displays from the client file.
- The Billing address defaults to the client’s but may be updated to other contact payors.
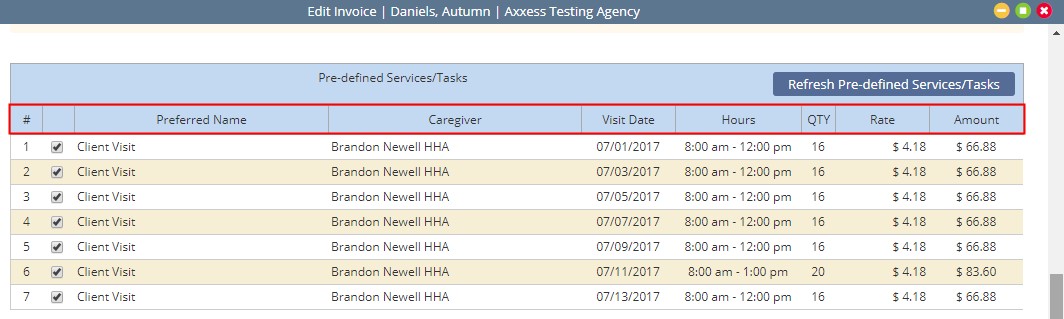
The lower half of the invoice will display billing line items. The columns displayed reflect what is set up in Manage Company Information.
Private (self) pay client rates are maintained in the client file. All others are maintained in the payment source file.
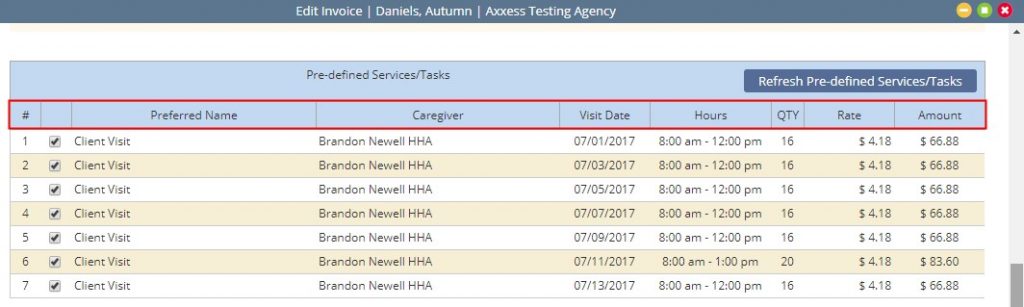
The Quantity and Rate are Editable by clicking in the field.

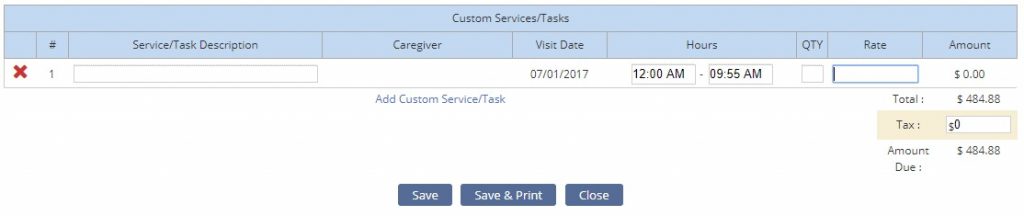
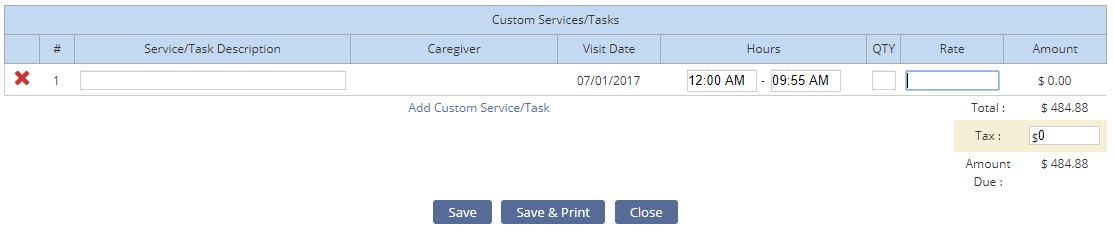
The last section provides the ability to add custom service charges. Click on the Add Custom Service/Tasks to enter the applicable charges.
Add any applicable tax
- Select Save to complete the verification
- Save & Print to complete and print the invoice
- Close cancels any changes

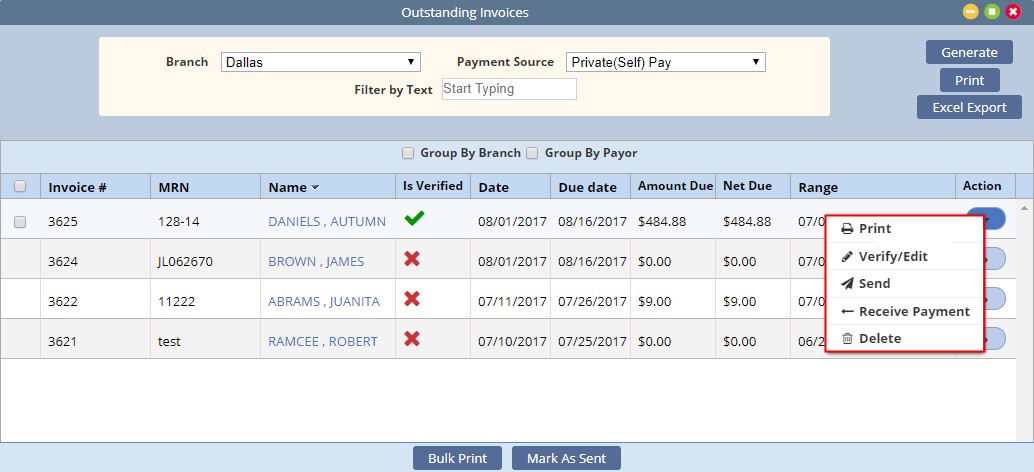
Verified Invoices contain a green check mark in the verified column. Once verified, a selection field is activated and the available actions are updated with additional options of Send and Receive Payment.
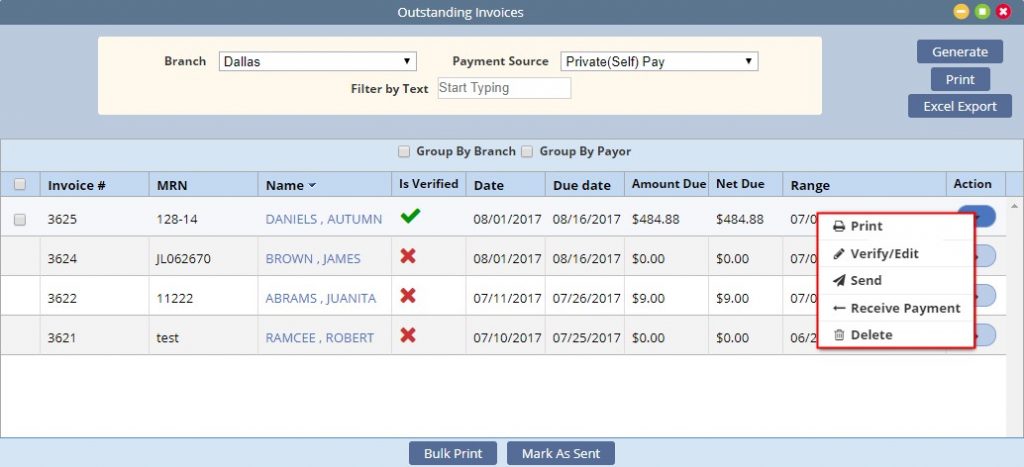
There are several options available to submit Invoices to Payment Sources:
Under Actions:
- The Send option provides the ability to Email the invoice to a payor.
- Print provides the ability to individually print an invoice for mailing. Once printed, the user updates the invoice status by selecting Mark as Submitted.
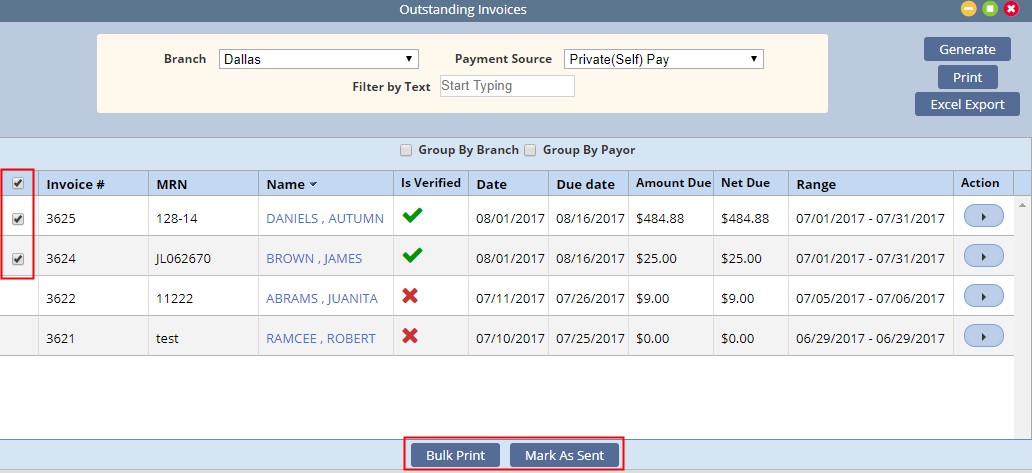
From the Invoice list page:
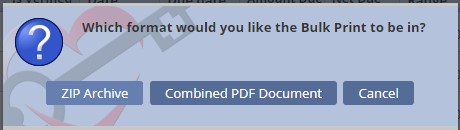
- Multi-Select Invoices and select Bulk Print. The user will have the option to combine into a PDF file, or a Zip Either choice will compile the invoices for selection under Reports-Completed Reports.
- Once printed, update the Invoice status by selecting and Marking as Submitted

Selecting to Receive Payment displays the post payment window for completion. This is described in greater detail under the Invoice History page.
Invoice History
Billing-Invoice-Invoice History
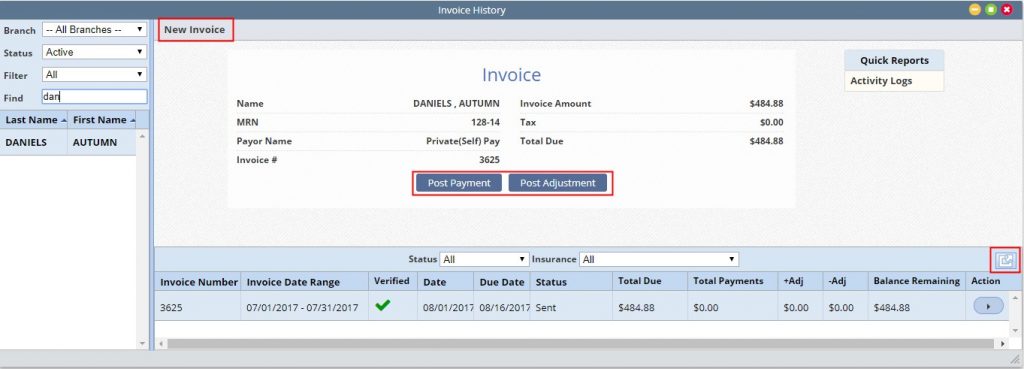
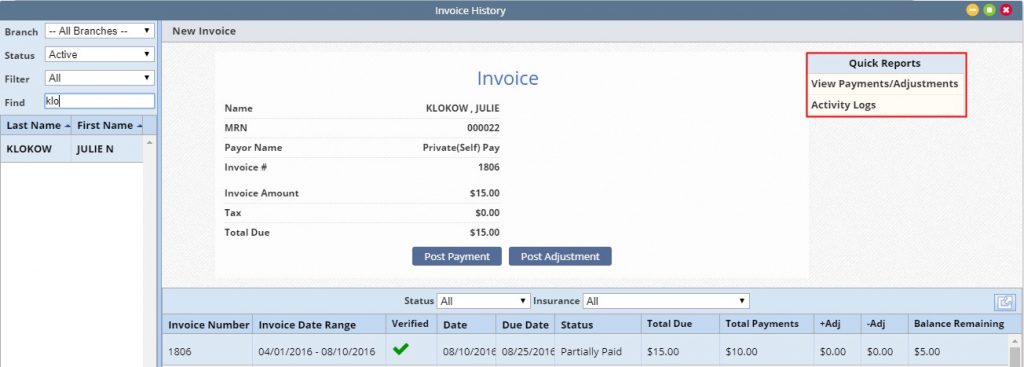
The Invoice History page contains a list of a client’s invoices.
For convenience, a new invoice may be added by selecting New Invoice at the top of the page.
The Expand will expand the list over the invoice summary at the top.
Once an invoice is selected:
- A summary is displayed in the top section of the page with the options to either post payment or adjustment.
- The information provided in the list includes: Invoice Number, Date Range, Verified, Date, Due Date, Status, Total Due, Total Payments, + Adjustments, – Adjustments, Balance Remaining and Action.
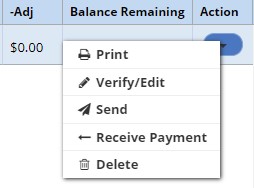
Options under the action column includes:
- Print provides the ability to individually print an invoice for mailing
- Verify/Edit verifies the invoice if it is in a created status
- The Send option provides the ability to Email the invoice to a payor
- Receive Payment Provides ability to post payments
- Delete: Deletes the Invoice
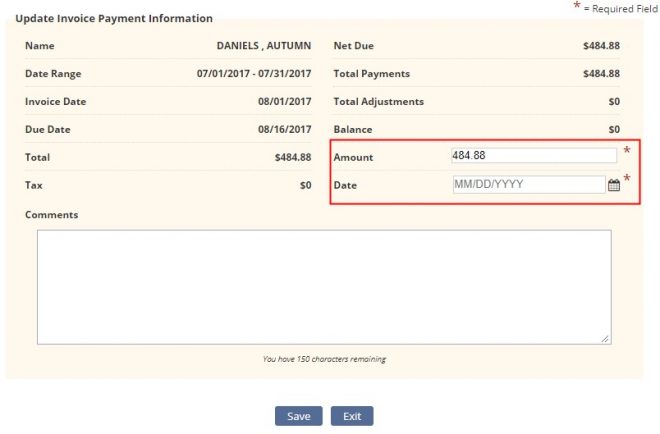
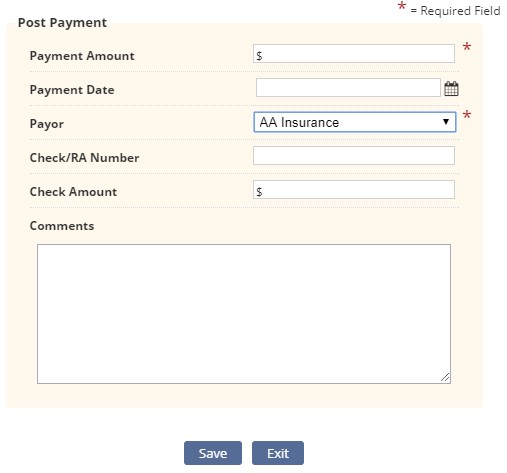
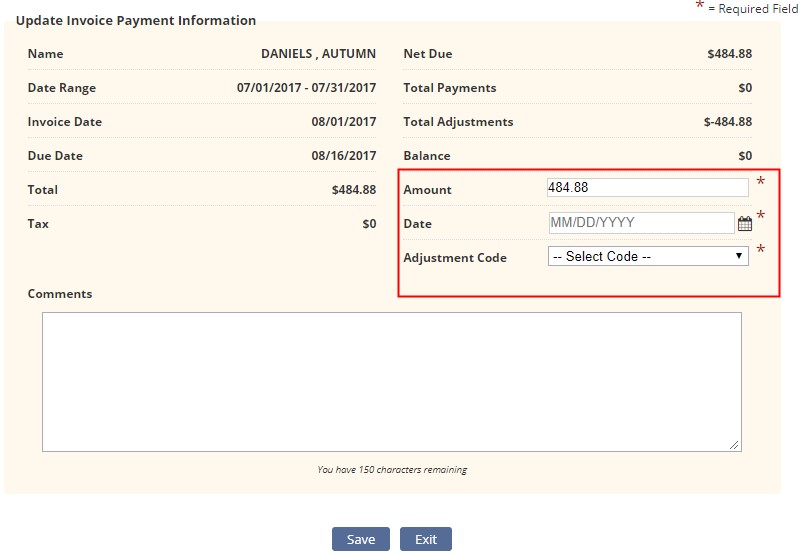
Post Payment contains two required fields
- Amount: enter the amount of the payment. The system defaults to the net due, update as needed.
- Date: enter the date of the applied payment
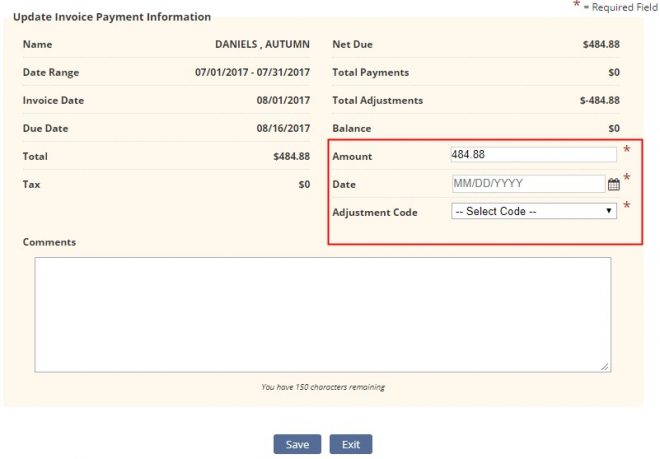
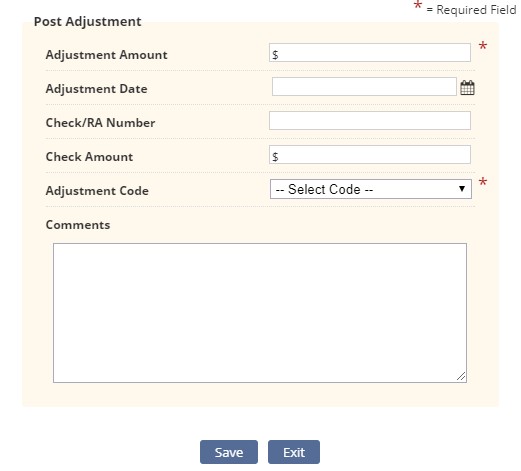
Post Adjustment: contains three required fields:
- Amount defaults to the invoice balance. Update as needed.
- Date indicate the date of the adjustment.
- Adjustment Code indicate the adjustment reason.
Invoice Quick Reports
To the right of the client information are quick reports associated to the invoice selected, allowing the user to view payments and adjustments posted to the invoice as well as an activity log showing when the invoice was updated and by whom.
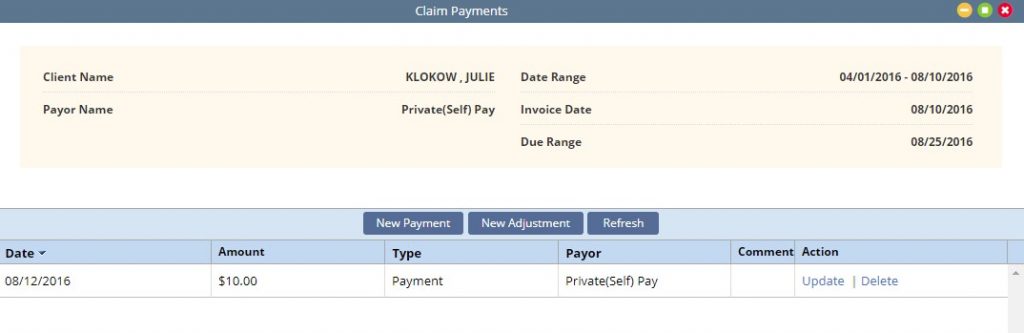
View Payments/Adjustments:
- Displays all payments and adjustments associated to the invoice with the ability to update or delete if needed.
- Users may also quickly add a new payment or adjustment from this page.
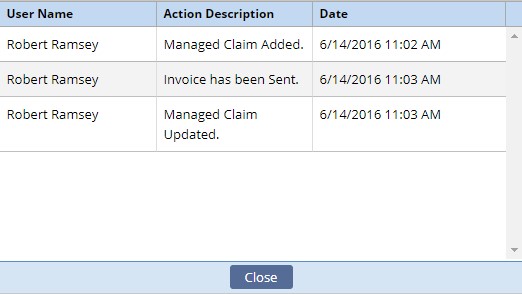
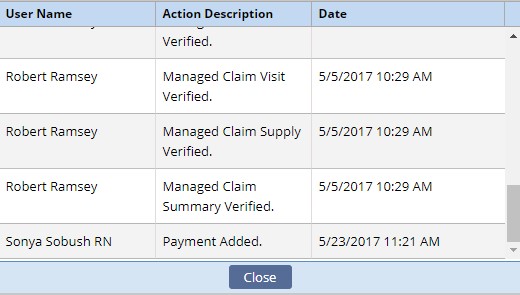
Activity Log:
Claims
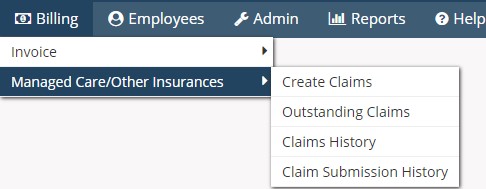
The Managed Care/Other Insurances category contains four sub-menus.
- Create Claims: Used to create claims for payors billing UB04, HCFA 1500 or Ansi
- Outstanding Claims: Once claims are created they move into the outstanding claims page for review and submission options.
- Claims History: View and update claims. Features include the ability to view existing client claims; post and view payments and adjustments; view the claim in UB04, HCFA 1500 or ansi format; update claim status’ as well as create a new claim.
- Claim Submission History: Ability to view submission date, batch number, clients included in a batch and claim responses.
Create Claims
Billing-Managed Care/Other Insurances-Create Claims
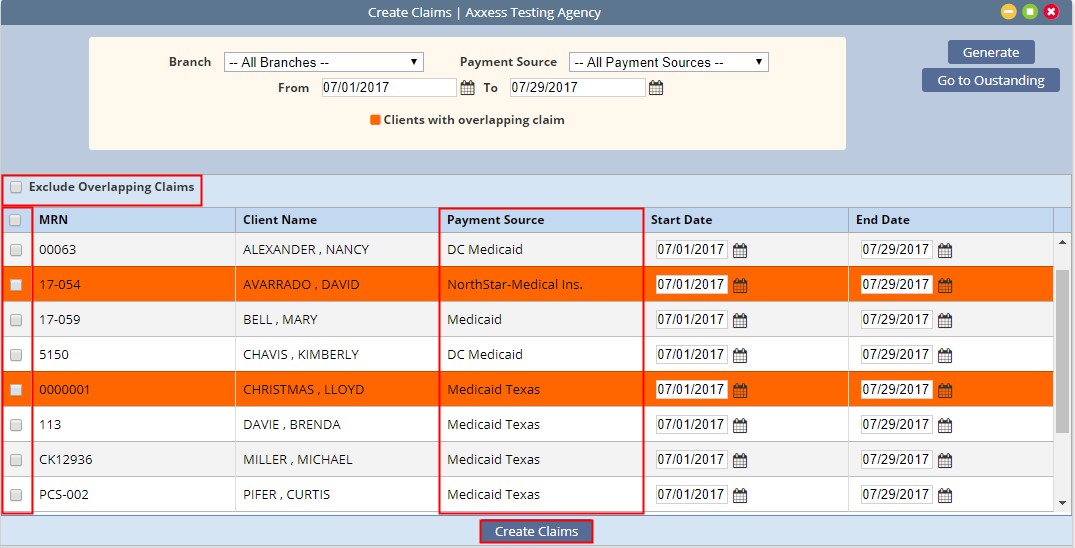
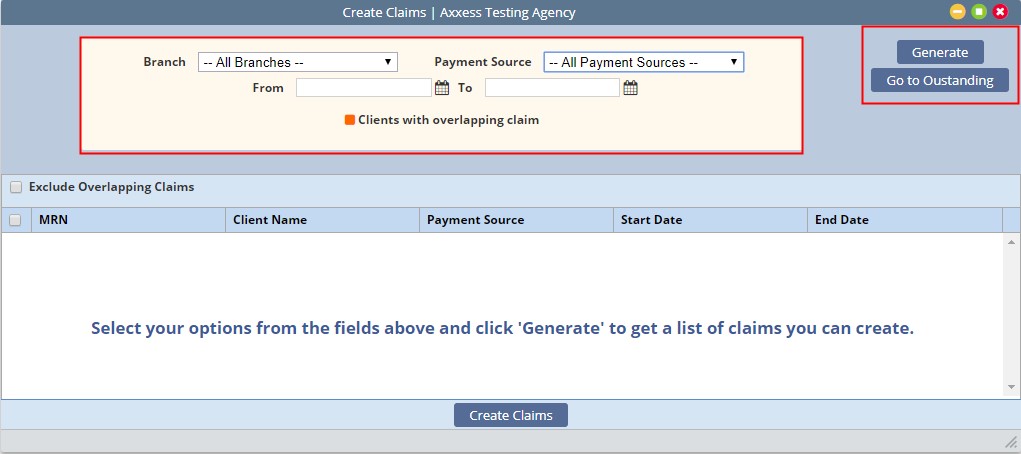
Select the branch, payment source/s and date range that you are creating claims for.
Then select Generate
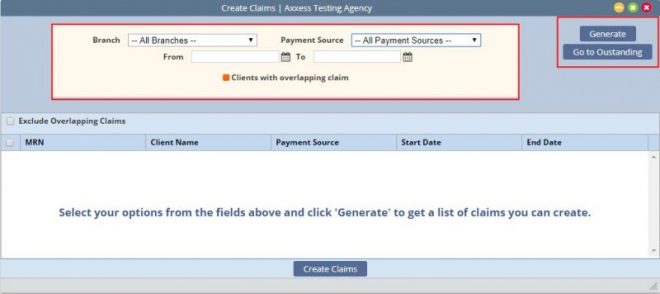
The system will generate a list of claims that match the requested parameters.
Claims identified as having overlapping claim dates will be highlighted in orange. These claims may be excluded from the list by selecting Exclude Overlapping Claims.
Select the claims you wish to create and click Create Claims. This action move the claims into the Outstanding Claims page.
Users may select the quick link Go to Outstanding to navigate to the claim list.

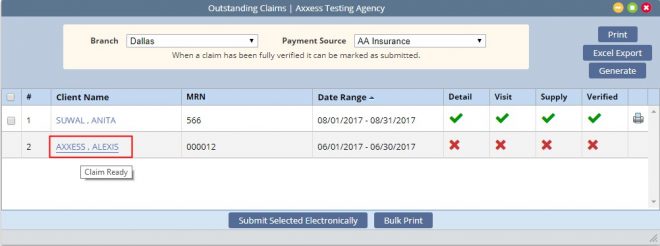
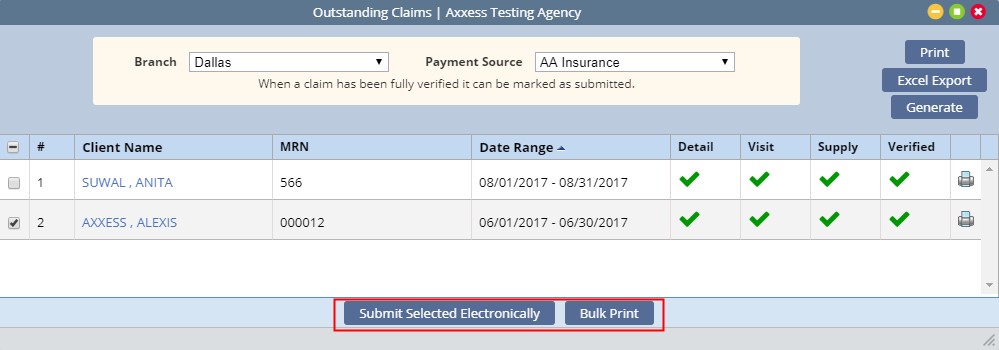
Outstanding Claims
Billing-Managed Care/Other Insurances-Outstanding Claims
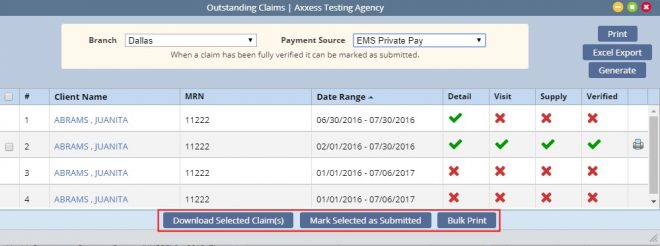
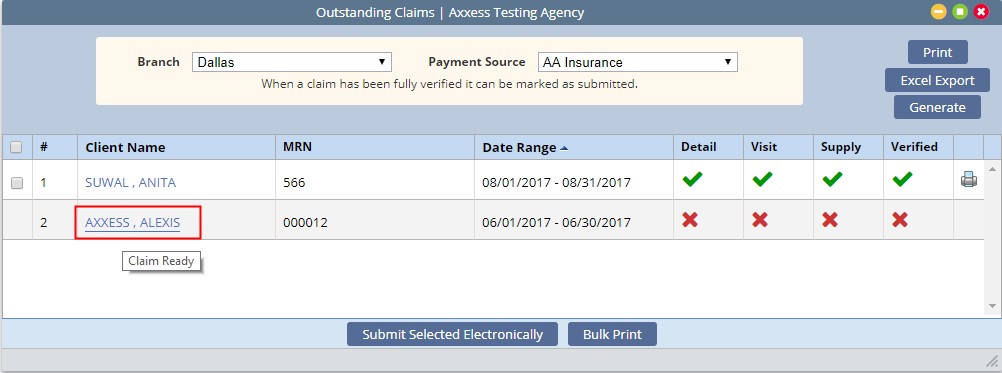
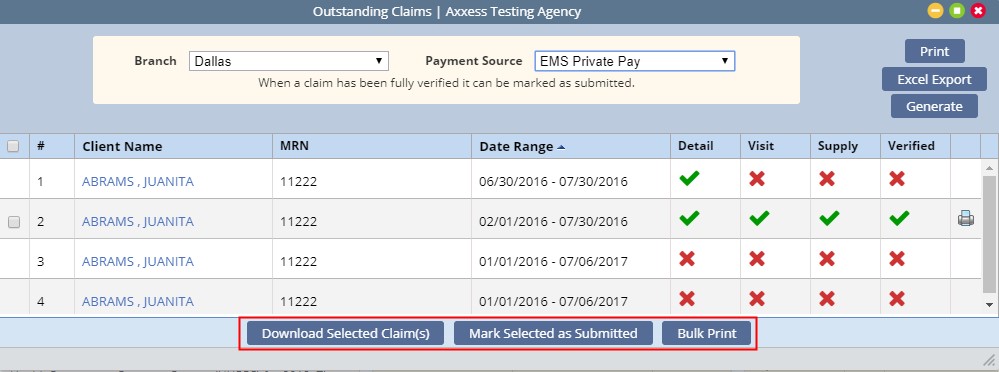
The outstanding claim list will display all generated claims requiring verification to bill.
The summary list contains the Client Name/MRN/ Claim Date Range and the 4 verification pages of the claim (detail/visit/supply/verified). The last column is the print icon for viewing and downloading the claim.
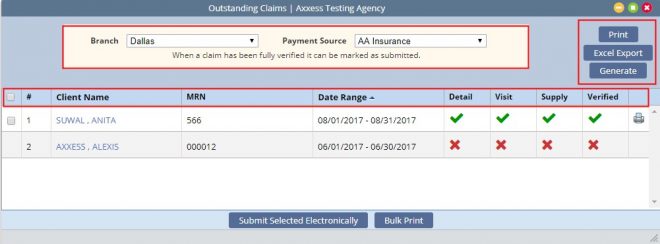
Clicking on the client name opens the claim for verification.
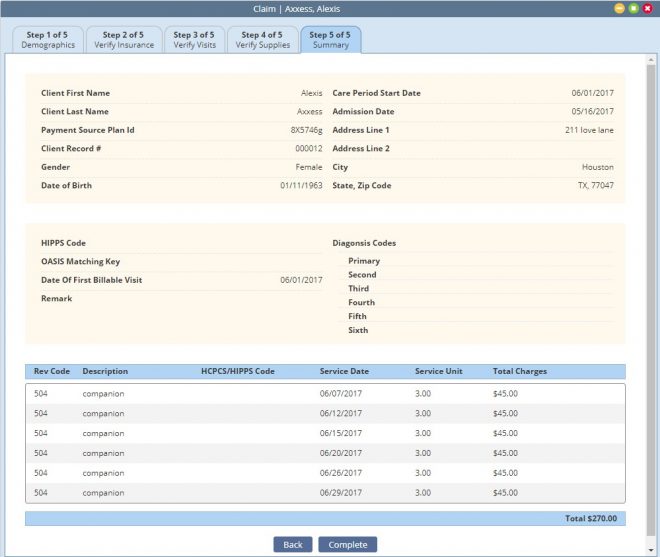
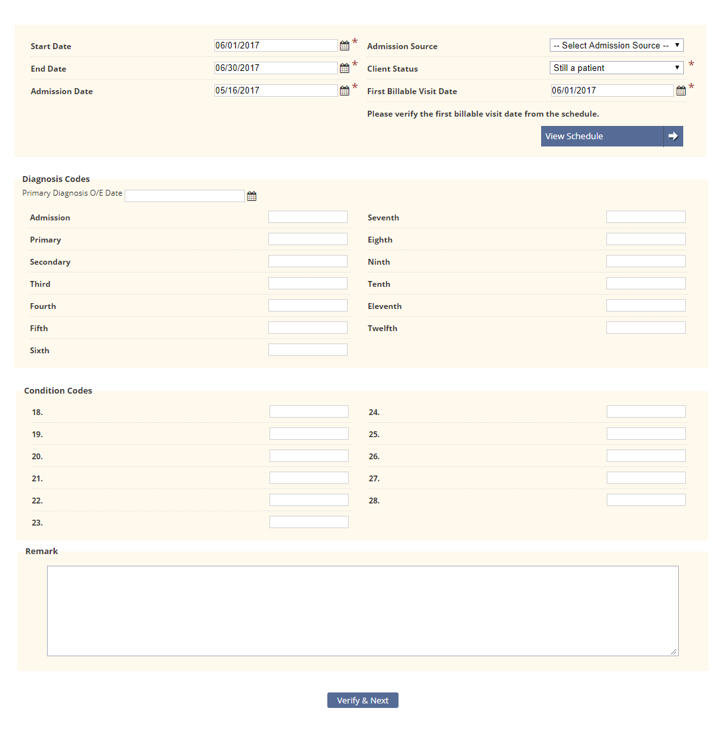
Step 1-Demographics:
Required field completion includes:
- Facility & Bill Type: this defines what type of bill the invoice is. For example: First claim, continuing claim.
- Client Information includes: Client Name, Address, DOB, Gender and Client Record #
- Start and End Dates indicate the date range of the claim.
- Admission Date & Source: Start of Care date and where the referral originated from.
- First Billable Visit: the first billable visit in the claim
- Client Status: Client’s status during the claim date range.
Diagnoses: A Primary Diagnosis is required.
Nonrequired fields include Additional Diagnoses, condition codes, and remarks. Ensure population of these if required by the payor.


Step 2-Verify Insurance
- Insurance Details pull from the client file. .

- Locator Information (UB or HCFA): Add/Edit locator information as needed. The values displayed pull from the payment source setup. If changes have been made to the payor select Reload Locators and Providers to pull the new requirements into the claim.

The lower half of the screen displays all rates that have been loaded for the insurance. You can Add Additional Task Rates or edit/delete existing task information as needed.

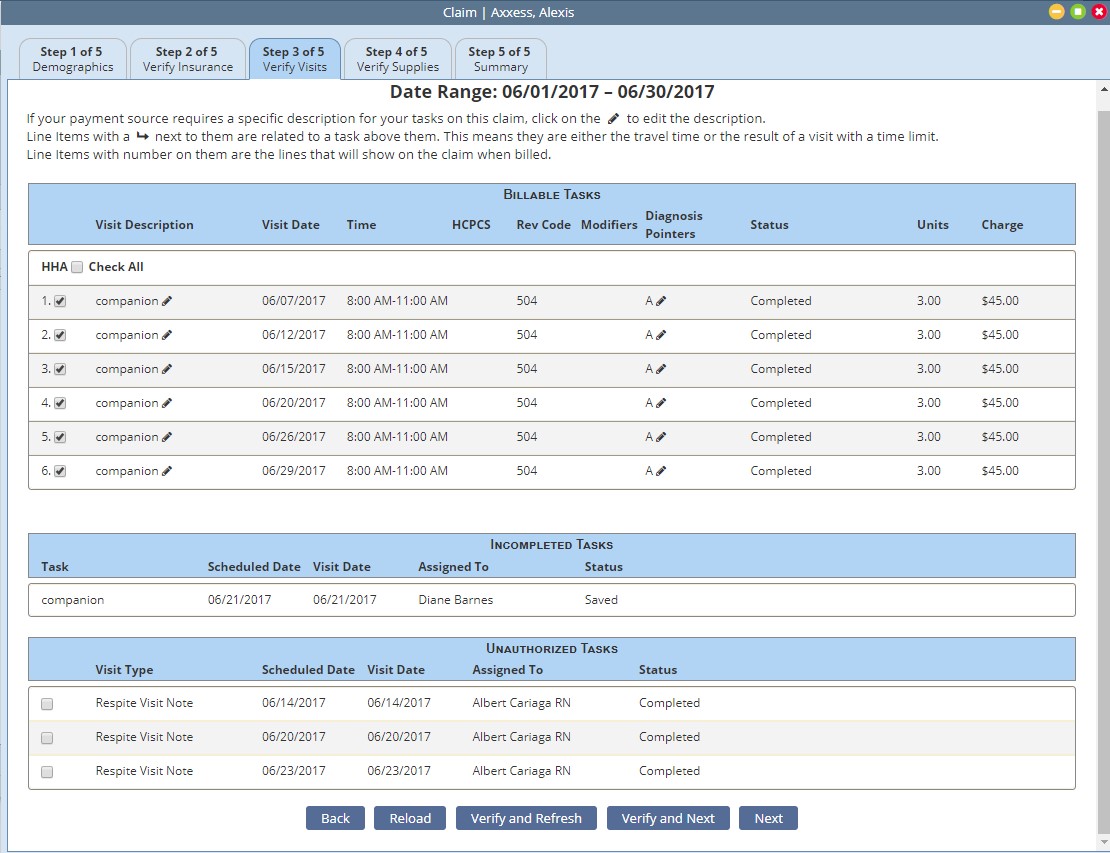
Step 3-Verify Visits
The claim date range displays at the top of the page for reference.
Tasks group into categories.
- Billable Tasks: Lists all completed tasks that fall within the claim date range. All billable tasks are selected by default. Task description and diagnosis pointers may be edited.
- Incomplete Tasks: Displays all billable outstanding tasks that fall within the date range.
- Unauthorized Tasks: Lists all completed tasks that fall outside authorization parameters. Users may elect to ignore the authorization warning and bill anyway.
- Tasks with no associated rate: Indicates tasks that were completed that are missing insurance rates.
- Overlapping claim: lists tasks that are associated to a claim that overlaps date range.
If no tasks fit a category the category will not display.
Actions include:
- Back navigates back to step 2.
- Reload: reloads the page after changes were made
- Verify and Refresh: verifies the tasks and refreshes the page
- Verify and Next: verifies the tasks and navigates to step 4
- Next: Navigates to step 4 without verifying the tasks.

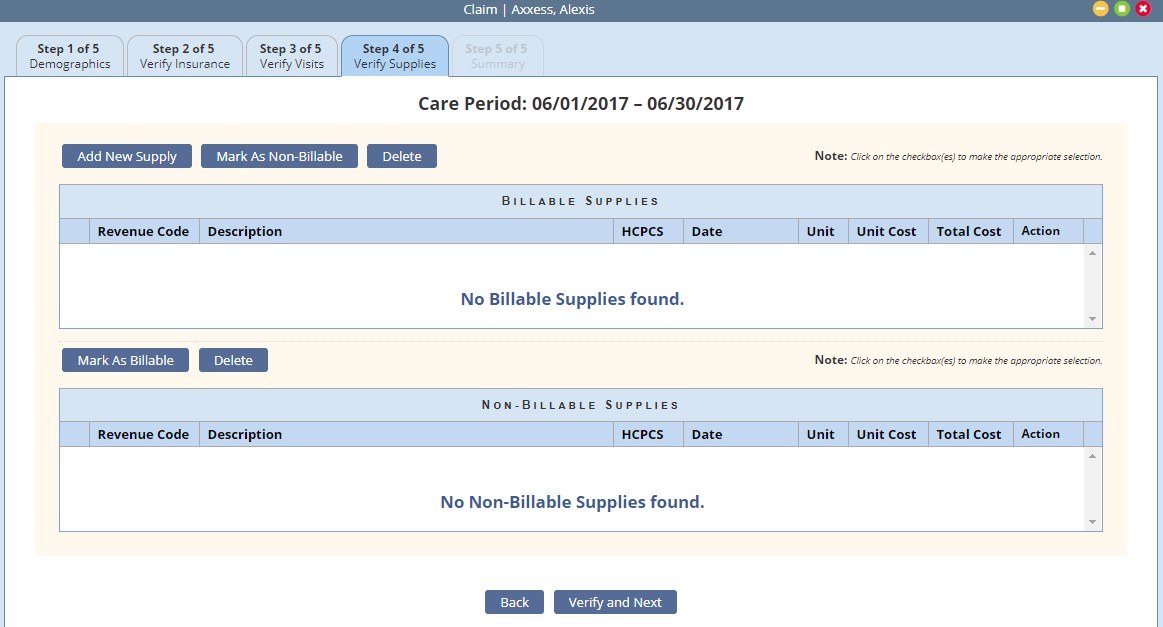
Step 4-Verify Supplies
Recorded supplies (billable and non-billable) display and are editable as needed.

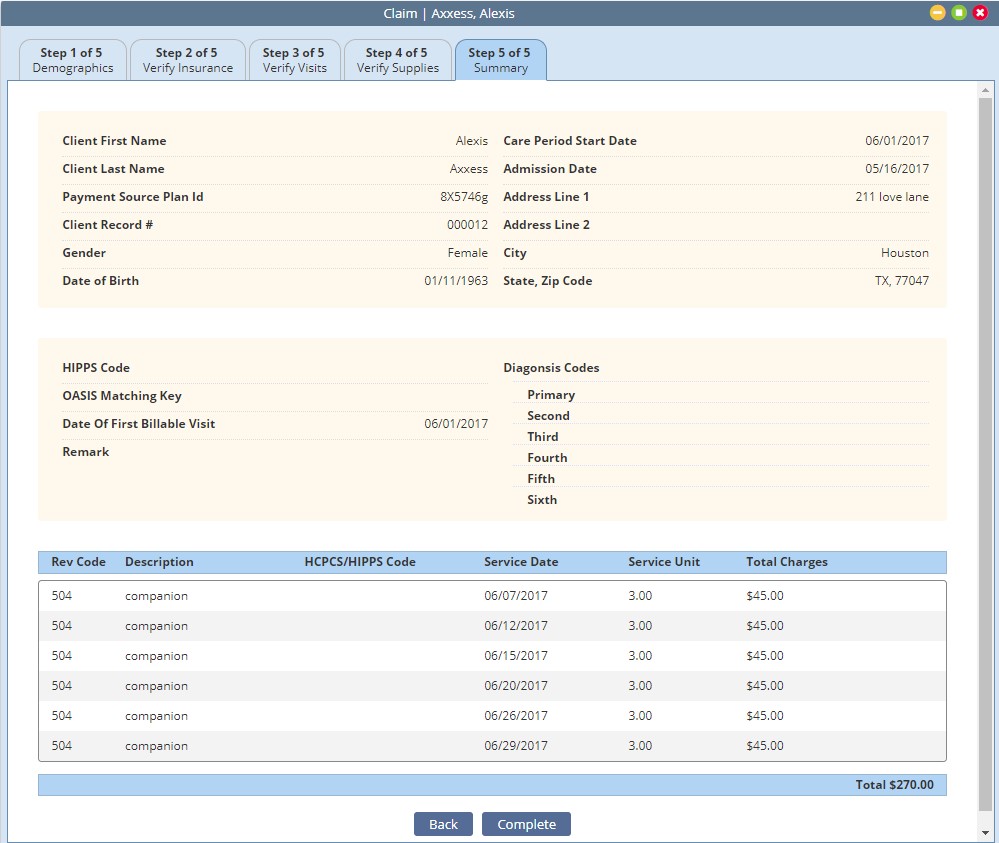
Step 5-Claim Summary: Provides a summary review of the claim. Select Complete to finish the verification process.
A green checkmark displays when the verification is completed for the pages. Once all checkmarks are present a selection field presents to the left of the claim.

Claim submission options depend on the payment source setup. Options include:
- Electronic Submission: electronic submission to a clearinghouse
- Download: users download the claims and then upload to the payor portal or clearinghouse. Once the claim/s are downloaded the user must mark the claims as submitted to remove them from the outstanding claim page.
- Bulk Print: provides ability to print multiple claims for mailing
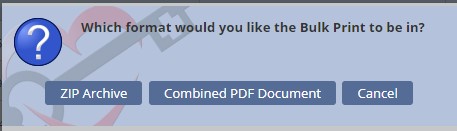
- Select all the desired claims click Bulk Print. The user will have the option to combine into a PDF file, or a Zip Either choice will compile the claims for selection under Reports-Completed Reports.
- Once printed, update the claim status by Marking Selected as Submitted

Claims History
Billing-Managed Care/Other Insurances-Claims History
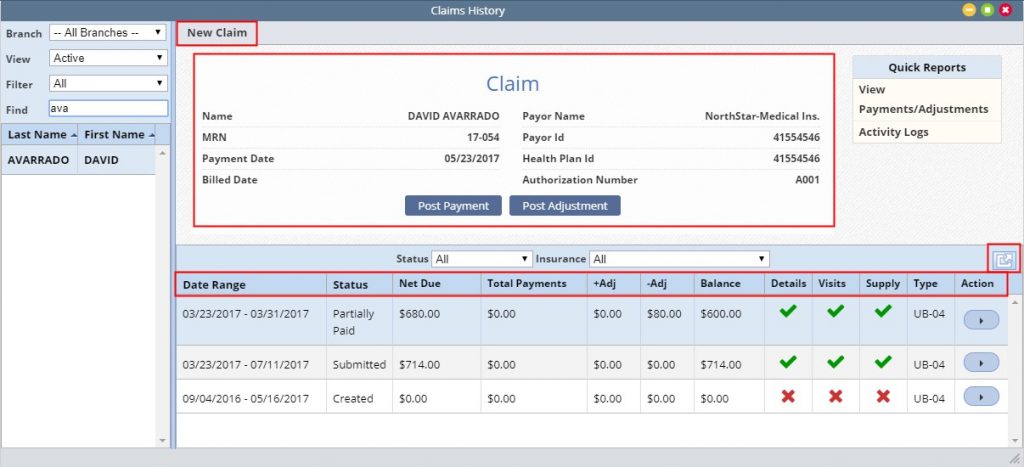
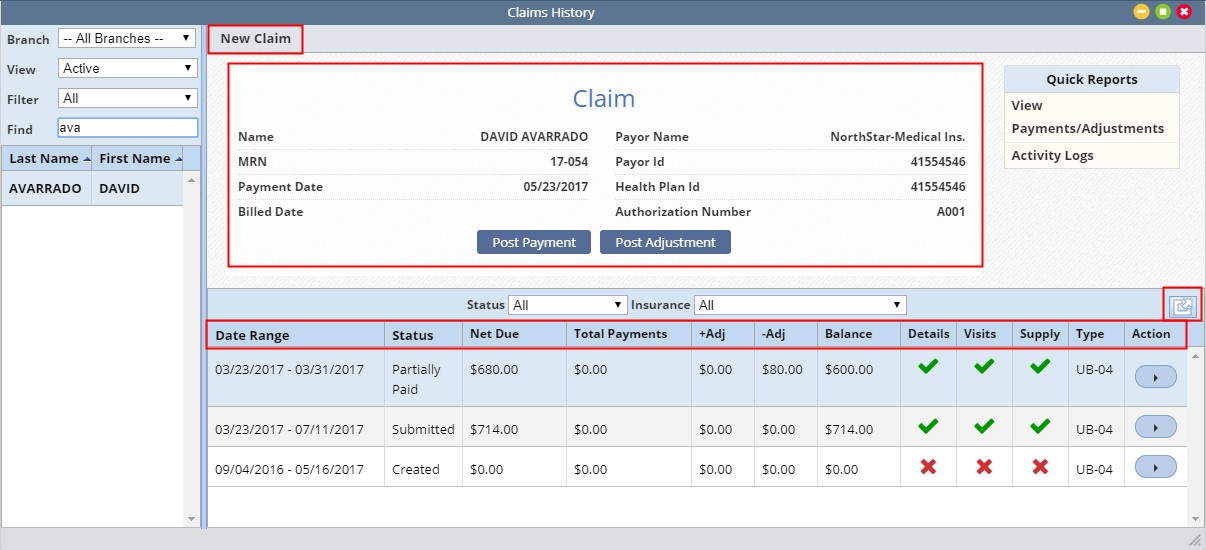
The Claim History page contains the list of a client’s claims.
For convenience, a new claim may be added by selecting New Claim at the top of the page.
The Expand will expand the list over the claim summary at the top.
Once a claim is selected:
- A summary is displayed in the top section of the page with the options to either post payment or adjustment.
- The information provided in the list includes: Date Range, Status, Net Due, Total Payments, + Adjustments, – Adjustments, Balance Detail/Visits/Supply, Claim Type and Action.
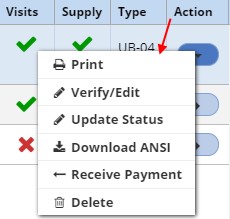
Available Action Items depend on the claim status. Most include the ability to
- Print: print a paper copy of the cliam
- Verify/Edit: review/update the claim verification process
- Update Status: available status’ vary depending on the current claim status
- Download ANSI: provides the ability to download the ANSI (text) file for review or submission
- Receive Payment is available once a claim has been submitted
- Delete: provides the ability to delete the claim.
Post Payment contains two required fields:
- Amount: enter the amount of the payment. The system defaults to the net due, update as needed.
- Payor: Indicate who received payment from
- Other available fields include: Payment date, Check/RA number the payment is part of, Check Amount and any comments
The claim status will automatically update based on the outstanding balance and includes: paid, partially paid and overpaid
Post Adjustment: contains three required fields:
- Amount indicate the amount of the adjustment.
- Adjustment Code indicate the adjustment reason.
- Other Fields: Date, Check/RA Number and amount as well as any applicable comments.
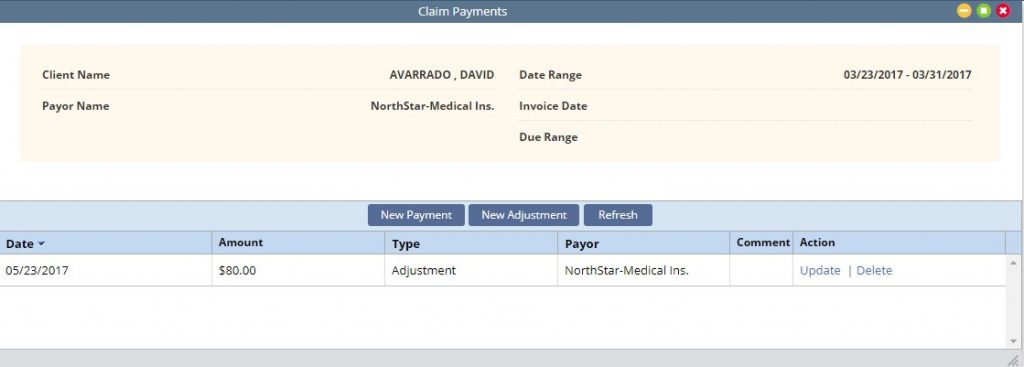
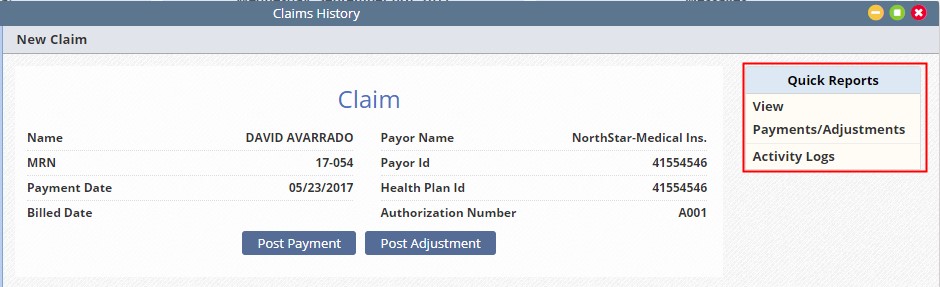
Claim Quick Reports
To the right of the client information are quick reports associated to the claim selected, allowing the user to view payments and adjustments posted to the claim as well as an activity log showing when the claim was updated and by whom.

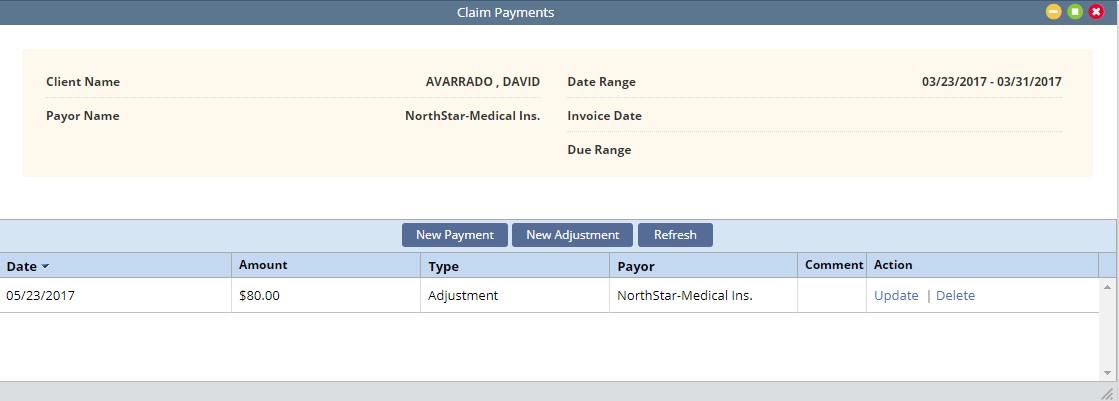
View payments/adjustments:
- Displays all payments and adjustments associated to the claim with the ability to update or delete if needed.
- Users may also quickly add a new payment or adjustment from this page.
Activity Log:
Claim Submission History
Billing-Managed Care/Other Insurances-Claim Submission History
Claims that are electronically submitted will populate to the Claim Submission History page. This menu allows the ability to review batches of claims, the response files and the claims within the batch.
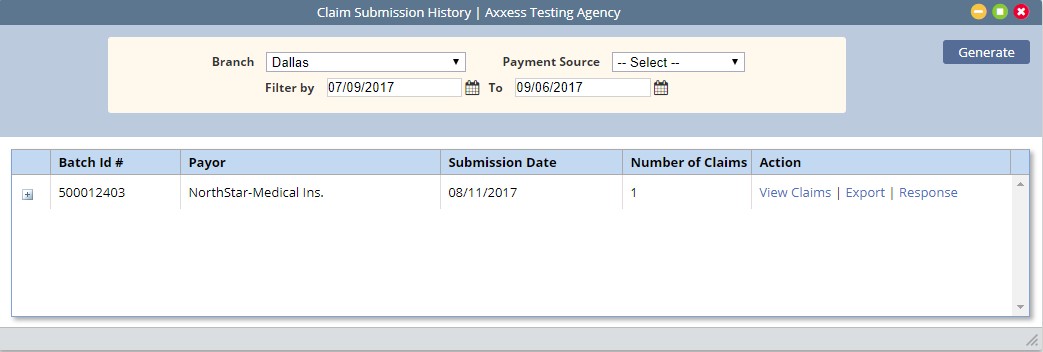
Select the branch, payment source and date range and select generate to narrow return results.
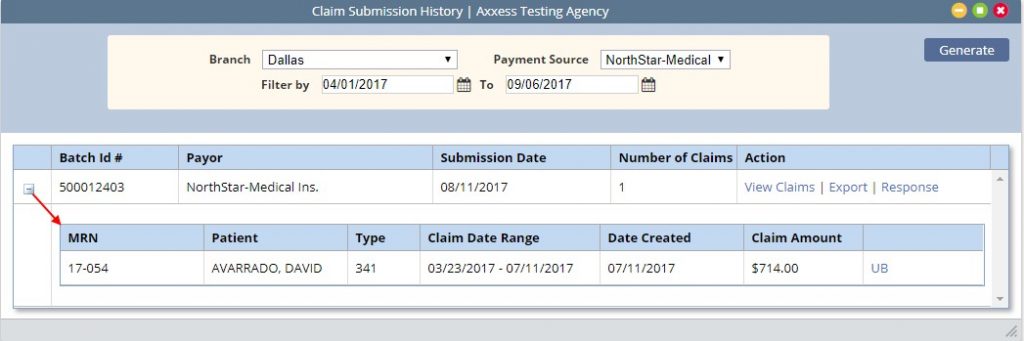
The summary line item displays the Batch Id, Payor, Submission Date, Number of claims in the batch as well as an action column from which the user may elect to view the claims, export the file or view the response.

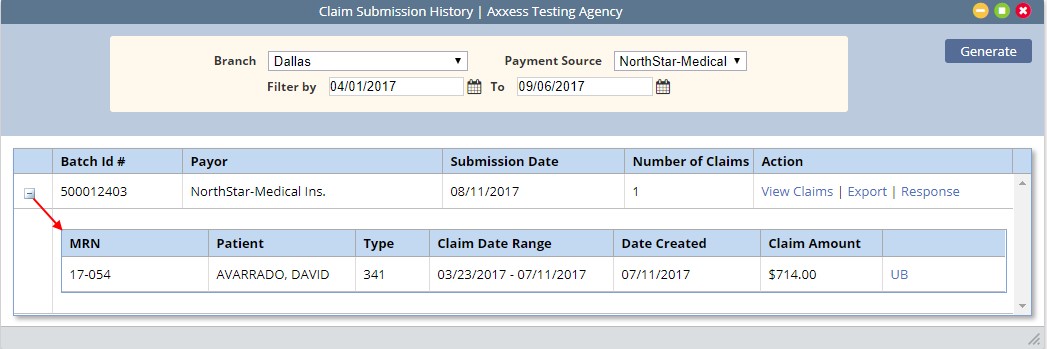
Selecting the expand icon (+) next to the batch will display the list of claims included in the batch. Information includes the Client Record number, Client Name, Type of Bill, Claim Date Range, Date Created, Claim Amount and the ability to view the claim.
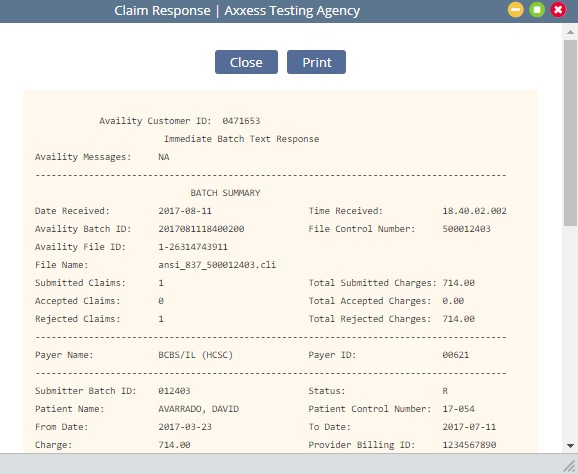
Response File
The response file will provide a summary at the top and then list the claims within. Users have the ability to close or print upon viewing.
It will list the total number of claims submitted along with the number accepted and rejected and provide charges associated with each.


