x
Join our new Axxess User Community to connect, share, learn and grow together.Learn More
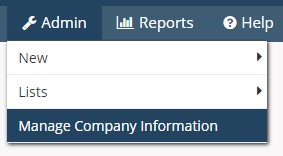
Admin/Manage Company Information
The first step in the payroll processing functionality is to create the agency’s Payroll Policy.
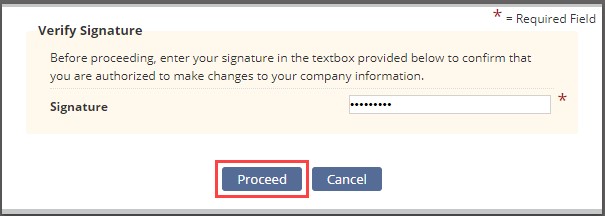
Enter the electronic signature and select “Proceed”:
Select the tab on the left-hand side, labeled Payroll Policy. Included in this tab will be several features that will need to be filled in, in order to apply the functionality to the agency’s visits.
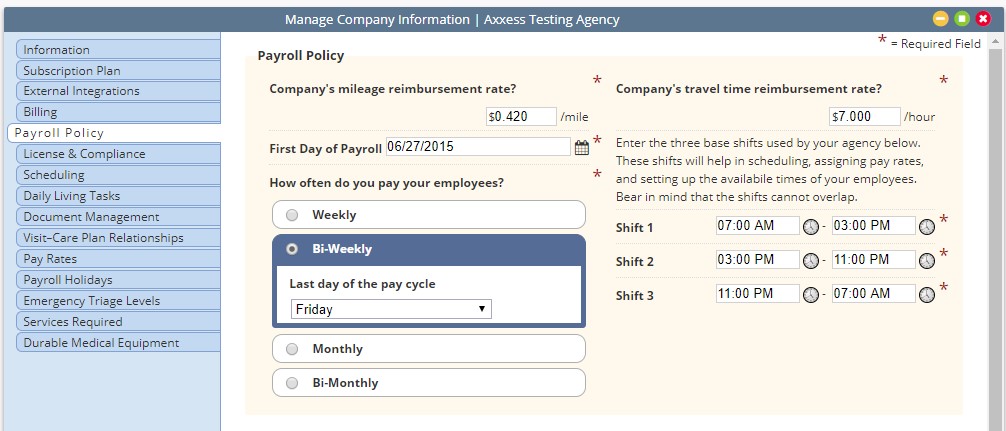
Mileage Reimbursement Rate – This amount will be the default mileage rate, if a rate is not entered in a specific task.
Travel Time Reimbursement Rate – This amount will be the default travel time reimbursement rate, if a rate is not entered in a specific task.
First Day of Payroll – Select the calendar and select the first day of the payroll.
How Often Are Employees Paid – Select one of the four options to determine how the software will create payroll.
Three Base Shifts – Select the white box, or select the clock, to display the time ranges for three shifts in the agency.
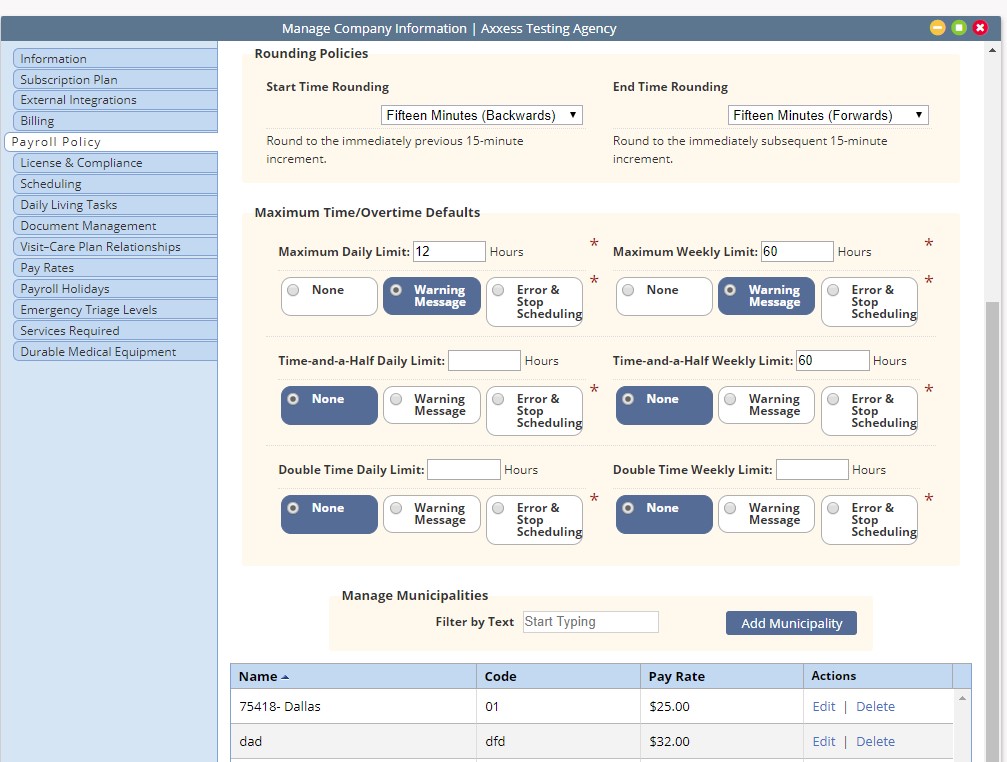
Rounding Policies – Select the drop-down arrow to determine how the time (visit time and travel time) is rounded.
Maximum Time/Overtime Defaults – These options will determine if users are allowed to complete tasks over their limit, and if so, how many hours they are allowed to be paid.
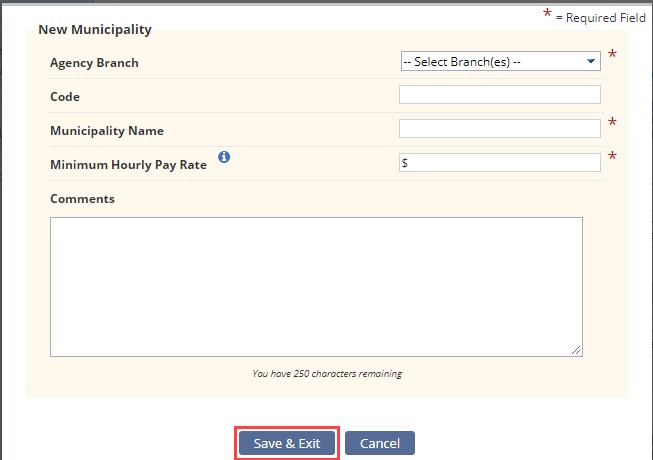
Manage Municipalities – If the agency pays a specific amount for select regions, a unique municipality can be created. The municipality will later be applied to a specific client in this area.
To create a municipality, select the blue button labeled, “Add Municipality”.
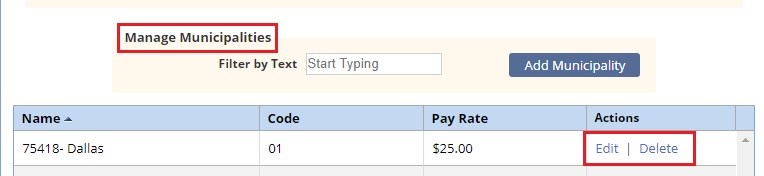
Once a municipality is added, make updates if needed. The list of municipalities will be displayed at the bottom of the screen. Select the “Edit” or “Delete” hyperlink to make these changes.
Admin/Manage Company Information/Pay Rates
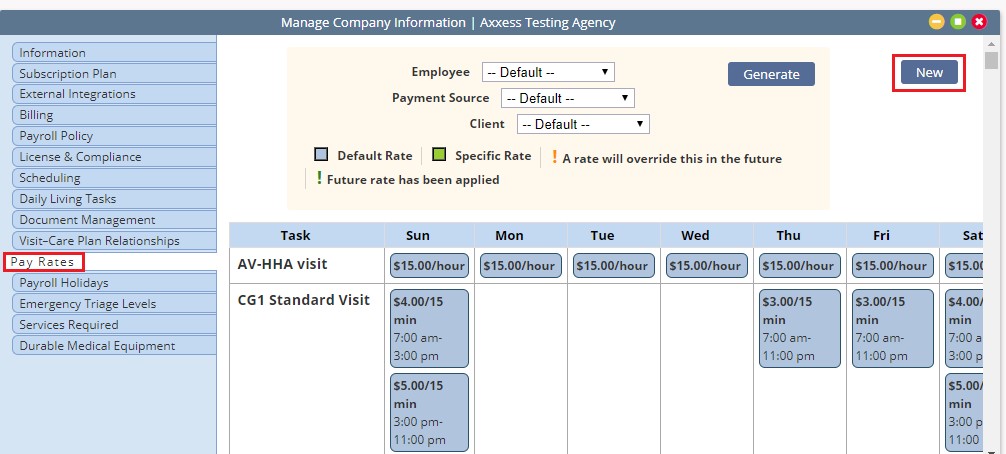
Select “New” and the window below will open, allowing users to create a New Pay Rate.
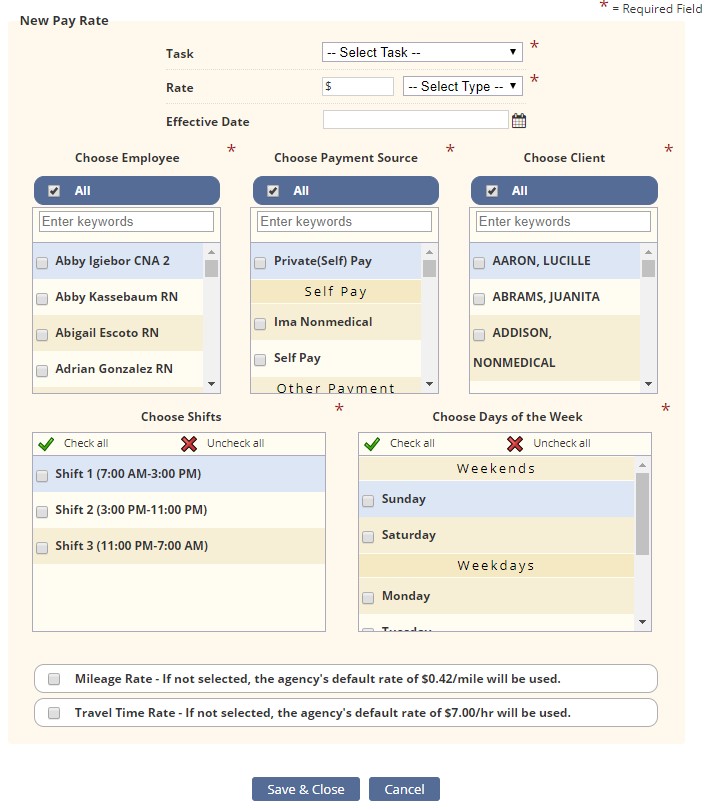
Select the required criteria to apply to the New Pay Rate:
Admin/Manage Company Information/Payroll Holidays
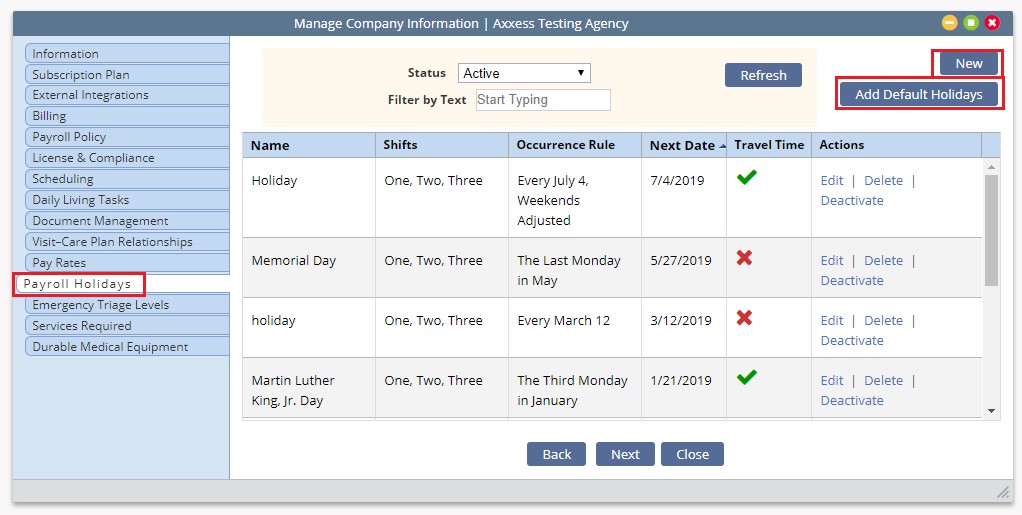
To set up a Payroll Holiday, select the blue buttons, in the upper, right-hand corner, labeled “New” or “Add Default Holidays.”
Add Default Holidays – Axxess will provide a list of holidays commonly used. Select one of these holidays and a window will open, allowing the user to select the criteria wanted to apply to this Payroll Holiday. Once the criteria are chosen, select “Add Holidays.”

Time – Depending on if “Use Shifts” or “Use Custom Time” is selected, Axxess will require further time descriptions to be entered.
Rules – If specific rules apply to this holiday, select the box on the left-hand side and a checkmark will appear.
NOTE: If not sure what each rule means, hover over the info ![]() icon next to the rule and a short description will appear.
icon next to the rule and a short description will appear.
New – This will allow agencies to create a customized Payroll Holiday that is not currently listed in Axxess. Once “New” is selected, the same functionality will apply to creating a unique Payroll Holiday.
Employees/Payroll
The box below will appear, allowing a search to be completed from specific criteria.
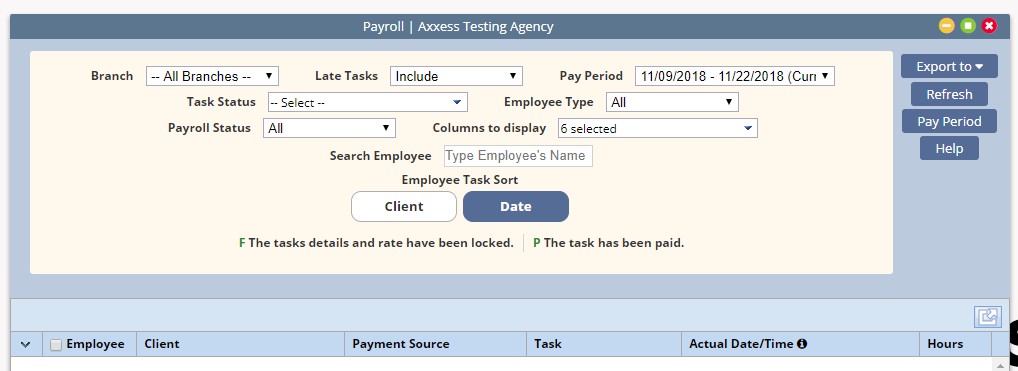
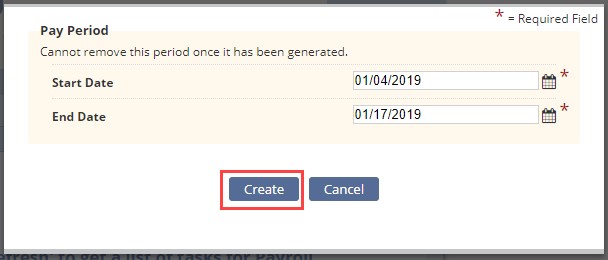
Enter in a Start Date and End Date, that the Pay Period will include, then select “Create”.
NOTE: Axxess will not allow Pay Periods to overlap, so if this date range is already covered in another Pay Period, an error message will appear.
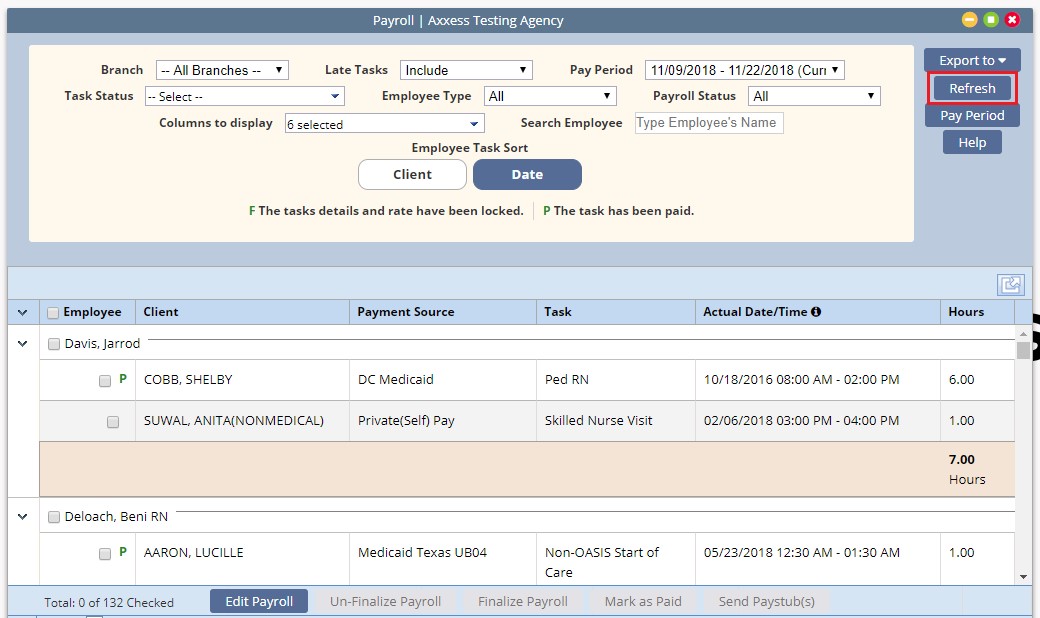
Once all the filters in the Payroll Report are displaying the correct search criteria, select “Refresh” to generate the Payroll.
To mark the task as Paid, it must first be Finalized. Follow the steps below:

When “Edit Payroll” is selected users will be able to make changes to the Actual Date/Time of the task.

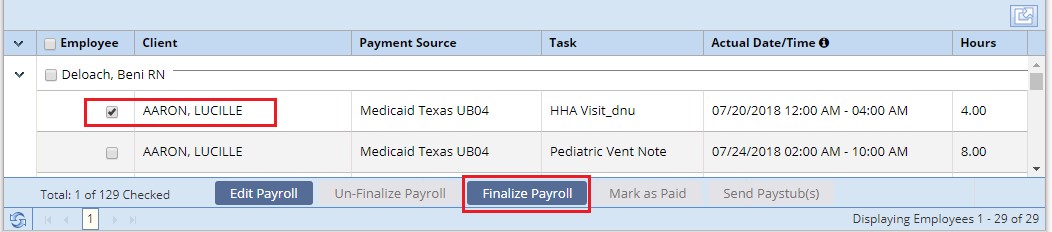
A green F will appear next to the client’s name. Then choose to “Un-Finalize Payroll” or “Mark as Paid.” Users cannot Edit Payroll for tasks that have already been Finalized, they would need to be Un-Finalized and then edited.


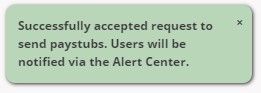
Select “Send Paystubs”, a green box will appear in the upper, right-hand corner of the screen displaying the following message:
Reports/Report Center
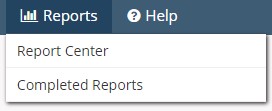
Select the Report Center. The Report Center lists multiple reports that can pull up agency data. The reports are grouped into sections based on the type of information they display.
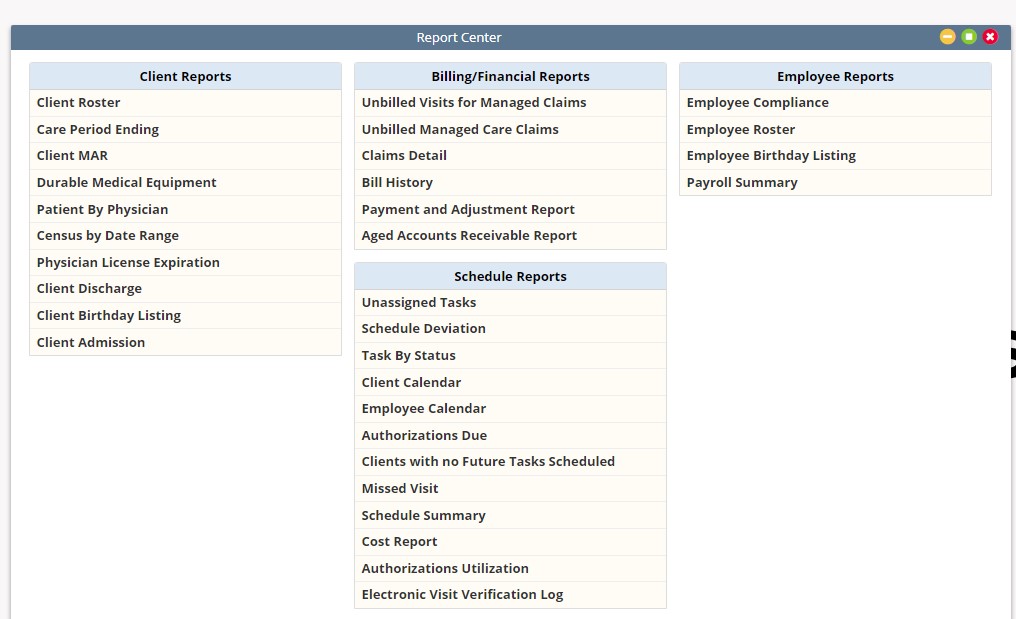
NOTE: Viewable reports are based on the user roles (User Setup is covered in Admin Overview).
For more information about what data the report is displaying, simply hover over the report name. A blue box will appear giving more details.

The Client Roster Report is selected, and the blue box appears. Select the name of the report, and a new box will open, allowing users to generate the report.
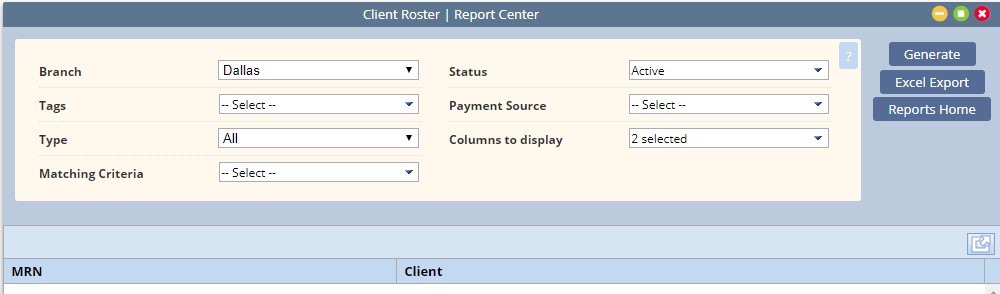
Once the desired criteria have been chosen, select “Generate Report.” The report will display on the bottom of the screen.
Reports/Completed Reports
Some reports in the Report Center will need to be requested, rather than generated. Once a report is requested, the data will begin pulling, and once it is finished the report will be in the Completed Reports section.

For a report to appear in the Completed Reports section, they will need to follow the following workflow:

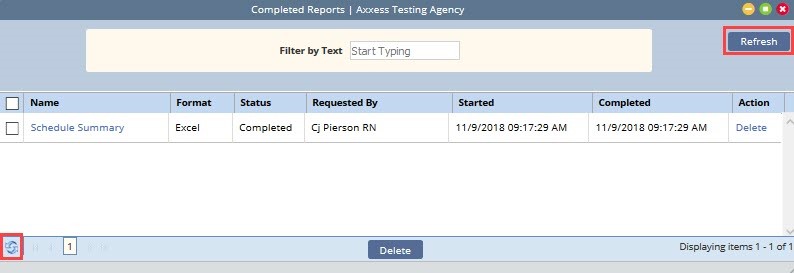
The status column will show when a report is finished pulling in all the data. The following status descriptions will appear:
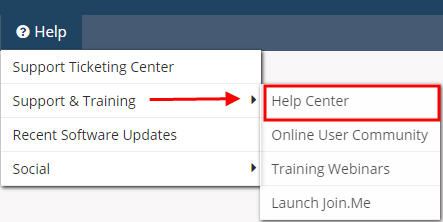
Our Help Center is a great resource that is available 24/7. Here you can get answers to frequently asked questions or watch videos of all of Axxess products. You can access it by going to Help/Support & Training/Help Center.
Or, it is also available at https://www.axxess.com/help/