This tutorial will provide you with an overview of how to Edit a Client in Axxess HomeCare.
Navigate to Clients -> Client Center
Filter the client list at the left or type in your client name utilizing the “Find” Field.
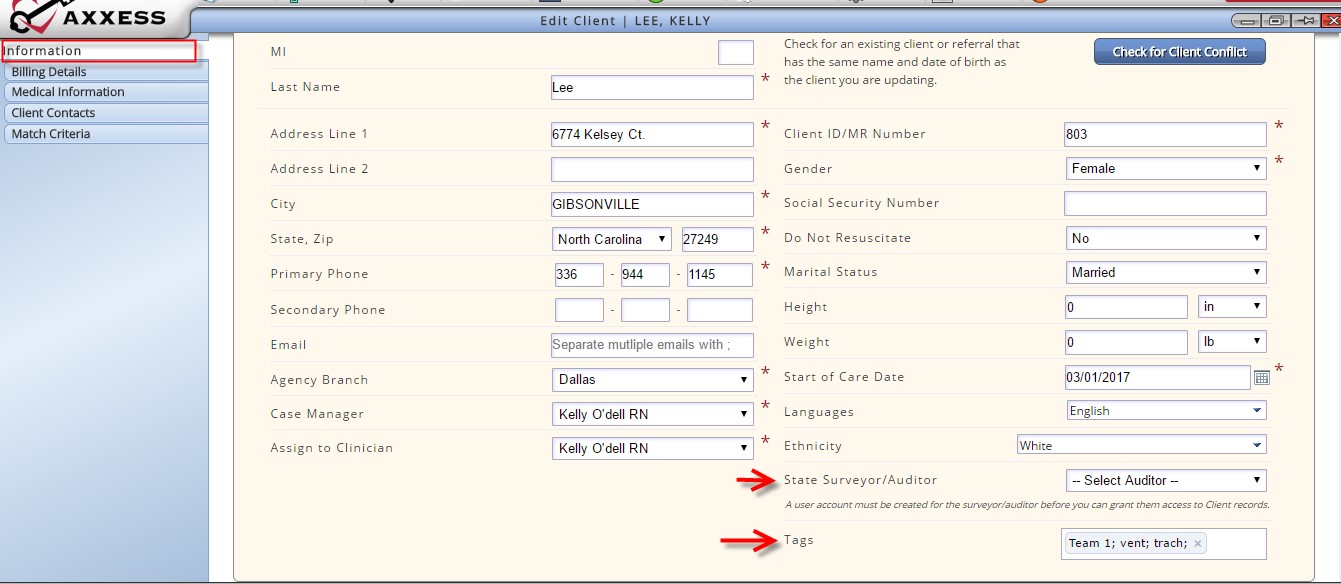
The Selected Client’s Chart information will be available to the right of the client list. Selecting Edit will navigate the user into the Client Chart.

Items that will be discussed under the Edit Client Chart tutorial:
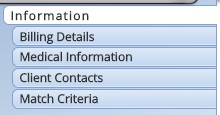
- Information: Demographics (including Tags, State Surveyor), Pharmacies, Evacuation Zones, Services Required, DME Needed, Emergency Triage, Referral Source, and Comments.
- Billing Details: Payment Sources, Accident Information, Client’s Invoice Task Rates.
- Medical Information: Physicians, Admission Diagnosis, Diagnoses. (This will be further discussed later in the tutorial)
- Client Contacts: Add applicable Contacts associated to the client. Contacts may be granted Family Portal access by entering an email.
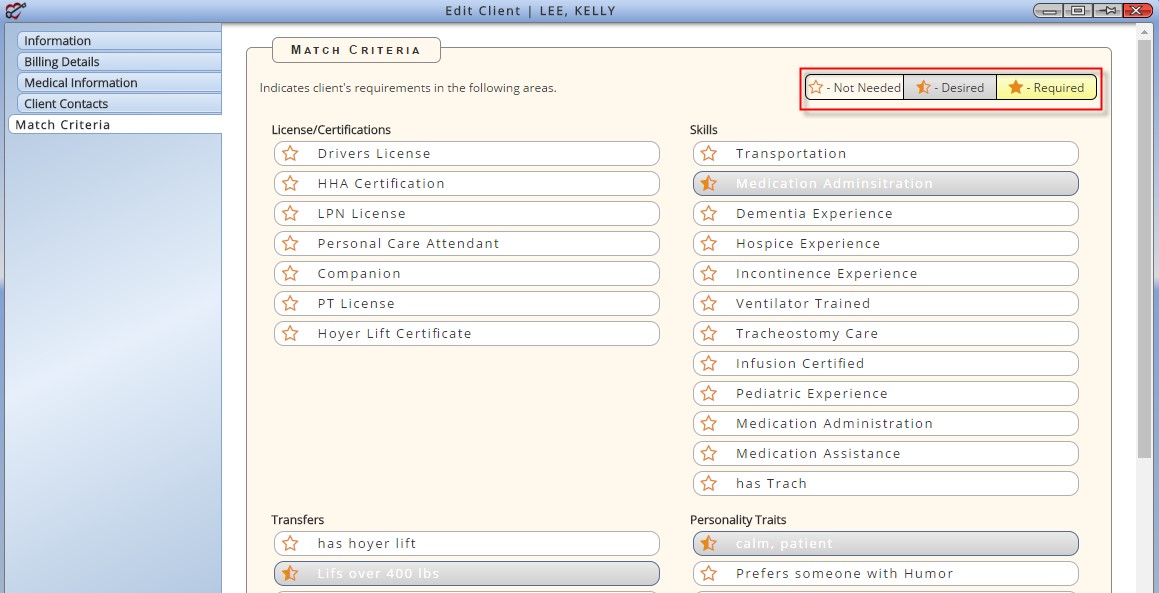
- Match Criteria: select the Matching items that match the Client needs. The matching items may be used when scheduling caregivers to the client. (This will be discussed further in the Scheduling Tutorial)
Information Tab
- Demographics: The demographics flow over from the intake/referral (refer to intake/referral tutorial). Fields are editable as needed.
- State Surveyor: This provides the surveyor electronic access to the client’s chart.
- Tags: Agency has the ability to create tags for clients for grouping purposes. Multiple tags may be used on a client. The tags can be searched for in the main Client search area as well as in reporting. (Tags will also be discussed under User Tutorial section)
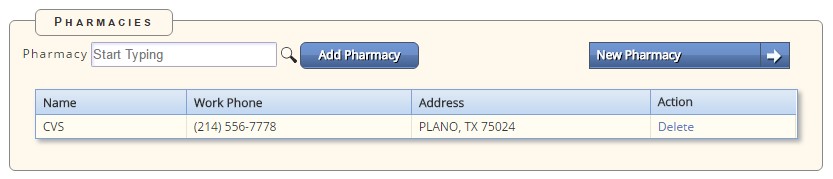
- Pharmacies: (Medical Only) To add a Pharmacy begin typing in the Pharmacy Field. A list of agency pharmacies that match the characters will display. Choose the Pharmacy, then select Add Pharmacy to associate it to the client. All associated pharmacies will be listed in the grid below. Multiple Pharmacies may be added for a client. If a desired Pharmacy is not found, the user has the ability to add a New Pharmacy right from the Pharmacy screen. See “Creating and Managing Pharmacy Information” for further instruction on adding a new Pharmacy to the software. The Pharmacy Information will flow to this section from Intake if it was entered. Existing pharmacies may be deleted using the Delete action item.
- Evacuation Zone: This section is applied to clients that live in areas that require Evacuation necessities. This is based upon Agency Policy and Procedures. (Ex: Hurricanes, Earthquakes, Floods, etc.). This will flow over from intake and can be adjusted or added if not previously entered.

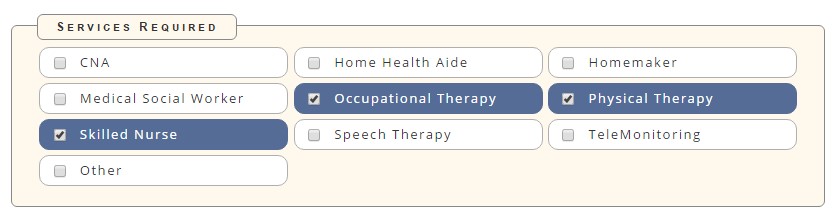
- Services Required Listed services pull from the information set up in Manage Company Information. The displayed list will depend on whether the client is Medical or Non-Medical.
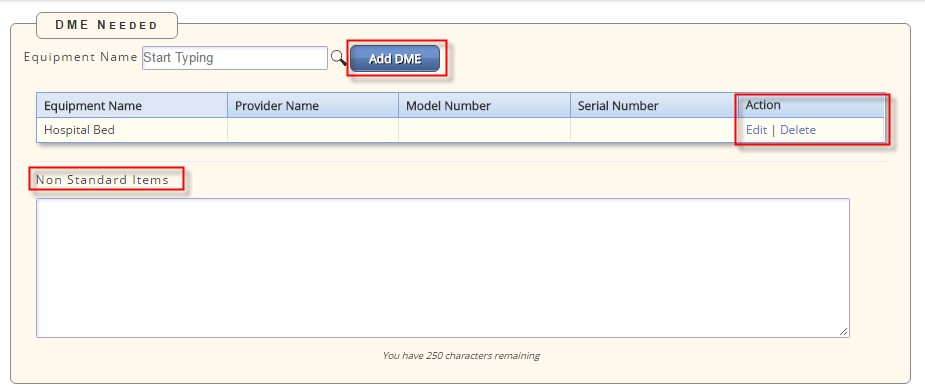
- DME Needed (Medical Only) To add a DME for a client begin typing in the Equipment Name Field. A list of agency DME items that match the characters will display. Choose the item, then select Add DME to associate it to the client. All associated DME items will be listed in the grid below. Multiple equipment items may be added for a client. Once a DME item is added the user had the ability to include optional Provider name, Model number, and Serial Number via the Edit Action. If an item is not in the DME list it may be added in text format in the Non-Standard comment box.
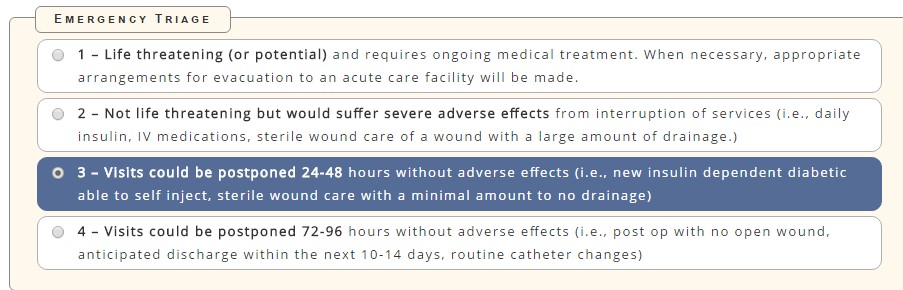
- Triage Levels (Medical Only) Indicate the emergency triage level for the client. The triage levels are agency specific.
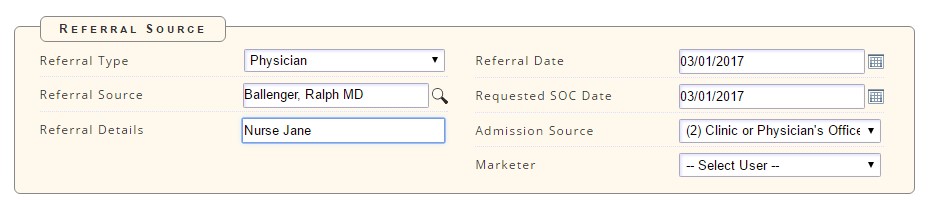
- Referral Source assists the agency in tracking where clients are coming from.
- Referral Type: Describes what external entity sent the referral
- Referral Date: Enter the date the agency received the referral from the referral source
- Referral Start of Care Date: Requested date to begin services
- Admission Source: Where the client came from (Clinic/Physician, Hospital, SNF, etc.)
- Marketer: This is an internal user associated to the referral source.
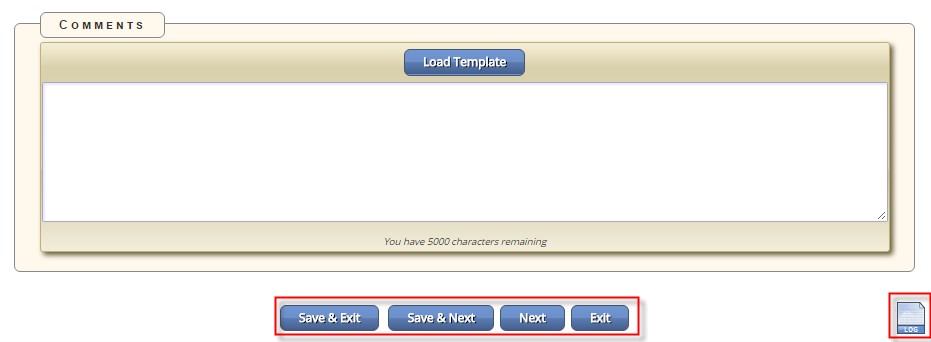
Comments: Any additional client notes may be added here. They will pull to the client profile.
Select one of the Save options if changes were made.
The Activity Log is permission based and viewable in the bottom right hand corner. This indicates when changes were made to the client information.
Billing Details Tab
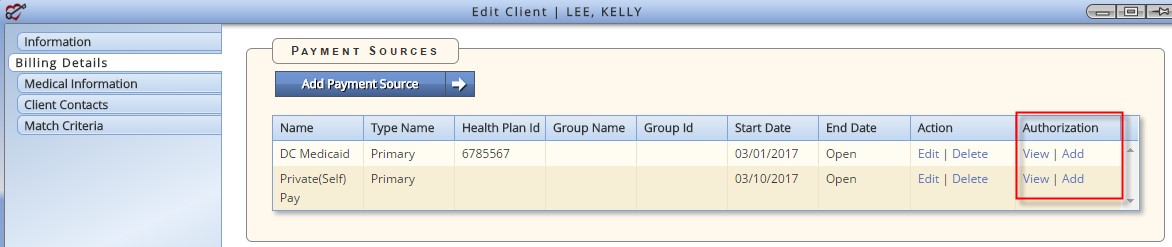
- Payment Sources: This is where the agency manages the client’s payment sources. All Payment Sources added through the Intake process will pull to the list.
- Information displayed includes the payment source name, type (primary/secondary etc.), Health Plan Id, Group Name and Id as well as start and end dates. The last two columns are for editing the existing payment source and managing authorizations associated to the payment source

- The Authorization Column allows the user a quick link to view the authorization screen or add a new authorization for the payment source. Authorizations may also be viewed/added through the client quick reports or schedule center.
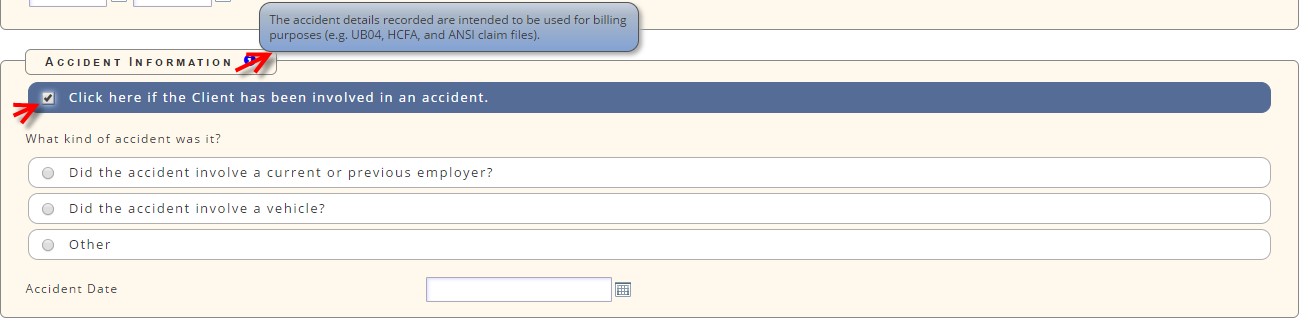
- Accident Information: (refer to Intake Tutorials). Complete this information if the client is receiving services due to an accident. The accident details recorded will pull to the claim information. Indicate the type of accident and the Accident Date.
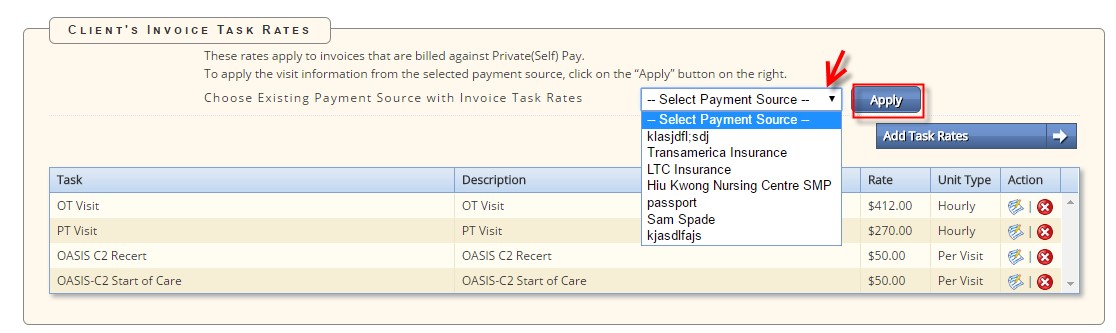
- Client’s Invoice Task Rates: Rates entered in this section ONLY pull for tasks associated to the Private (Self) Pay payment source. All other payment source rates are maintained through the payment source file.
- Users have an option to pull rates from an existing payment source. To apply an existing payment source’s rates choose it from the list and click the “Apply” button. This pulls the rates from that payment source in for the client. Tasks not applicable for the client may be deleted and existing rates edited as needed. (Please see the Tutorial on Payment Source Set up regarding setting up Task Rates for Payor)
Medical Information Tab
- Physician Information:
- To associate a physician to the client begin typing the physician name in the Physician Search Field. Select the physician and Add Physician. At that point the physician will be added to the physician list. If only one physician is added they are presumed to be the primary (signing orders). When more than one are added the user has the ability to indicate which is primary. The Primary physician may or may not be the same as the referring physician.
- Use the New Physician option to add physicians not currently associated to the agency. See, “Creating and Managing Physician Information” for further instruction on adding a new Physician into the software. All physicians added during the intake process automatically populate to the grid. Once associated, a physician may be deleted (for the client), made as the referral or primary.

- Admission Diagnosis: If the client’s payment source requires admission diagnosis information on the claim it may be entered here. Diagnoses may be added using the search by description or code option. Once the Diagnosis Code is entered a blue book displays which is a link to Medline Plus and is a Teaching Guide to that Diagnosis.
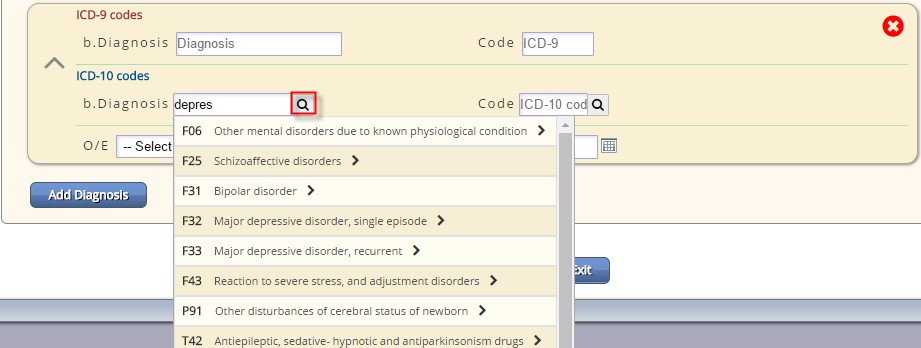
- When adding ICD-10 the magnifier must be selected to activate the search. Type either 5 characters of the description or 3 of the code and select the magnifying glass. This will initiate the search functionality. A filtered list will display for selection.

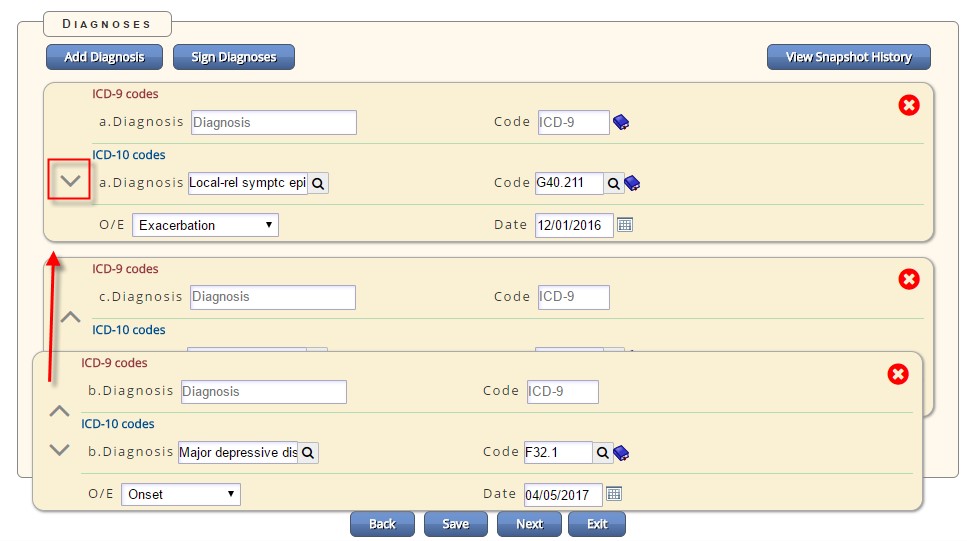
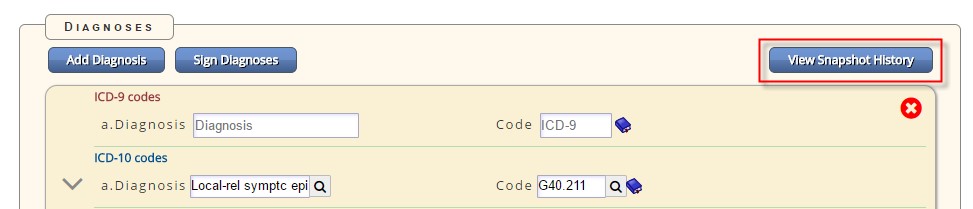
- Diagnoses: All Diagnoses relevant to the client must be added under the Diagnoses section. This includes the Admission Diagnosis. If the Admission Diagnosis is an active diagnosis it must be added in this section to be included in any Orders and listed on the claim.
- To add an ICD-10 diagnosis: Type either 5 characters of the description or 3 of the code and select the magnifying glass. This will initiate the search functionality. A filtered list will display for selection. Indicate the O/E and Date of the diagnosis.
-
- The Diagnosis listed at the top is considered the primary diagnosis for the client.
- Diagnoses may be rearranged by dragging and dropping the diagnosis or by using the arrows positioned to the left of the diagnosis.
-
- Once all Diagnoses are added and are listed in the desired order select to save the page.
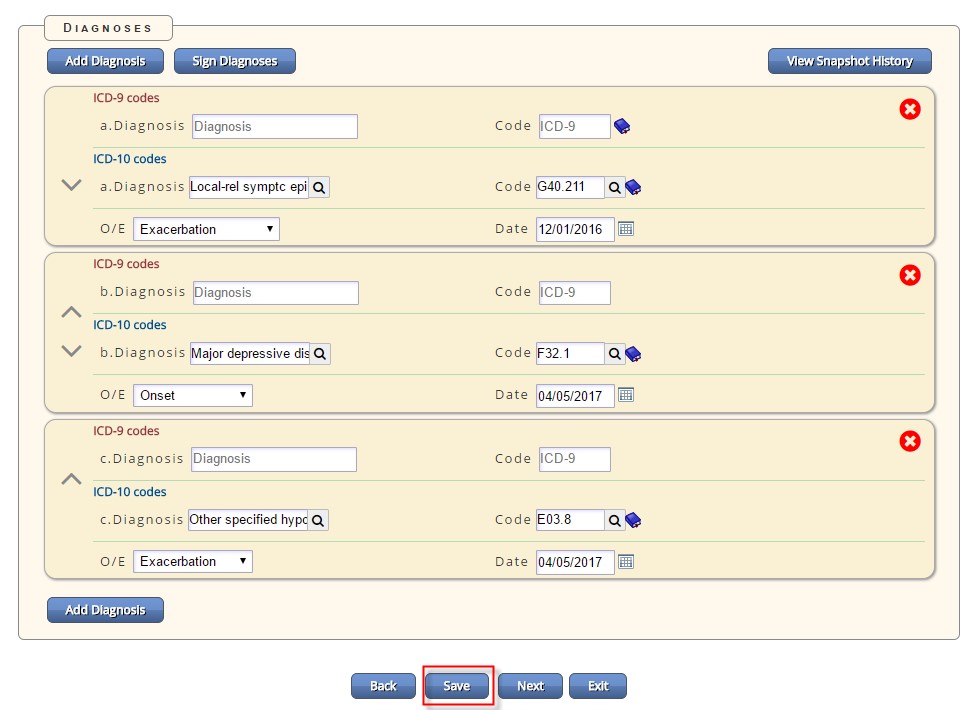
For Diagnoses to populate to orders and claims, a diagnoses snapshot must be created. The snapshots allow agencies to keep a history of the client’s diagnosis throughout their admission. To create a snapshot, click the “Sign Diagnoses”.
- The client name is displayed along with an effective date. The date defaults to the current date. Update as needed. Orders and Claims use the effective to pull in applicable diagnoses and will only use snapshots with an effective date on/before the date of the respective order or claim.
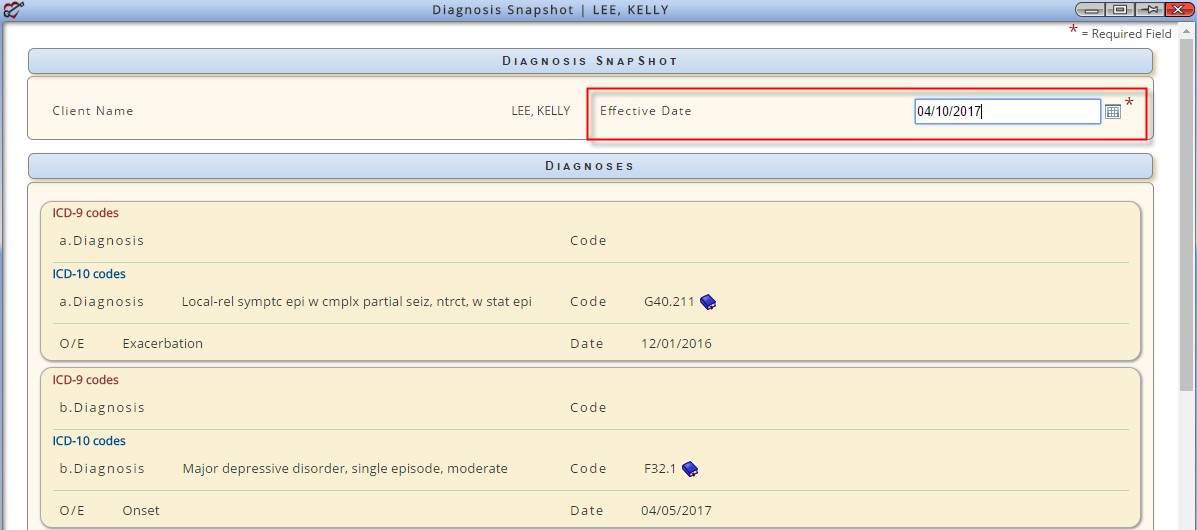
- The bottom of the snapshot contains the signature and date fields for completion. After completing click Sign to save the snapshot.
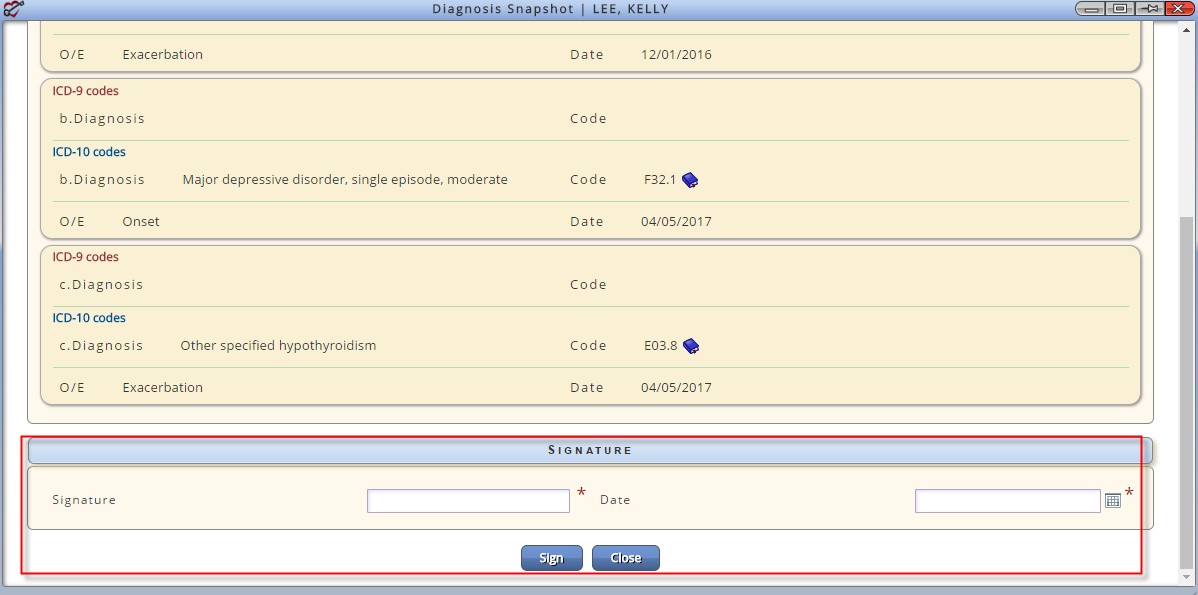
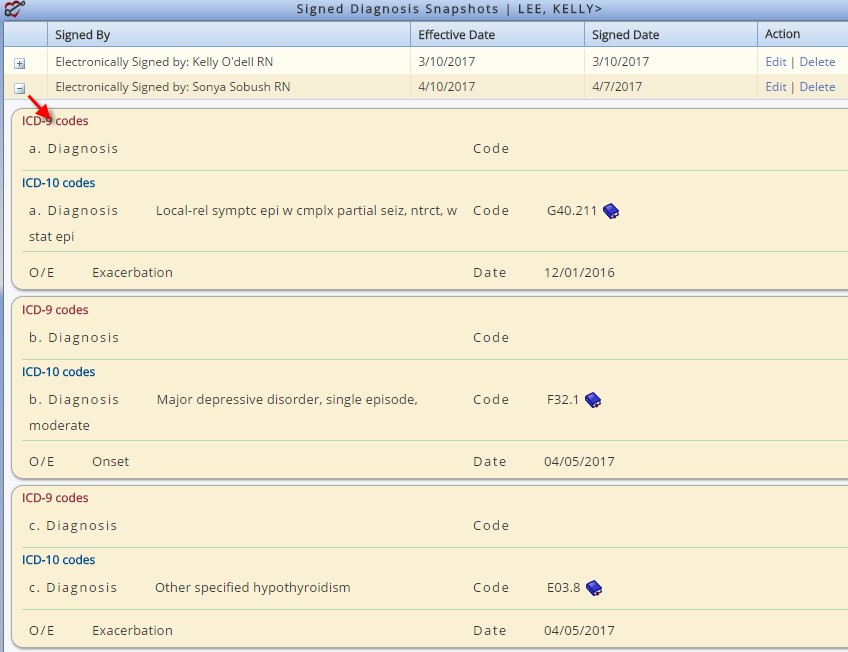
- Existing Snapshots may be viewed through “View Snapshot History” Button.
- Signed Diagnosis Snapshots: When user clicks on the “View Snapshot History” they can view: who has signed prior snapshots, effective dates, signed dates. The diagnoses associated to the snapshot may be viewed by clicking on the plus sign in the left column. Edit provides the ability to edit the effective date and delete will delete the entire snapshot.

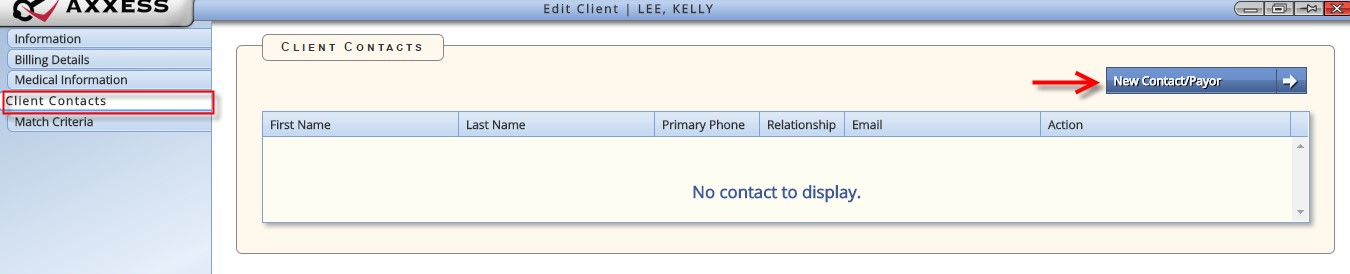
Client Contacts Tab
- New Contact/Payor: Clients may have multiple associated contacts. Contact relationships include: Emergency, Financial Payor’s, POA, etc. This is where family portal access is also maintained. To add a client contact, select New Contact/Payor
-
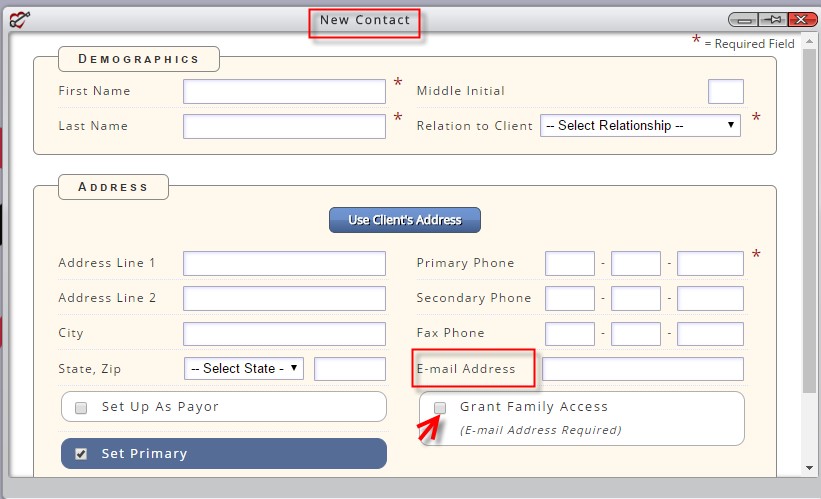
- New Contact Tab: Minimum information to save a contact is indicated by a Red Asterisk. First, Last Name, Relationship to Client and Phone Number.
- To grant Family Portal Access enter the user’s email address and select Grant Family Access. They will receive a link to set up their family portal sign-on.
-
- Contacts may be set as a payor, the primary or both. Ensure address information and/or email information is complete if the contact is a Payor (mailing or emailing invoices)
- Match Criteria: Matching is an option available during the scheduling process. When used, the system will provide a list of employees that match the needs of the client. The matching list is custom created by the agency. Select criteria that the Client requires clicking on desired item. One click indicates it is a Desired match, Two Clicks indicates Required, a Third Click will make it Not Needed. Further Tutorial on how the Matching Criteria will be utilized will be discussed in the Scheduling Tutorial.
This concludes the Edit Client Tutorial for Axxess HomeCare.
