x
Join our new Axxess User Community to connect, share, learn and grow together.Learn More
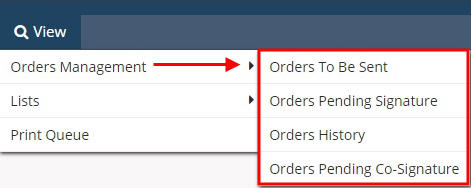
View/Orders Management
Orders Management is where approved orders are processed to and from the physicians. You can access Orders Management through the menu bar. The Orders Management Center is where users can access sub-menus that include:
View/Orders Management/Orders To Be Sent
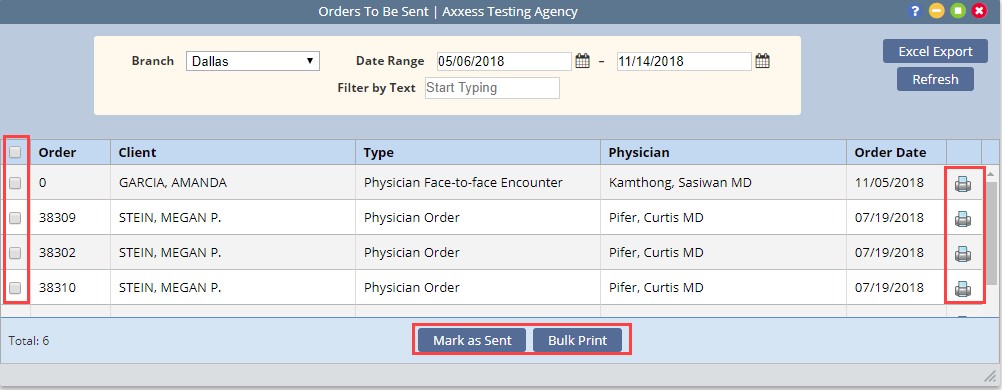
The “Orders To Be Sent” screen will populate the items ready to be sent to the physician manually (fax, mail, deliver).
NOTE: Electronic Orders are currently under development.
Within the orders sent screen, sort and filter by the below items:
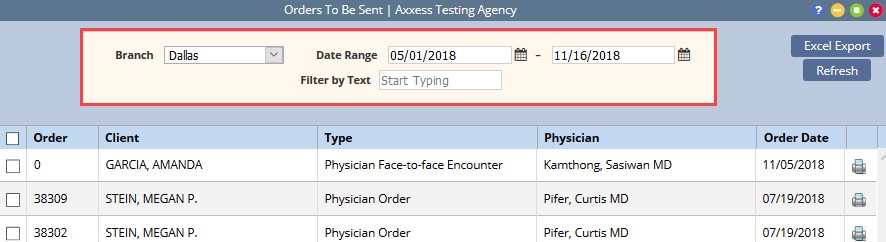
Once the order list is generated, it may be sorted by any of the column headers (Order/Client/Type/Physician/Order Date).
Once the orders are printed, the user updates the orders by selecting “Mark as Sent”. Orders marked as sent to physician, move to the “Orders Pending Signature” submenu. The order is also updated to a “Sent to Physician” status in the Client chart.
NOTE: If using Bulk Print, minimize the page until the user chooses to print the orders, then open the page and select “Mark as Sent.” All the orders selected for the bulk print will still be checked.
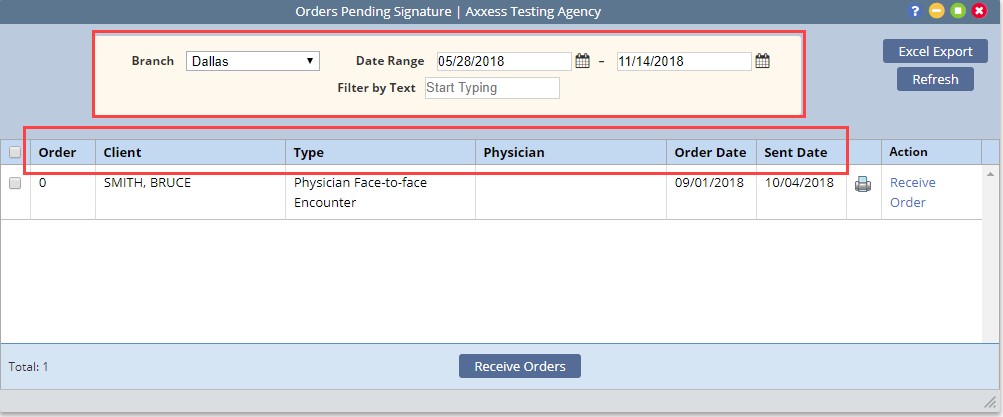
View/Orders Management/Orders Pending Signature
This menu is used to track outstanding orders and mark as received. The default date range is 60 days back from the current date.
NOTE: The date range refers to the Order Date, not the Sent Date. This is important because most states require orders to be signed within 30 days of the order date, not the date sent. Please check the agency’s state policies to ensure the user is tracking orders against the correct timeframe.
Any of the columns may sort the list: Order/Client/Type/Physician/Order Date/Sent Date.
Individual orders may be received by selecting “Receive Order” in the far right-hand column for the appropriate order. Multiple orders may be updated by selecting all applicable and selecting “Receive Orders” at the bottom of the page.
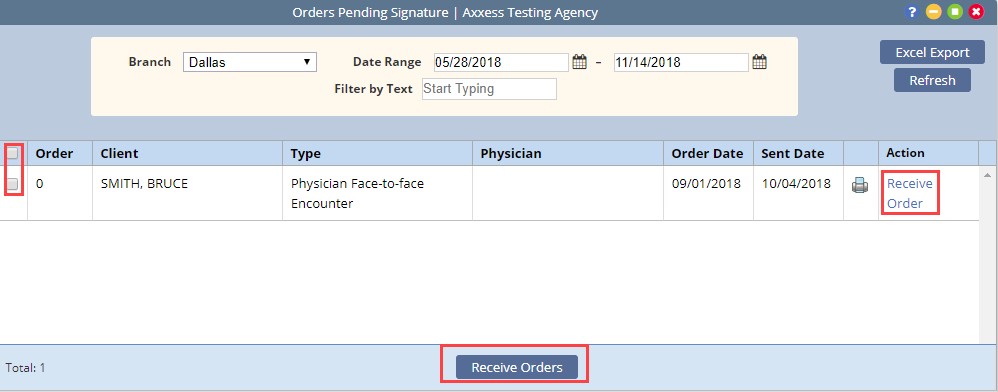
Select multiple orders at one time to mark as received. Select the applicable orders on the far left-hand side and select “Receive Orders” at the bottom of the screen. A pop-up will display to confirm the Received Date and Physician Signature Date.
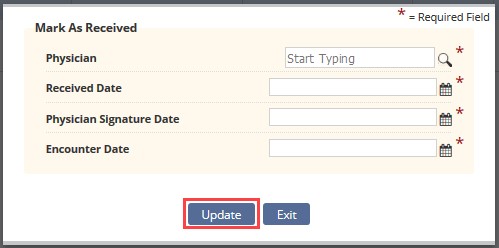
Once an order is marked as “Received”, it moves to the Order History screen. The order will also be updated in the patient chart to indicate “Returned W/ Physician Signature.”
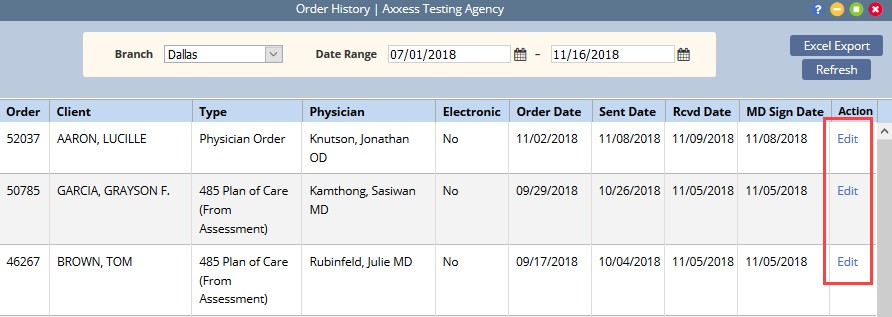
View/Orders Management/Orders History
Once an order is marked as “Received”, it moves from the Pending Signature Screen to the Order History screen. The order also updates to Returned W/ Physician Signature in the Client chart.
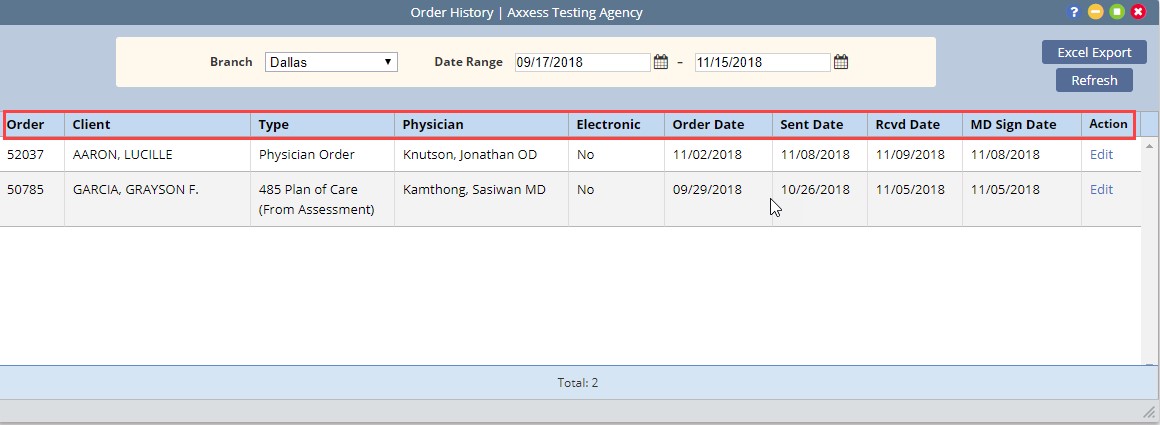
If the order Sent Date, Received Date, or MD Sign Date was entered incorrectly, corrections can be made by selecting “Edit” in the Action column. Upon selection, a pop-up window appears allowing updates to one or all the dates.
Selecting “Update” will save the changes and “Exit” will discard any changes to the record.

View/Orders Management/Orders Pending Co-Signature
User permissions allow the agency to set up specific users to require co-signature on all orders. Once on this screen, the user can filter for Branch, Date Range, as well as search for a Patient name. Selecting a column title will sort the list by title. Select “Refresh” once filters have been updated. The information can also be exported to Microsoft Excel for further analysis.
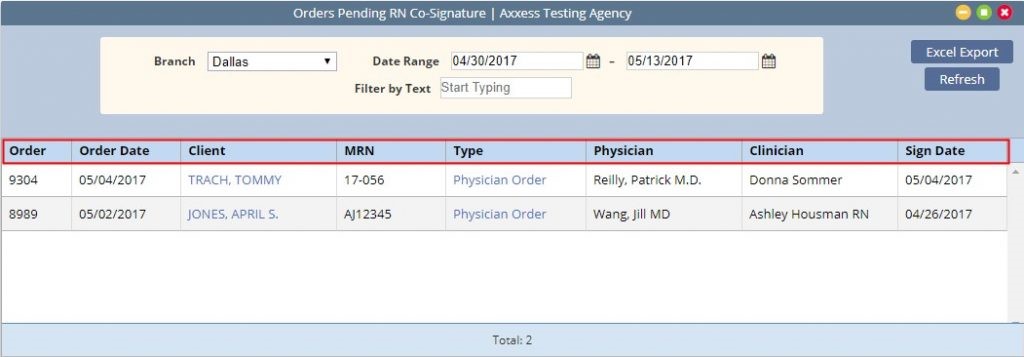
Both the “Client Name” and “Type” are links.
“Client Name” link navigates the user to the client center-client chart while the “Type” link opens the order for review and ability to co-sign the note, return to the caregiver, download, print, or close.
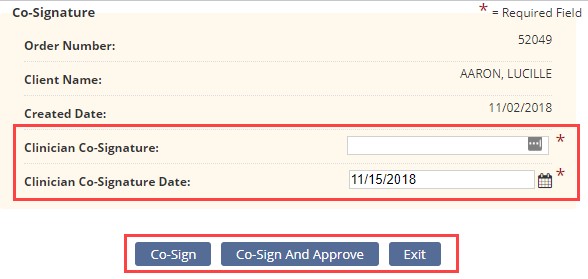
To complete the co-signature process, select the “Type” hyperlink of the item to be co-signed. A PDF preview of the order will appear where there is an option to Co-Sign, Return, Download, Print, or Close.
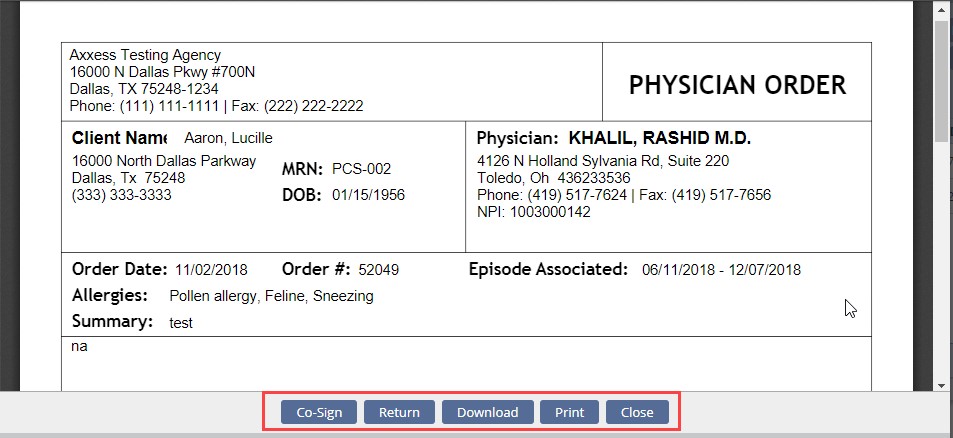
After “Co-Sign” is selected, a confirmation box will appear. Enter the signature & signature date and select either “Co-Sign” or “Co-Sign and Approve” based on permissions and agency policy. If “Co-Sign” only is selected, the order will flow to the QA Center for approval. If “Co-Sign and Approve” is Selected, the order bypasses QA center and gets approved.
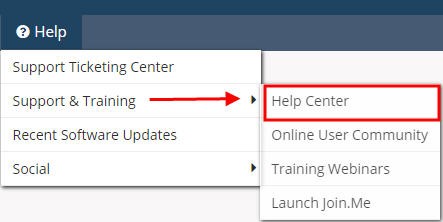
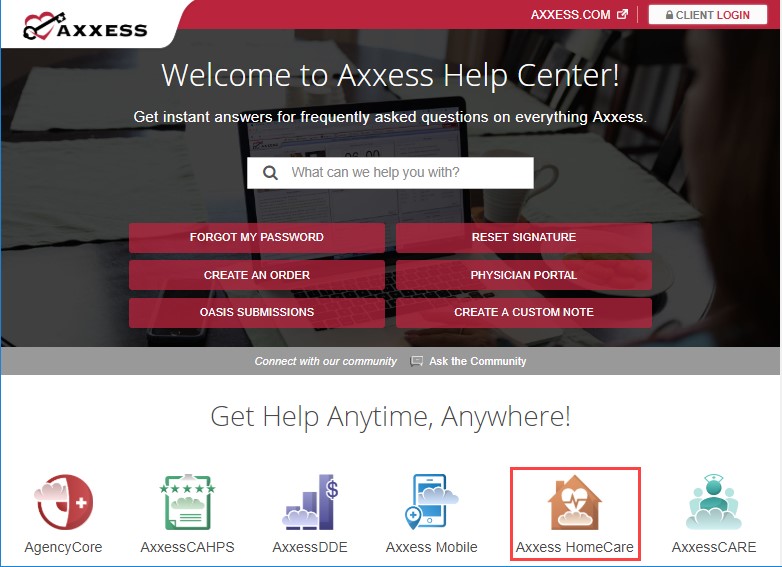
Our Help Center is a great resource that is available 24/7. Here you can get answers to frequently asked questions or watch videos on all our Axxess solutions. You can access our Help Center by going to Help/Support & Training/Help Center or https://www.axxess.com/help/