x
Join our new Axxess User Community to connect, share, learn and grow together.Learn More
The first step in the payroll processing functionality is to assign Visit Pay Rates and Non-Visit Pay Rates to each of the users.
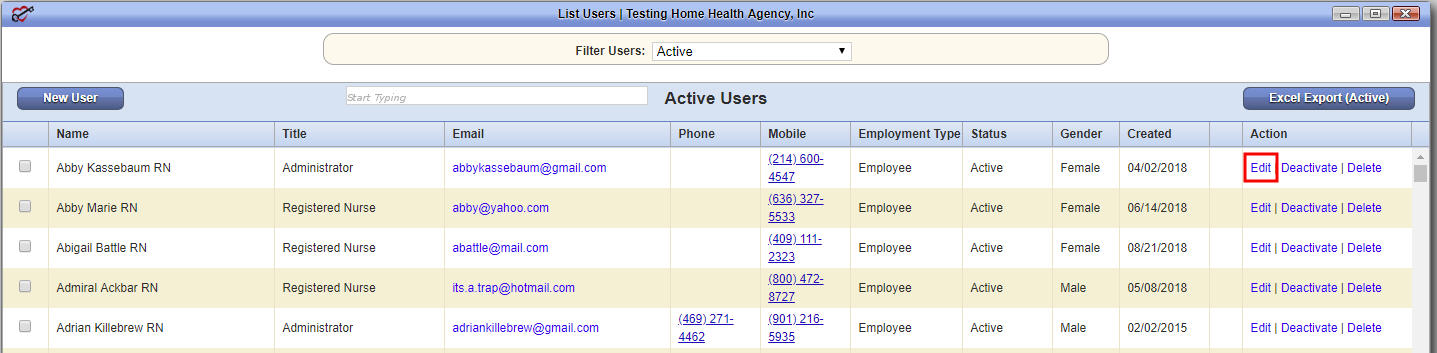
Find the name of the user to add Visit Rates to and select “Edit” on the right-hand side of the screen.
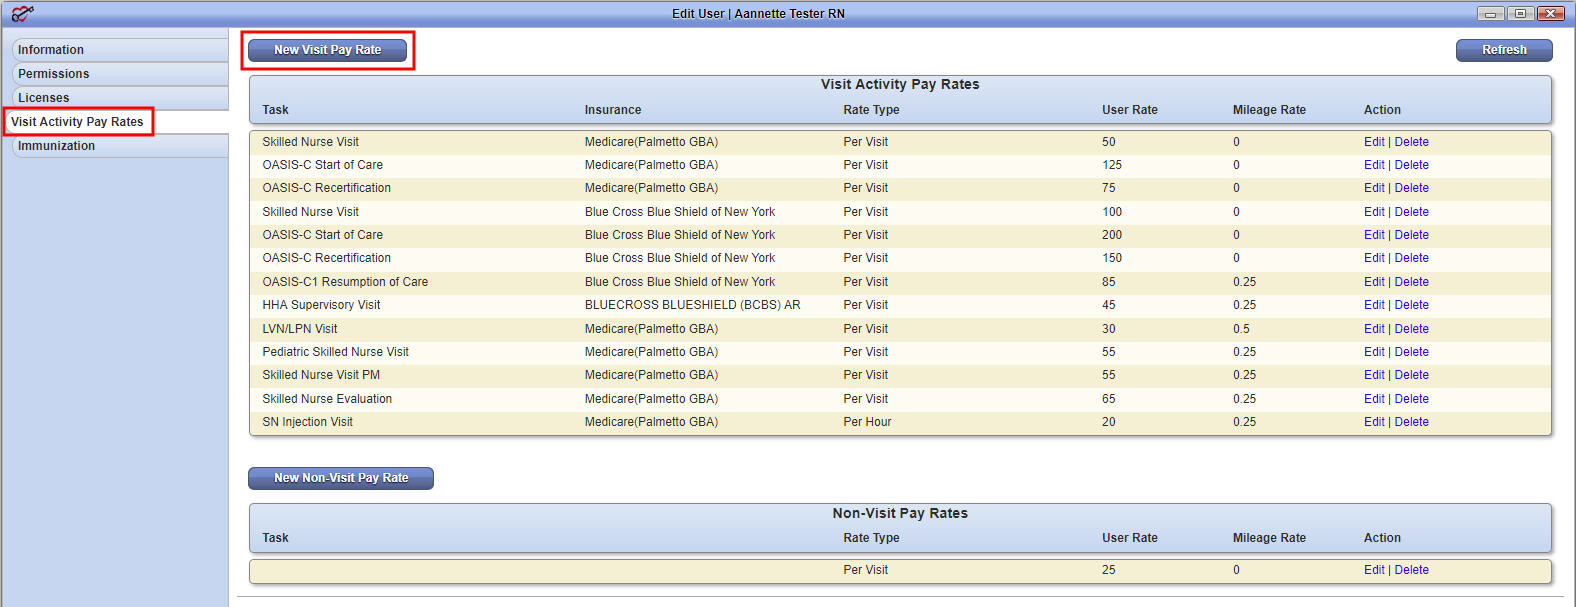
The user’s profile window will open, select the “Visit Activity Pay Rates” tab on the left-hand side of the screen.
NOTE: Anything with a red asterisk (*) is required.
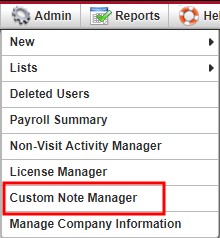
Admin/Custom Note Manager
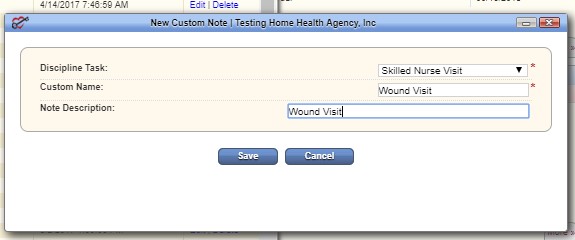
The list of tasks was already set up in the Custom Note Manager. To create a new task, select “Create New Custom Note.”

The following box will appear to enter the Task information. Choose the Discipline Task from the drop-down menu, enter the Custom Name and an optional Note Description. Once completed, select the “Save” button.
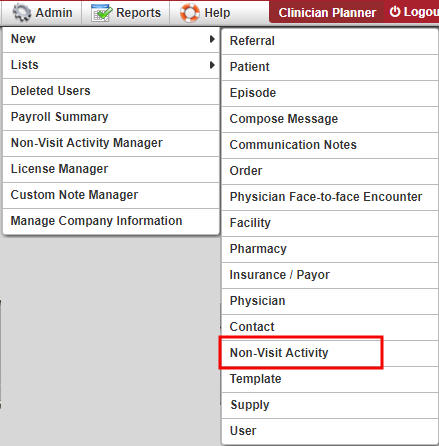
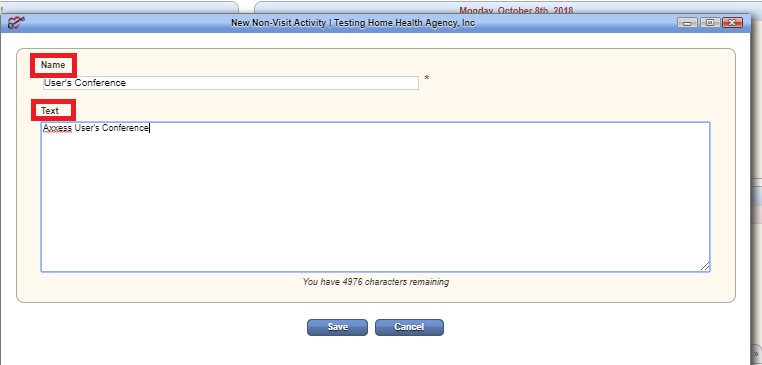
Admin/New/Non-Visit Activity
The box below will appear, allowing for entry of Non-Visit Activity details. Enter the Name and Text. Once completed, select the “Save” button.
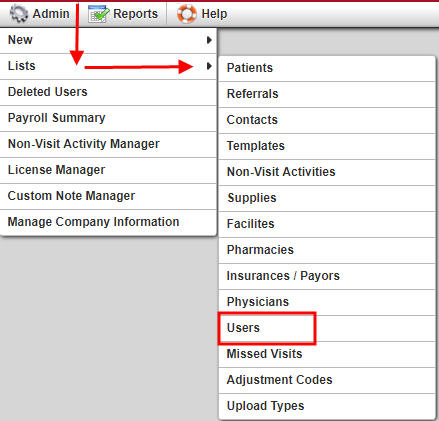
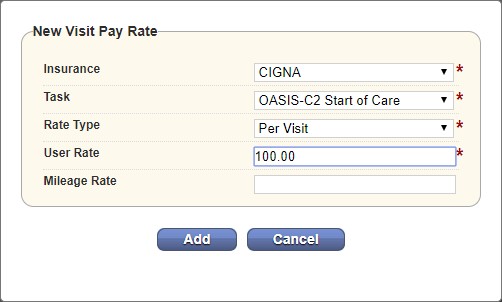
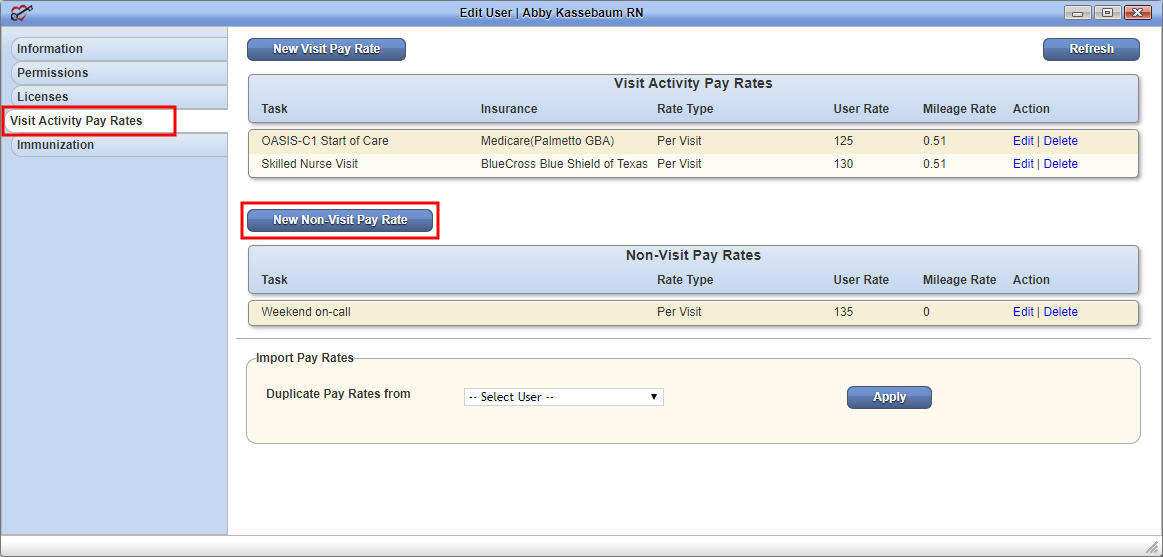
Admin/Lists/Users/Visit Activity Pay Rates
To assign a rate to a New Non-Visit Activity in a user’s profile, pull up the user and make sure the Visit Activity Pay Rates tab is selected. Select “New Non-Visit Pay Rate.”
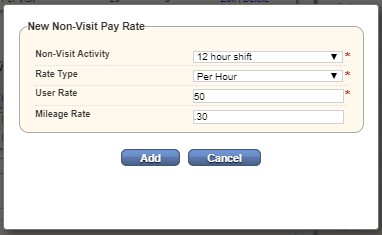
The New Non-Visit Pay Rate window will appear. Enter the information then select the “Add” button.
Now that Non-Visit Pay Rate has been added to the user, Assign the Non-Visit Activity to a user. This is the process that will pull to the Payroll Summary Report.
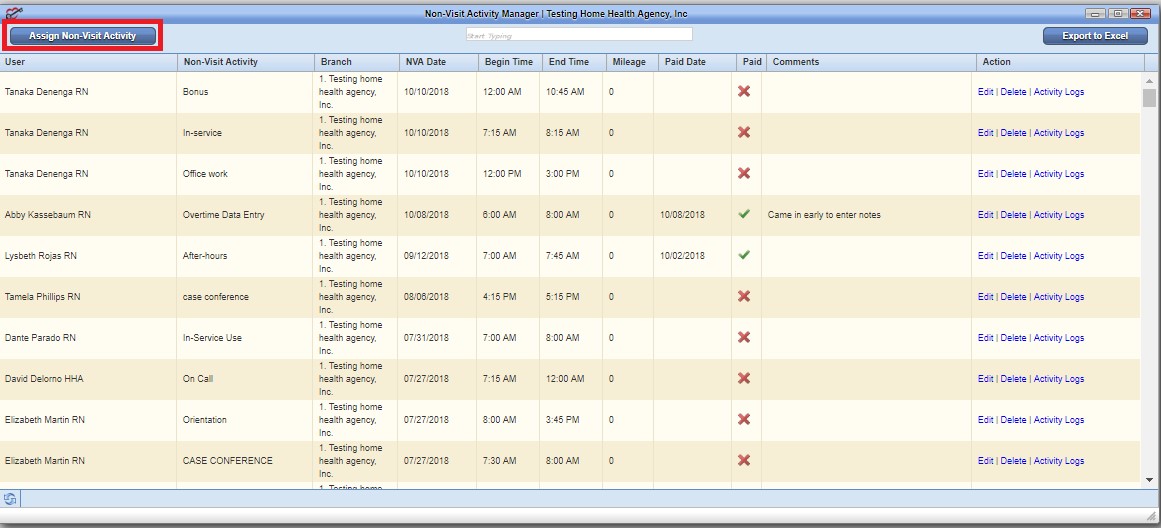
Admin/Non-Visit Activity Manager
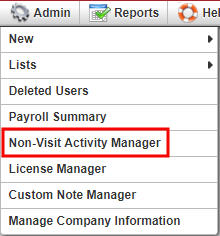
The Non-Visit Activity Manager will open. Select “Assign Non-Visit Activity.”
Once the button is selected the window below will open.
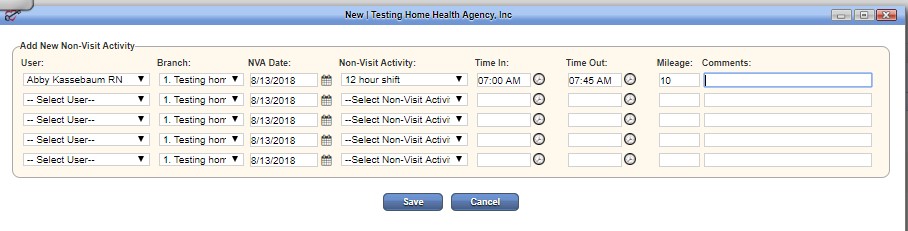
Select the user, branch, NVA Date, Non-Visit Activity, Time in, Time Out, Mileage, and any Comments that may pertain to this entry. After entering all criteria, select “Save.” Now the user’s Non-Visit Activity will pull the rate set up and appear in the Payroll Summary.
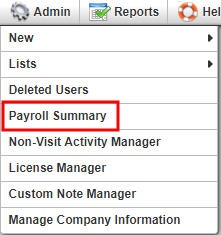
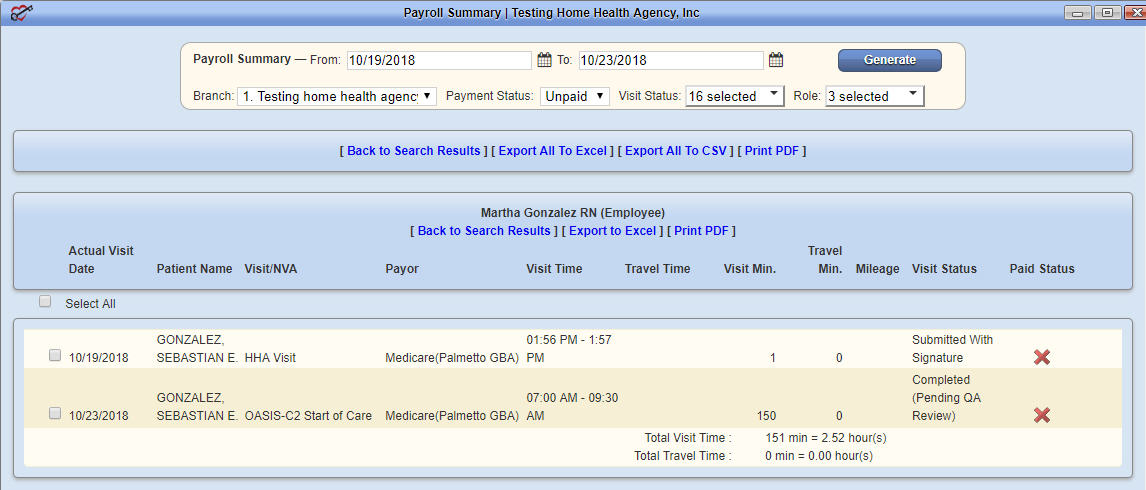
Admin/Payroll Summary

There are filters at the top of the screen, that all you to choose what information you want to view.
Once you have entered the criteria you want to view, select ![]() . A Summary will display on the screen.
. A Summary will display on the screen.
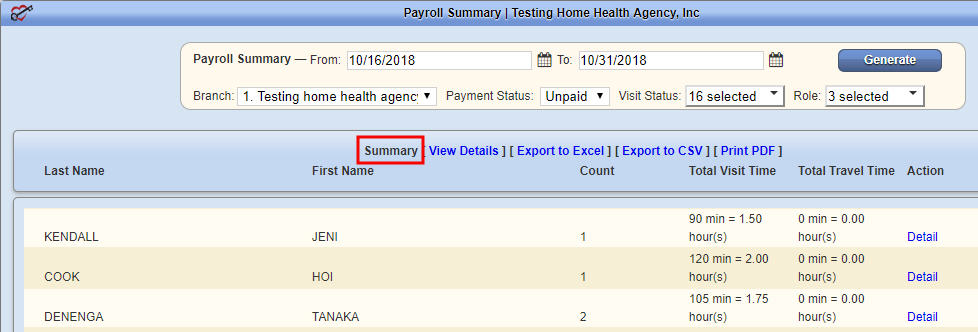
The Summary will display one row per user, with the total count of visits, Total Visit Time, and Total Travel Time. The option to View Details, Export to Excel, Export to CSV, and Print PDF are also available on this Summary.
![]() – Visit has already been paid.
– Visit has already been paid.
![]() – Visit is still unpaid.
– Visit is still unpaid.
Print PDF – When the “Print PDF” has been selected, a document will be created that pulls all the payroll details, as well as the amount the agency owes each user, allowing processing of payroll.
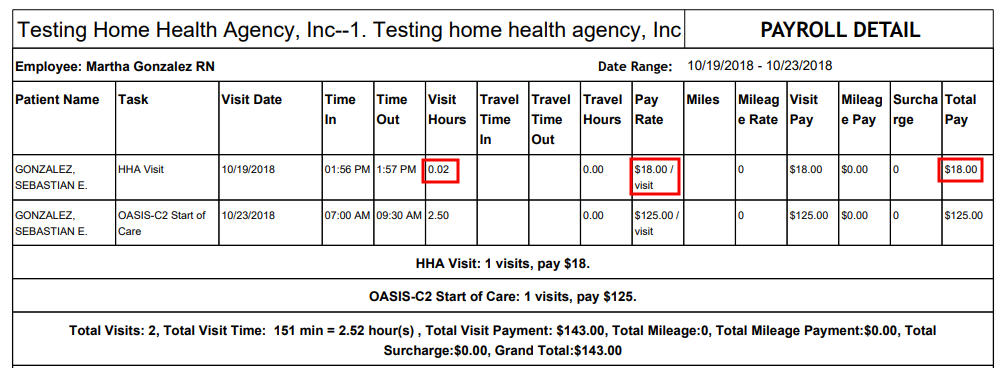
The number of hours in the visit are multiplied by the Pay Rate (the rate set up in the user profile). It will calculate a Total Pay amount for this visit.
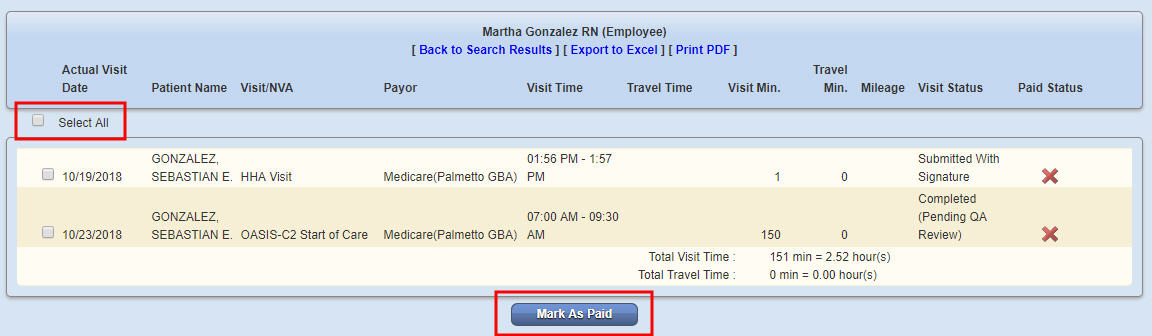
Export to Excel – All the data from the PDF Printout will appear in an Excel Workbook. Users can filter, manipulate and sort dates. After running the Payroll Summary for Unpaid activity, make sure the activity is marked as paid.
Reports/Report Center
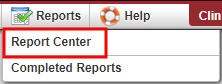
Select the Report Center. The Report Center lists multiple reports that can pull up agency data. The reports are grouped into sections based on the type of information it displays.
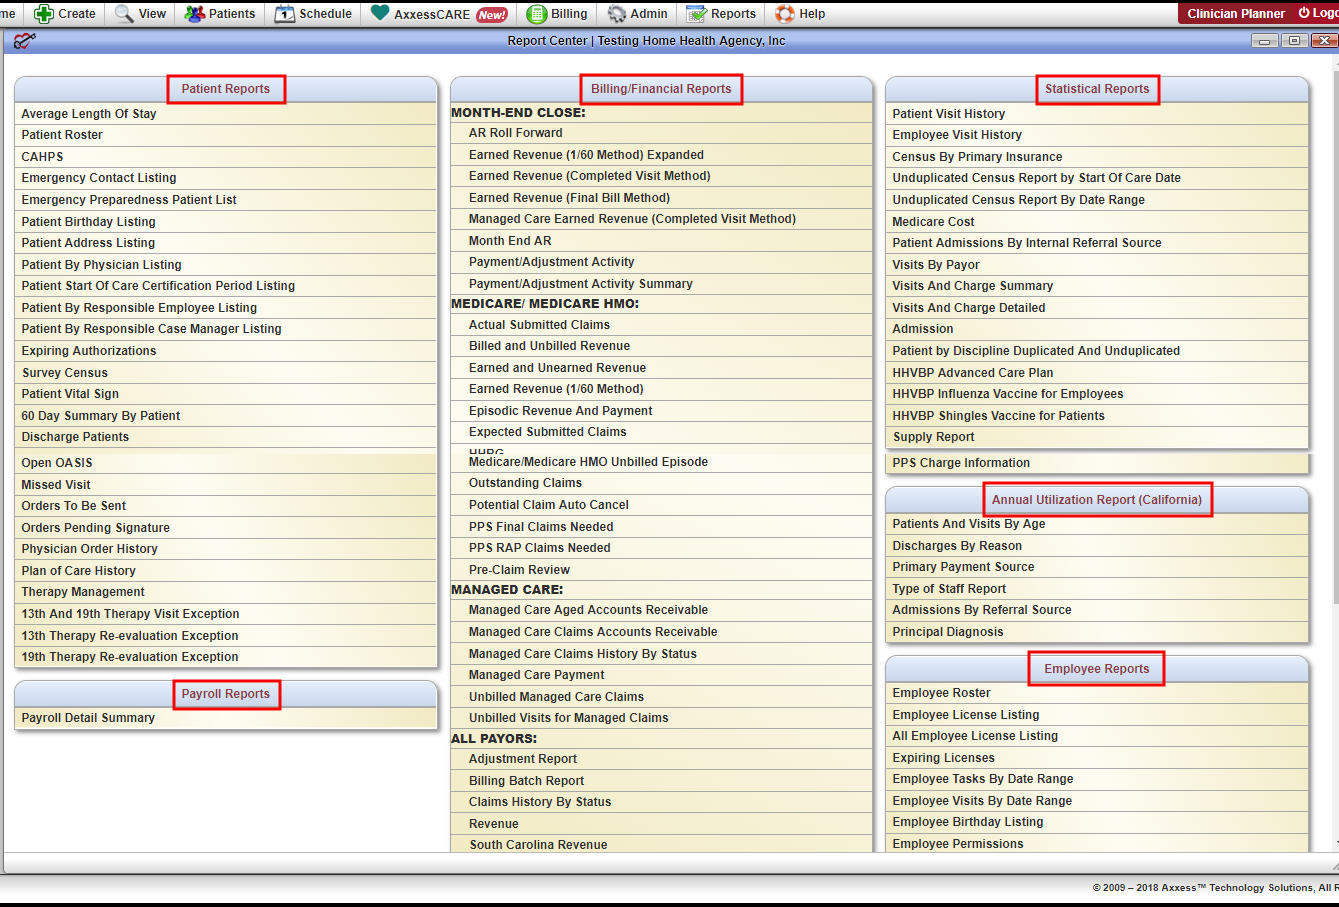
NOTE: Viewable reports are based on the role users are set up as (User Setup is covered in Administrative).
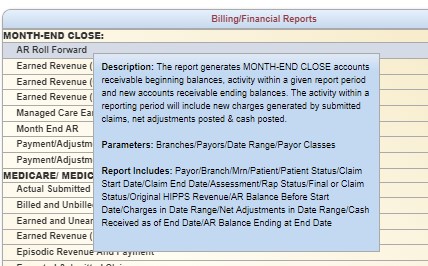
For more information about what data the report is displaying, simply hover over the report name. A blue box will appear giving more details.
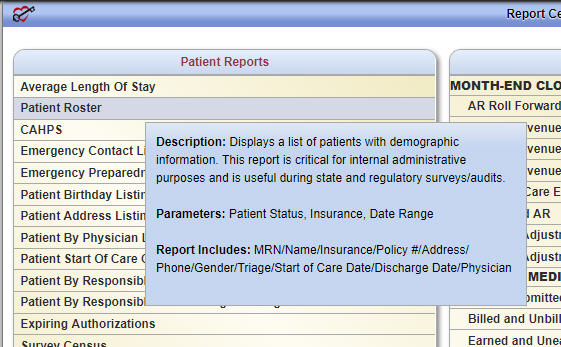
The Patient Roster Report is selected, and the blue box appears. Select the name of the report, and a new box will open, allowing users to Generate the report.
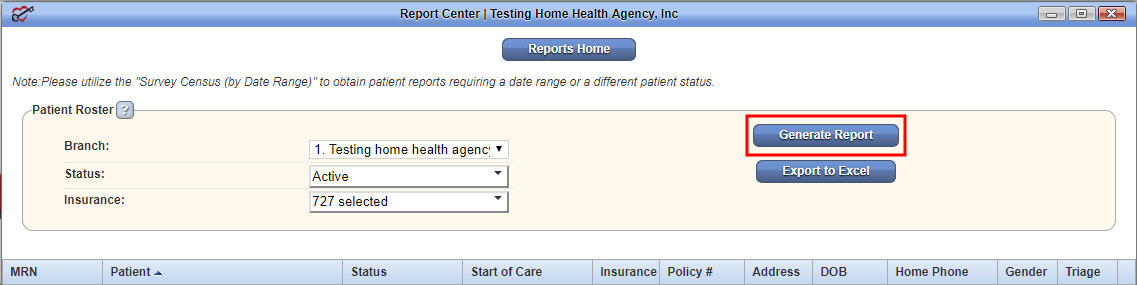
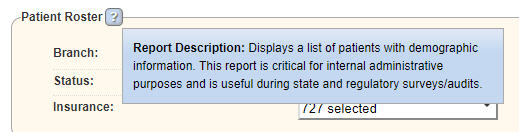
The name of the report will be listed in the upper, left-hand part of the screen. Next to the name of the report will be the ![]() icon. While hovering over this icon a report description will display.
icon. While hovering over this icon a report description will display.
Once desired criteria have been chosen, select “Generate Report.” The report will display on the bottom of the screen.
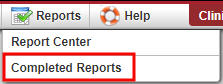
Reports/Completed Reports
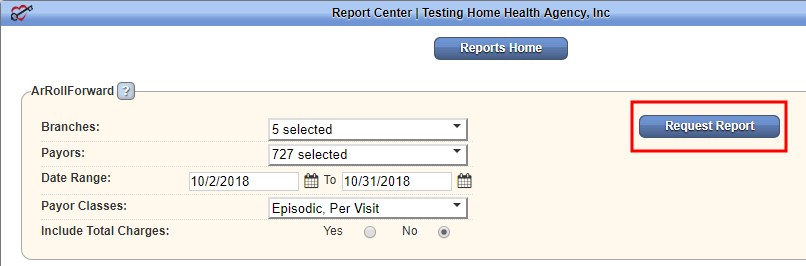
Some reports in the Report Center will need to be requested, rather than generated. Once a report is requested, the data will begin pulling, and once it is finished the report will be located in the Completed Reports section.
For a report to appear in the Completed Reports section, they will need to follow the following workflow:
Fill in the search criteria, then select “Request Report.”
Now that the report has been requested, it will be in the Completed Reports list.
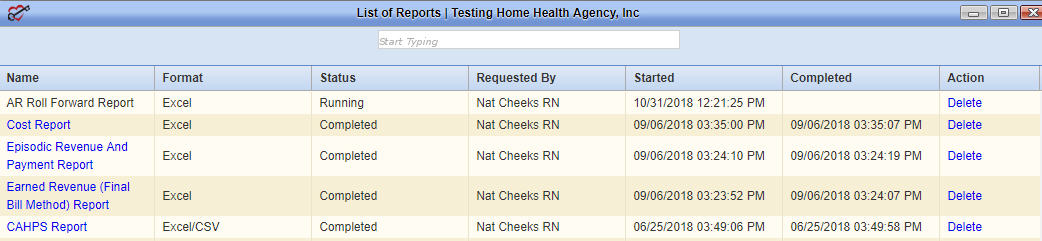
The status column will show when a report is finished pulling in all the data. The following status descriptions will appear:
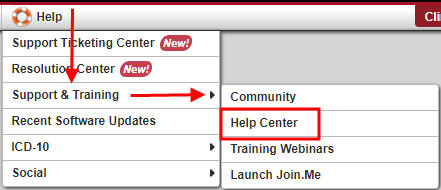
A great resource that is available 24/7 is our Help Center. A place to get answers to frequently asked questions or watch videos of all of Axxess products. It can be accessed by going to Help/Support & Training/Help Center
Or also available at https://www.axxess.com/help/