This tutorial will provide you with an overview of how to Schedule a New Client Task in Axxess HomeCare.
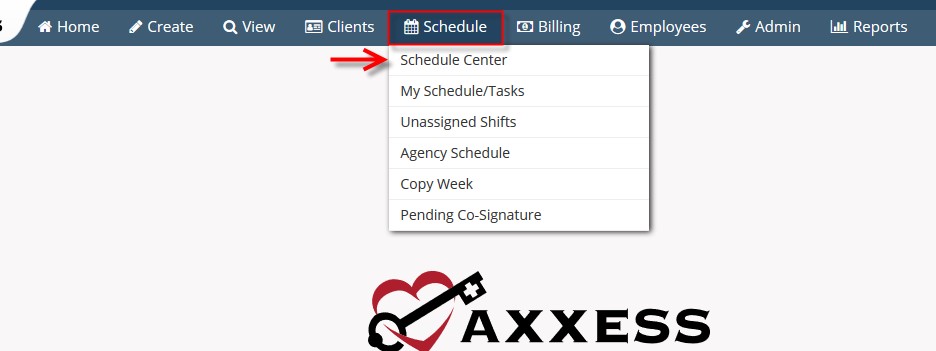
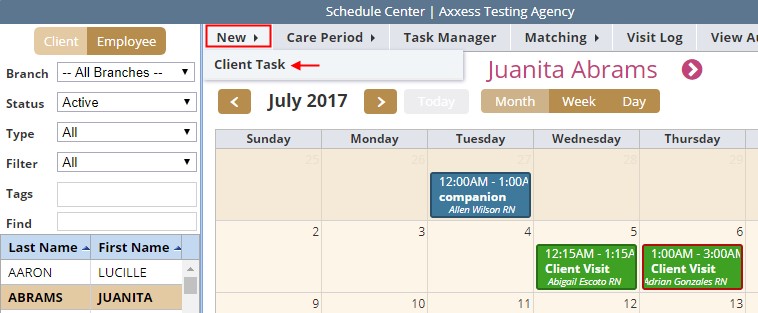
Navigate to “Schedule” tab > select Schedule Center
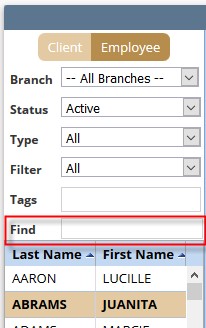
Select your client through your client list at the left or you can type in your client name in the “Find” Bar.
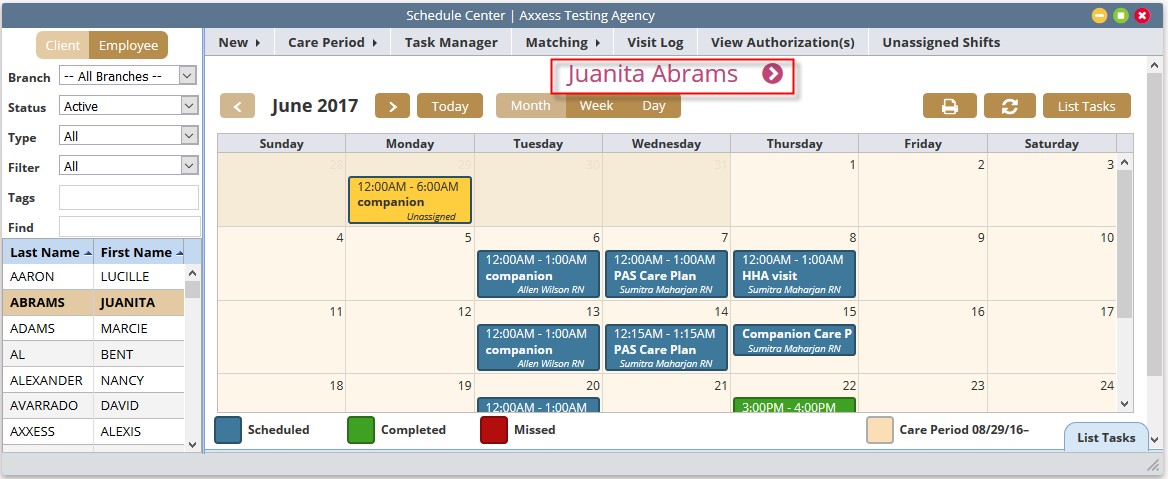
Once selected the client’s schedule will be populated on the right hand side of the page.
New Client Task:
There are two ways to schedule a new client task.
Both paths will pull up the Employee Scheduler for the selected client. Schedule related times, payment source, task,
recurrences, staff, and any comments for that client.
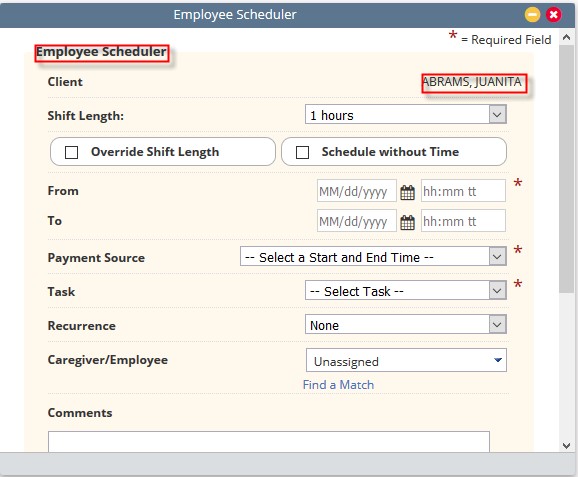
Let’s discuss in further detail the Employee scheduler, each piece and what it allows the agency for scheduling purposes.
start time is entered; Override the Shift Length allows manual input of the shift in and out times (useful when it
doesn’t match an option in the drop-down list). Last is the option to schedule without a time.

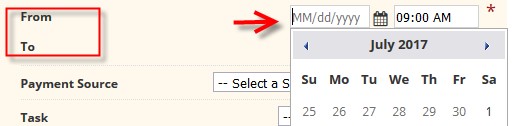
2. From: and To: Agencies will place the date of Service in the From and To areas. If the agency Selects a Shift length
hour from the drop-down selection once they place the start time it will automatically calculate the end time. (Ex: 2-hour shift
length…. 9 am start will automatically populate to end at 11 am). If the agency selects to Override Shift Length then the
agency will set their own start and end time. (Ex: 9:15am to 11:30am). If the agency selects to Schedule without time then
the start and end time will disappear.
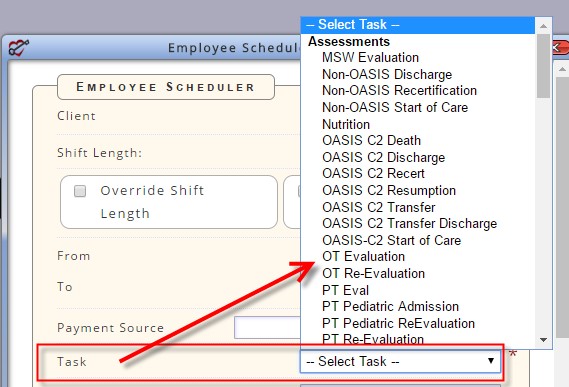
that cover the date being scheduled. Select the Payment Source paying for the scheduled task.

types of documents the agency has created: Assessments, Visit Notes, Care Plans, Orders, Coordination of Care and Supervisory.
(See Manage Company Information-Document management for more information on setting up task documents).
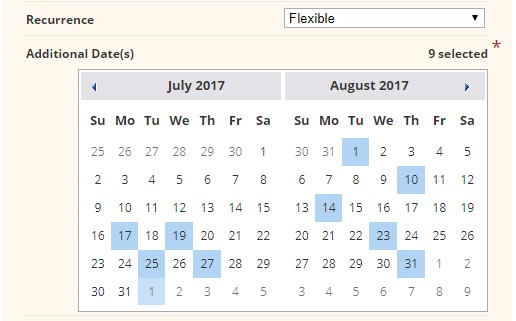
based on the client’s specified need. If a recurrence schedule is used the user must indicate an “end date” of the recurrence
and for the daily/weekly options how often the task repeats
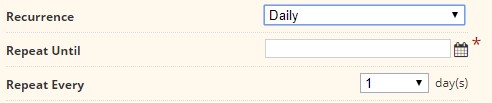
Recurrence Options:
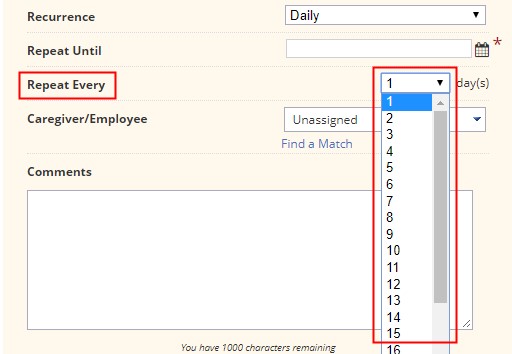
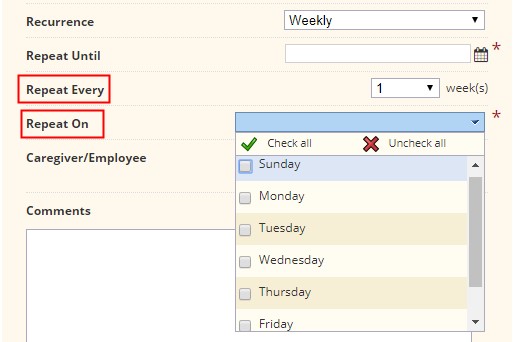
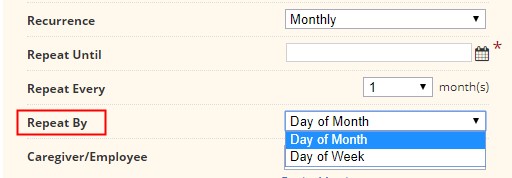
is a current limit of 31 scheduling events that may be scheduled at a time.

Unassigned: If there isn’t an identified caregiver for the shift the task may be set up as unassigned (open). Unassigned
tasks appear Yellow on the client schedule for easy identification. Once a caregiver is identified the task may be reassigned to
the user.
Assign to Caregiver/Employee: If a staff member has been identified the drop down user list may be used to select the
staff. The staff that has been identified as oriented and favorite will show at the top of the list for easy selection. The list will also
filter as a user’s name is typed (when the drop-down list is open).

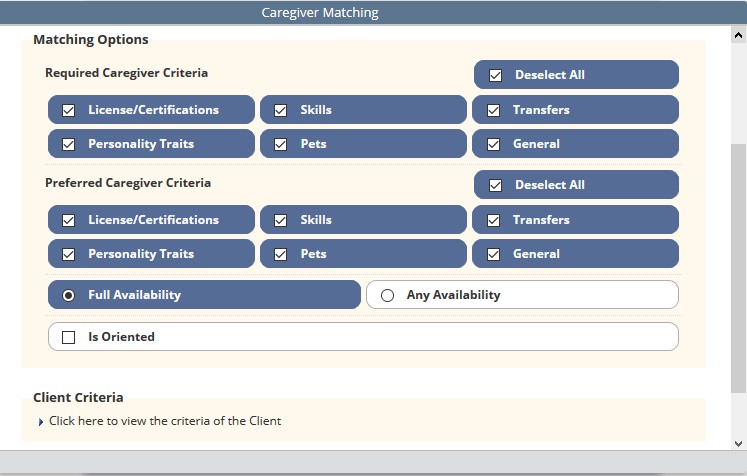
Find a Match: The last option is to search for suitable matches based upon the match criteria you have set up for your client
and employees.
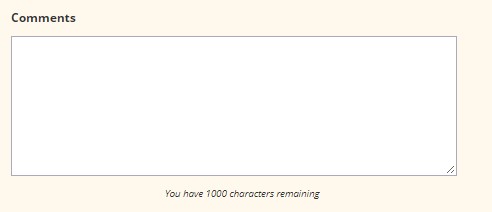
to be scheduled. These show up as a yellow sticky note on each task scheduled.
Once all the information is entered completed, the agency can Save & Close which will add the task/s to the client schedule.
If the agency chooses they can Save & Add Another task for the client.

This concludes the Scheduling New Client Task Tutorial.
