x
Join our new Axxess User Community to connect, share, learn and grow together.Learn More
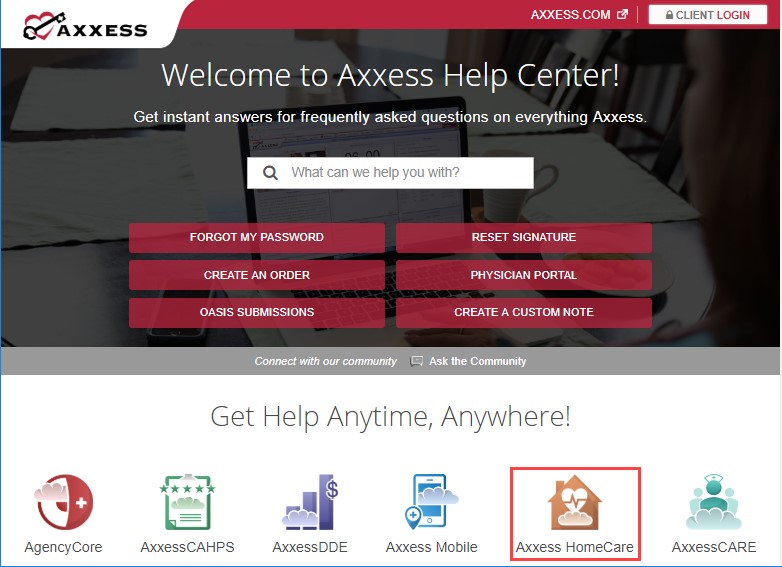
To access Axxess HomeCare, open the Internet browser (Chrome and Firefox recommended) and type in the address www.axxess.com When the Home screen appears, select the “Client Login” button at the top right-hand side of the webpage.

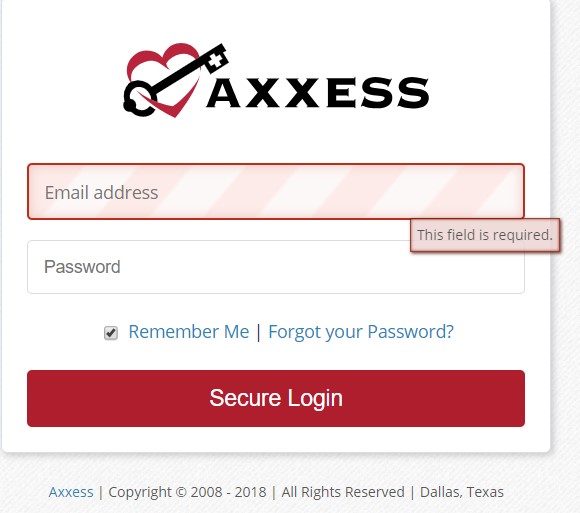
Next, the sign-in page will appear where the username and password fields are required. The username is the email address associated with the Axxess HomeCare user account. Once the username and password have been entered, select “Secure Login” to enter Axxess’ software.
NOTE: For resetting the password, See Overview.
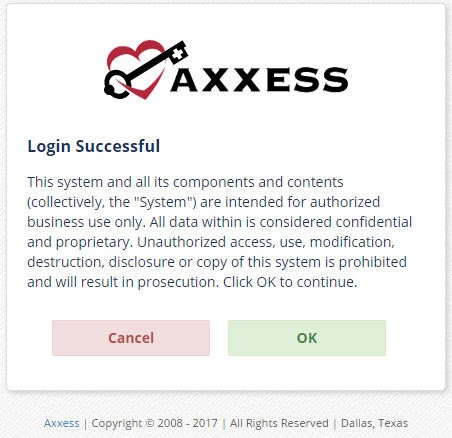
After successfully logging in, a user acceptance message will display. Select “OK” to accept the message or “Cancel” to exit the application.
The Clinician Planner displays. Select the appropriate Axxess application on the left side of the page to perform the Intake and Scheduling process.
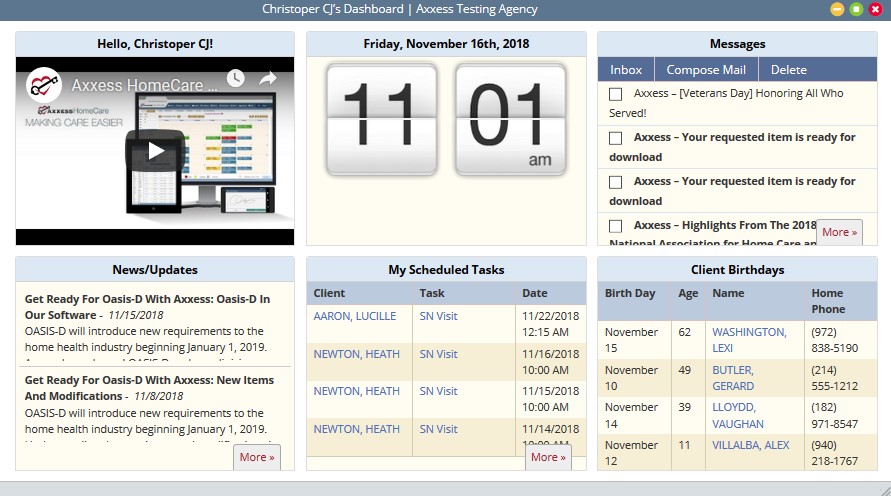
The dashboard can display six tiles. Three of these tiles are default and the remaining three will be based on user permissions.
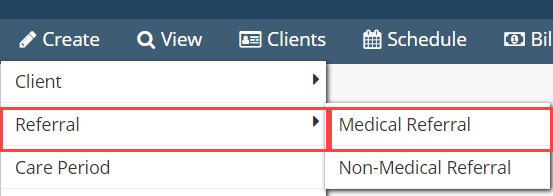
Create/Referral/Medical Client
There are two options to add a Client into Axxess HomeCare. The path chosen will depend on information received at time of the referral as well as by the agency process. To add a new client receiving skilled services as a “Referral,” the proper location is in Create/Referral/Medical Referral.
The referral entry details page will populate. Sections with a red asterisk* indicate that the information is required to save the page.
Section contains geographical and contact details pertaining to the client.
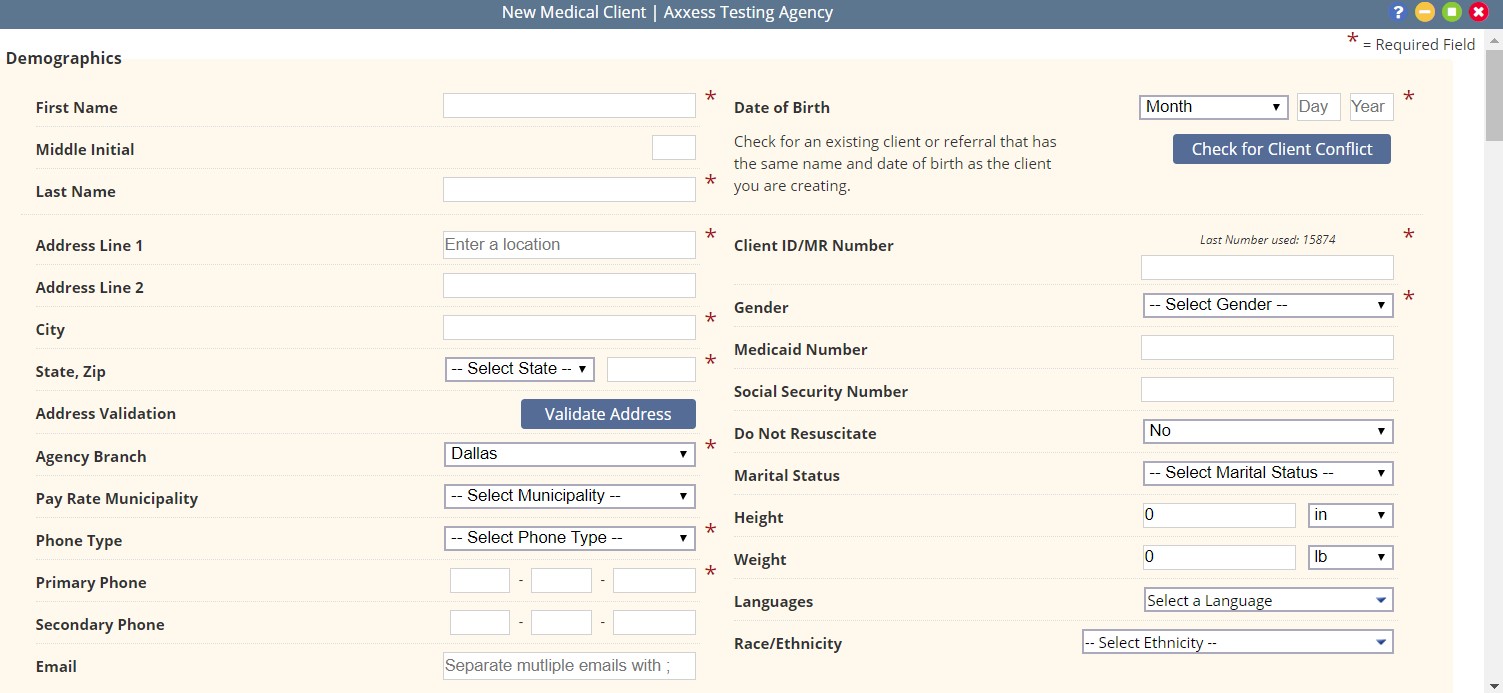
Items noted with a red asterisk in the Demographics section include:
This section is for setting up the timeframe in which the client will receive care.

The “Create Care Period” must be checked to create the client’s initial Care Period once admitted. Care periods are a pre-requisite to scheduling services.
The doctor that will sign the orders is selected in this section. It may or may not be different than the referring physician.

The client’s Pharmacy information which will populate the Medication Profile is entered in this section.

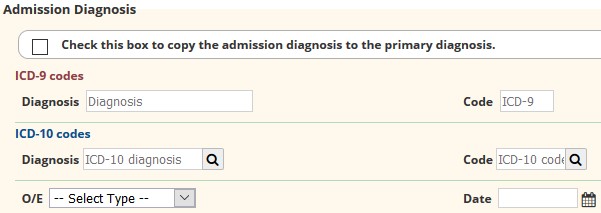
The ability to populate the Admission Diagnosis Code upon Intake of a New Medical Client is available.
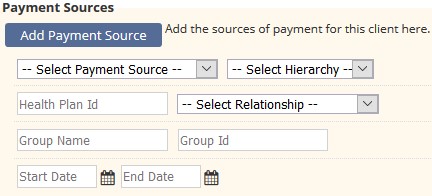
Encompasses details of how the client will be billed. It is not required at initial client intake; however, it is beneficial to input as soon as it is obtained.
This section is completed if the client is receiving services due to an accident.
Note: Hovering over the ![]() will provide an elaboration pertaining to the section.
will provide an elaboration pertaining to the section.

This section is for indicating the type of service the client should be receiving. The options are determined by the information entered inside Manage Company Information.

Durable Medical Equipment for the client is selected in this section. The options are determined by the information entered inside Manage Company Information.

If an item is not in the DME list it may be added in text format in the Non-Standard comment box.
This section allows the ability to document the process during a state of emergency. This is a required field for Intake.

This section is applied to clients that live in areas that require evacuation necessities. This is based upon the Agency policy and procedures.
This section is part of the tracking process for new referrals.

“Save” – This button places the client in the Pending Admission status.
“Admit” – This button admits the client and places the client in the Client Center.
View/Lists/Referrals
After the client’s referral has been created, the next step is admitting the client. There are two ways to locate the saved referral to proceed with the admission.
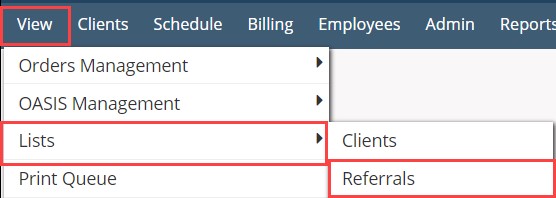
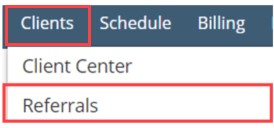
Client/ Referrals
The “Referral List” will appear with the client’s referral date, referral source, date of birth, gender and name of the person who entered the initial referral. There will also be a column indicating if the client is Medical “Yes” or “No.”

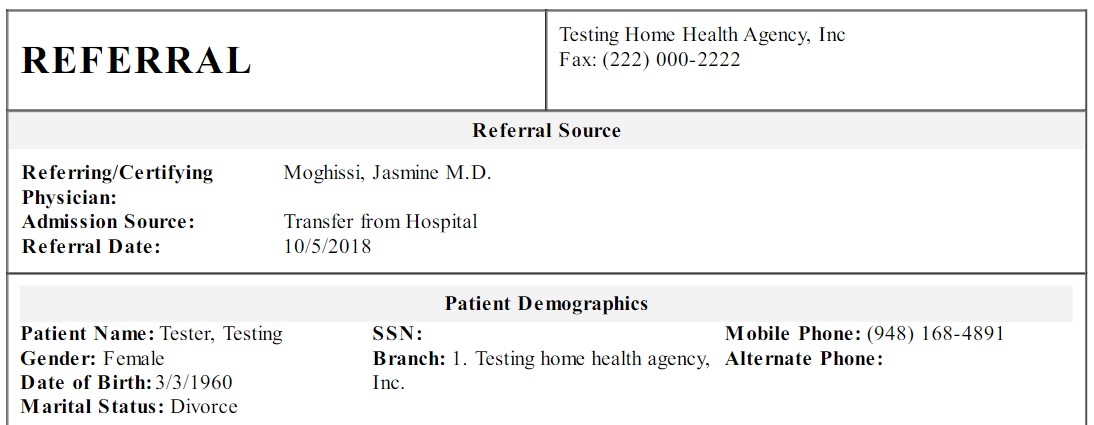
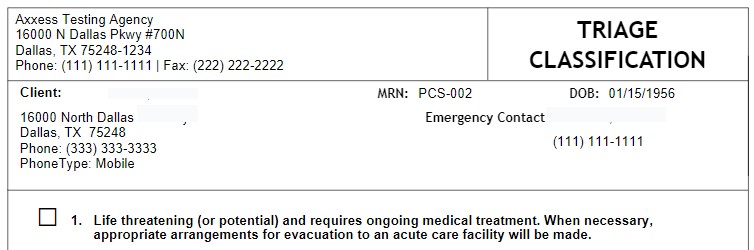
The option to add a New Referral is available in this window by selecting the “New Referral” button. The Printer icon ![]() gives a preview of the referral document. It is the client’s Face Sheet, which is only available in this format prior to admitting the client. The document can be Printed or Saved.
gives a preview of the referral document. It is the client’s Face Sheet, which is only available in this format prior to admitting the client. The document can be Printed or Saved.
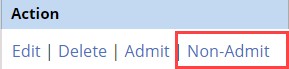
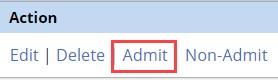
The Action column contains a variety of action items for the client’s referral:
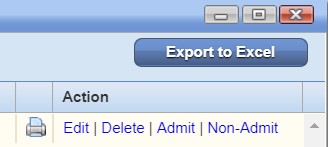
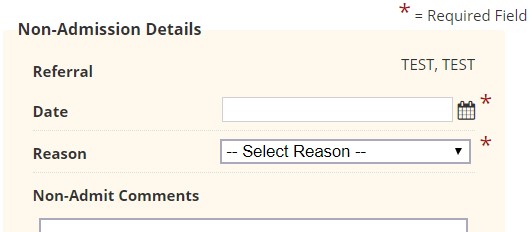
To Non-Admit a client, the option must be selected in the Actions column in the Referral List.
The Non-Admission date and Reason are required before the referral can be processed into Non-Admit status. A section for comments will be available.
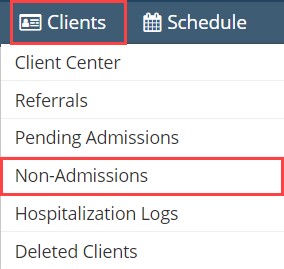
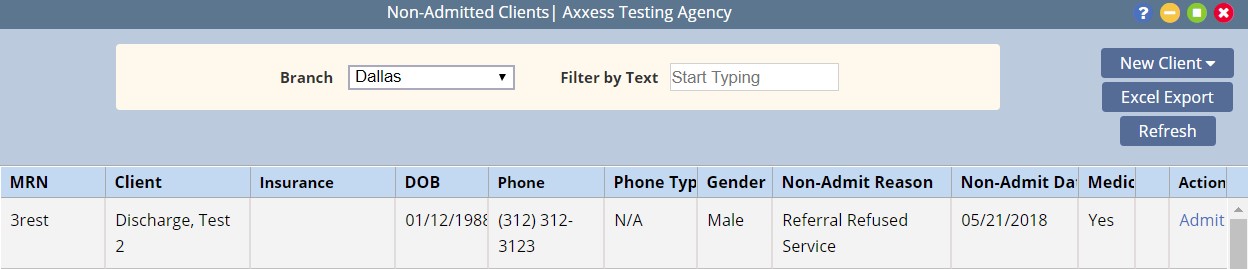
Once the Non-Admission is processed, the list of Non-Admitted clients can be found in Clients/Non-Admissions.
In the Referral List, the “Admit” hyperlink under the Action column will update the client to an Active admitted status.
The Demographics section will contain all the information entered during the referral process. Below are sections that were not in the referral process that will need to be addressed to admit the client:


![]()

Selecting “Save” instead of “Admit” will generate a message with further options for proceeding.
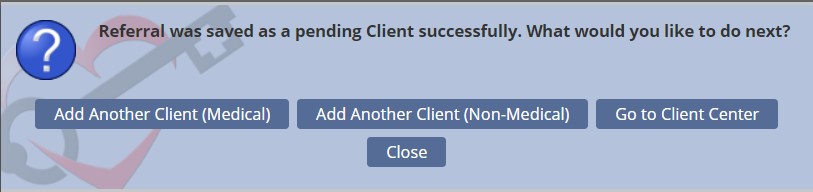
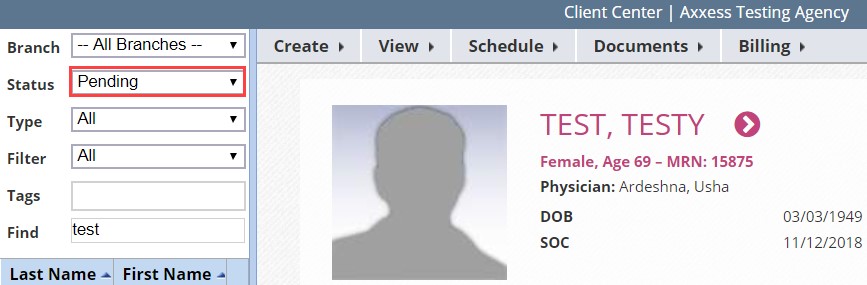
Selecting “Go to Client Center” will load the Client Center with the Pending status selected and the client’s profile selected.
Selecting “Admit” will move the client into the Client Center with an Active status.
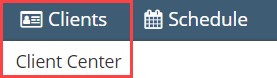
Clients/Clients Center
The Client Center is the client’s electronic medical record.
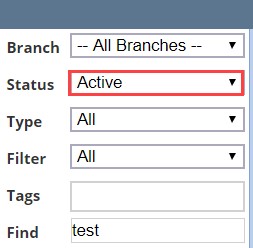
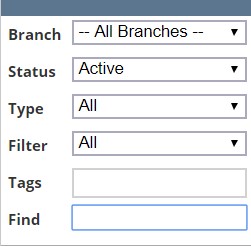
On the right-hand side of the Client Center window, there are parameters available to further narrow the selection when searching for a client.
The Client Charts window has buttons at the top of the window that can be selected when adding details to the client’s record.

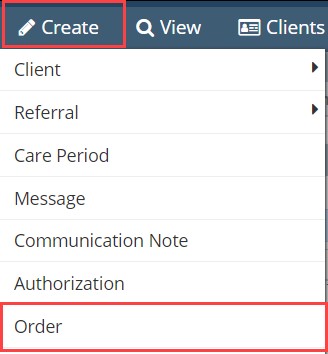
This button provides the option to add a new order to the client’s chart. An alternative route is Create/Order.
This button allows a coordination note to be entered into the client’s chart. This note can be sent to another user within the agency by selecting “Send Note as Message.”
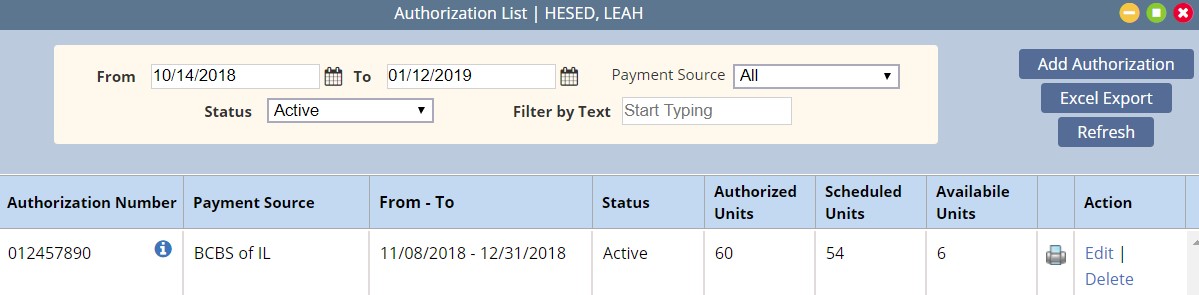
This option is used for clients with insurance payers which require authorization. The client’s name will automatically appear when this option is selected inside that client’s chart. The Start/End date ranges and Authorized Task options will be required depending on the type of authorization the client has.
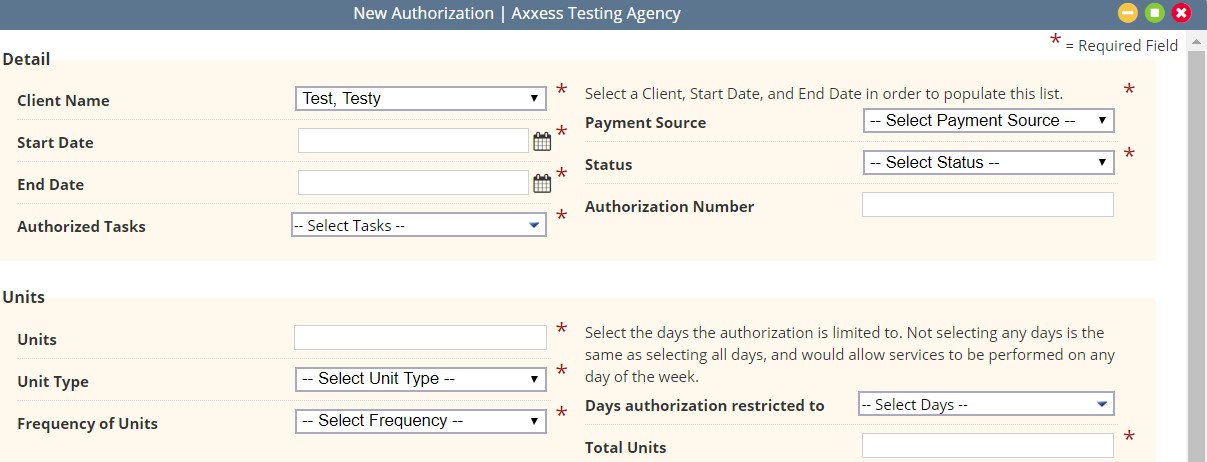
The Payment Source list pulls from the details indicated in the client’s chart. The list will not generate until the Start/End dates are entered. The Status of the authorization can be indicated by selecting the options provided. Once the top section is completed, the Units section must be addressed by indicating the unit count, type, frequency and the total.

The list of items under the View Tab will also be accessible from the Quick Reports.
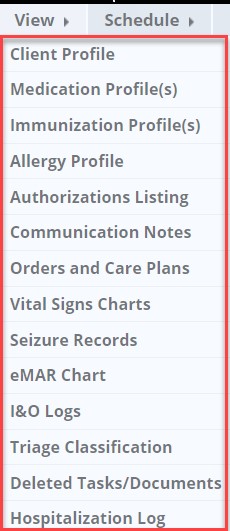
This section is the client’s Client Profile Data Sheet. It is a PDF Synopsis of the client’s profile. Upon viewing the profile may be Downloaded, Printed, or Closed.
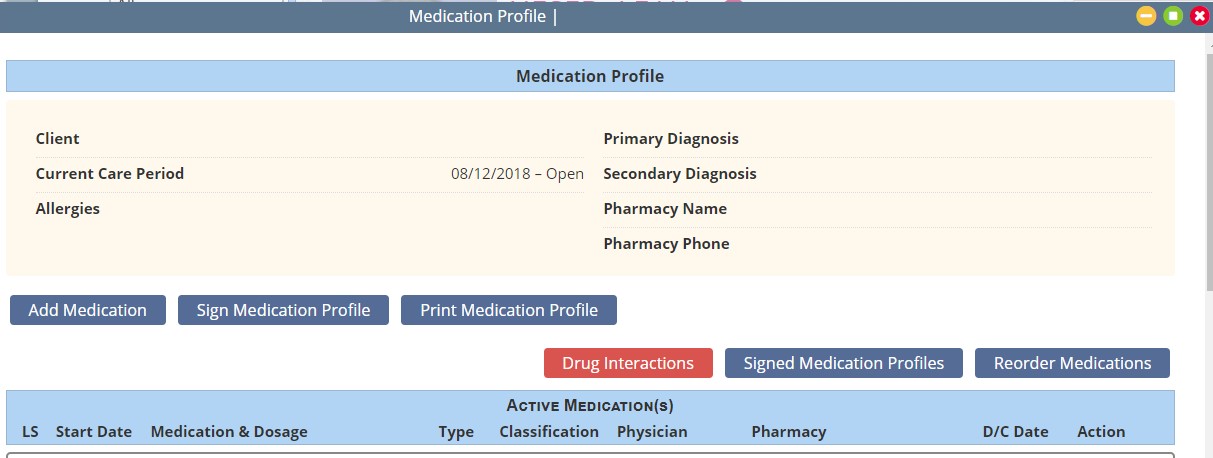
This section contains details of the client’s Medication Profile. Client medications are separated into Active and Discontinued Medications. Users have the option to: Add, Discontinue Activate medications, Sign Medication Profile, Print Profile, Check Drug Interactions, View Signed Medication Profiles, and Reorder Medications.
Provides the ability to search/view/edit existing authorizations as well as add new authorizations as needed. Actions include the ability to view/print, edit and delete existing authorizations as well as Add new authorizations.
Provides ability to view existing Communication Notes as well as add new notes as needed. Users may search by care period and further filter by text. Existing communication notes will display in the grid. Actions include the ability to edit, delete and view existing notes in the PDF format.

Provides the ability to view existing Orders and Care Plans. Users may search by care period and further filter by text. Actions (permission based) include the ability to view/print and delete. The list of Orders and Care Plans may be exported to Excel.

Displays the clients most recent 7 visits and the vitals entered during those visits. Vitals may be viewed in graph format as well. The Vital Sign Log contains Temperature, Weight, Respiratory Rate, Pain Level, Pulse, Blood Sugar, Blood Pressure, and an overall Report with all Vital Signs during the period.
Displays a list of existing Seizure Records. The list may be searched by date range and further filtered by text. Individual record details may be viewed/printed via the printer icon and the entire list may be exported to excel. Available actions include the ability to Edit and/or Delete based on permissions.
(Available for Medical Admissions only) Provides the ability to view the client’s medication administration record. Display options include Daily, Weekly, or Monthly views. Client Medications are listed in the left column and the administration log displays green for taken meds and red for refused.

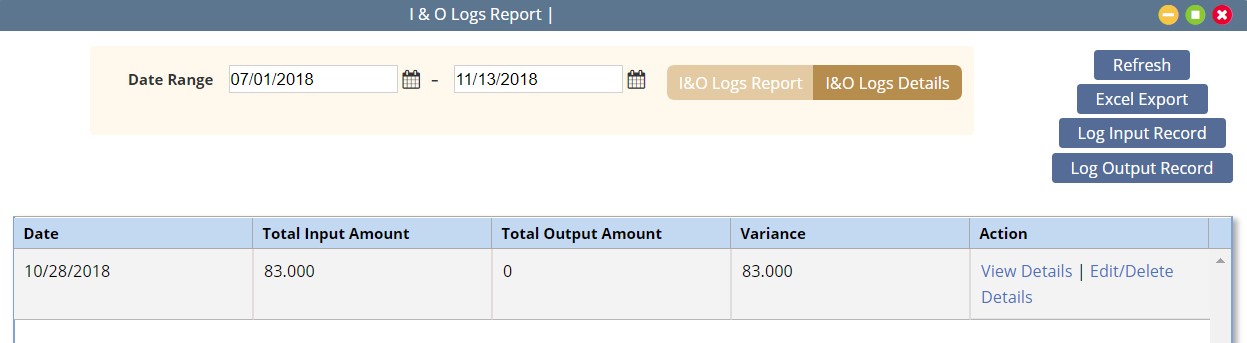
Provides the ability to search and view recorded input and output values for the client. The default shows the summary, but users may view details by selecting the details link or toggle. Additional actions include the ability to edit/delete recorded values (permission based).
This section contains information based on answers from client’s profile Emergency Preparedness section.
Axxess is a cloud-based software so most deleted data will remain in the system. Deleted tasks will be found in this section.

Displays a list of the client hospitalizations. Information provided includes: the name of the Facility and Unit, Contact, Admit Date and End Date, who recorded the hospitalization, Last Home Visit, Source, and Current Client Status.

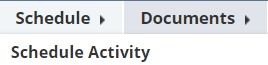
The Schedule Menu has a Schedule Activity option which generates the client’s Schedule Center window.
The Documents Menu has two options available to select:
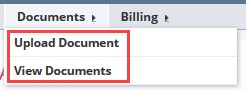
Upload Document: Upload Document provides the ability to attach a document to the client chart. It contains three required completion fields: Document Name, Upload Type and a document attachment field.
NOTE: There is a 5MB document size limit. Documents greater than 5MB will need to be separated prior to uploading.
View Document: Provides the ability to view existing client documents.
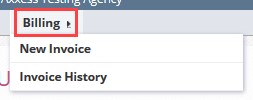
The Billing tab has two options available to select:
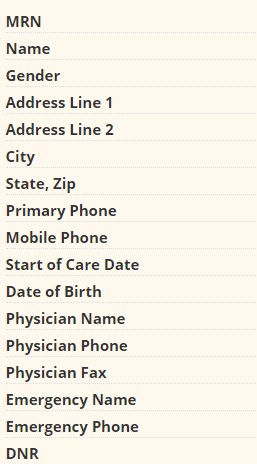
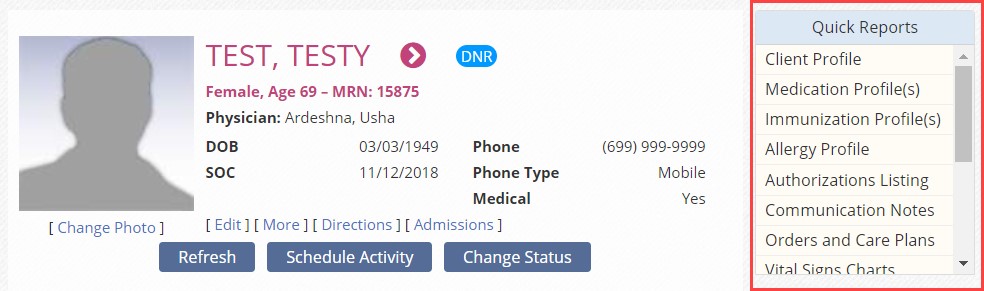
The main section of the client charts window will contain a brief synopsis of the client’s details:

Below the client’s details are helpful hyperlinks:
![]()
Edit – This hyperlink will open the client’s chart which contains the referral and admission details (permissions based).
More – This hyperlink will produce additional client details at a glance.
Directions – Provides turn by turn directions to the client home as well as satellite view directions. Starting address defaults as the Agency address, but may be altered as desired.
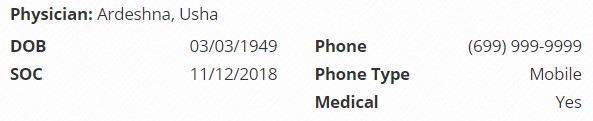
Admissions – If the client was discharged and readmitted, the admission periods will be listed in this window.

Selecting the “+” icon beside the Admission Date will generate more details pertaining to that admission period.

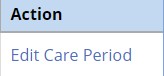
In the Actions column, the ability to “Edit Care Period” will be visible for users with the corresponding permissions.
Select “Edit Episode” to generate a window with details for managing the episode.
For more details, please reference Managing Episodes in the Schedule Center section within this document.
The three action buttons in the middle section of Client Center include the following abilities:
The list of items under the Quick Reports is also accessible from the View Tab. Reference View Tab section for an elaboration of the reports’ content.
![]()

The lower section of the client chart contains a list of scheduled and completed documents for the client.
The list of documents may be grouped or filtered by task type or date range.
![]()
Additionally, the bottom section includes the following columns:

Task – Displays the document name. The document name acts as a link to open and complete any task not in a completed status.
Date, Time In-Out, and Assigned To – The date and time are set to the scheduled date and time until the note is completed. It then displays the actual date and time of the task. The employee scheduled for the task will be displayed next.
Task Status – Displays the current status of the task. Examples include: Not Yet Due, Not Yet Started, Submitted with Signature, Submitted Pending Co-Signature, Completed, Returned from QA, Sent to Physician, Returned w/Physician Signature.
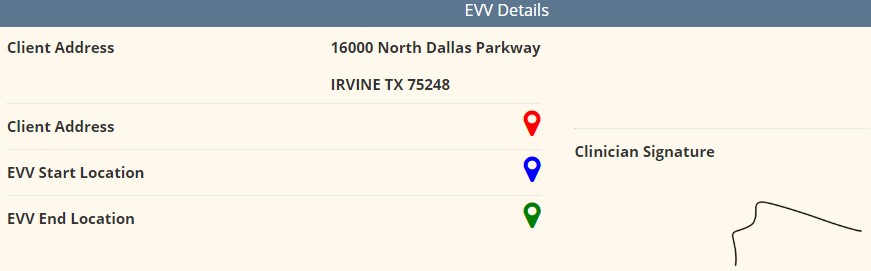
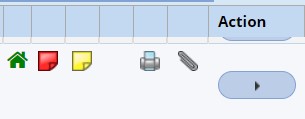
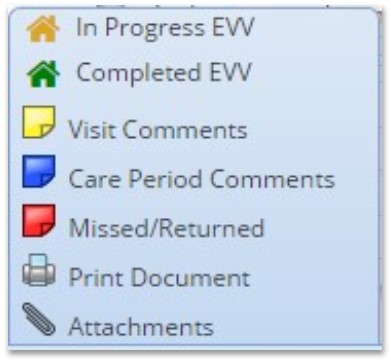
Electronic Visit Verification – A house icon provides notification that EVV has occurred for the task.

A yellow house indicates the employee has Clocked In, and a Green House indicates the employee has Clocked Out and Obtained Client Signature. Selecting the house provides EVV details.
Sticky Notes: Yellow Sticky Notes provides notes for a particular task, Blue Sticky Notes provide notes related to the whole care period and Red Sticky Notes provide notes that are returned for Review.
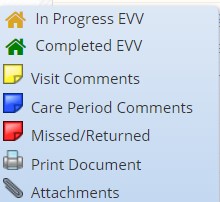
Printer Icon – Selection of the printer icon displays the print view of the document. From here, the document may be downloaded or printed.
Attachments Icon – Displays documents attached to the notes. Attachments are added from within the details tab and may include wound pictures.
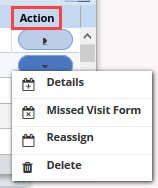
Action Column – Contains various action items based on the note status as well as the user’s permissions.
NOTE: The lower half of the client chart may be expanded to increase the field of vision for the task list.

An alternative route to review client tasks and schedule further visits is to select the “Schedule Activity” button, and it will generate the Schedule Center window.
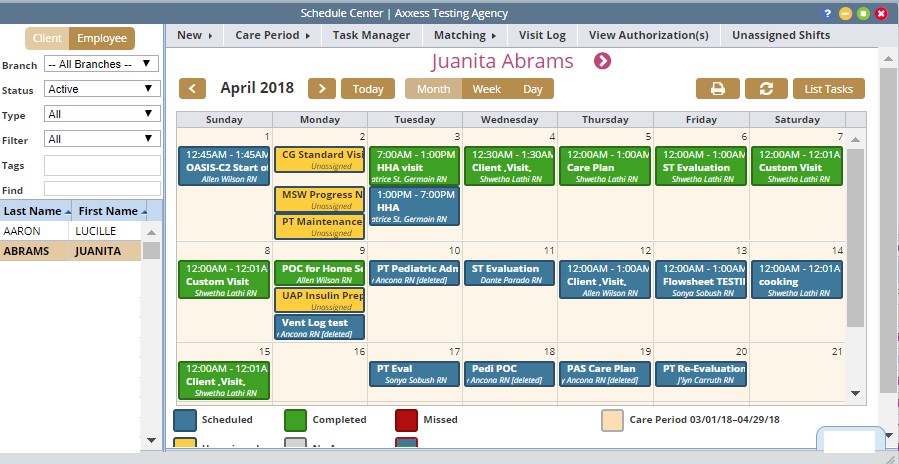
The Schedule Center is the view of the client’s tasks in a calendar format.
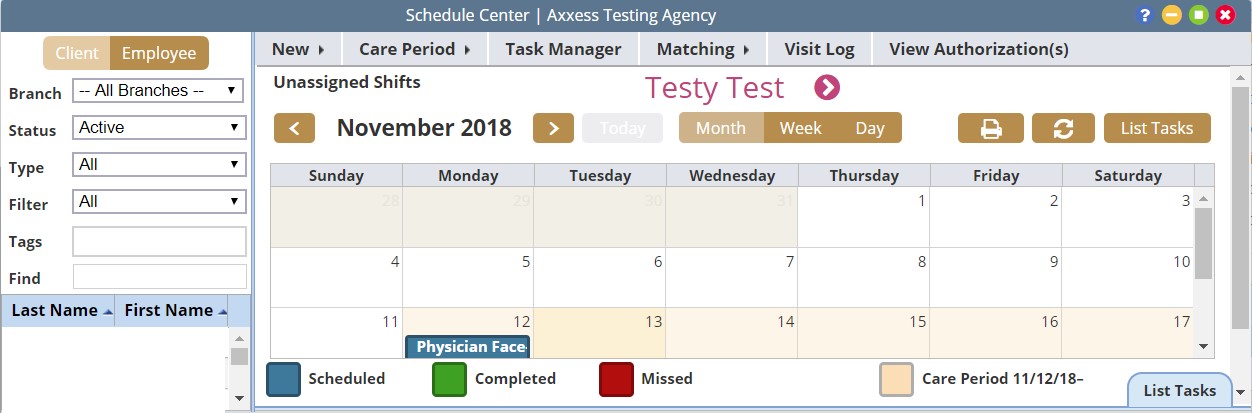
The left column provides the ability to view client and employee calendars/schedules. The default search is by client. Selecting Employee updates the criteria and results to the employee.

The Schedule Center has a list of menus that will assist with preparing and managing the client’s schedule.
![]()
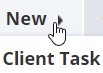
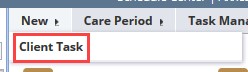
This menu option has one item available to select, “Client Task.” This option is one of the two ways to schedule a task for the client.
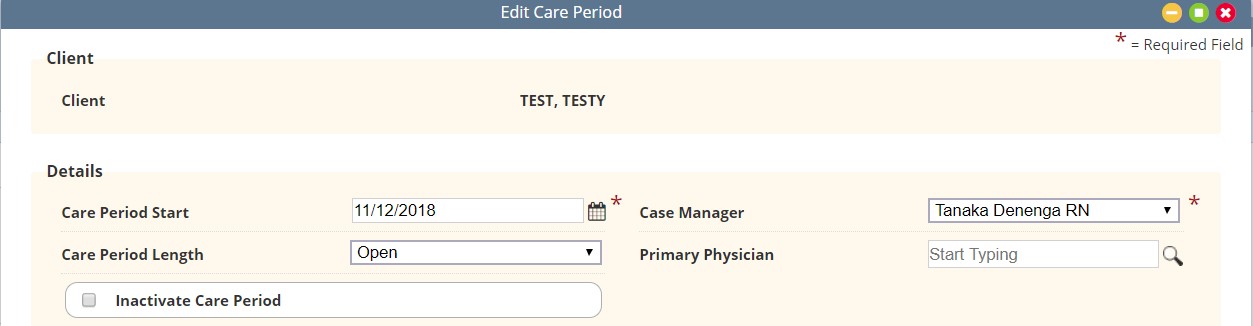
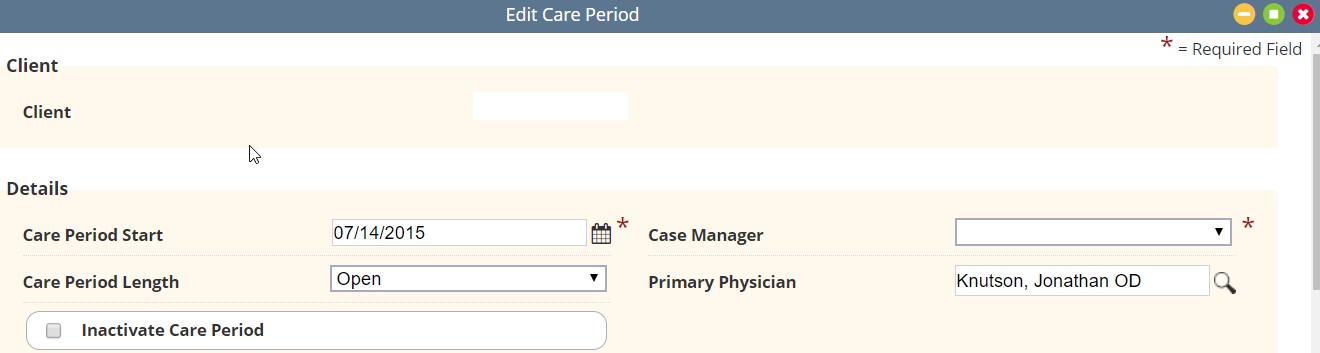
An active care period covering the time-span being scheduled is a prerequisite to successfully scheduling any task. To add a new care period the user selects Care Period/New.
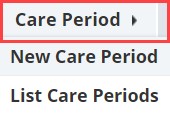
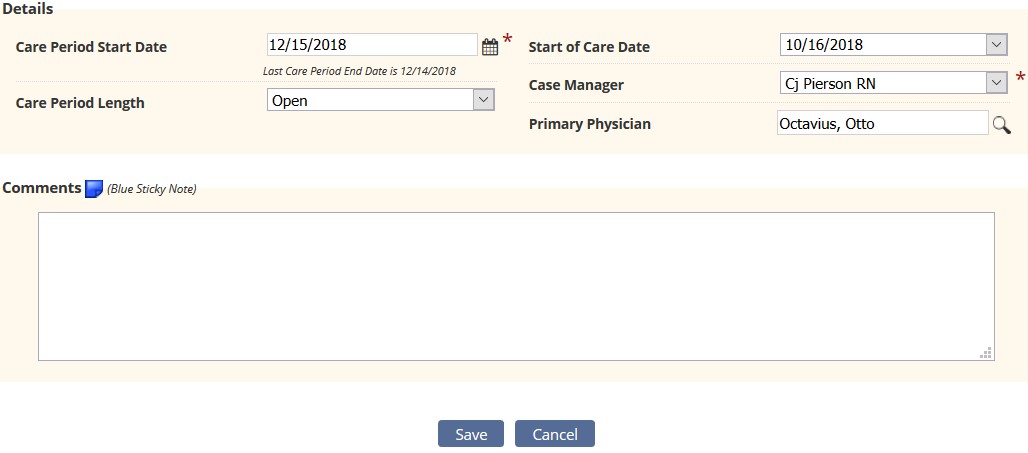
New Care Period: The following information will be available to complete:
List Care Periods: All active and any inactive care periods for the client will be displayed.
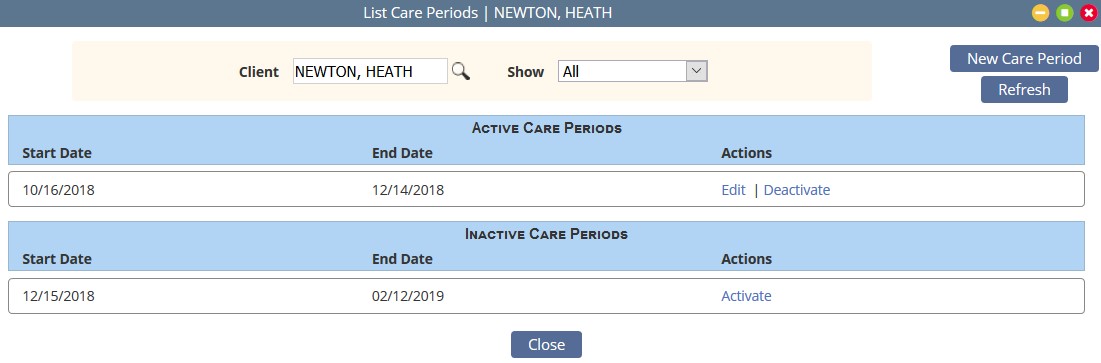
The “Edit” option will generate a window with the current Care Period details, with an opportunity to make modifications.
Task Manager
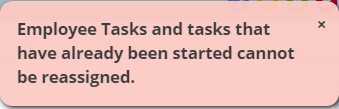
The Task Manager allows the ability to reassign or delete multiple tasks at the same time.
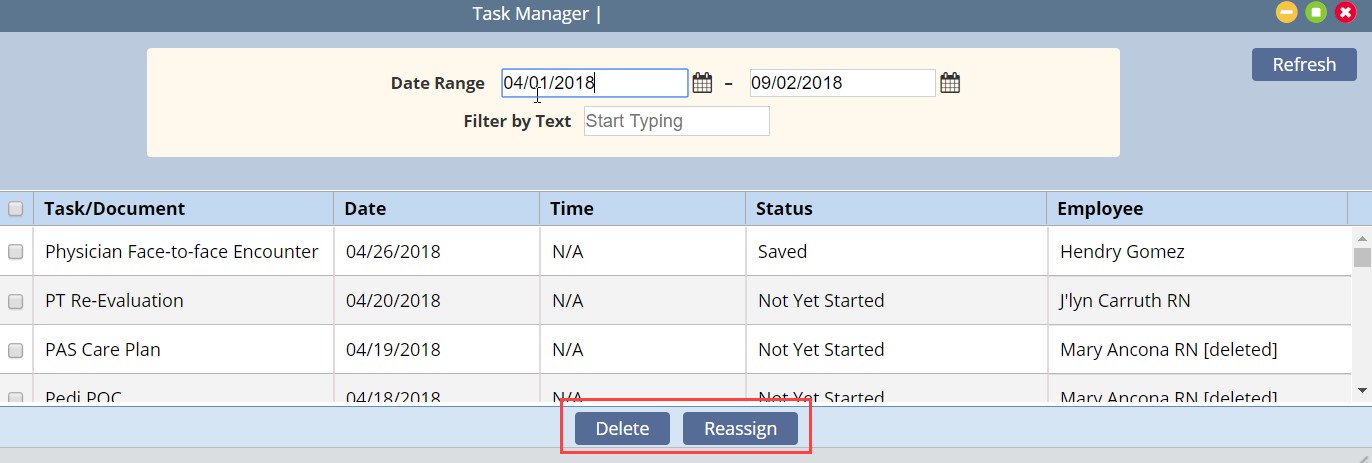
Tasks that have been Started or Completed cannot be reassigned.
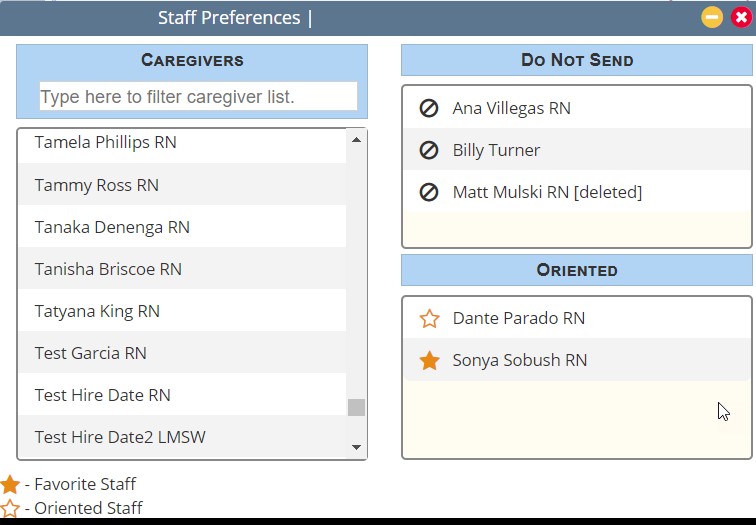
Matching
This tab has two submenus: Preferences and Match Criteria.
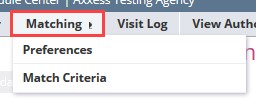
Preferences – Provides the ability to mark a caregiver as Oriented, a Client Favorite or as a Do Not Send.
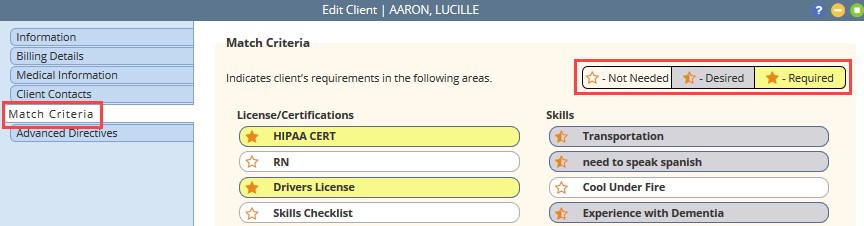
Match Criteria – Takes the user to the client’s match criteria in their client file. From here the client’s criteria may be viewed or updated. The Matching list is created by the agency and is taken into consideration when using the matching functionality during the scheduling process.
This option provides the ability to update specific information for billable tasks. This is particularly useful for updating non-system user information. Task status start and end dates, time in/out as well as travel time logging may all be updated from this menu.
This menu offers a quick link to the client’s authorization screen where they may view/edit or add a new authorization.
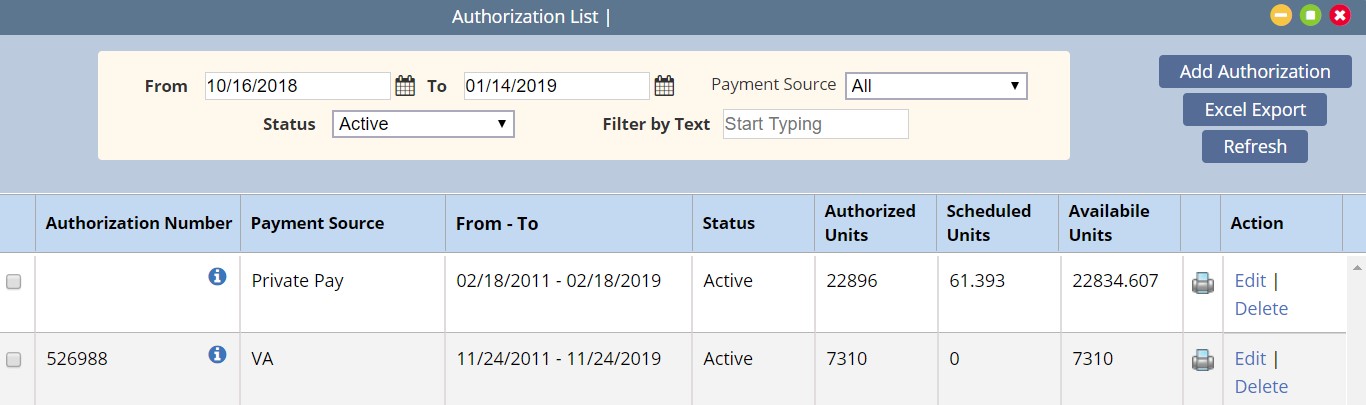
Hovering over the ![]() will indicate the Tasks assigned to the authorization.
will indicate the Tasks assigned to the authorization.

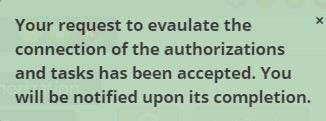
The ability to evaluate the authorization is available at the bottom of the window by selecting the “Evaluate Authorizations” button.
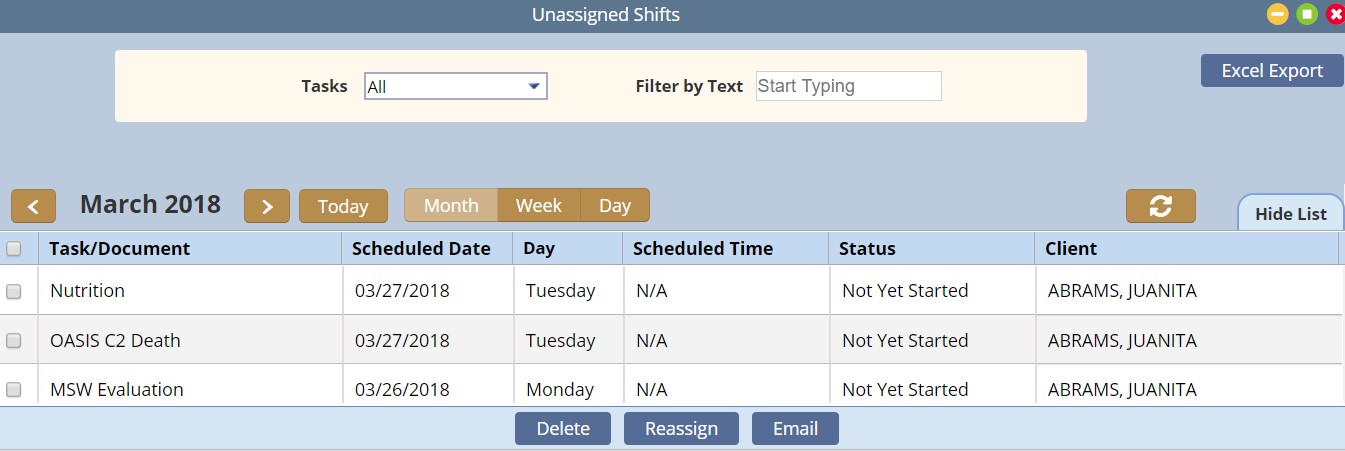
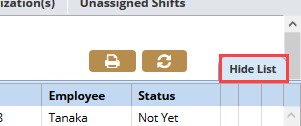
The Unassigned Shifts menu displays all scheduled tasks that have not been assigned to a caregiver. The default page display is for the unassigned (open) tasks for the current month in list view. Users may select to view individual tasks, adjust the date range (month/week/day) or view in calendar format (select Hide List). To assign a caregiver select the day(s) they are confirming, select Reassign and choose the caregiver who is accepting the shift(s).
Once a client is selected, the calendar will display:
If the List Task view is displayed, selecting “Hide List” will revert to the Calendar View. Selecting the Client’s Name is a quick link to the Client’s Chart.
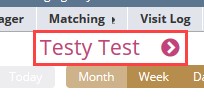
User’s may view the Client Schedule in Month, Week or Day formats by selecting the corresponding action. The default view is by month.
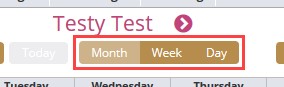
Depending on the view selected the arrows will move to the prior or next Day/Week/Month.

![]()
The Printer Icon will print the schedule (permission based). The Rotating Circle Icon is a page refresh.
![]()
Selecting “List Tasks” displays the client schedule in list format. See List Task section below.

The color legend is located below the calendar for easy reference:

Selecting “List Tasks” displays the client schedule in list format. The List Task button is also available at the bottom right-hand side of the page.
![]()
Above the List Tasks view, a Menu Bar displays with the following:
![]()
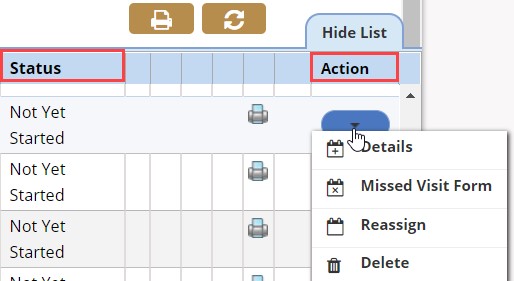
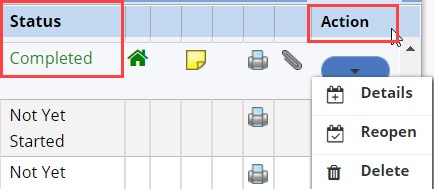
The Completed tasks on the other hand have fewer actions available. Details and Delete are the same actions while Reopen will reopen the task. To hide the List Task view, select the “Hide List” view.
There are two ways to schedule a task: One way is by selecting the calendar day or by selecting New/Client Task.
Both paths open the “Employee Scheduler” window. Selecting the calendar day will pre-populate the date in the new task schedule window. The date will be entered manually when using the New Task route.

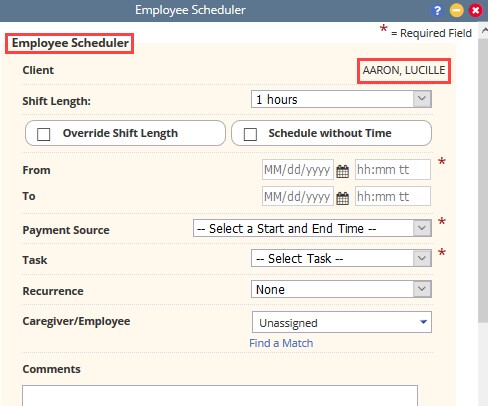
The following are further details for the Employee Scheduler, each piece and what it allows the agency for scheduling purposes:


Recurrence Options:
None – No recurrence needed.
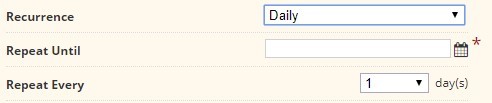
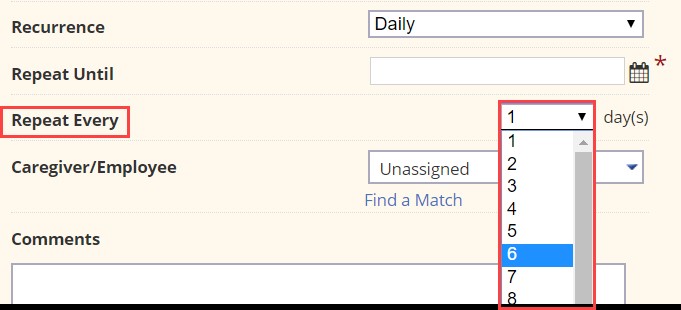
Daily – Task recurs every ‘X’ amount of days until the end date is reached.
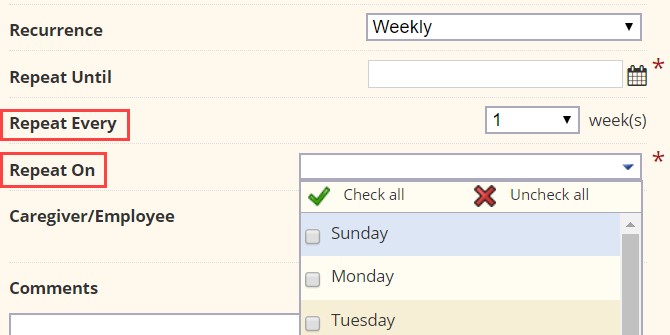
Weekly – Task repeats every ‘X’ number of weeks on the days selected.
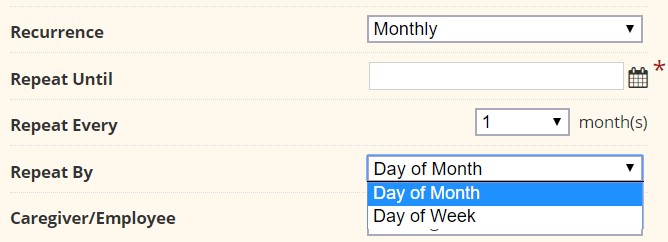
Monthly – Task repeats every ‘X’ number of months on the selected day of the month or the day of the week.
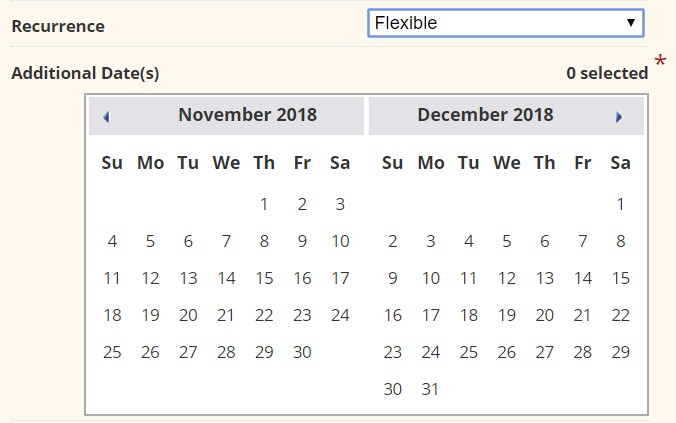
Flexible – Useful for tasks that do not recur in a set pattern. Select the days the task needs to occur on. There is a current limit of 31 scheduling events that may be scheduled at a time.

Unassigned – If there isn’t an identified caregiver for the shift the task may be set up as unassigned (open). Unassigned tasks appear Yellow on the client schedule for easy identification. Once a caregiver is identified the task may be reassigned to the user.
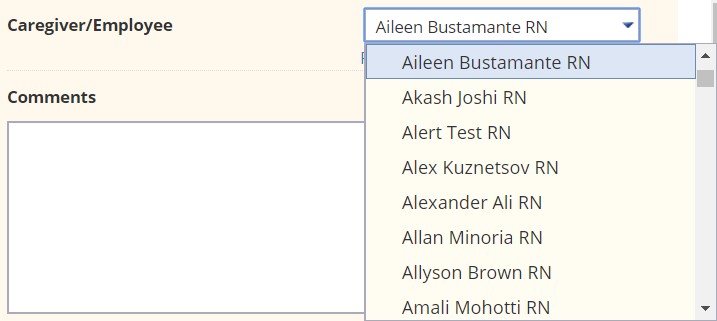
Assign to Caregiver/Employee – If a staff member has been identified the drop-down user list may be used to select the staff. The staff that has been identified as oriented and favorite will show at the top of the list for easy selection. The list will also filter as a user’s name is typed (when the drop-down list is open).
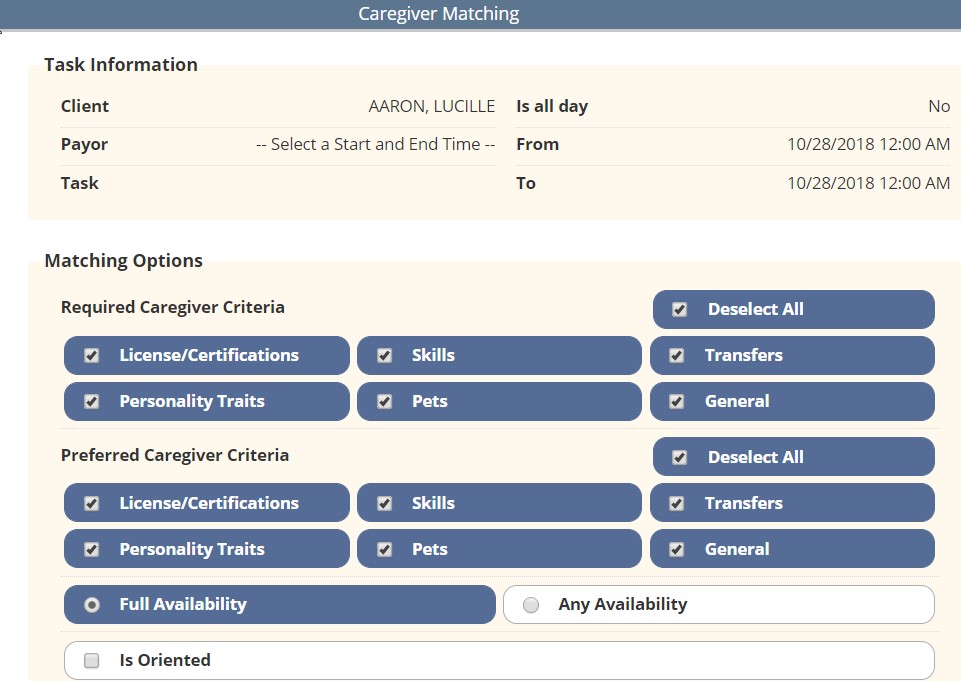
Find a Match – The last option is to search for suitable matches based upon the match criteria set up for the clients and employees.
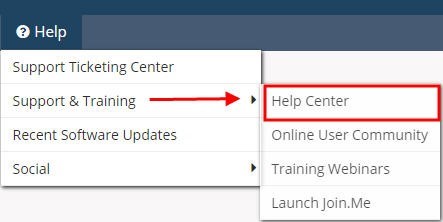
A great resource that is available 24/7 is our Help Center. It is a place to get answers to frequently asked questions or watch videos of all Axxess products. It can be accessed by going to Help/Support & Training/Help Center.
Or also available at https://www.axxess.com/help/