x
Join our new Axxess User Community to connect, share, learn and grow together.Learn More
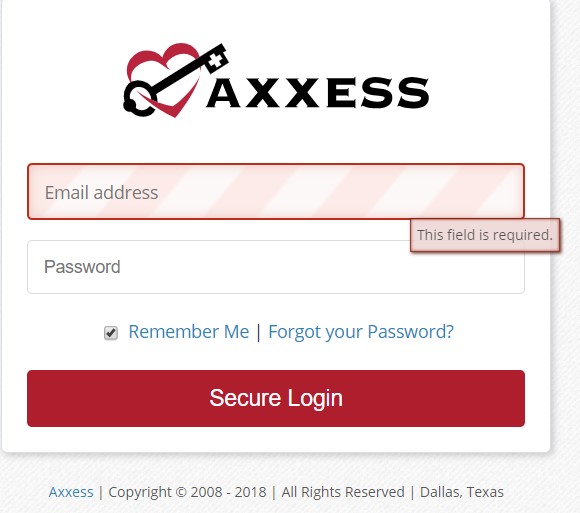
To access Axxess Hospice, open the Internet browser (Chrome or Firefox recommended) and type in the address www.Axxess.com When the Home screen appears, select the “Client Login” button at the top right-hand side of the webpage.

Next, the sign-in page will appear where the username and password fields are required. The username is the email address associated with the Axxess Hospice user account. Once the username and password have been entered, select “Secure Login” to enter Axxess’ software.
NOTE: For resetting the password, see Axxess Hospice Overview Manual.
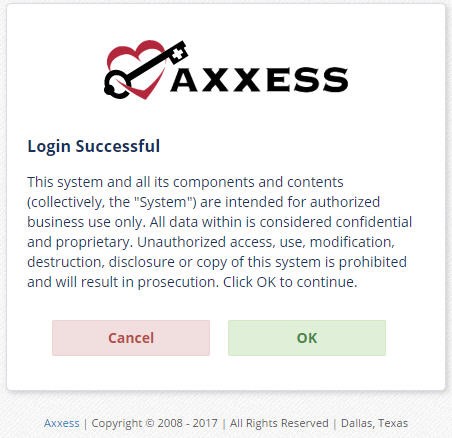
After successfully logging in, a user acceptance message will display. Select “OK” to accept the message or “Cancel” to exit the application.
The Clinician Planner displays. Select the appropriate Axxess Hospice application on the left side of the page to perform the Intake and Scheduling process.
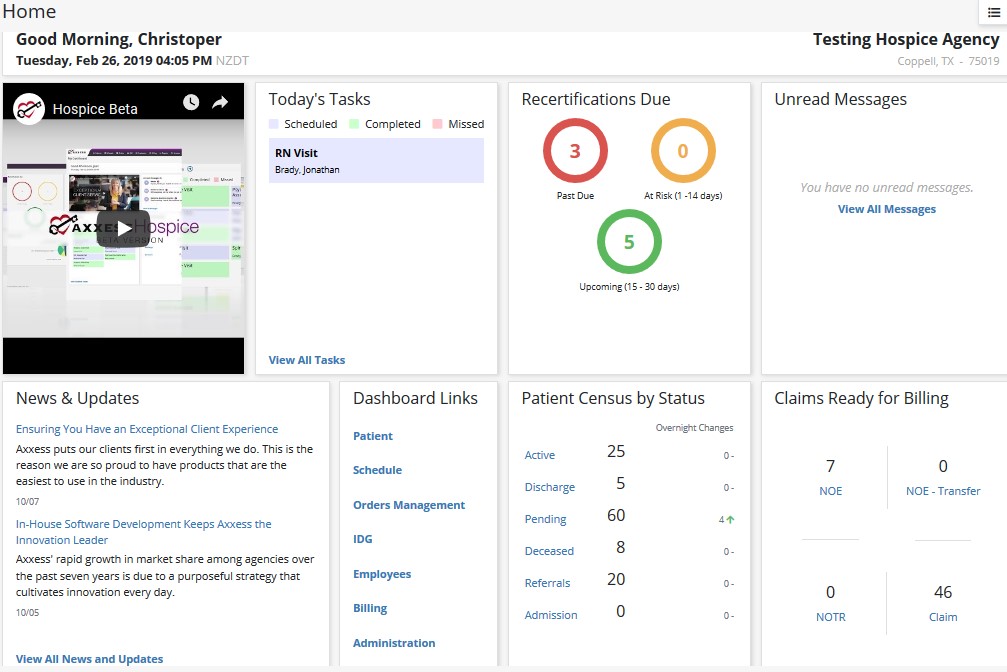
Below are the nine tiles that will appear:
Add/Inquiry-Lead
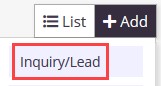
Users can enter potential hospice patients to track inquiries or leads without having them be entered as referrals.
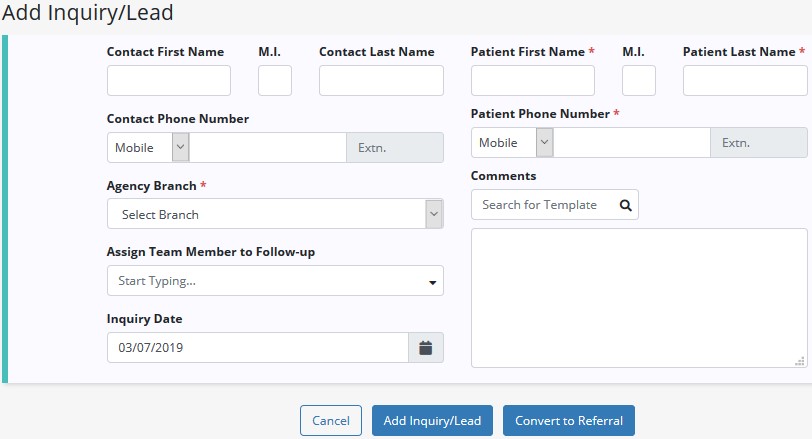
Patient Name, Phone Number, Agency Branch and Comments will flow to the referral (if converted). Enter all available information then select the “Add Inquiry/Lead” button to keep as an inquiry. If the patient needs to be moved forward in the admission process, users can select the “Convert to Referral” button.
List/Inquiries-Leads
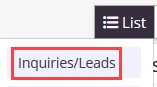
Once an inquiry has been added it will be housed with all other inquiries in a list.
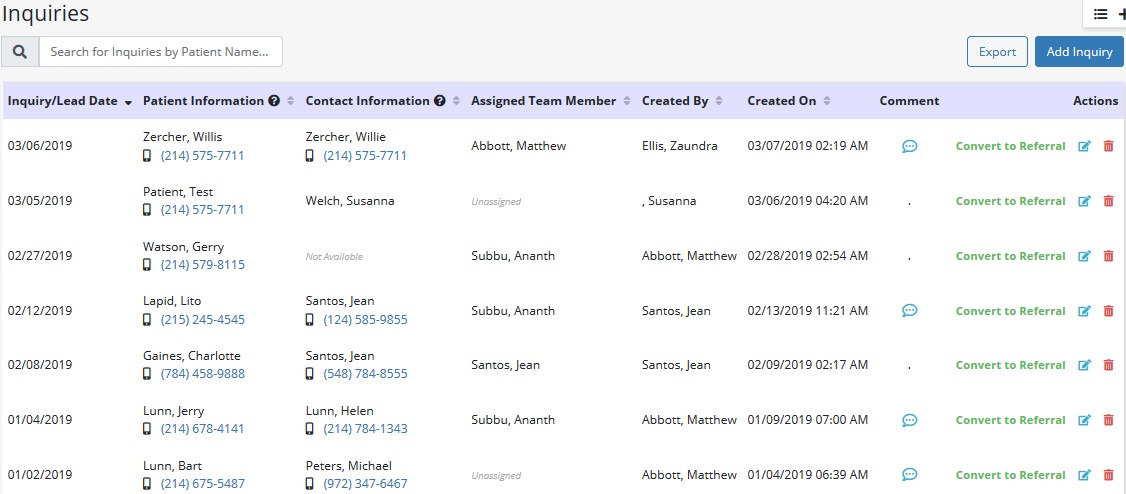
Search through the inquiry list by using the search bar in the top left. Add a new inquiry from this screen by selecting the “Add Inquiry” button or export the list as an Excel report by selecting the “Export” button in the top right.
The inquiries are displayed by Date, Patient & Contact Information, Assigned Team Member, Created By & On and Comments.
The Action column contains a variety of action items for the patient’s inquiry.
Add/Referral
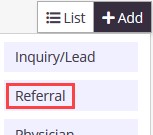
The referral entry details page will populate. Sections with a red asterisk* indicate that the information is required to save the page.
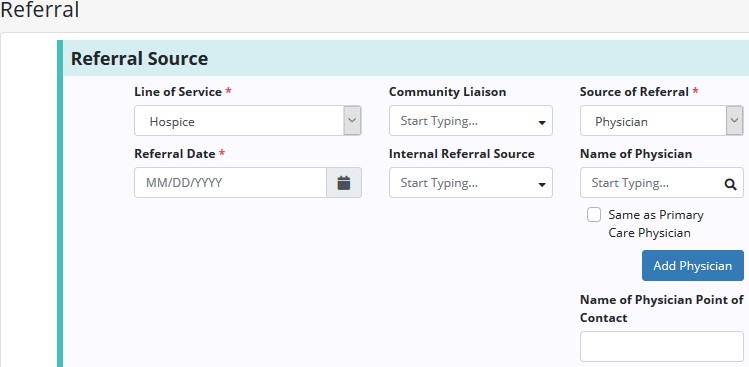
Referral Source – Contains details of the source involved in referring the patient to the agency.
Line of Service – Choose from Bereavement, Hospice or Palliative Care.
Community Liaison – Start typing the name of the Liaison or select the drop-down menu to scroll through the available list.
Source of Referral – Choose from Facility, Physician, Internal or Other. Then in a later step, enter specific source, depending on what type is chosen.
Referral Date – Enter or choose date of referral.
Name of Physician – (Seen above) Start typing the name of the referring Physician then select the name. Select the “Same as Primary Care Physician” checkbox if applicable. If physician is not available, select “Add Physician” (permissions based).
Comments – Add any additional notes relevant to the referral source.
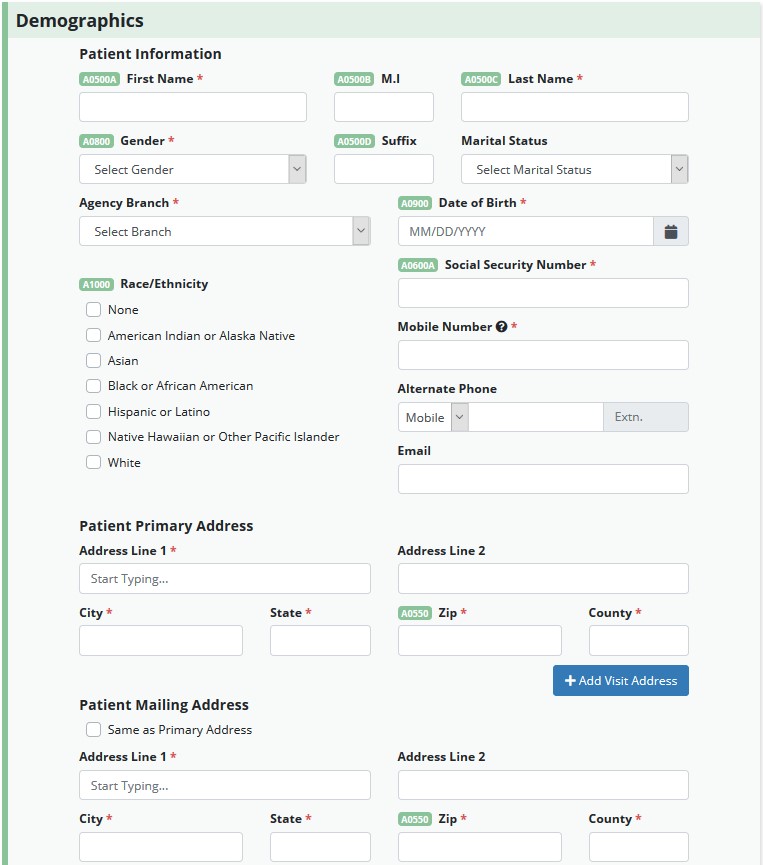
Demographics – Patient details, contact information and address will be entered in this section.
NOTE: Hover over the ![]() icon to get more insight into the section
icon to get more insight into the section
Questions with a sage green HIS locator identifier ![]() are Hospice Item Set (HIS) answers that will flow to fill out the HIS document.
are Hospice Item Set (HIS) answers that will flow to fill out the HIS document.
Payer – Encompasses details of how the patient will be billed.
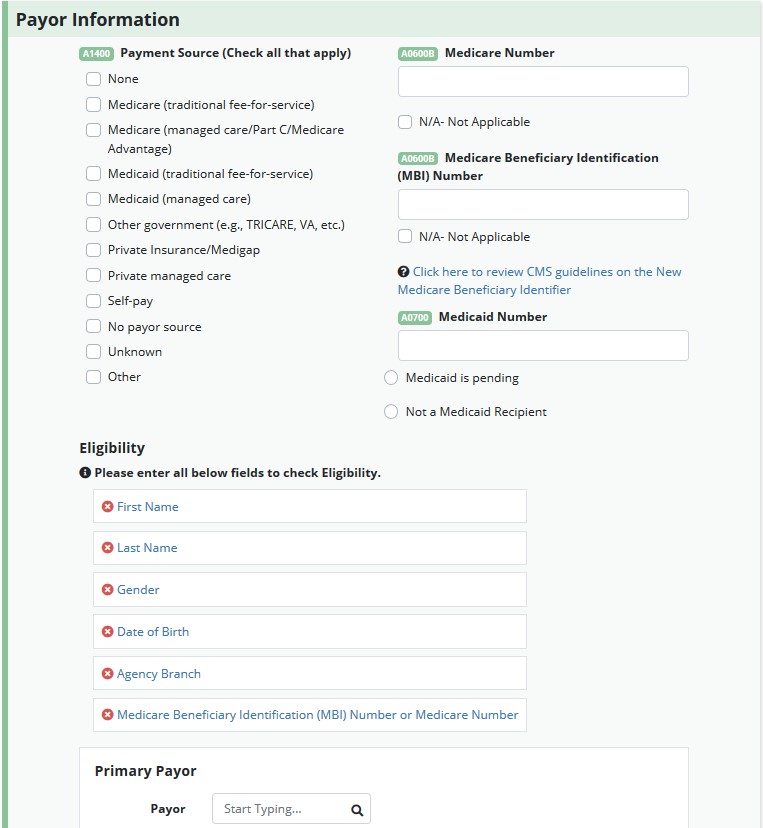
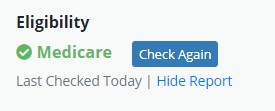
Eligibility– Enter all Eligibility fields for eligibility check. This can only be done once per day. Missing information needed for the Medicare Eligibility Check will show with a ![]() . Once the check is done, the user will see a full report and when it was last checked:
. Once the check is done, the user will see a full report and when it was last checked:
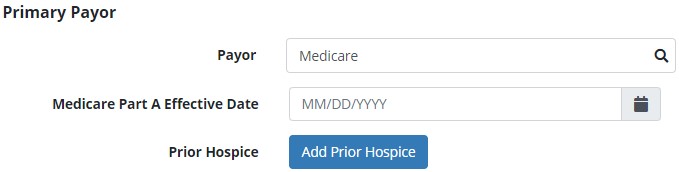
Primary Payer – Start typing name of Primary Payer. If payer is not available, new payers can be entered by employees with permissions. If Medicare is chosen, the following fields will show:
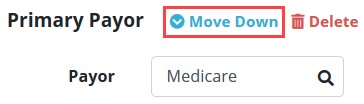
To add an additional payer, select “+Add Payer”. The “Move Up” and “Move Down” options will also populate once a secondary payer is entered to change payer order:
Payers other than Medicare will see the following fields:
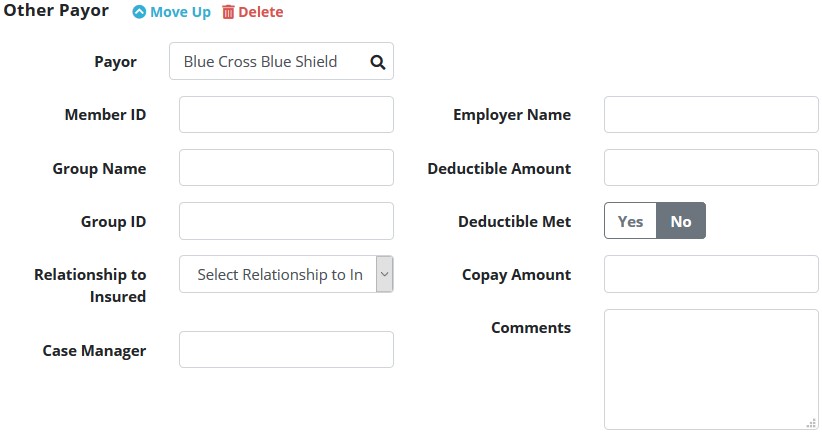
There will be an error if the “Relationship to Insured” is not selected.
NOTE: Primary Payer is not required to save a Referral, but it is required for converting a referral to Pending status.
Admission Information – Choose the Type of Admission, Admission Source and whether admission is New or Hospice to Hospice Transfer.
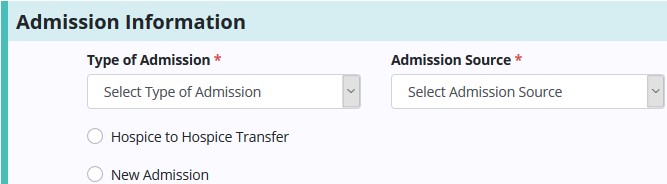
These fields will allow the system to create the appropriate Benefit Period for the patient with the correct number of days, allowing the recertification to be scheduled in a timely manner.
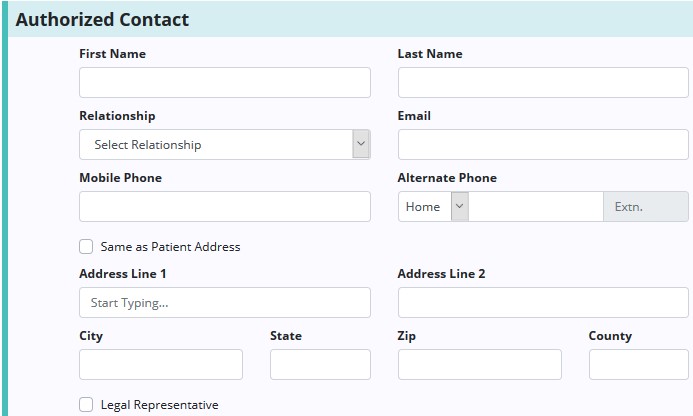
Authorized Contact – Enter patient contact information and indicate if they are Legal Representative.
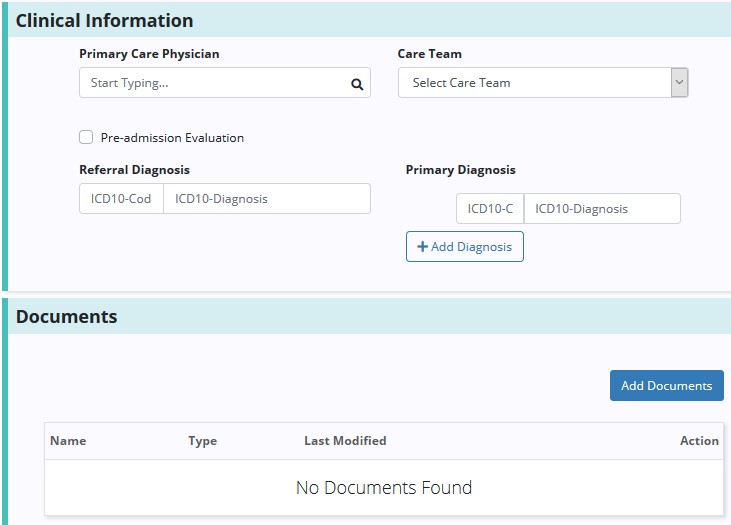
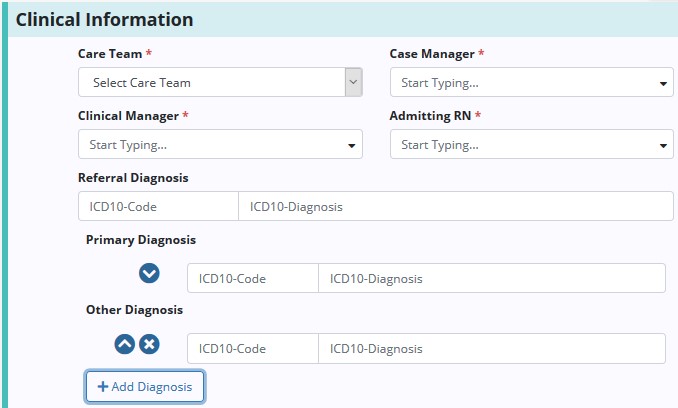
Clinical Information/Documents – Encompasses patient care information, diagnoses and attach applicable documents.
NOTE: If document type is not available, users with specific permissions can add new Upload Types from the List.
After all the Referral sections have been entered, select the “Save Referral” button to save all details entered into the system or “Convert to Pending” to move to the next step of the intake process.
List/Referrals
The Referrals list will appear with patient’s Referral Date, Patient Name, Referral Source, DOB, Gender and name of the person who entered the initial referral. Search through the list of referrals using the search bar in the top left. Export the entire list by selecting the “Export” button in the top right.
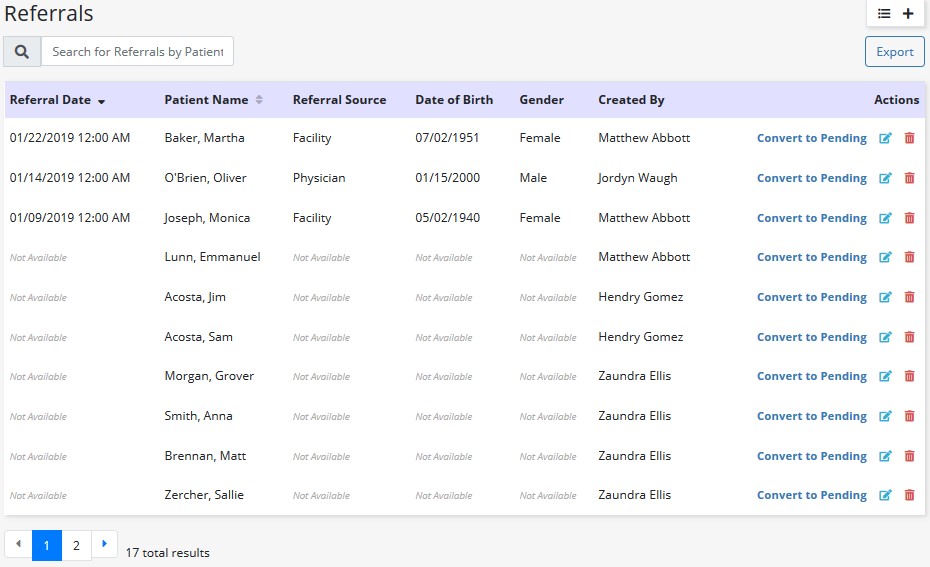
The Action column contains a variety of action items for the patient’s referral.
The referral should be converted to pending once a decision has been made to admit a patient and there is an appointment made for admission. In the existing Referral list, select the “Convert to Pending” hyperlink under the Action column to admit the patient. The patient window will appear with sections on the left side that are pertinent to the admission process.
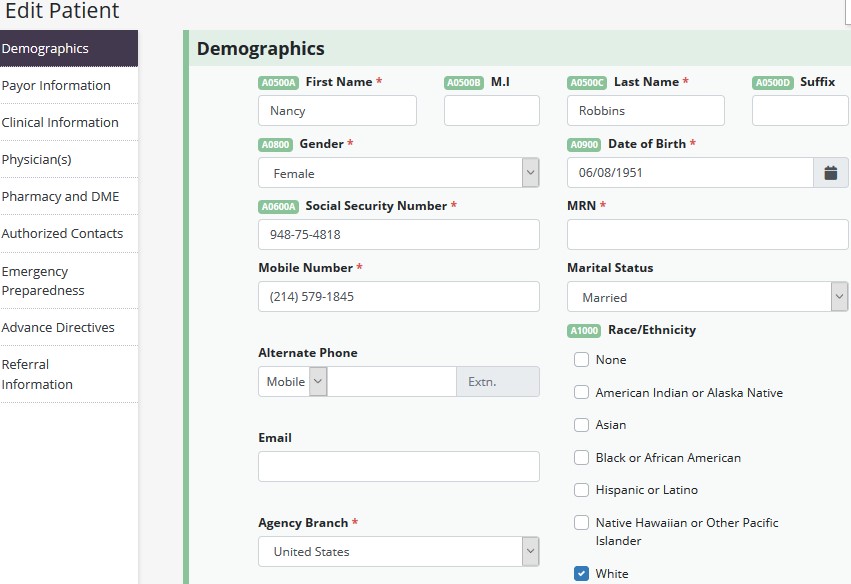
Demographics section will contain mostly information that was entered during the referral process. Below are sections that were not in the referral process and need to be addressed:
Once all required information has been entered, select the “Next” button at the bottom to continue. In addition to the Demographics section, the sections listed below will also need to be completed prior to admitting the patient:
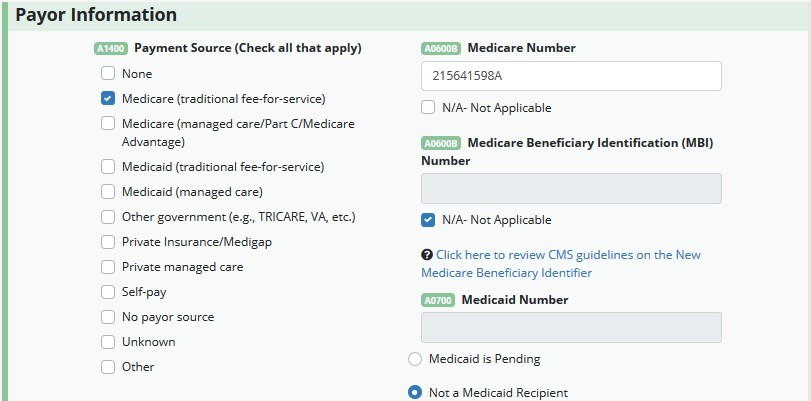
Payer Information – This section requires the Medicare number, MBI (Medicare Beneficiary Number) and/or Medicaid number to be entered, if they were not entered during the New Referral process.

Medicare eligibility can be rechecked, additional payers can be added, and Admission Information can be confirmed or entered.
Navigate through the referral by selecting these buttons:
![]()
Clinical Information – This section encompasses various clinical details, including the anticipated team members. These details will populate from the New Referral process.
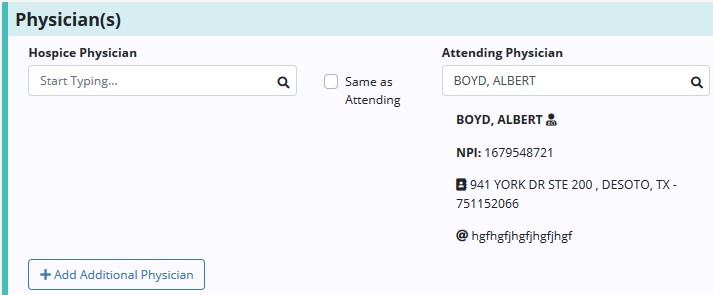
Physician(s) – If the referring physician was identified as the Attending Physician during the new referral process, the physician’s name will automatically populate that field. Start typing the Hospice Physician name to search and select the checkbox if it will be the same as the Attending Physician. Select the “Add Additional Physician” button if there are more physicians involved in patient care.
Pharmacy and DME – This section allows users to add the pharmacy where the patient will be receiving medications. Multiple pharmacies may be entered from this window. If the pharmacy is not listed in the system, the option to add a new pharmacy is available by selecting the “Add Pharmacy” button (permissions based).
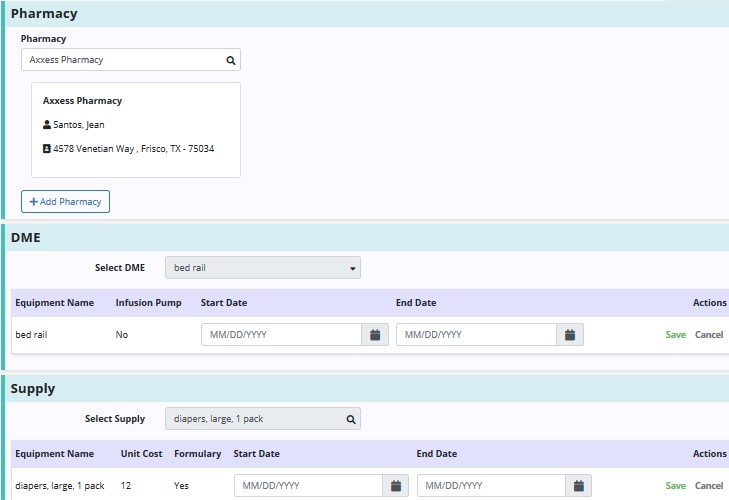
Add DME by typing the name in the search bar or select to scroll through the list of available DME. Once found, enter the Start and/or End Date then select “Save”. Add Supplies by typing the name in the search bar. Once found, enter the Start and/or End Date then select “Save”. Both will flow to the Plan of Care.
Authorized Contacts – At least one authorized contact must be entered in this section. If an emergency contact was added during the new Referral process, the details of that contact will populate in this window. Add additional as needed.
Emergency Preparedness – Choose an Emergency Preparedness level.
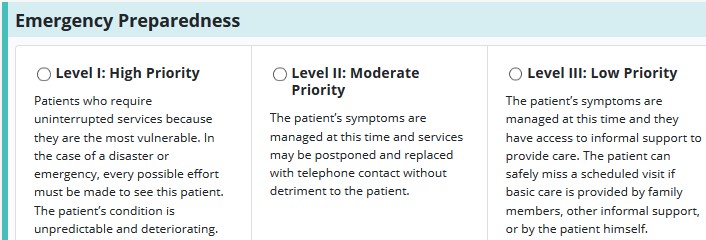
Choose Emergency Preparedness Information, Evacuation Zone and enter Evacuation Address.
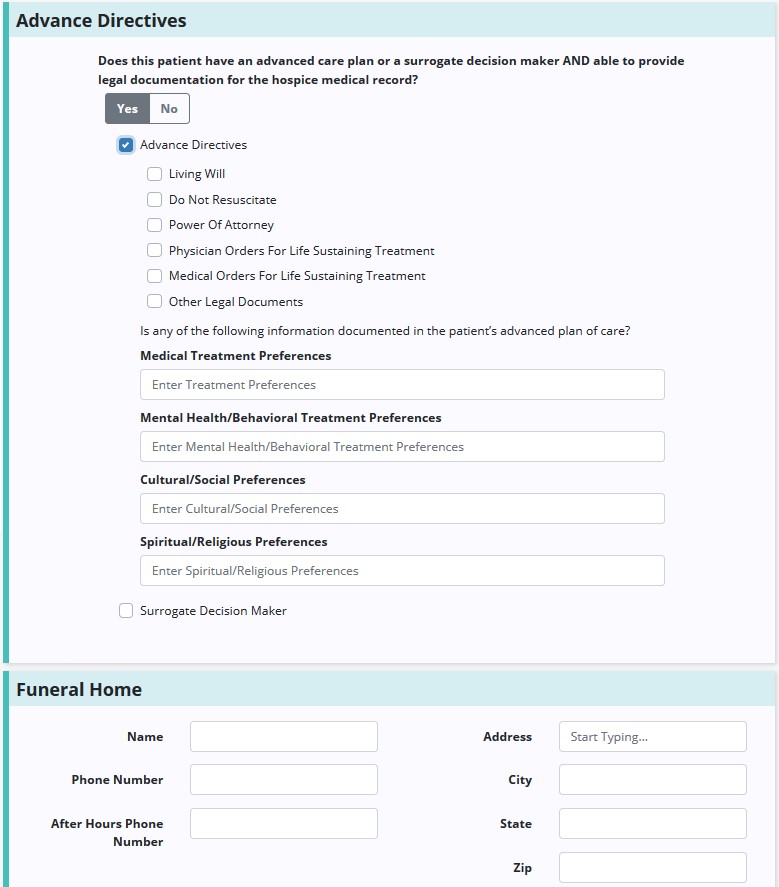
Advanced Directives – If the patient has an Advanced Directive or a Surrogate Decision Maker and can provide legal documentation for the home health medical record, the options are available to enter those details. Funeral Home information is also entered in this section.
Referral Information – This section assists agencies in tracking referrals including confirming referral details entered during the New Referral process.

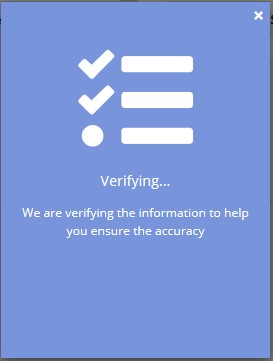
Choose/Confirm Community Liaison, Source of Referral and attach documents. When all required referral information has been entered, select “Complete.” The following verification pop up will check that the referral was completed entirely and if it is, a green confirmation notification will appear.
Patients/Patient Charts
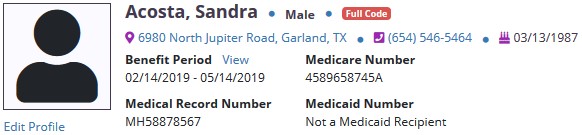
The main section of the patient charts window will contain a brief synopsis of the patient’s details:
On the left-hand side of the Patient Charts window, there are some parameters available to further narrow the selection when searching for a patient.
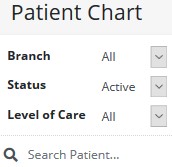
The patient’s scheduled tasks will appear at the bottom of the Patient Charts window. The best way to review patient tasks and schedule further visits is from the Patient Schedule.
The Schedule Center is a 14-day, Month or Benefit Period (in List View) view of the patient’s calendar.
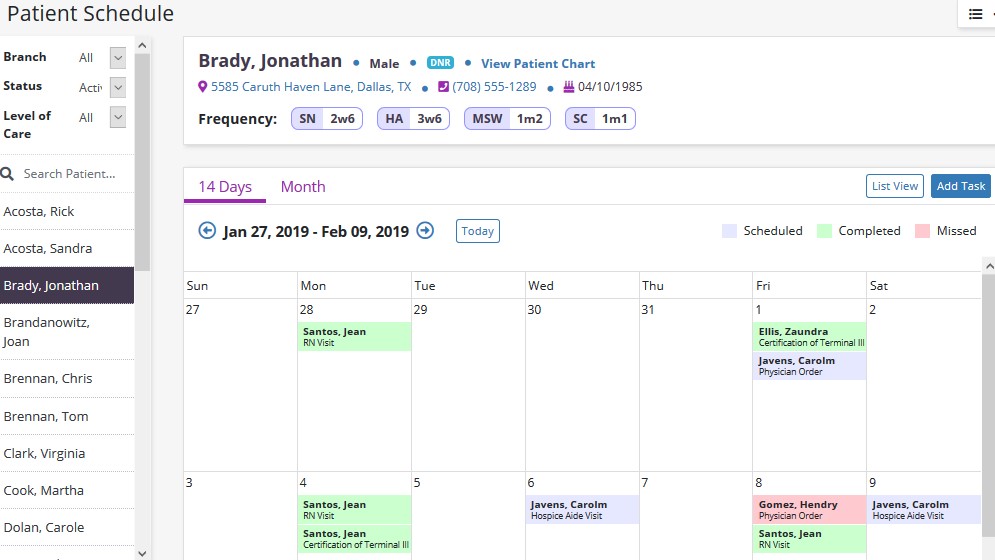
The color legend is located above the calendar for easy reference:
![]()
The filters on the left-hand side of the Patient Schedule provide the opportunity to narrow down the search for patients.
Select the ![]() button to schedule a visit.
button to schedule a visit.
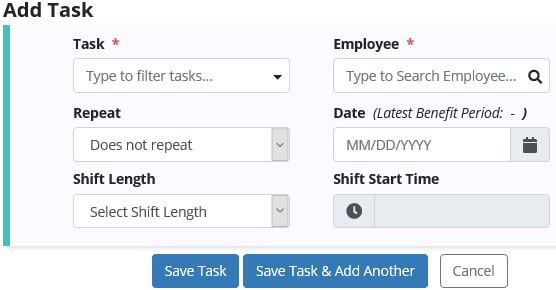
Start typing the name of the Task or choose from the drop-down list. Then start typing the name of the Employee and results will narrow for choices. Repeat the Task either Weekly or Biweekly. Choose Flexible under the Repeat drop-down to add multiple tasks under the Date entry. Choose a Shift Length from 1-12 hours in hour increments. If a Shift Length is chosen, then a Shift Start Time must be chosen. Select the On-Call Visit checkbox if applicable. Select the “Save Task & Add Another” button if there is more than one Task to add or select “Save Task” for adding a single task.
Manage individual tasks by choosing any of the three options under the Action column next to each task. Reassign, Print or Delete a task.
![]()
If the user chooses to reassign a single task, a search option will appear to find another clinician. Once found, select the “Save” button to complete.
![]()
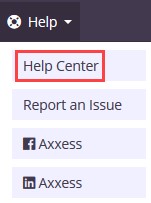
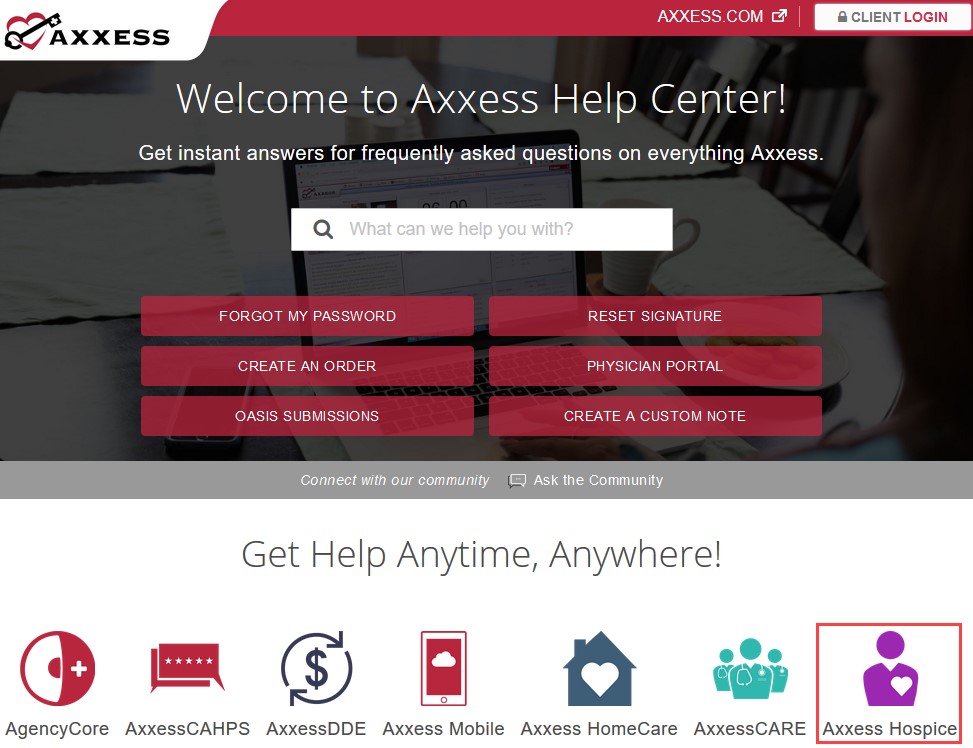
A great resource that is available 24/7 is our Help Center. It is a place to get answers to frequently asked questions or watch videos on all our Axxess products. Our Help Center can be accessed by selecting Help/Help Center or https://www.axxess.com/help/