The Insurance/Payor profile screen has been beautifully redesigned to accommodate more Insurance/Payor requirements. The changes include new sections, new data fields, helpful tool tips and additional HCFA-1500/UB-04 Locators fields.
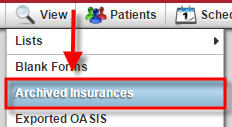 To make this transition smooth, we have automatically converted any of your old Insurance/Payor profiles to the new format. All existing fields in the setup prior to the update were copied over to avoid any interruption. AgencyCore will also provide you the ability to view previous Insurance/Payor profiles under the Archived Insurances view located under the View menu.
 The new profile introduces a more intuitive four step process for setting up new Insurances/Payors. Each step has been structured to address key requirements to ensure claims are created according to Payor specifications. Here are the four easy steps:
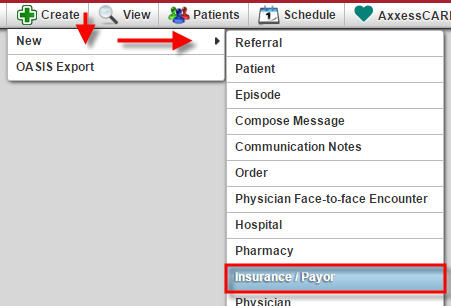
To add a new insurance from the main menu hover over Create, choose New and select Insurance/Payor.
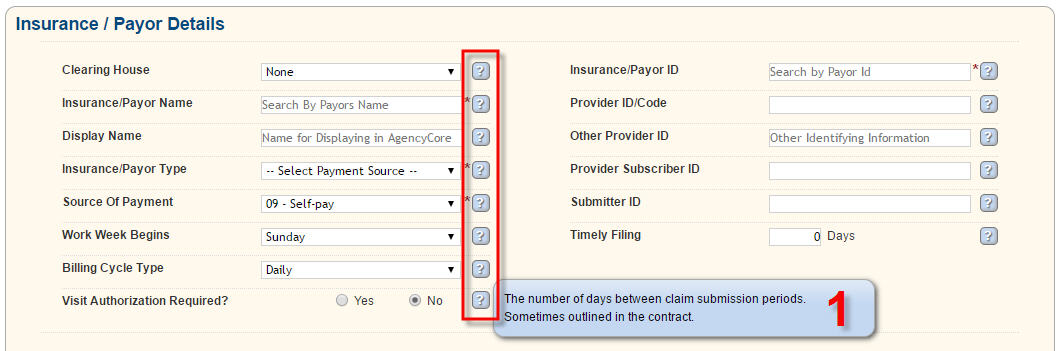
INSURANCE / PAYOR DETAILS
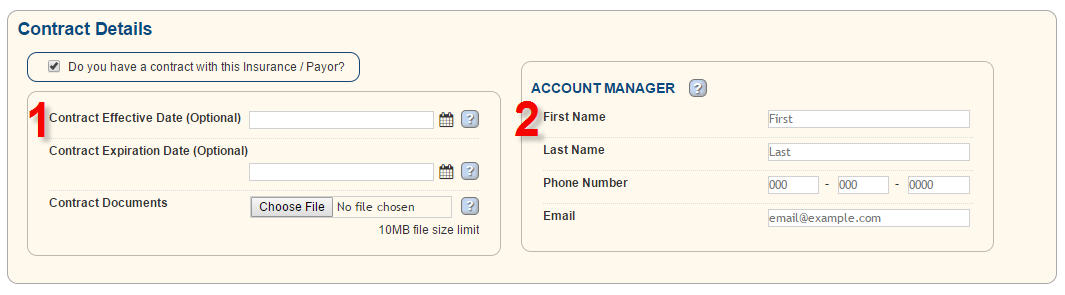
On the first page of setting up a new insurance, you have the ability to customize the information to fit each agency individually. You can add your Contract Details (1) and/or set up a payor Account Manager (2).
You have the freedom to completely customize your payor profile. We have added hints to help you understand each field.
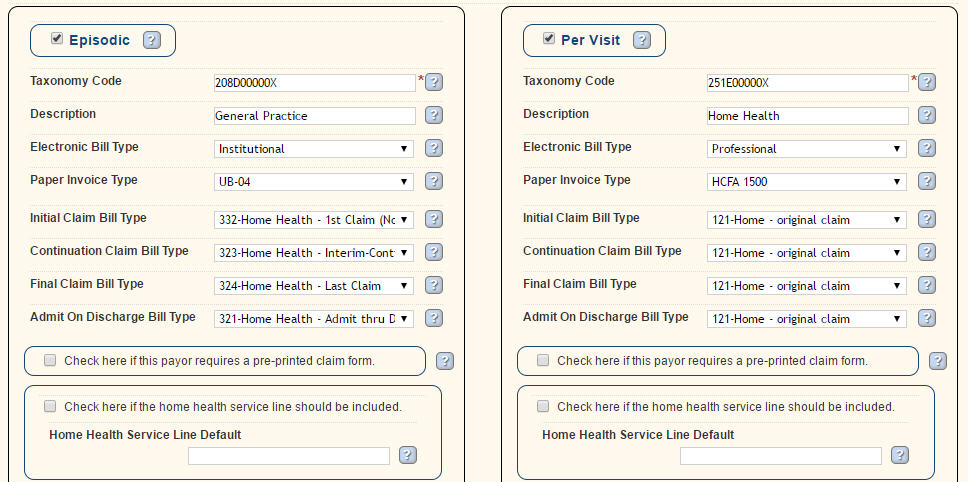
You can specify whether you want to bill your claims Episodically with a RAP and a final or Per Visit with a single claim. You are able to set up each payor with their required recommendations.
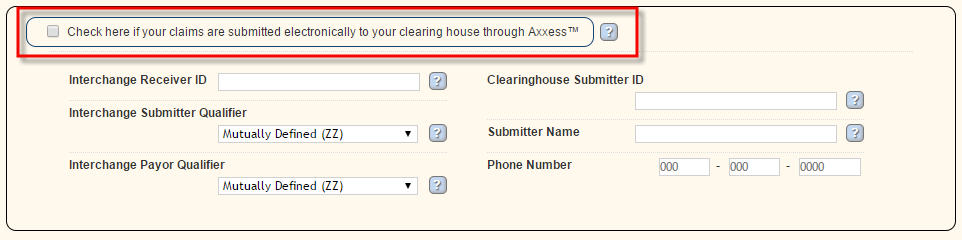
You have the choice of billing electronically through Axxess, put a check mark in the box, or downloading your claims and then uploading them directly to your intermediary.
You may specify if payments are to be sent to a different address by checking the box and adding the info. When you are complete simply click NEXT:BILLING INFORMATION.
![]()
BILLING INFORMATION
You have the ability to complete Field locators to tailor the claims to the payer’s specifications.
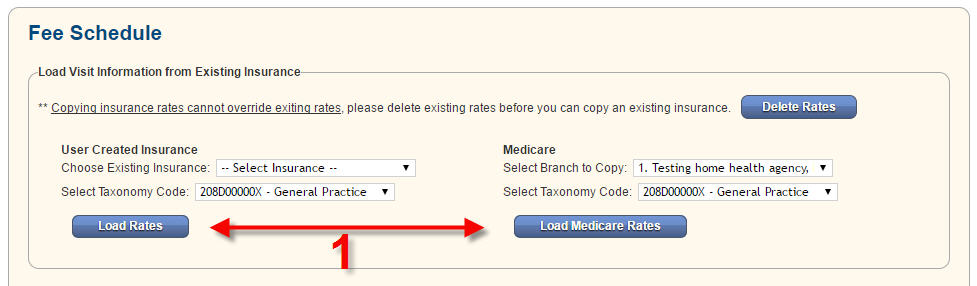
FEE SCHEDULE
You have the ability to load the rates and coding for each payer per task (2) or duplicate the coding and rates (1) previously loaded into another payer.
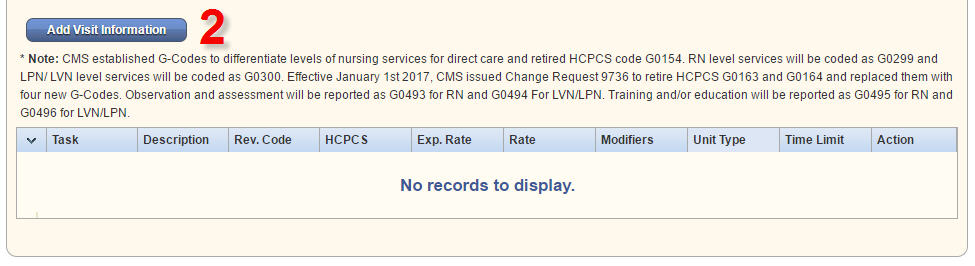
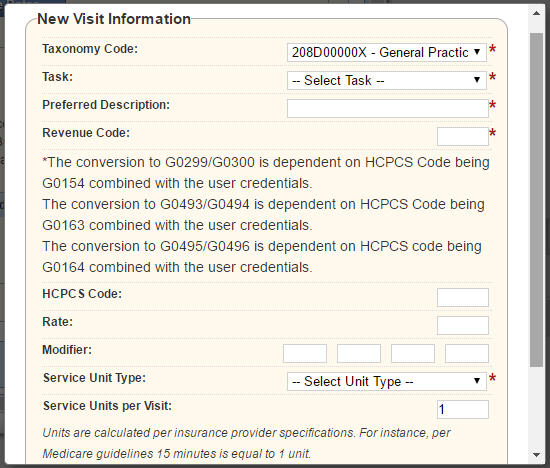
Clicking on Add Visit Information will open a pop up window that allows you to customize your billing task details. (Hint: the items that show up under the drop down list for task will be the same items that you choose when scheduling)
SUMMARY
Step 4 is a summary of your payor setup, review the information to make sure everything is complete.
 Axxess gives you the choice to bill a payor by either Per Visit or Episodic Claims. The payor class designation will give an agency the ability to create claims accordingly. Your agency will need to select Episodic or Per Visit in the insurance profile in order to bill accordingly.
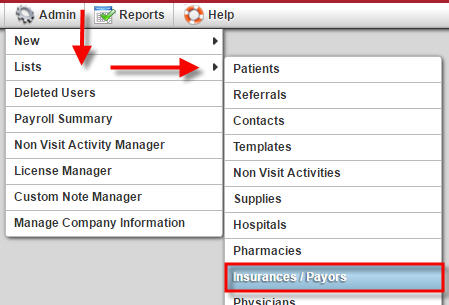
To navigate to the list of Insurance/Payors, if you have Admin permissions, hover over Admin, choose List and select Insurances/Payors.
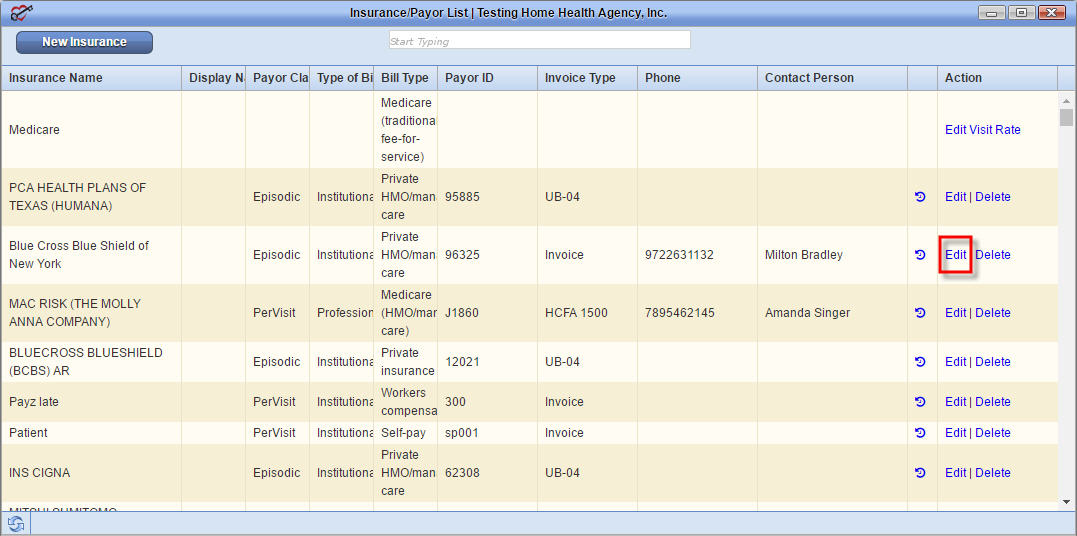
To make changes to an existing Insurance Provider, locate the payor and select Edit on the right.
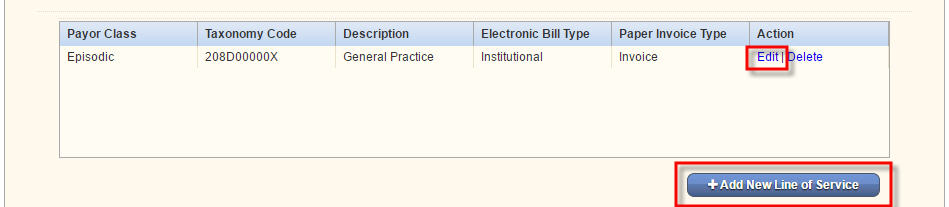
Scroll down to the table in the middle of the page that starts with Payor Class. You can edit an existing line of service by clicking Edit on the right or you can add a new line of service by clicking the Add New Line of Service button on the bottom right of the table.
 In the edit/add screen, select the appropriate Payor Class from the drop down menu.
Scroll to the bottom and select Save.