An agency has two options to add a Client into Axxess Home Care. The path you choose will depend on information you receive at time of referral as well as by the processes your agency follows.
To add a new client receiving skilled services as a New Client go to Create, then choose Client and select Medical Client.
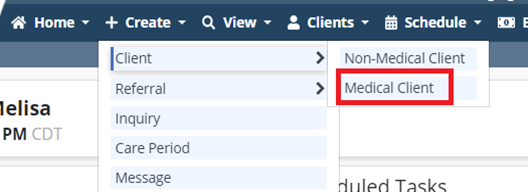
Medical Clients include:
Throughout Axxess Home Care; field items that require completion to save the client to the database are indicated by a red asterisk to the right of the field.
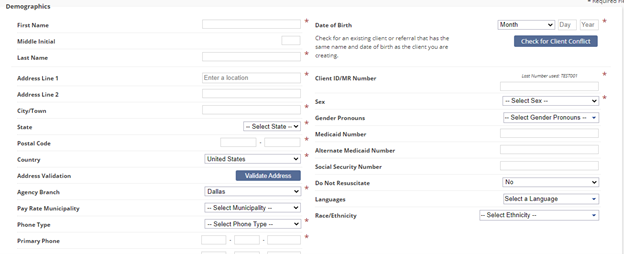
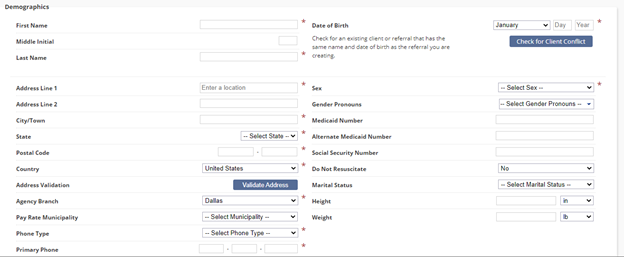
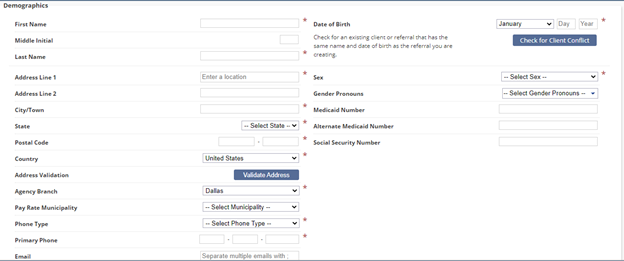
Items noted with a red asterisk in the Demographics section include:
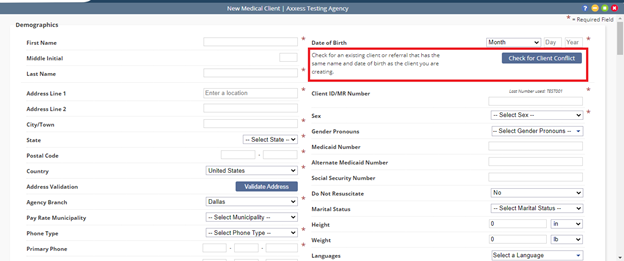
Once the client name and DOB are entered the user has the option to check for client conflict. This action checks for any existing clients that match the name/DOB of the referral.
CARE PERIOD TIME
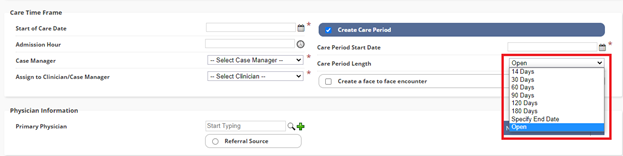
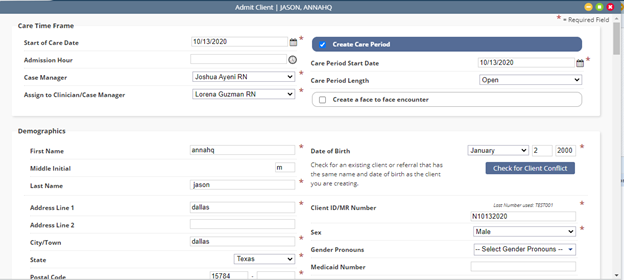
Your next section in completing the New Medical Client Intake is Care Period Time Frame. Care Period Time Frame Required Fields are as follows:
FACE TO FACE ENCOUNTER
When selected, the system will create a Face to Face Encounter task for the agency to send/track to a physician. (This is typically not needed for Non-Medical Clients)

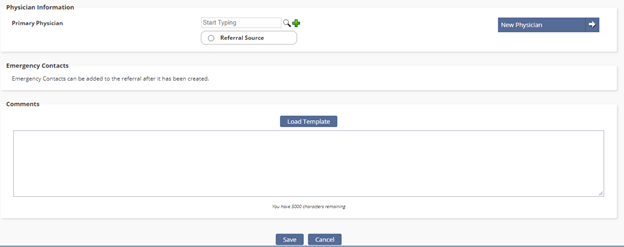
PHYSICIAN INFORMATION
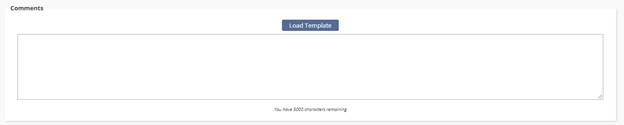
(This is the doctor that will sign the orders) which may or may not be different than the referring physician. An example of differing referral and primary physicians occurs in many instances when a client is discharged from a hospital. The initial verbal order for start of care order and other comments may be entered in the comments section.

If your agency tracks referral sources and it happens to be a physician that referred the client; the intake staff may add the physician to the referral form.
If the physician is not found, the user has the ability to add a New Physician right from the new referral screen. See, “Creating and Managing Physician Information” for further instruction on adding a new Physician into the software.
PHARMACY INFORMATION
Agencies have the option to enter in the Client’s Pharmacy information which will populate the Medication Profile (See Medication Profile Tutorial). You can add multiple Pharmacies per client. If the Pharmacy is not found, the user has the ability to add a New Pharmacy right from the intake. See “Creating and Managing Pharmacy Information” for further instruction on adding a new Pharmacy into the software.
![]()
ADMISSION DIAGNOSIS
Agencies have the option to populate the Admission Diagnosis Code upon Intake of a New Medical Client.
Checking the top box allows the diagnosis code placed in as the Admission Diagnosis to be copied over as the Primary Diagnosis
Agencies can choose to enter either ICD-9 or ICD-10 codes based upon their Regulations
Axxess Home Care has an ICD-10 Lookup built-in which allows you to either place in the description and search or the code and search and it will reverse populate for you.

PAYMENT SOURCES
This section is not required at initial client intake; however, beneficial to input as soon as it is obtained. If you do not have Payment Source/s information during the Intake process it can be added through Clients-> Client Center-> Edit Client (See Edit Client tutorial for additional information)
Select Payment Source: All payment sources the agency has set up will be available for selection.
Select Hierarchy: Indicate the hierarchy the particular payment source is for the client. (Primary, Secondary, Tertiary)
Relationship: Select the client’s relationship to the Insurance (Self, Spouse, POA, etc..)
Agency can place additional Payment Source Information about the Payment Source: Plan ID, Group Name, Group ID, Start and End Date (If Applicable)
Multiple Payment Sources may be added via the Add Payment Source Tab

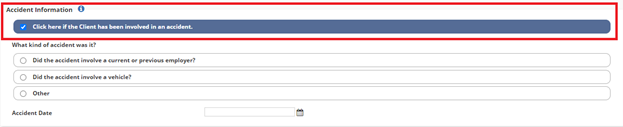
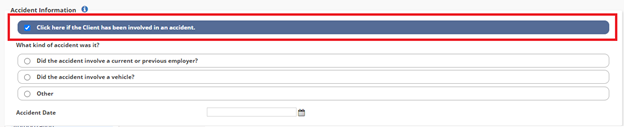
ACCIDENT INFORMATION
This section is not a required field for Intake of a Non-Medical Client. Complete this information when the client is receiving services due to an accident. This information is used during billing):
Type of accident:
Did it involve a current or previous employer
Did the accident involve a vehicle
Other
Date of Accident
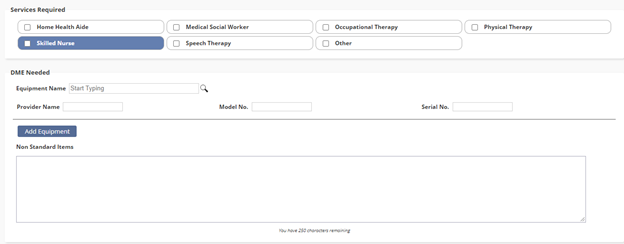
SERVICES REQUIRED
This pull from the information entered in Manage Company Information that the agency has associated to medical clients.
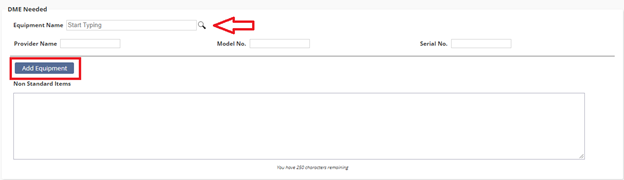
DME NEEDED
Choices for selection will pull from the list created by the agency in Manage Company Information. Multiple items may be added along with optional Provider name, Model number, and Serial Number. If an item is not in the DME list it may be added in text format in the Non-Standard comment box.

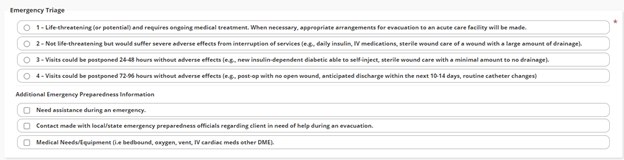
EMERGENCY TRIAGE LEVEL
This is a required field at time of Intake. Clinician’s do have the ability to change this during the admission under “Edit” in the Client chart (This will be discussed in a separate Tutorial).
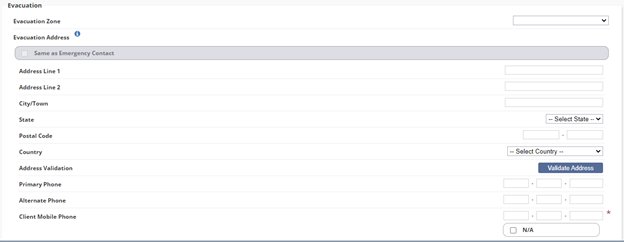
EVACUATION ZONE
This section is applied to clients that live in areas that require Evacuation necessities. This is based upon Agency Policy and Procedures. (Ex: Hurricanes, Earthquakes, Floods, etc.)
REFERRAL SOURCE
This section assists the agency in tracking where clients are coming from.
Referral Type: Describes what external entity sent the referral
Referral Date: Enter the date the agency received the referral from the referral source
Referral Start of Care Date: Requested date to begin services
Admission Source: Where the client came from (Clinic/Physician, Hospital, SNF, etc.)
Marketer: This is an internal user associated to the referral source.

Once all the required fields and any additional information is entered the user may select
Save: to place the client in a pending admission status Clients->Pending Admission
Admit which adds the client as an admission. Clients -> Client Center
Cancel discards the information.
An agency has two options to add a Client into Axxess Home Care. The path you choose will depend on information you receive at time of referral as well as by the processes your agency follows.
The agency has an intake option to enter as a “Referral” or “New Client” for each client that comes into your agency.
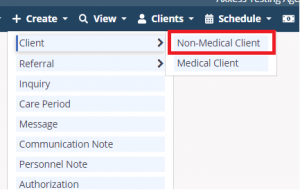
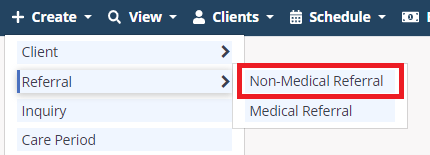
To add a new Non-Medical client in as a “Client” go to Create-> Client -> Medical Non-Medical Client
Throughout Axxess Home Care; field items that require completion to save the document to the database are indicated by a red asterisk to the right of the field.
DEMOGRAPHICS
Items noted with a red asterisk in the Demographics section include:
Once the client name and DOB are entered the user has the option to check for client conflict. This action checks for any existing clients that match the name/DOB of the referral.
CARE PERIOD TIME
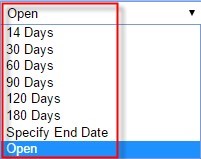
Your next section in the Non-Medical Client Intake is Care Period Time Frame. Required Fields are as follows:
FACE TO FACE ENCOUNTER
When selected, the system will create a Face to Face Encounter task for the agency to send/track to a physician. (This is typically not needed for Non-Medical Clients)

PAYMENT SOURCES
This section is not required at initial client intake; however, beneficial to input as soon as it is obtained. If you do not have Payment Source/s information during the Intake process it can be added through Clients-> Client Center-> Edit Client (See Edit Client tutorial for additional information)
Multiple Payment Sources may be added via the Add Payment Source Tab

ACCIDENT INFORMATION
This section is not a required field for Intake of a Non-Medical Client. Complete this information when the client is receiving services due to an accident. This information is used during billing):
SERVICES REQUIRED
Indicate the services the client will be receiving. Options available reflect what the agency set up in Manage Company Information.

EMERGENCY TRIAGE LEVEL
This is a required field at time of Intake. Clinician’s do have the ability to change this during the admission under “Edit” in the Client chart (This will be discussed in a separate Tutorial).
EVACUATION ZONE
This section is applied to clients that live in areas that require Evacuation necessities. This is based upon Agency Policy and Procedures. (Ex: Hurricanes, Earthquakes, Floods, etc.)
REFERRAL SOURCE
This section assists the agency in tracking where clients are coming from.

Once all the required fields and any additional information are entered the user selects “Save” and the client is added.
The Client chart is now created and will now be located under the “Clients” tab -> Client Center
From here you are able to view and manage your Client Charts.
An agency has two options to add a Client into Axxess Home Care. The path you choose will depend on information you receive at time of referral as well as by the processes your agency follows.
The agency has an intake option to enter as a “Referral” or “New Client” for each client that comes into your agency.
To add a new client receiving skilled services as a “Referral” go to Create-> Referral -> Medical Referral
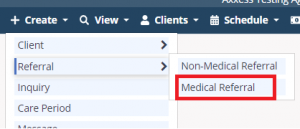
Medical Referrals include:
If your agency tracks referral sources and it happens to be a physician that referred the client; the intake staff may add the physician to the referral form.
If the physician is not found, the user has the ability to add a New Physician right from the new referral screen. See, “Creating and Managing Physician Information” for further instruction on adding a new Physician into the software
Throughout Axxess Home Care, field items that require completion to save the document to the database are indicated by a red asterisk to the right of the field.
Items noted with a red asterisk in the Referral Source and Demographics section include:

The lower half of the referral information page allows intake staff to indicate services requested; any DME equipment needed;
Primary Physician information (this is the doctor that will sign the orders) which may or may not be different than the referring physician. An example of differing referral and primary physicians occurs in many instances when a client is discharged from a hospital. The initial verbal order for start of care order and other comments may be entered in the comments section.
Once all the required fields and any additional information is entered the user selects “Save” and the referral is added. All of the information entered on the “Referral” form will transfer onto the new “client” form, after selecting the client to admit under the existing referrals section.
The referral will now be located under the “Clients” tab -> Referrals
From here you are able to view and manage your referrals.
An agency has two options to add a Client into Axxess Homecare. The path you choose will depend on information you receive at time of referral as well as by the processes your agency follows.
The agency has an intake option to enter as a “Referral” or “New Client” for each client that comes into your agency.
To add a new Non-Medical client in as a “Referral” go to Create-> Referral -> Medical Non-Medical Referral
Throughout Axxess Home Care, field items that require completion to save the document to the database are indicated by a red asterisk to the right of the field.
Items noted with a red asterisk in the Referral Source and Demographics section include:

Once the client name and DOB are entered the user has the option to check for client conflict. This action checks for any existing clients that match the name/DOB of the referral.
Services Required pull from the information entered in Manage Company Information that the agency has associated to non-medical clients.

Once all the required fields and any additional information are entered the user selects “Save” and the referral is added.
All of the information entered on the “Referral” form will transfer onto the new “client” form, after selecting the client to admit under the “Referrals” section.
The referral will now be located under the “Clients” tab -> Referrals
From here you are able to view and manage your referrals.
The first place to make a client a non-admit is while the client is still in either Referral or Pending Admission status:
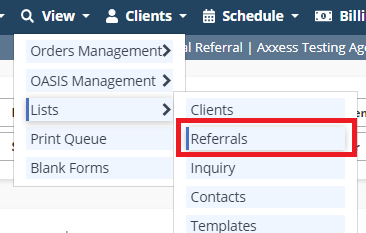
View ➜ List ➜ Referrals
Clients ➜ Referrals or Pending Admissions
Select Non-Admit on the far right under Actions.
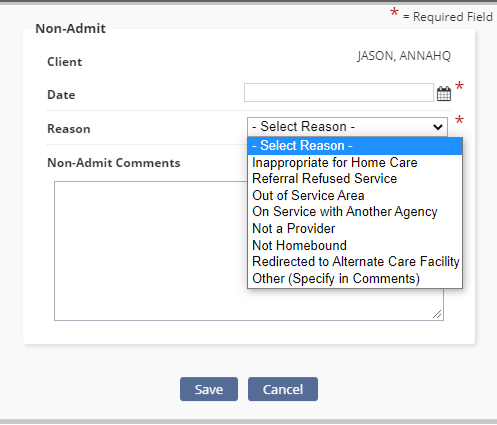
Enter the Non-Admission details and Save.

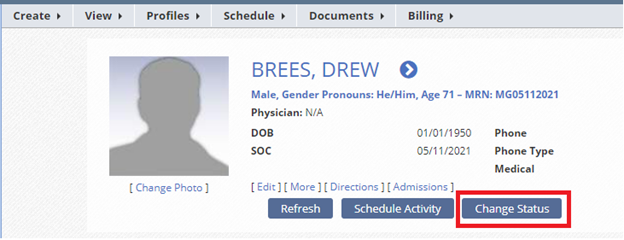
An agency can also change an active client to a Non-Admit from within the client’s chart.
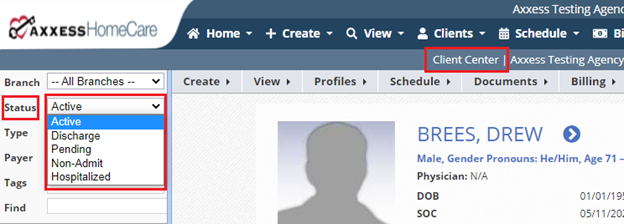
Client-> Client Center->Select the Client and then Change Status.
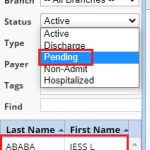
Select Non-Admit from the status drop-down list.
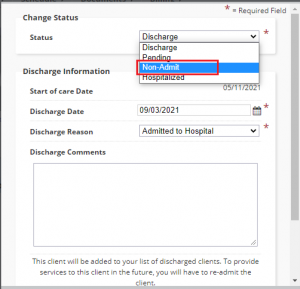
Once Non-Admit is selected the lower portion updates to reflect Non-Admission options.
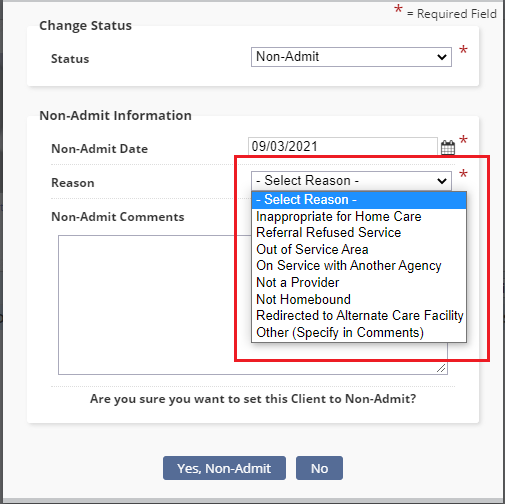
Choose the most appropriate reason and then select to Non-Admit.
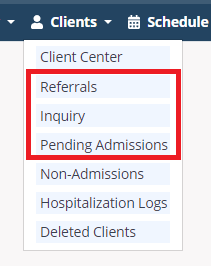
Non-Admitted clients can be viewed through 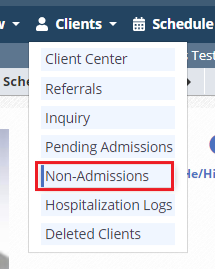 Clients -> Non-Admissions or Client Center->Non-Admissions.
Client details that are visible from the Non-Admitted Client list include the MRN (medical record number), the client name, insurance, date of birth, phone number, gender, non-admit reason and the non-admit date.
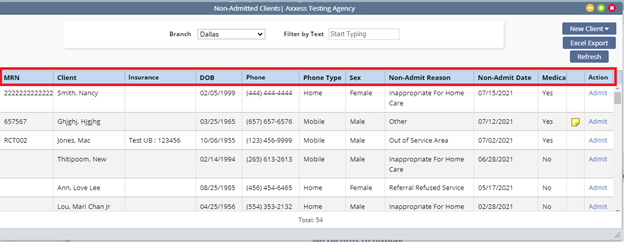
Under the Action column on the far right, a user with permissions has an option to Admit the client. This feature allows the agency to simply choose to Admit the client and complete the Admission steps instead of re-entering all the information once again. To print a list of non-admitted clients, simply export to Microsoft Excel.
Pending Admissions are clients that have been entered into the system as a New->Client (Medical or Non-Medical) or have transitioned from existing referrals. This occurs when an existing referral has been selected to Admit but then opted to save the information instead of Admitting.
This tutorial will cover:
 The Pending Client Admission list is a great tool for monitoring clients currently waiting for admission to your agency.
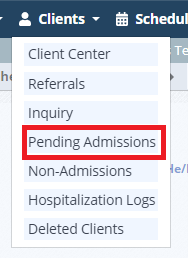
The quickest way to view pending clients is through Clients->Pending Admissions
Client specific Actions available within the Client list screen are Edit, Admit and Non-Admit.
Selecting Edit will open the client chart and allow the user to update applicable information. Remember to Save information prior to Exiting.
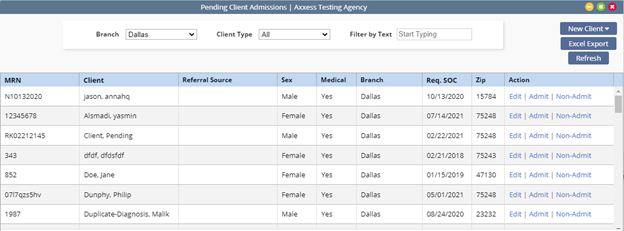
Selecting the action to Admit opens the Client Information page where information may be reviewed/updated. Once the Admit choice is selected the client will move off the pending list over to the active list.
NOTE: Update the Start of Care Date, and Care Period Start Date to match the admission information as needed.
The Non-Admit feature allows the agency to mark the client as a non-admission if they are not coming on service. Once selected the “Non-Admission Details” window will display allowing the user to update necessary information. Once saved the client moves to the Non-Admit Client List.
To Upload Documents to a Pending Client (for example: hospital discharge records)
Clients -> Client Center
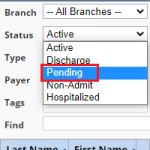
Select Pending from the status drop down list on the left hand side of the page
Locate and select the client from the Pending Client List
Once the client is selected choose Documents-Upload Document to upload documents to the client chart
To View uploaded client documents select Documents-View Documents.

Scheduling Tasks to a Pending Client:
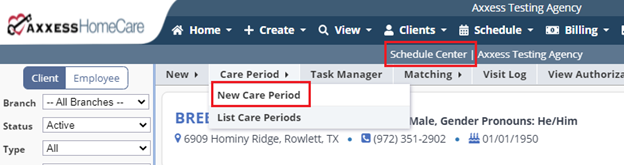
Schedule-Schedule Center-Status (Pending)
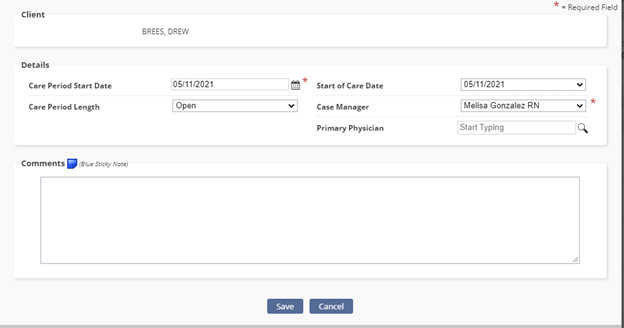
Pre-Requisite: A Care Period must be established for the client. To create a care period, select Care Period-New Care Period.
Complete the fields within the Details section. Comments related to the care period may also be entered. These comments appear as a blue sticky note on every task associated to the care period
To schedule one of more tasks: