This tutorial will provide you with an overview of the functionality found in the schedule center. Please see the Scheduling Tutorial for more in-depth training.
Navigate to Schedule tab -> Schedule Center.
The left column provides the ability to view client and employee calendars/schedules. The default search is by client. Selecting Employee updates the criteria and results to employee. Viewable items in the schedule center are role and permission based (selected from within the employee chart). Discipline roles only see clients they are scheduled to and are restricted to only viewing their own employee schedule.
Branch: Default is all branches. User’s that have multiple branch access under the same agency may limit the client/employee search by selecting an individual branch location.
Status: The Client or Employee’s current status level.
Type:
Filter: Client only search item: Drop down list of payment sources.
Tags: Allows filtering by tags the agency is using in the system (client/employee)
Find: Provides the ability to input part of the client/employee first or last name and filter the list.

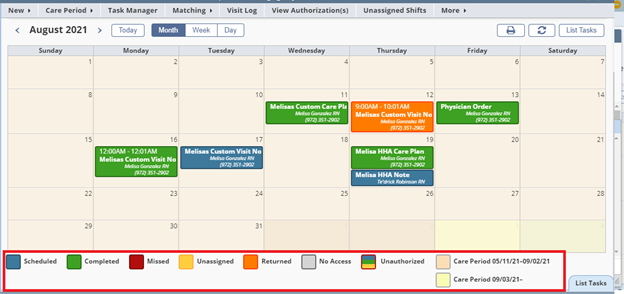
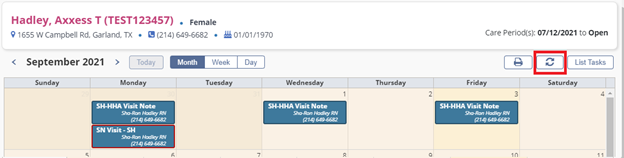
Once a client is selected his/her calendar will display.
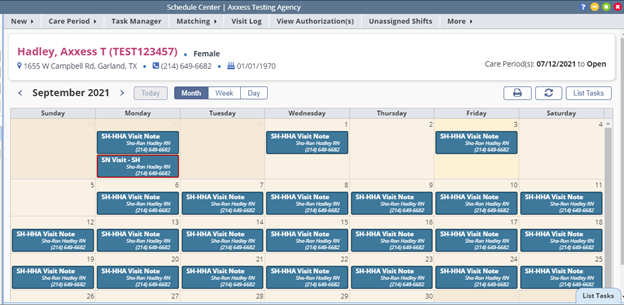
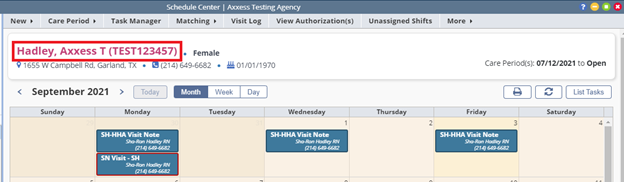
The Client’s Name is a quick link to the Client’s Chart.
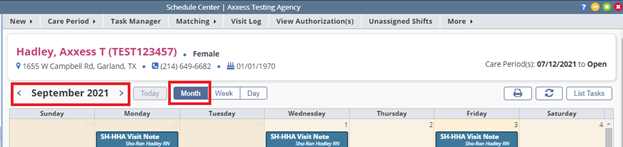
User’s may view the Client Schedule in Month, Week or Day Formats by selecting the corresponding action. The default view is by month.

Depending on the view selected the arrows will move to the prior or next (Day/Week/Month)
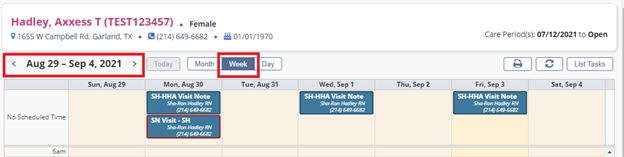
The Printer Icon will print the schedule (permission based)

The Rotating Circle Icon is a page refresh
Selecting List Tasks displays the client schedule in list format
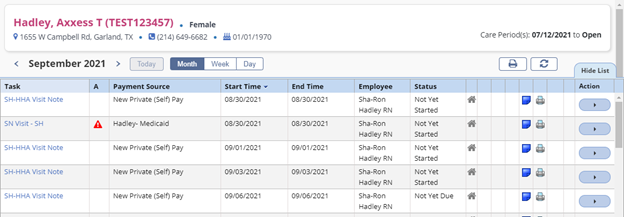
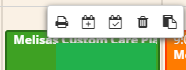
The Menu Bar above the task list is as follows:
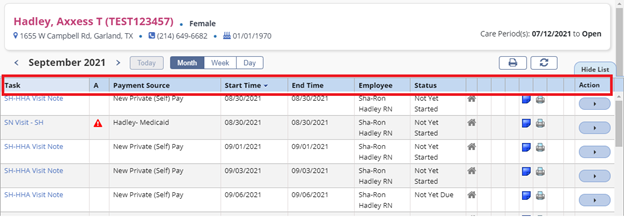
 The next columns are as follows:
Pending (Blue) Tasks: will have the following options available when you hover over the visits
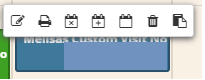
Completed (Green) Tasks on the other hand have fewer actions available.
Details and Delete are the same actions while Reopen will reopen the task.
Moving to the menu bar across the top of the client calendar page:
New-Client Task: There are two ways to schedule a task. Clicking on the calendar day or by selecting New->Client Task

Either path opens the scheduling window. Clicking on the calendar day will pre-populate the date in the new task schedule window. Users will enter the date when selecting New-Client Task. The actual process of scheduling is outlined in the Scheduling Tutorial.
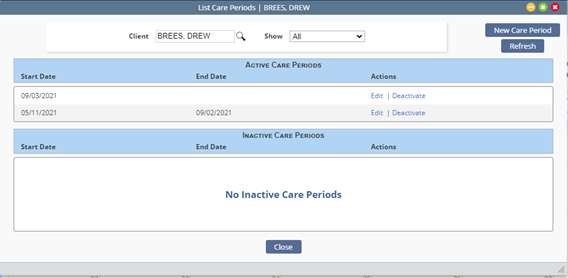
New Care Period and List Care Periods: An active care period covering the time-span being scheduled is a pre-requisite to successfully scheduling any task. To add a new care period the user selects Care Period-New.

The user completes the following information:
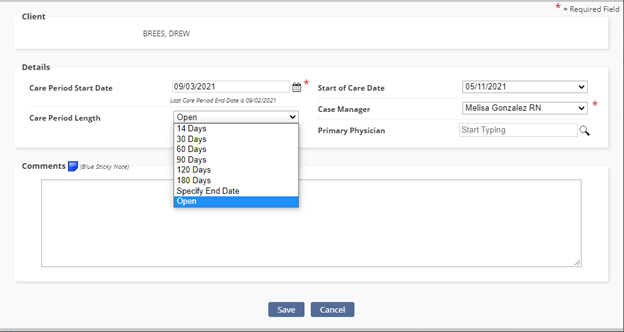
The Care Period List displays all active and any inactive care periods for the client. Active care periods may be Edited or inactivated while Inactive Care Periods may be reactivated.
For convenience, the option to add a New Care Period is also available.
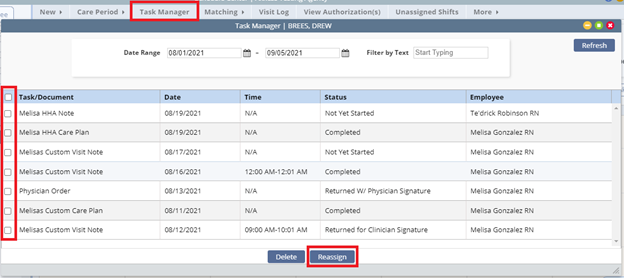
The Task manager allows you the ability to reassign or delete multiple tasks at the same time.
Select the date range wish to review, select the applicable tasks and select to delete or reassign the tasks. All tasks being reassigned will be to the same user.
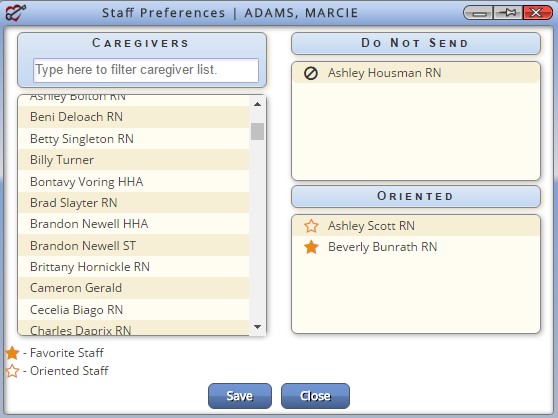
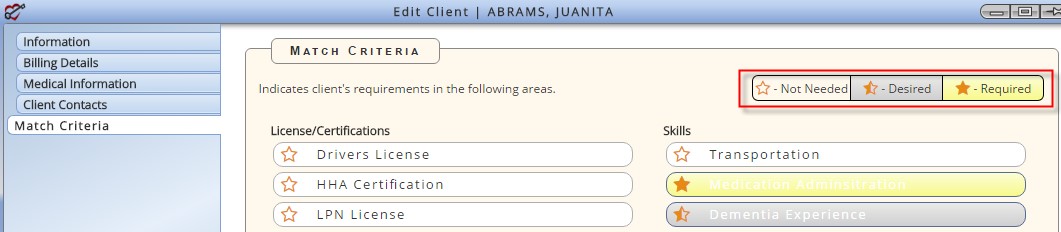
Matching: The matching tab has two submenus: Preferences and Match Criteria.

Preferences provides the ability to mark a caregiver as Oriented, a Client Favorite or as a Do Not Send.
Selecting Match Criteria takes the user to the client’s match criteria in their client file. From here the client’s criteria may be viewed, or updated. The Matching list created by the agency and is taken into consideration when using the matching functionality during the scheduling process.
To update simply click on the criteria.
The Visit Log provides the ability to update specific information for billable tasks. This is particularly useful for updating non-system user information.
Task status, start and end dates, time in/out as well as travel time logging may all be updated from this menu.

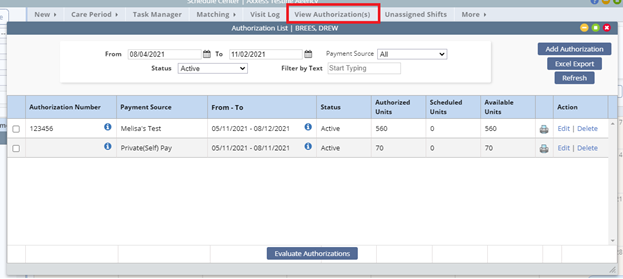
View Authorizations offers a quick link to the client’s authorization screen where they may view/edit or add a new authorization. View the authorization tutorial for a more in-depth training on setting up and managing client authorizations.
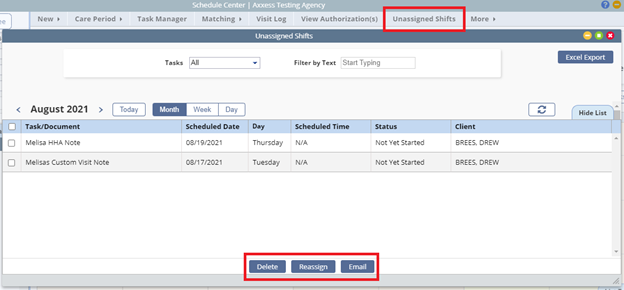
The Unassigned Shifts menu displays all scheduled tasks that have not been assigned to a caregiver.
The default page display is for the unassigned (open) tasks for the current month in list view. Users may select to view individual tasks, adjust the date range (month/week/day) or view in calendar format (select Hide List).
Delete: Allows you to delete the task
Reassign: To assign a caregiver select the day(s) they are confirming, select Reassign and choose the caregiver who is accepting the shift(s).
Email: Sends an email to all those clinicians who are either preferred or oriented with the patient to advise them that there is an unassigned shift for them to cover.
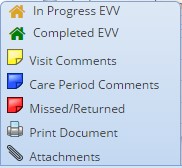
Moving to the bottom of the page you will see a color legend is located below the calendar. Task coloring has been implemented as a quick and easy user reference.