Admin/Admin Dashboard
The Administrator Dashboard is seven different tiles:
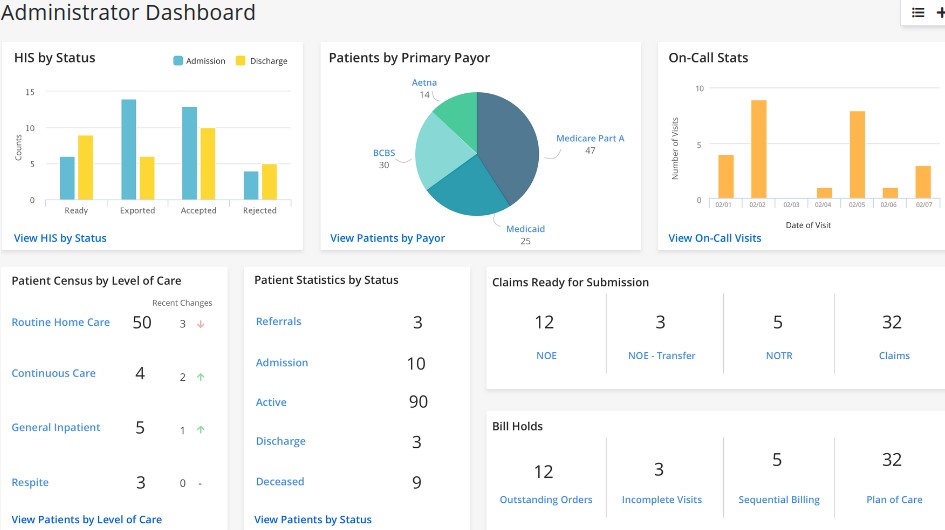
HIS by Status - Bar graph view of HIS differentiated by the number of Admissions and Discharge in Ready, Exported, Accepted and Rejected status.
Patients by Primary Payer - Pie graph view of how payers are split up between patients.
On-Call Status - Bar graph view of the number of visits that were made per day for the last seven days.
Patient Census by Level of Care - Shows the number of patients by Routine, Continuous, General Inpatient and Respite and the recent changes of each level.
Patient Statistics by Status - Shows the number of patients by Referrals, Admission, Active, Discharge and Deceased.
Claims Ready for Submission - Shows the number of claims by NOE, NOE-Transfer, NOTR and Claims that are ready for submission.
Bill Holds - Shows the number of bills being held by Outstanding Orders, Incomplete Visits, Sequential Billing and Plan of Care.
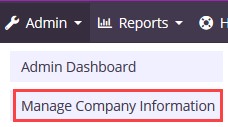
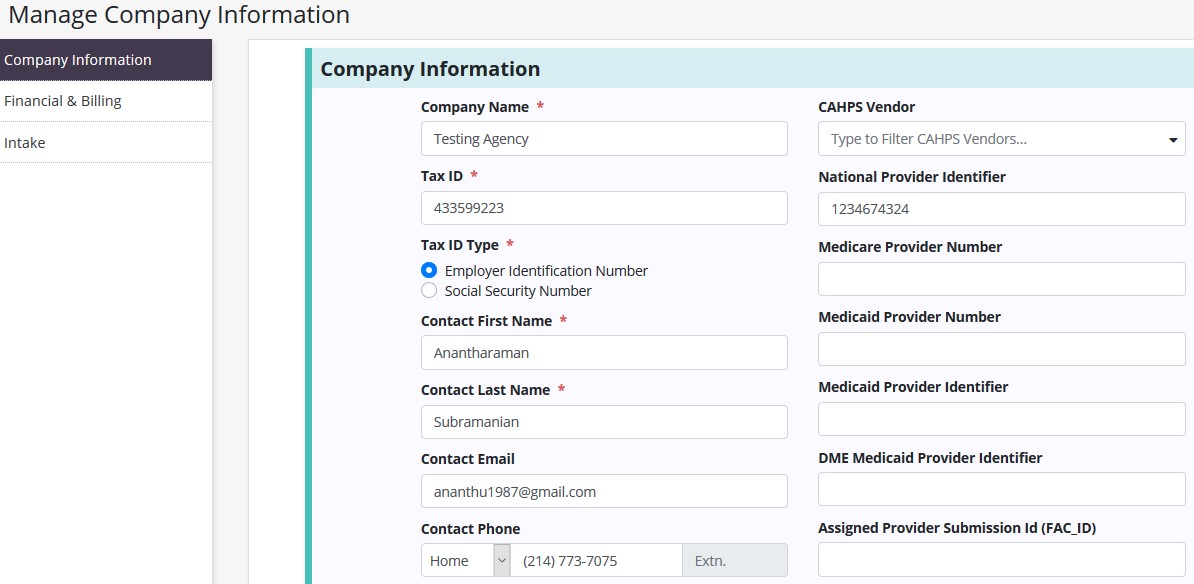
Admin/Manage Company Information
Manage Company Information is split up into three tabs found on the left side of the window:
NOTE: Anything with a red asterisk (*) means the information is required to save.
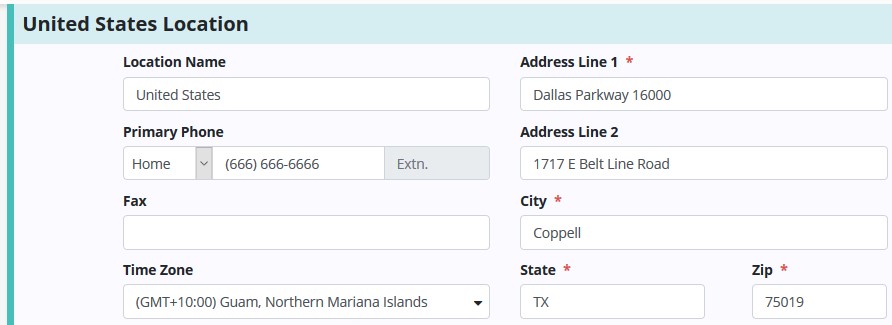
Agency Location - Enter the agency's Name, Phone & Fax number, Address and Time Zone.


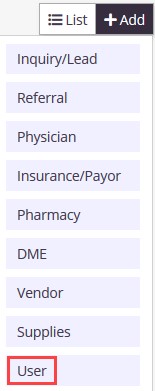
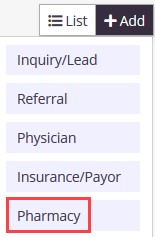
The top right-hand corner of Axxess Hospice houses the Lists and Add sections.
Add/User
Information – A window will open and the user's information must be entered. All items with an asterisk are required.
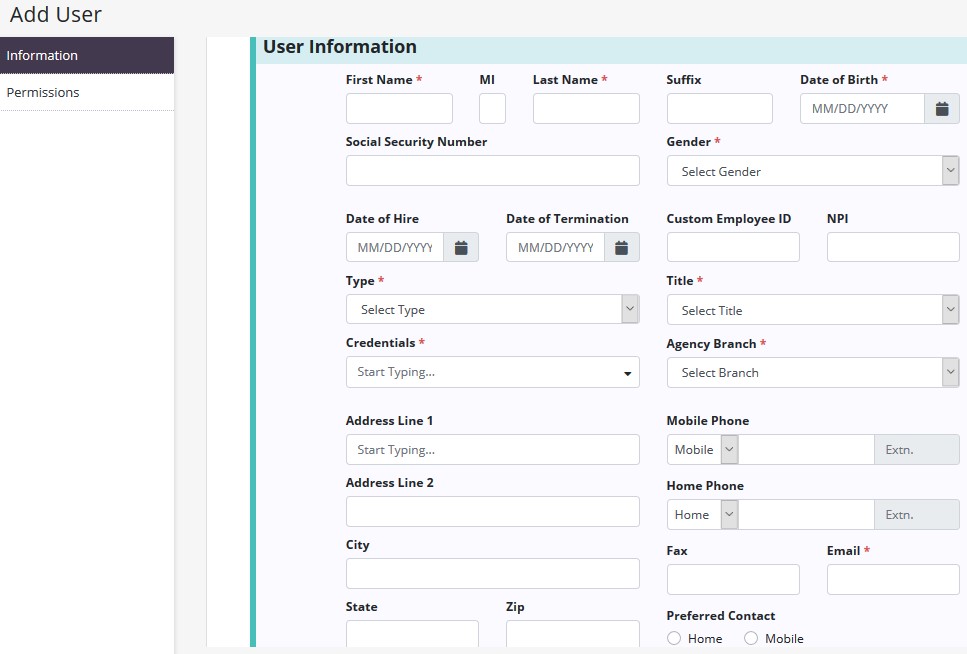
The bottom of the page houses System Roles. This is a restriction function that will allow agencies to limit the times that users can access the software. For example, if the "Allow Weekend Access" box is not checked and a user attempts to login on a Saturday, the system will not allow entry. Times can also be adjusted for the earliest time a user can log in and/or when they are automatically logged out of Axxess Hospice.

Select the "Save" button to leave the section but keep what has been entered so far. Select the "Next" button to move on to the next new user tab.
Permissions – Permissions are important in the software because they determine what a user can or cannot see, add, edit, delete or reassign.
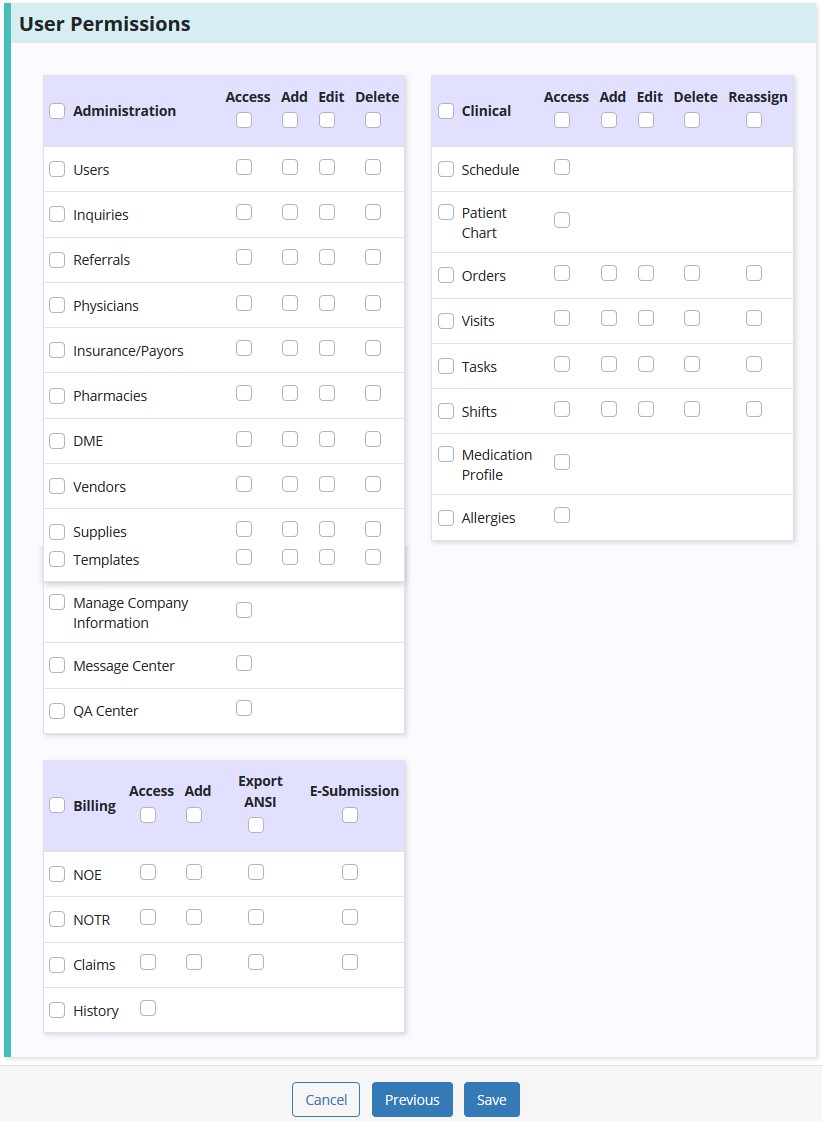
Permissions will allow agencies to manually select which Administration, Clinical or Billing permissions they wish their users to have.
To save time, there is also a Select All checkbox in the top left corner of each category that will check every single permission box in that section. Once finished, select the "Save" button to complete.
People/People Center/Edit
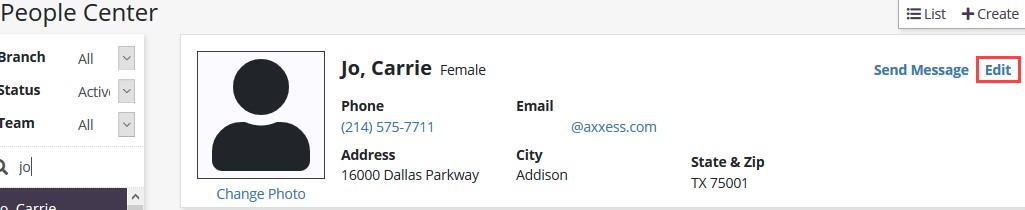
The People Center window will open which will default to show a list of all Active users. Use the Search feature in the top left to filter for specific employees or scroll down through the list. Selecting the name of the user will show detailed information of that user including their Photo (user can change), Name, Gender, Roles, Address, Phone Number and Email Address.
To edit a user, select the "Edit" hyperlink in the top right of the user profile. The same Information and Permissions tabs while adding new user will be available to edit. Other hyperlinks include "Refresh", which updates the page, and "Send Message", which is a quick link to send that user a message.
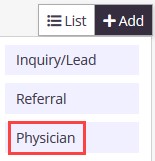
Add/Physician
A new window will open. The quickest way to enter a physician is by entering their "NPI number." As the number is typed, physicians and their corresponding NPI numbers will appear below for selection.
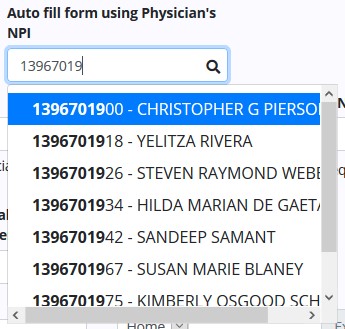
After selecting the physician and pressing the tab key, the Physician Information and Address will auto-fill based on the information that is in the NPI registry. This can still be edited. Everything with a red asterisk is required.
NOTE: If the NPI number is unknown, use the following website: https://npiregistry.cms.hhs.gov/registry/
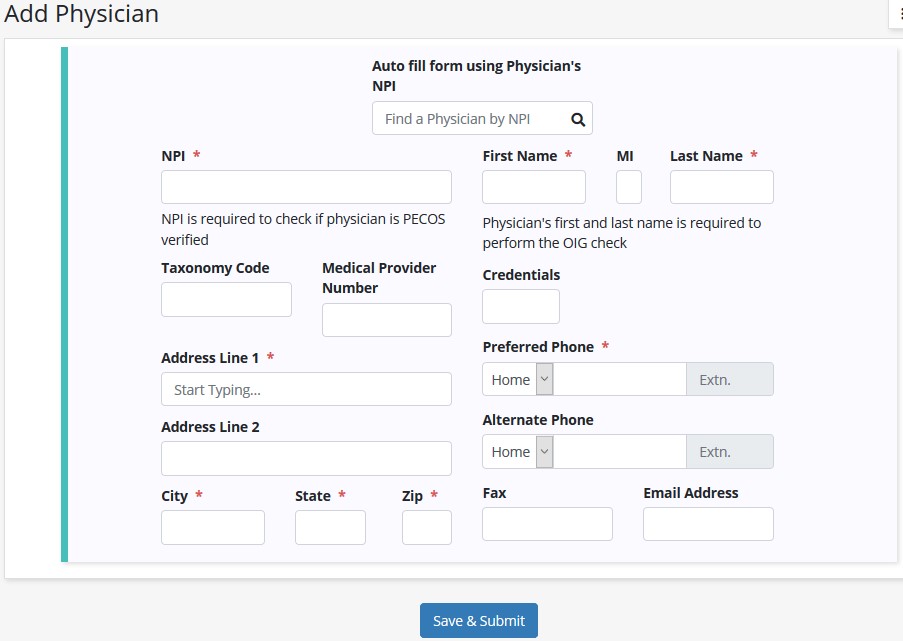
If the physician is already listed in the NPI registry, the system will automatically do a PECOS Verification and OIG check. A green check mark indicates they are PECOS-verified, a red "X" indicates they are not.

Once completed, select the "Save & Submit" button at the bottom.
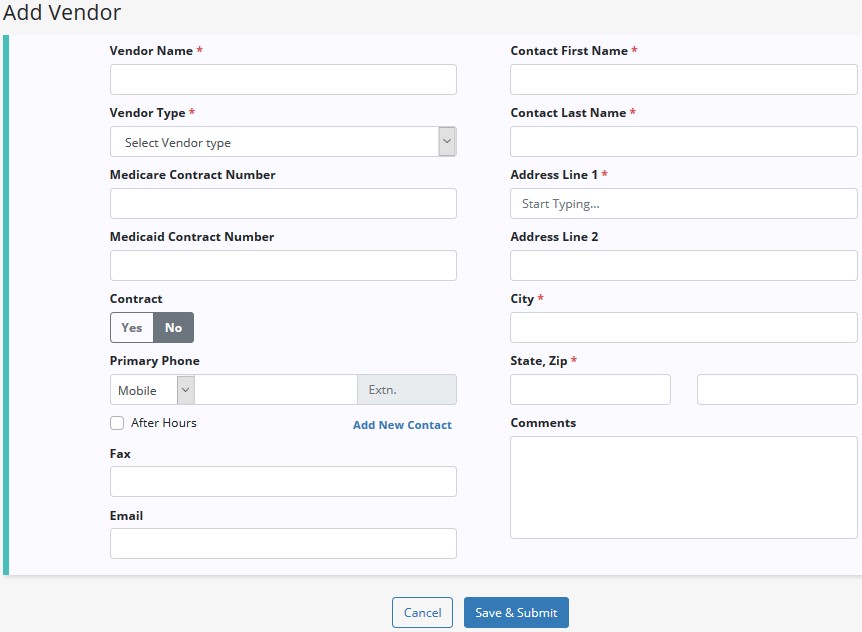
Add/Vendor
A new window will open. Enter the Vendor Name, Type, Contact First & Last Name, Address, and as much information as possible. When finished, select the "Save & Submit" button at the bottom.
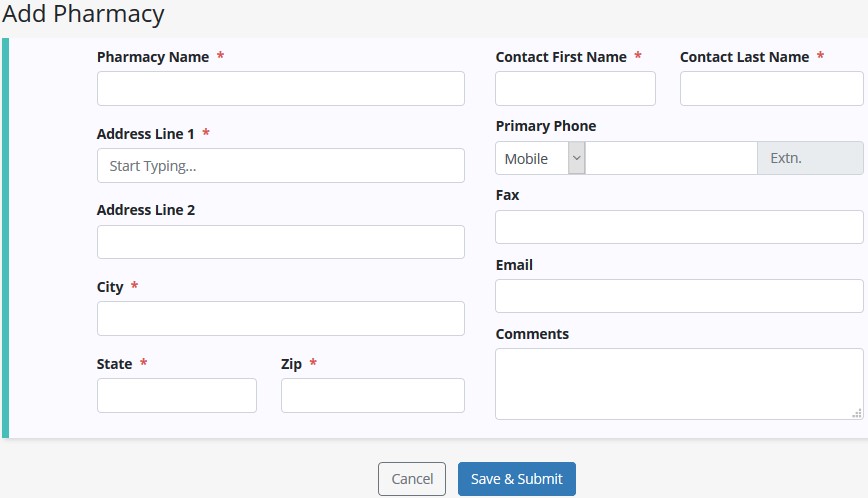
Add/Pharmacy
A new window will open. Input the Pharmacy Name, Address, Contact First & Last Name, and all other information available. When finished, select the "Save & Submit" button at the bottom.
Patients/Orders Management
Use the search bar to find a specific order. Search by Patient, Physician, Type or Order Date range.
![]()
Orders are split into two sections:
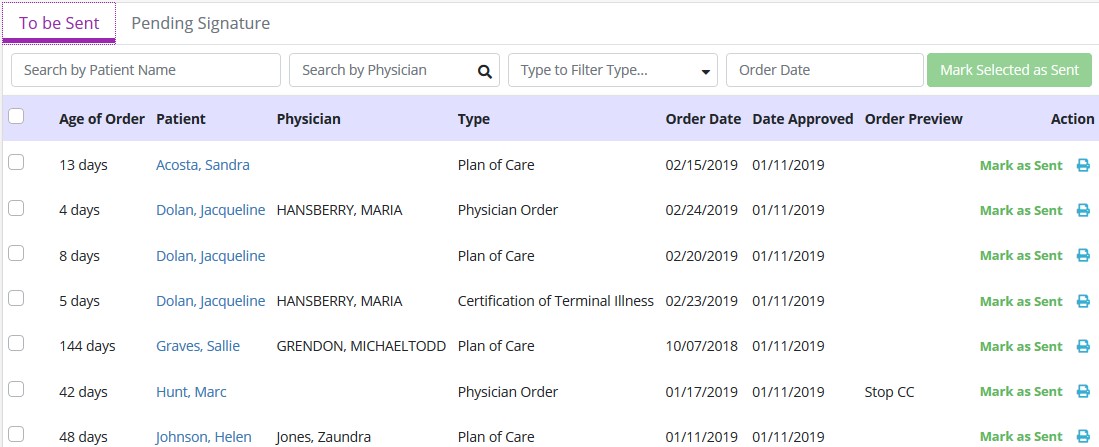
Select the Patient hyperlink to go straight to the Patient Chart. Print orders individually by selecting the ![]() icon under the Action column.
icon under the Action column.
Mark individual orders as sent by selecting the green "Mark as Sent" hyperlink under the actions column or select checkboxes to the left of orders then select the "Mark Selected as Sent" button at the top right.
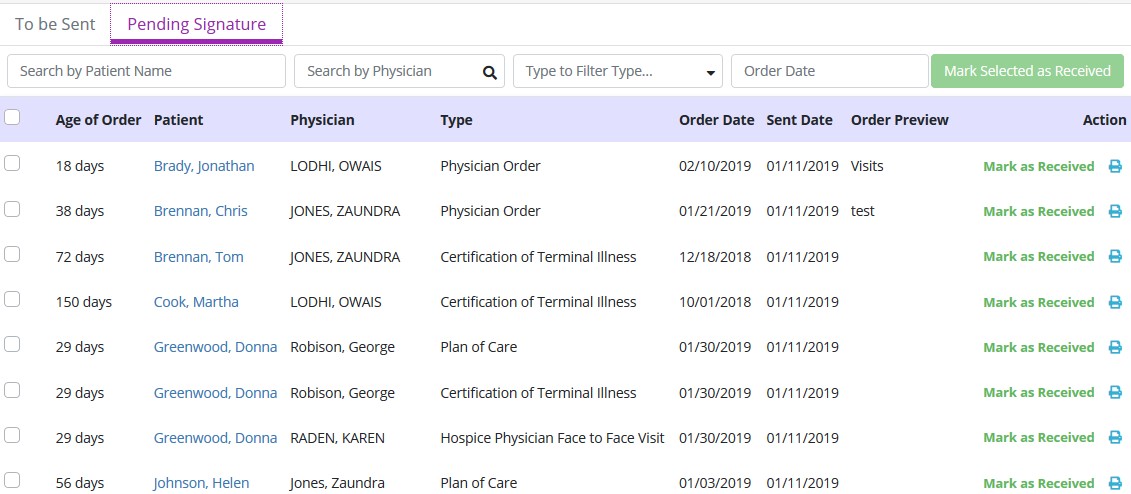
Select the Patient hyperlink to go straight to the Patient Chart. Print orders individually by selecting the ![]() icon under the Action column.
icon under the Action column.
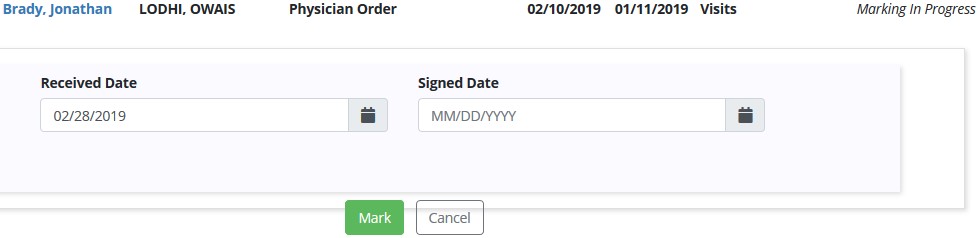
Mark individual orders as received by selecting the green "Mark as Received" hyperlink under the Actions column. The Received Date populates with the current date. Enter the Signed Date then select the "Mark" button.
To mark multiple orders, select checkboxes to the left of orders then select the "Mark Selected as Received" button at the top right.
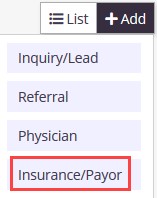
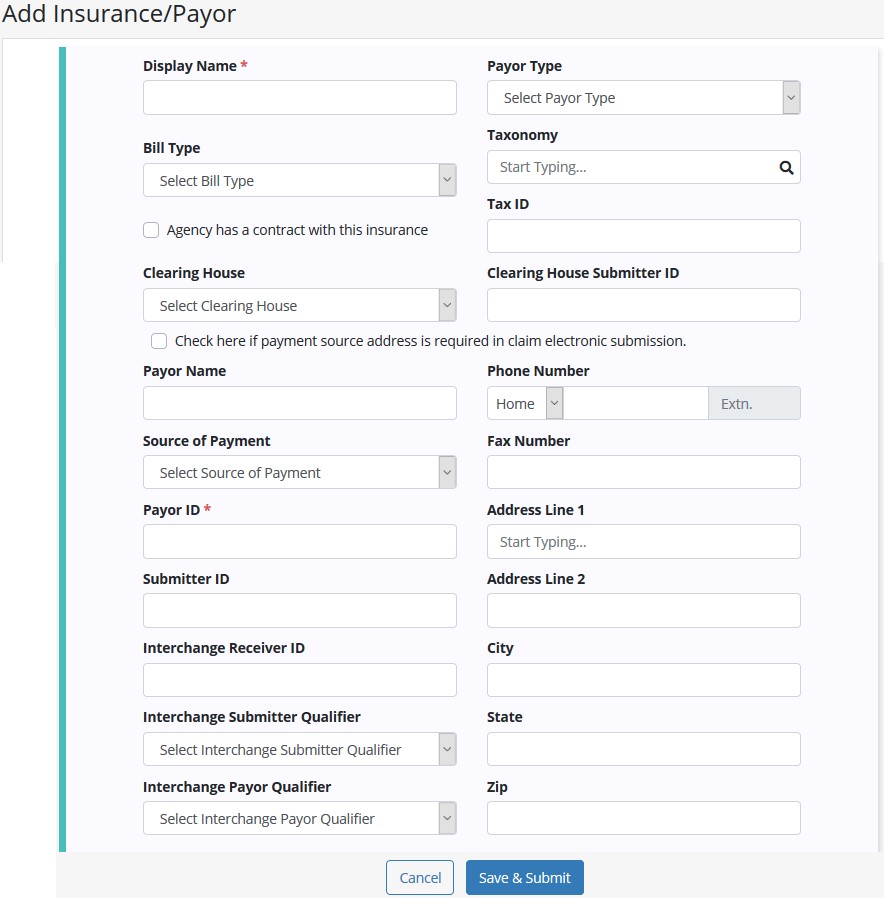
Add/Insurance_Payer
A new window will appear. Enter the Display Name, Payer ID and other fields below. When finished, select the "Save & Submit" button at the bottom.
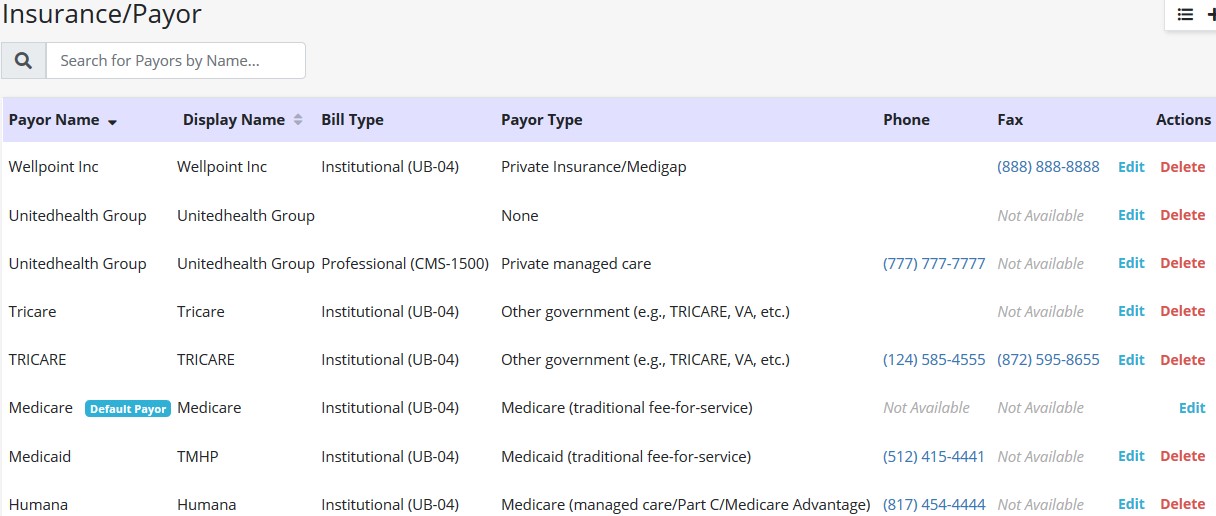
List/Insurance_Payers
Select the "Edit" hyperlink to the far right of the screen under the Action column. This is also where the "Delete" function is found. To search for a payer, Start Typing any part of the Payer Name, Display Name, Bill Type, Payer Type, Phone or Fax in the white free text space at the top left of the page.
List/Templates
The window below will appear. Search through the list of current templates by starting to type the Template Name in the search bar in the top left. Select the ![]() at the bottom left of the page to navigate if results are more than one page. Select the "Add Template" button to create a new template.
at the bottom left of the page to navigate if results are more than one page. Select the "Add Template" button to create a new template.
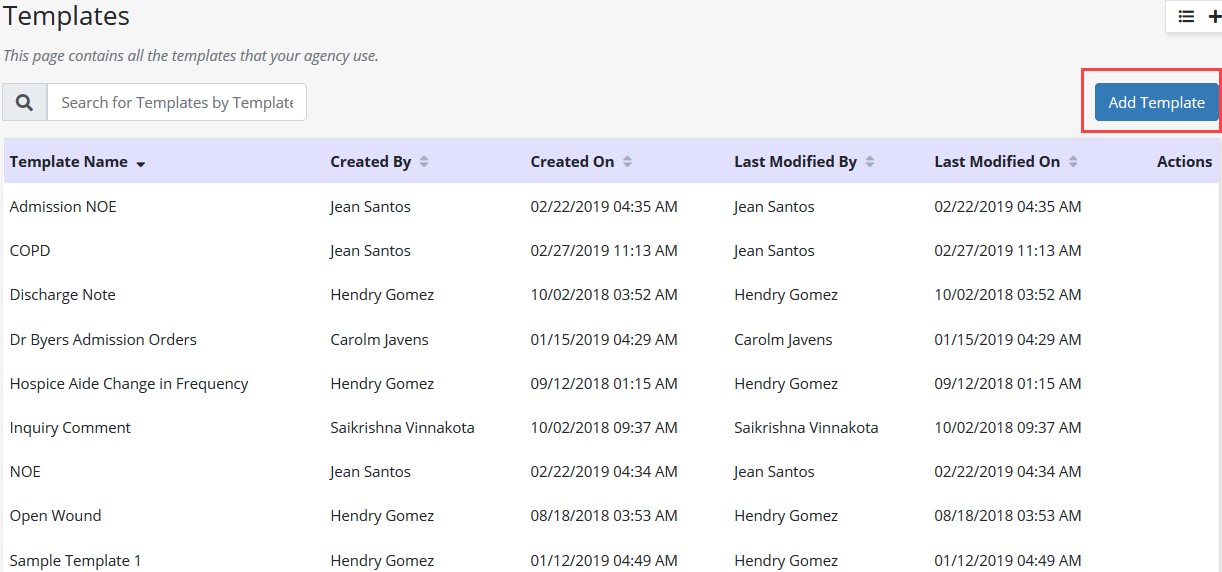
Create a Name for the template. Then write the template inside the Description. Once completed, select the "Save Template" button.
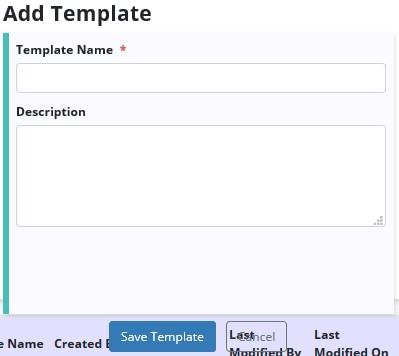
NOTE: Templates can be used to save time for writing orders, goals, care plans, physician statements, narratives and other places inside visits.
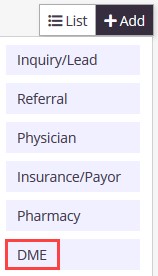
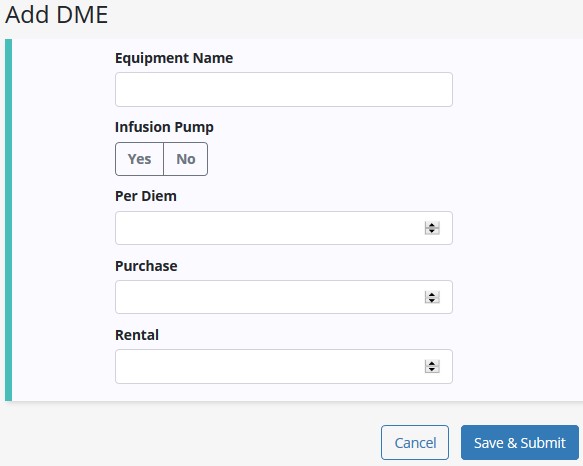
Add/DME
A new window will appear. Enter the Equipment Name and then decide whether the DME (Durable Medical Equipment) is an Infusion Pump. Then enter the price for Per Diem, Purchase and Rental for the DME. When finished, select the "Save & Submit" button at the bottom.
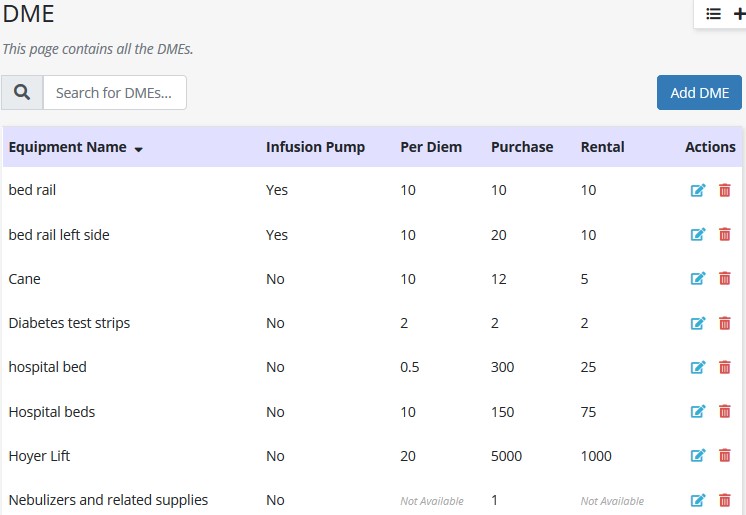
Then the user will be taken to a list of DME. Search through the current list by typing the Equipment Name in the search bar in the top left. Edit or Delete by selecting the icons under the Actions column. Users can also add additional DME by selecting the "Add DME" button in the top right.
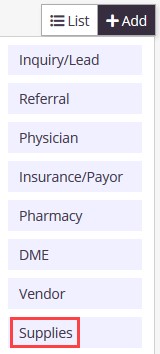
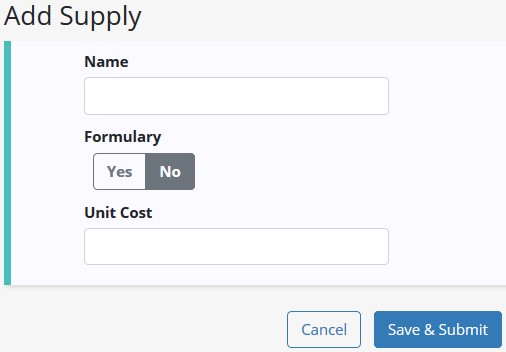
Add/Supplies
A new window will appear. Enter the supply Name, indicate whether the supply is formulary and enter Unit Cost. When finished, select the "Save & Submit" button at the bottom.
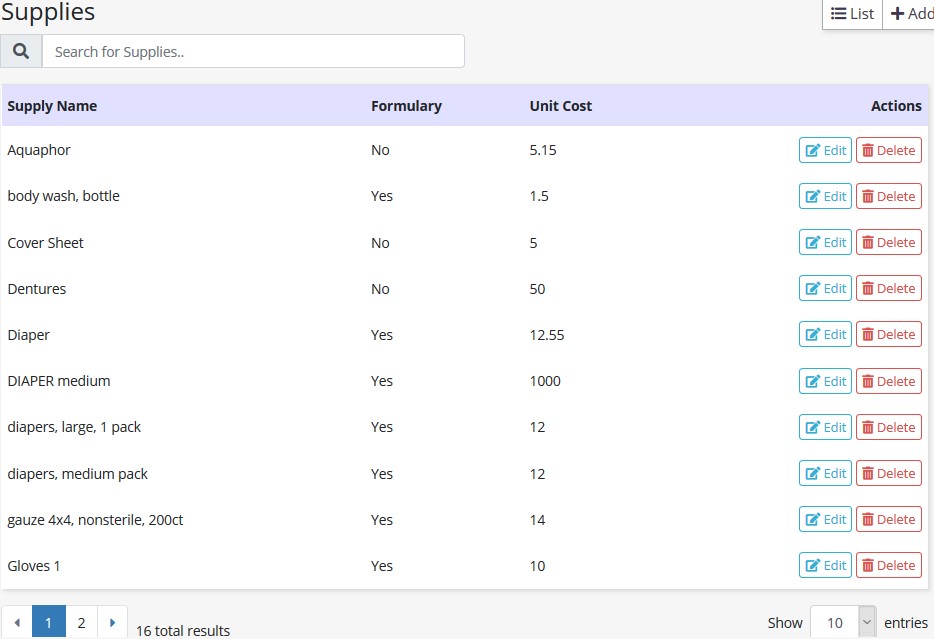
A confirmation window will appear, select "Ok." Then the user will be taken to a list of supplies. Search through the current list by typing the supply name in the search bar in the top left. Edit or Delete by selecting the buttons under the Actions column.
Add/Team
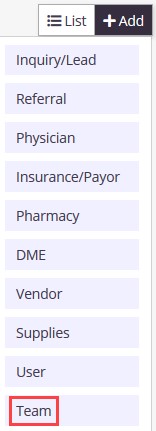
Enter a Team Name. Start typing the name of the Hospice Medical Director, Physician and Clinical Manager. After typing, names will then be available for selection.
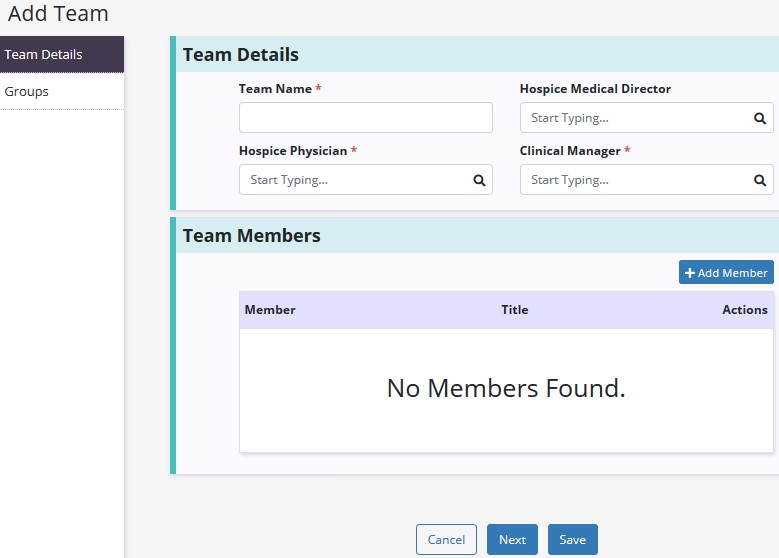
Select the "+Add Member" button to add team members.
![]()
Start typing member name and then select the name. Once found, select "Add Selected Member." Once all team members have been added, select "Save" at the bottom of the page.
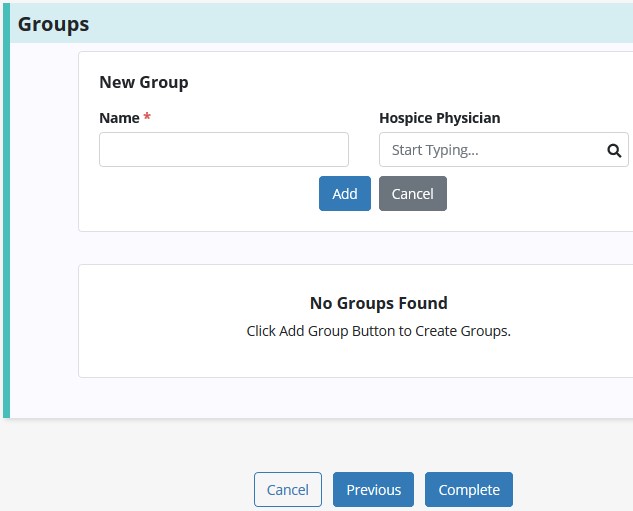
Groups - The next tab on the left in the Add Team section is for Groups. Select the "+Add Group" button in the top right to add a group. Enter a group name and add an optional Hospice Physician by typing the name then selecting the physician. After all desired groups have been added, select the "Complete" button.
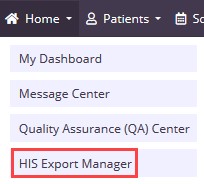
Home/HIS Export Manager
Users can manage the exporting of HIS documents from the Pending Approval, Export Ready and Export History tabs.
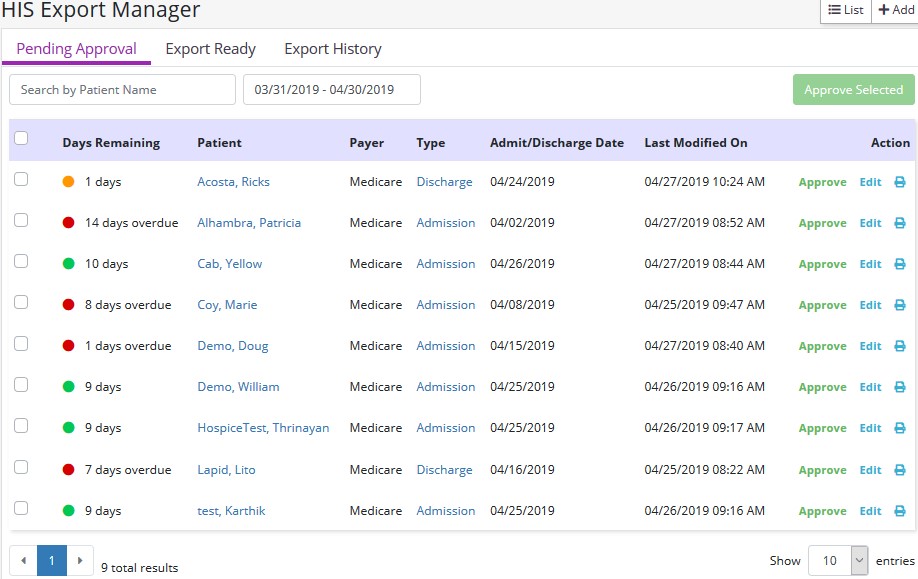
In each tab, search for patients by name in the search bar and/or change the date range of HIS by selecting the date range bar.
![]()
Pending Approval - Where the reviewer will review and make changes to the HIS as needed. The reviewer will be able to sign in Z0400 for any changes they make as well as be able to approve the HIS and sign in Z0500 that the HIS is completed. After the HIS is approved, it will be moved to the Export Ready tab. Admission HIS will have a countdown for approval of admission date + 14 days, and the Discharge HIS will have a countdown for approval of discharge date + 7 days.
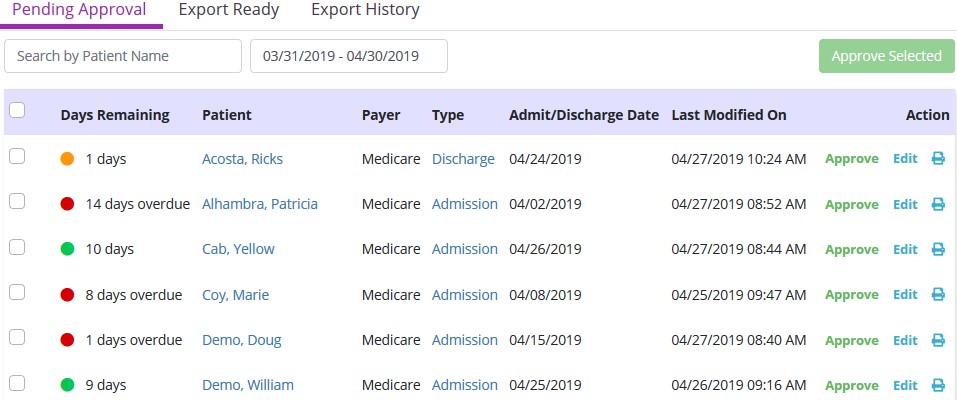
The dots next to each line represent timing of when HIS is due. ![]() Red is overdue, orange is nearly due and green is safe to approve.
Red is overdue, orange is nearly due and green is safe to approve.
Each line will show the Days Remaining, Patient name (selected will go to patient chart), Payer, Type (selected will go to HIS), Admit/Discharge Date and Last Modified On. The Action column hyperlinks allow users to Approve, Edit or Print the HIS.
![]()
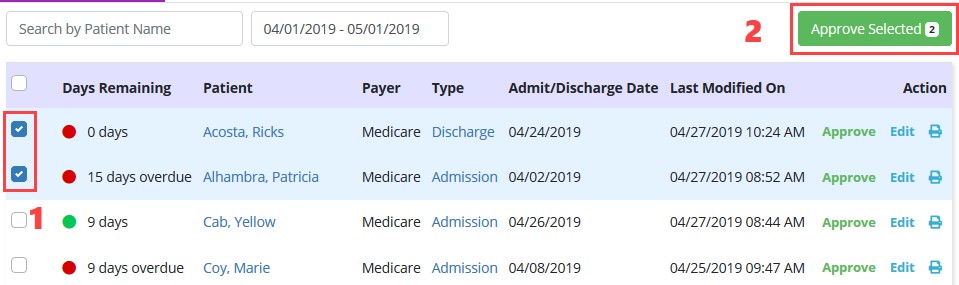
Approve multiple HIS documents by selecting the checkbox(es) on the left side of the page and then select the "Approve Selected" button in the top right.
Export Ready - Where all HIS awaiting export are located. The countdown for submission is 30 days after the admission or discharge date. Users can create export files of individual files or perform a bulk submission. Once the files are downloaded into the appropriate format, they are found in Downloaded Files on the user's computer. From there, submit the HIS per agency guidelines and then return to this page to mark HIS as Submitted.
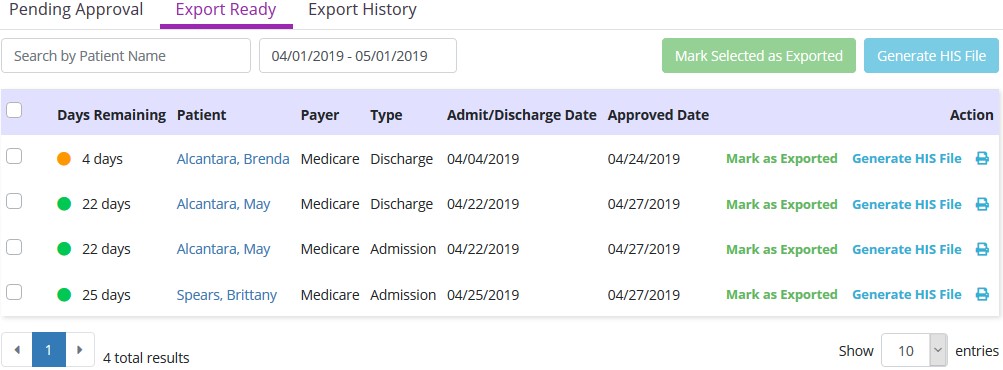
Each line will show the Days Remaining, Patient name (selected will go to patient chart), Payer, Type, Admit/Discharge Date and Approved Date. The Action column hyperlinks allow users to Mark as Exported, Generate HIS File or Print.
![]()
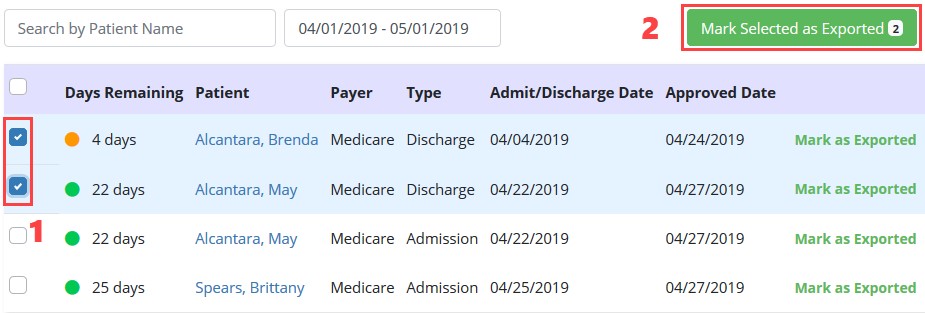
Mark multiple HIS documents as exported or generate multiple HIS files by selecting the checkbox(es) on the left side of the page and then select the "Mark Selected as Exported" or "Generate HIS File" button in the top right.
Export History - Where users can mark if a HIS was rejected, accepted, and be able to create modifications or inactivate a HIS.

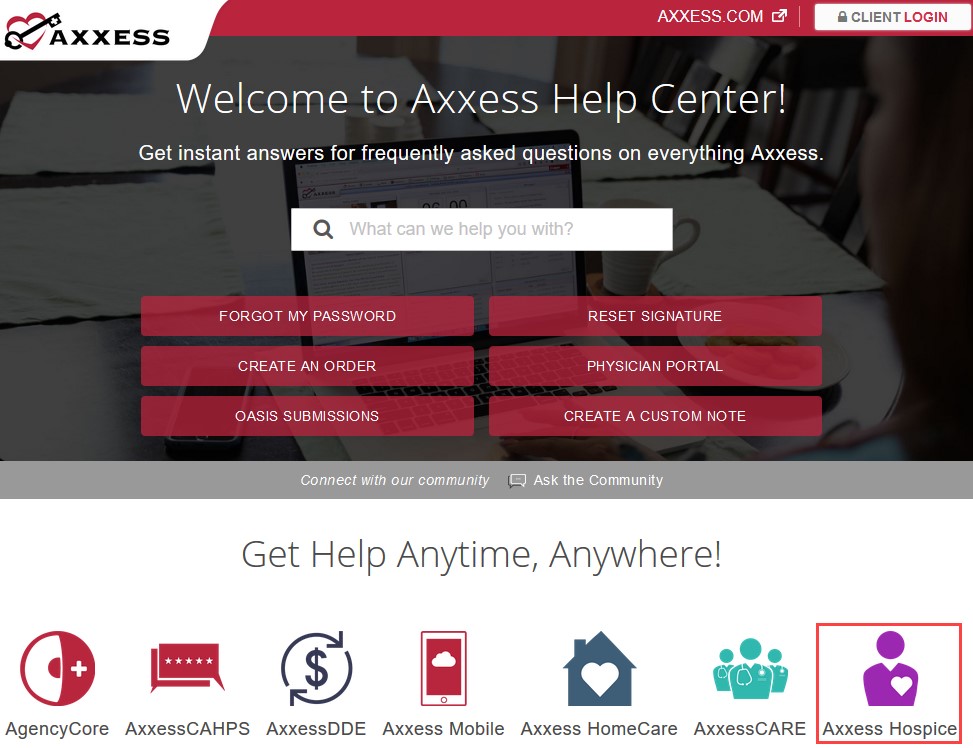
A great resource that is available 24/7 is our Help Center. It is a place to get answers to frequently asked questions or watch videos on all our Axxess products. Our Help Center can be accessed by selecting Help/Help Center or https://www.axxess.com/help/