Axxess Home Care now enables users to post and record deposits through the Invoice History page. By enabling users to post and record deposits, and post payments and refunds from deposits, this feature facilitates seamless financial operations for optimal cash flow.
To post payments and record deposits, users must have permission to add and edit Managed Care claims in Axxess Home Care.
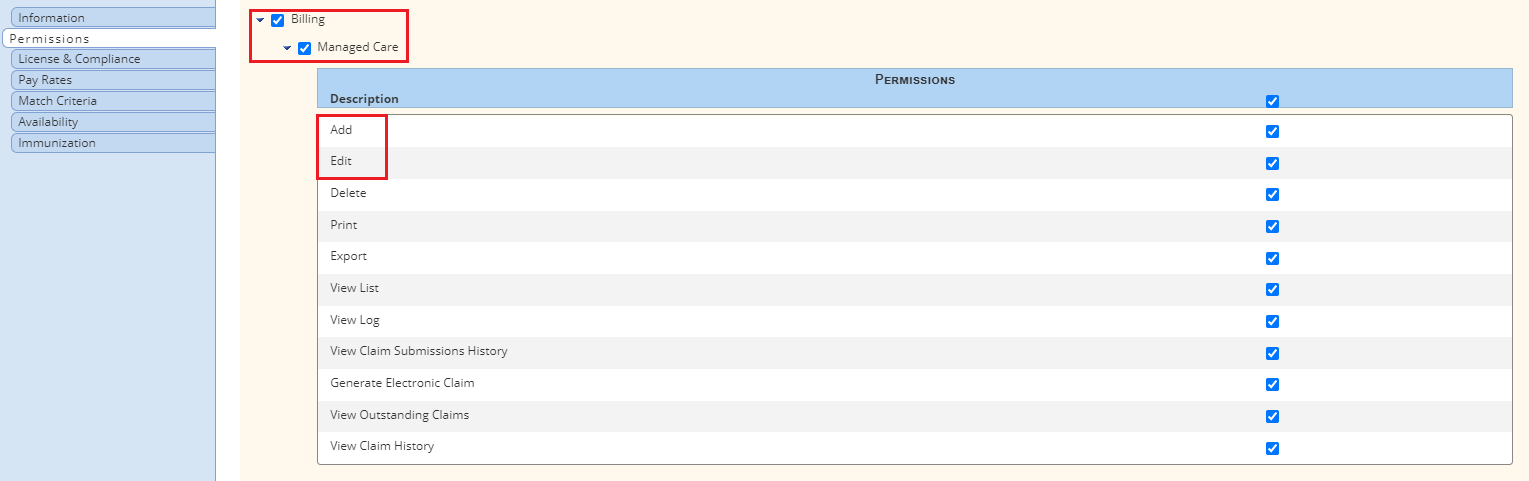
To give a user permission to post payments and record deposits, navigate to the user’s profile and select Permissions in the Quick Links menu. In the Billing section, select Add and Edit under Managed Care. Click Save to finish granting the permissions to the user.
Employees tab ➜ Employee Center ➜ Quick Links ➜ Permissions ➜ Billing ➜ Managed Care ➜ Add/Edit ➜ Save
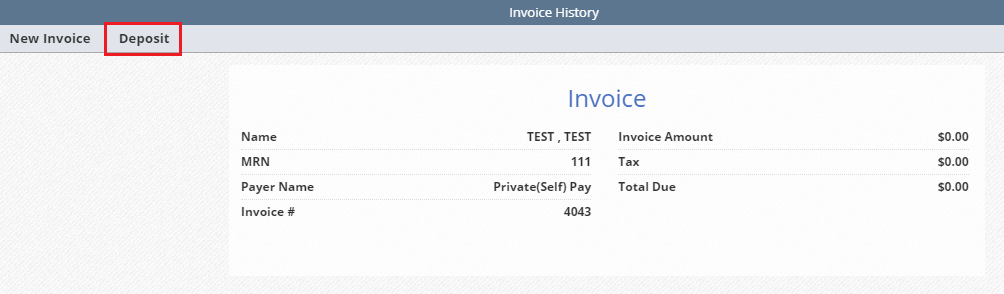
To add a deposit, navigate to Invoice History under the Billing tab. Select a client on the Invoice History page and click the Deposit tab at the top of the screen.
Billing tab ➜ Invoice ➜ Invoice History ➜ Select a client ➜ Deposit tab
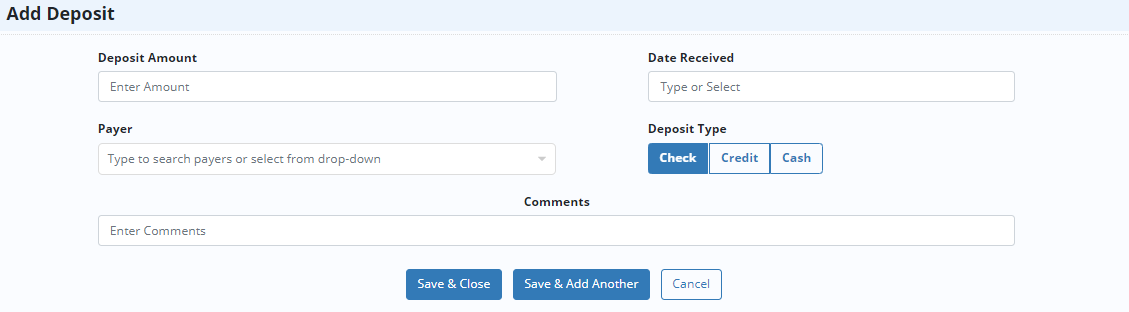
The Billing Deposit screen displays a list of payment deposits on file for the client. To add a deposit, click Add Deposit.

Complete the required fields and click Save & Close to add the deposit, or Save & Add Another to save and continue adding deposits.
Once the deposit had been added, the information will display in the deposit list.

Users can post payments from deposits with positive balances by selecting Post under Actions on the Billing Deposit screen.
Billing tab ➜ Invoice ➜ Invoice History ➜ Select a client ➜ Deposit tab ➜ Actions ➜ Post

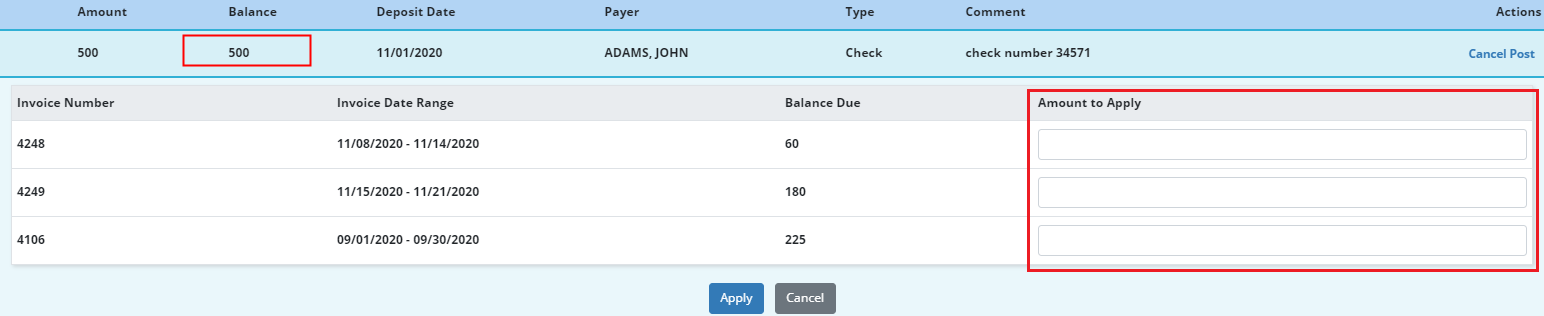
All invoices with a balance due and a private pay payer will appear for posting deposits. The invoices will display the invoice number, date range and balance due. Enter the amount of money to apply from the deposit to the invoice and click Apply.
Users can only apply money that is available in the deposit balance.
To record a deposit refund, click Refund under Actions on the Billing Deposit screen.
Billing tab ➜ Invoice ➜ Invoice History ➜ Select a client ➜ Deposit tab ➜ Actions ➜ Refund

Enter the necessary refund information and select Complete & Close.

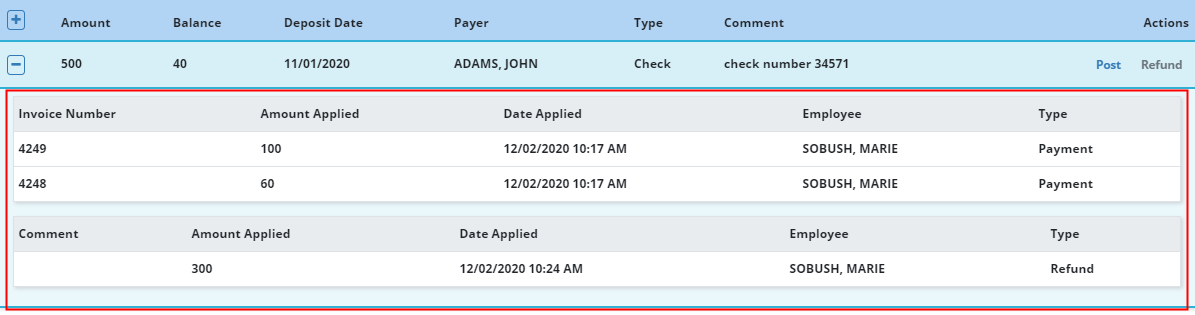
A plus sign icon will appear next to each deposit with applied posting or refund transactions. Click the plus sign icon to view the posting/refund details and the employee who performed the posting or refund.

Posted payments will display the invoice number, amount applied, date applied and the employee who applied the payment to the invoice.
Refunds will display the amount applied, date applied, associated comments and the employee who performed the transaction.
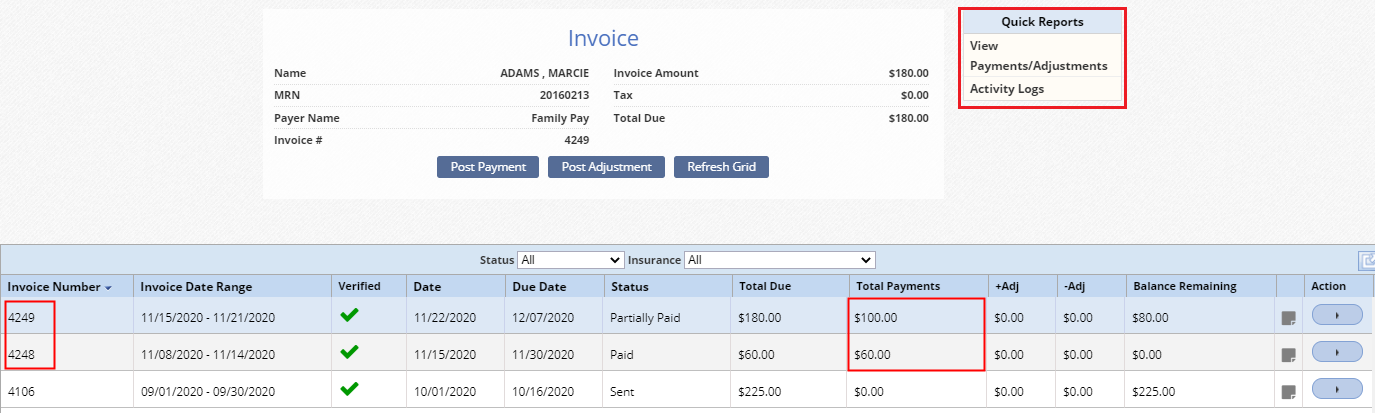
Payments posted from a deposit will appear on the Invoice History page and Quick Reports menu for the associated invoices.
Updated on 12/02/2020
