The Axxess Schedule Conflict Filtering feature, driven by Axxess intelligence™, enables users to filter caregivers by availability when scheduling visits. This enhancement streamlines scheduling and prevents errors in visit assignment.
When scheduling visits in the Schedule Center, users can search for caregivers and filter by availability to identify scheduling conflicts and assign a caregiver who is available at the time of the visit.
By enabling users to easily identify which caregivers are available and which caregivers are already assigned to other visits, this feature streamlines scheduling and prevents errors in visit assignments.
To filter caregivers by scheduling conflicts, organizations must enable this feature in Company Setup.
To enable this feature, navigate to Company Setup under the Admin tab. On the Scheduling tab in Company Setup, check the box next to Enable Scheduling Conflict Filtering. Click Save to finish enabling the feature.
Admin tab ➜ Company Setup ➜ Scheduling tab ➜ Enable Scheduling Conflict Filtering ➜ Save

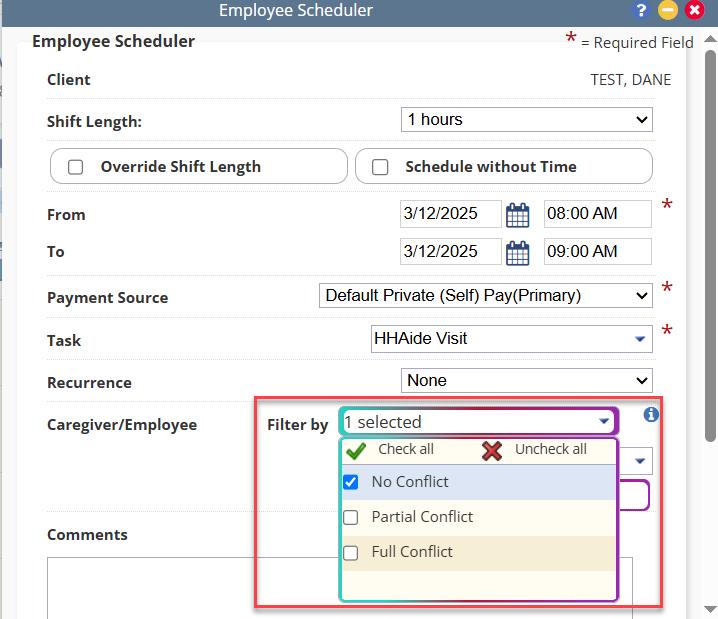
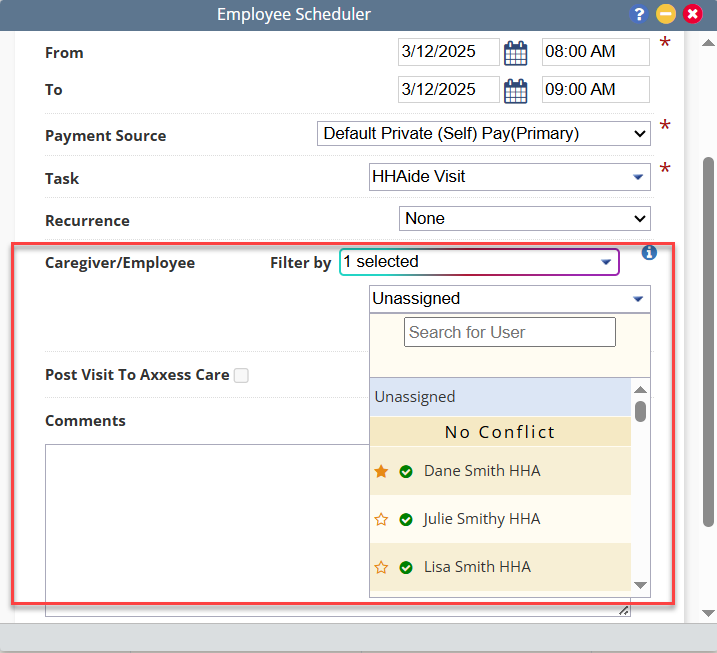
Once enabled, users can filter caregivers by availability when scheduling visits. To filter caregivers, navigate to the Schedule Center under the Schedule tab and schedule a visit. In the Employee Scheduler window, navigate to the Filter by menu and select from the following options:
| Filter | Description | ||
|---|---|---|---|
| No Conflict | Displays employees who are available at the time of the new visit | ||
| Partial Conflict | Displays employees who are assigned to another visit during a portion of the new visit | ||
| Full Conflict | Displays employees who are assigned to another visit during the entire duration of the new visit | ||
| Check All | Displays all employees sorted by scheduling conflict status |
NOTE: Recurrent visits will not display the scheduling conflict filters.
After filtering by scheduling conflicts, users can select an employee to assign to the visit. The filter menu groups employees by conflict status, with caregivers marked as Favorite, Oriented or Family Provider at the top, and caregivers marked as Do Not Send at the bottom of the respective group.
Once a user is selected and all other visit details are entered, click Save & Close to finish scheduling the visit or Save & Add Another to continue scheduling visits.
Updated on 8/06/2020
