Axxess Home Care now enables organizations to subtract meal break times for payroll and billing when a meal break is marked as taken. This functionality offers operational efficiencies to organizations providing staffing services that include unpaid meal breaks.
To use the meal breaks feature, organizations must enable unpaid meal breaks in Company Setup.
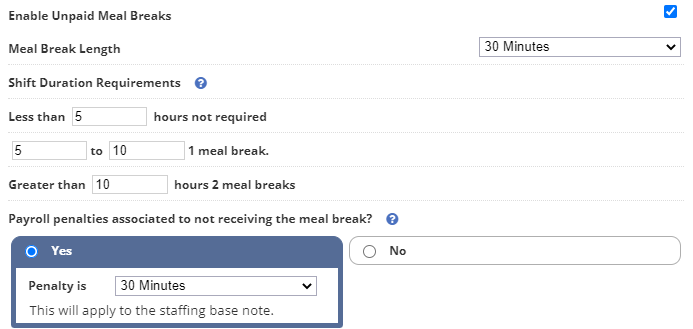
To enable unpaid meal breaks, navigate to Company Setup under the Admin tab. On the Payroll tab, check the box next to Enable Unpaid Meal Breaks and complete the subsequent fields.
Meal Break Length: Select the duration of the unpaid meal break.
Shift Duration Requirements: Enter the meal break shift requirements. In the following example, if a shift is less than 5 hours, the user is not entitled to a meal break. Example: 5-10 hour shift length requires 1 meal break and a shift greater than 10 hours requires 2 meal breaks.
The next section enables users to provide additional pay time when a meal break was not provided. (In this case, 30 minutes.)
Let’s review an employee scheduled for a 6-hour shift (5.5 hours with 30-minute meal break) using the values in the example below.
If the employee was able to take their meal break, they would be paid for 5.5 hours of work time (30 minutes unpaid).
If the employee was not able to take their meal break, they would be paid the full 6 hours as they worked the meal break.
If a 30-minute penalty was included, the employee would be paid 6.5 hours of work time:
5.5-hour shift
0.5-hour meal break that was not provided
0.5-hour additional pay penalty for not being provided their meal break
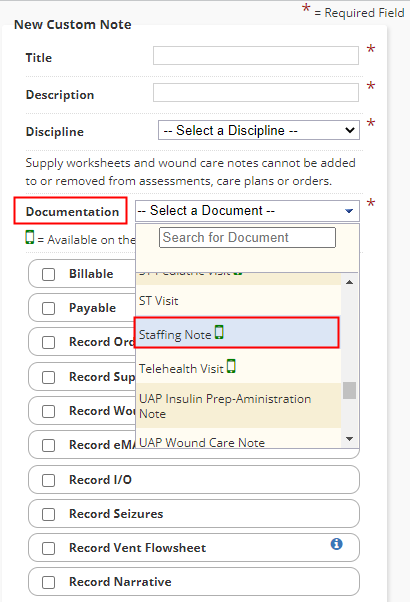
The meal breaks feature is only associated to the new staffing note. Therefore, the staffing note must be activated for the organization.
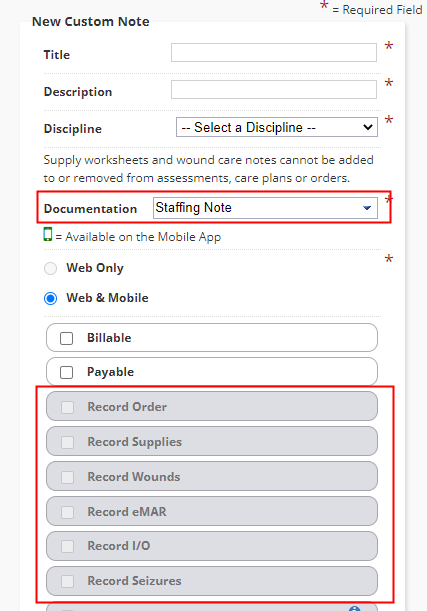
To activate the staffing note, navigate to Company Setup under the Admin tab. On the Document Management tab, select New. Complete the fields in the New Custom Note window and select Staffing Note from the Documentation menu. Click Save to finish activating the note.
All addenda for the staffing note are disabled. The purpose of the staffing note is to record time worked at a facility.
The meal breaks feature is associated to invoice payers whose Payer Type is selected as Staffing. To access the payers, navigate to the Payment Sources list under the View tab.
View tab ➜ Lists ➜ Payment Sources
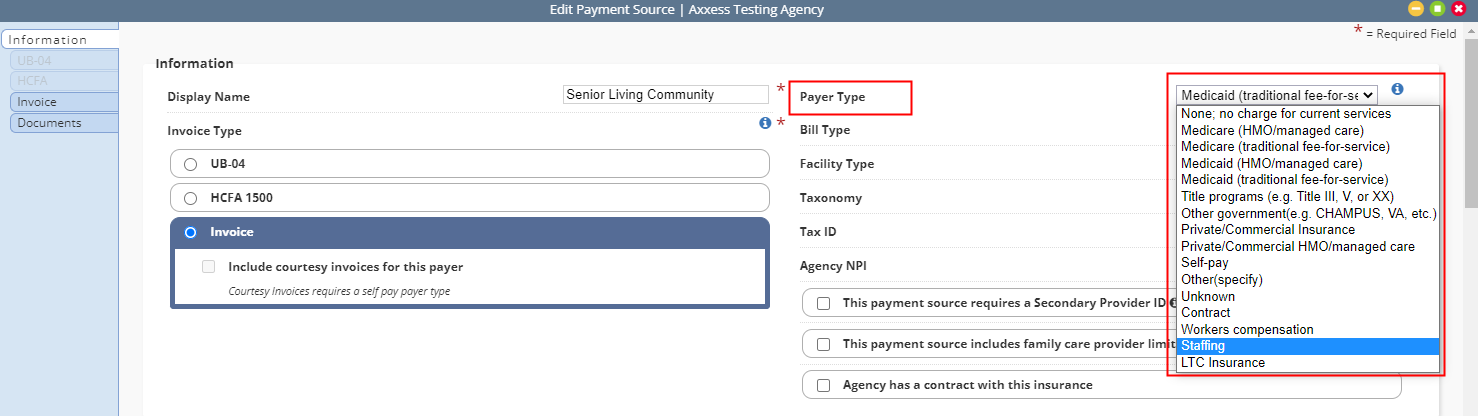
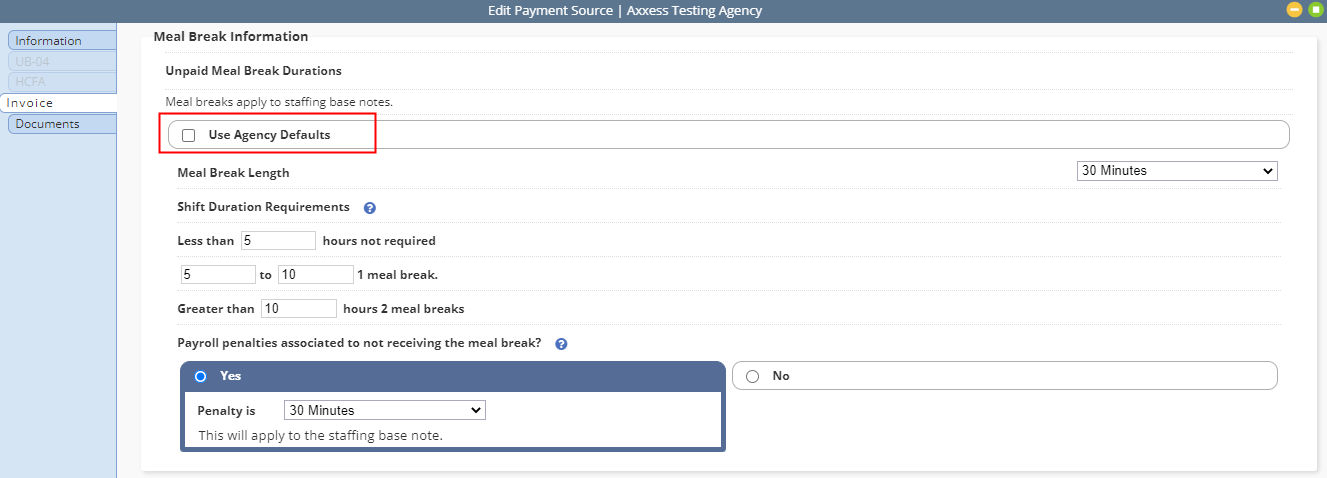
Once the invoice payer type is set to Staffing, the meal breaks feature will display above the Invoice Bill Rates section. Use Agency Defaults will be the default setting.
If a payer provides different shift length or meal break time requirements, users can deselect Use Agency Defaults and input different settings.
If the payer is required to pay extra when meal breaks are not provided, select the payroll penalties setting and input the additional time.
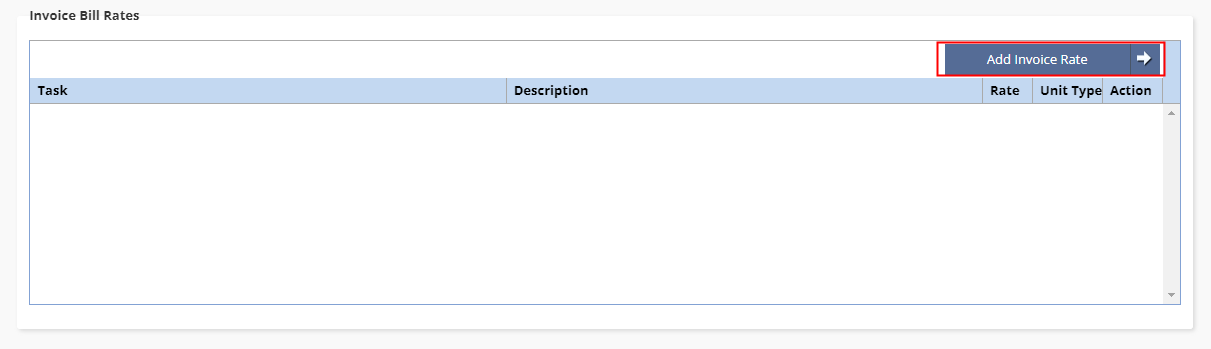
The last step is setting up the bill rates. To set up bill rates, select Add Invoice Rate under Invoice Bill Rates.
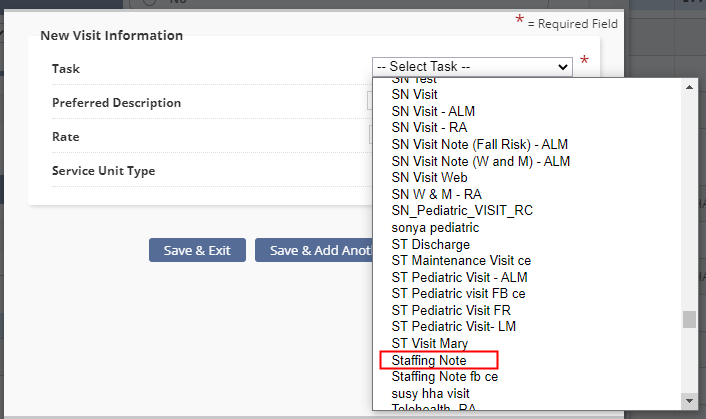
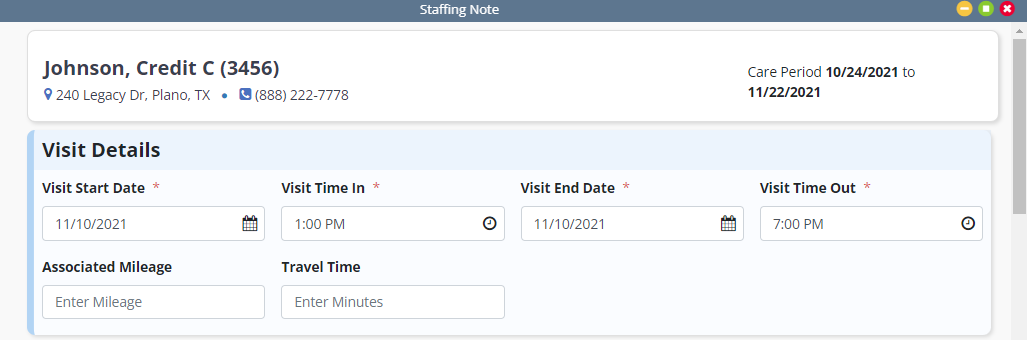
In the New Visit Information window, select Staffing Note from the Task menu. Complete the remaining fields and click Save & Exit.

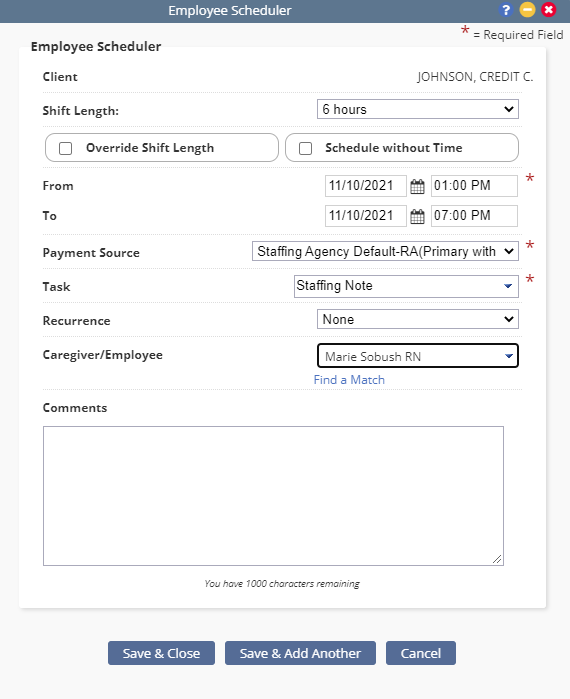
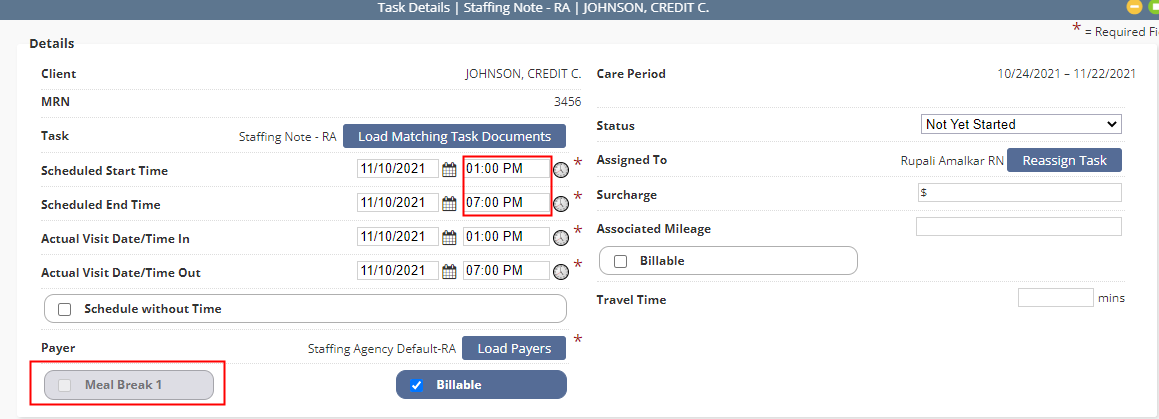
In the Employee Scheduler, schedule the note for the complete duration of the shift, including the meal break period.
Initially scheduled task details will display the full time of the shift. The task details will calculate the units as if meal breaks will be taken.
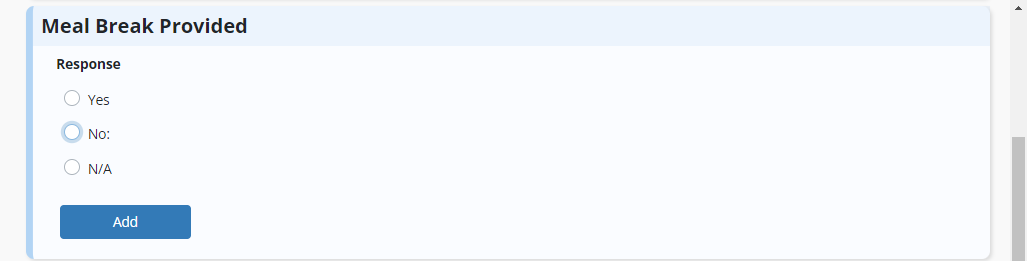
When completing a staffing note, users can select Yes, No or N/A under Meal Break Provided.
If a meal break was provided, select Yes. If a meal break was not provided, select No. If the shift did not meet the required timeframe, select N/A. If the shift qualified for two meal breaks, select Add and repeat this process.
Task details will update based on the meal break information entered into the note.
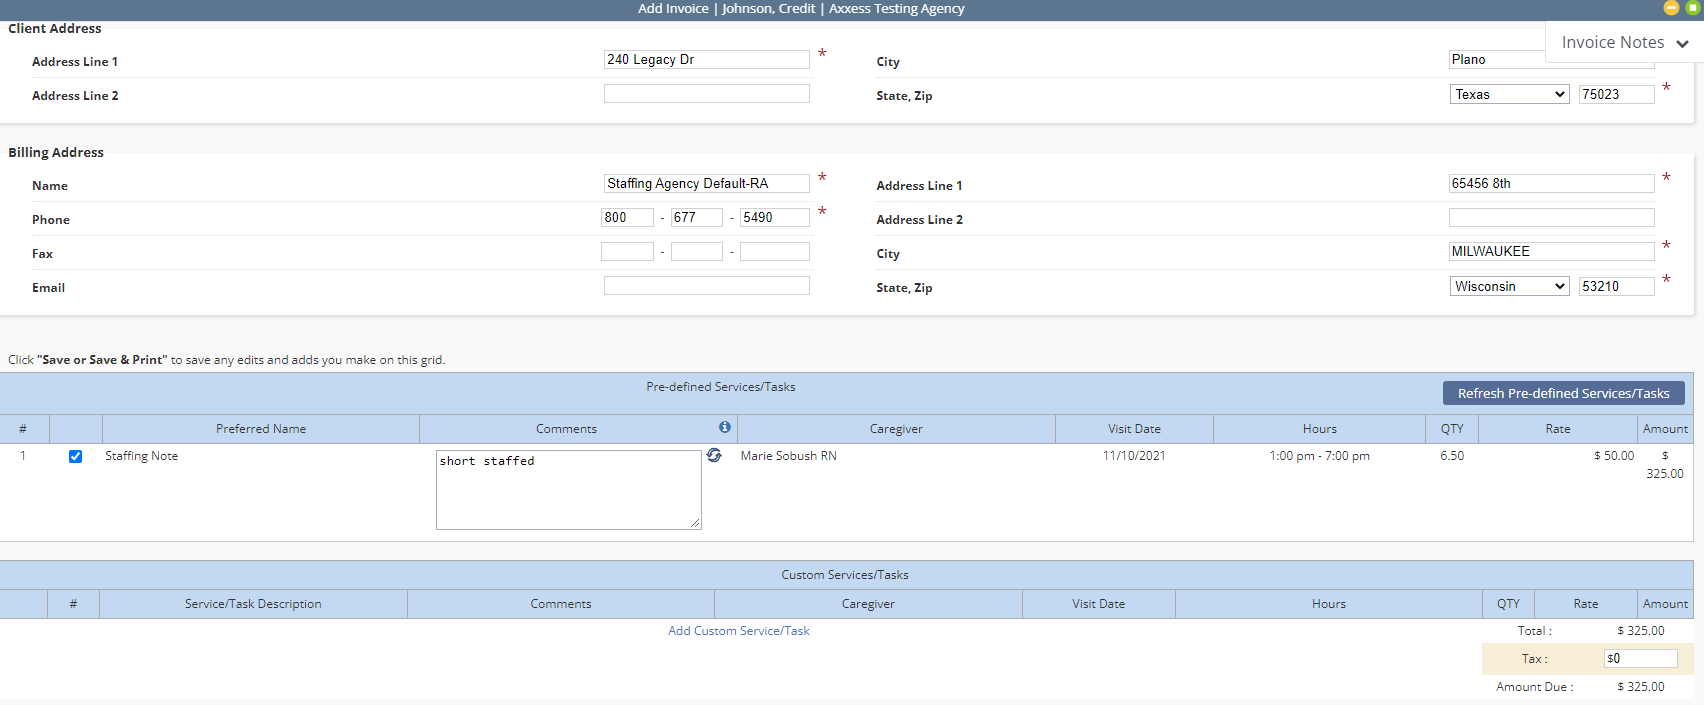
The payable units will reflect in the Payroll Center. In this scenario, the meal break was not taken and there was a 30-minute penalty.
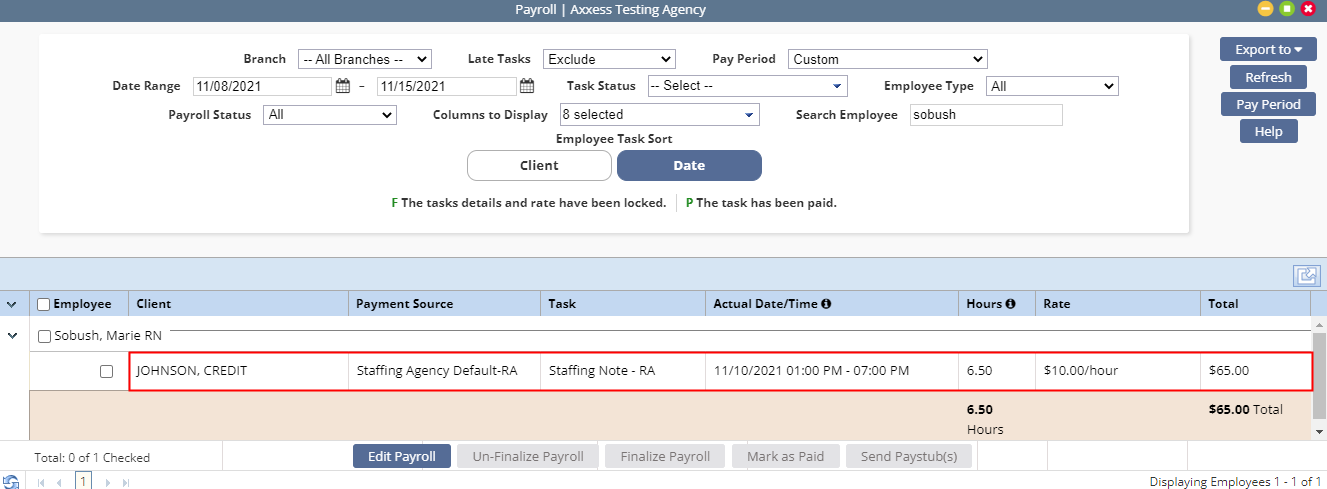
The billing units will reflect the units according to the settings in the payer setup.
Updated on 11/18/2021
