The Collections Center in Axxess Home Care enables users to manage all claims and invoices with outstanding balances in a central location.
By enabling users to easily view and manage all claims and invoices that are ready to work, this feature streamlines billing operations and helps organizations position themselves for lasting financial success.
To access the Collections Center in Axxess Home Care, navigate to the Billing tab and select Collections.
Billing tab ➜ Collections
At the top of the screen, users can filter claims and invoices by branch, date range, claim/invoice type and payer. Select More Filters to filter by client status, claim/invoice status and/or clients.
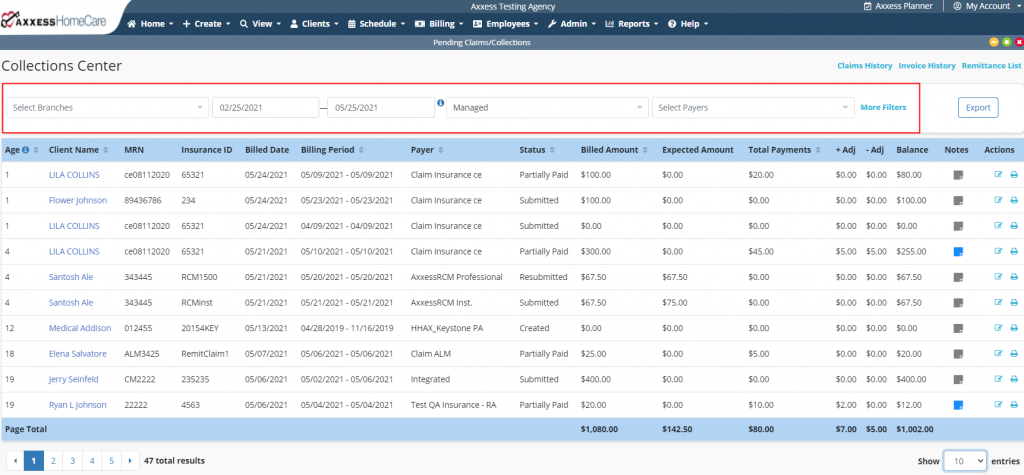
In the top-right corner of the screen, select Claims History or Invoice History to navigate to the respective screen. The Remittance List link appears if your organization has the remittance feature enabled. Users can also select Export to export the filtered list to an Excel file.

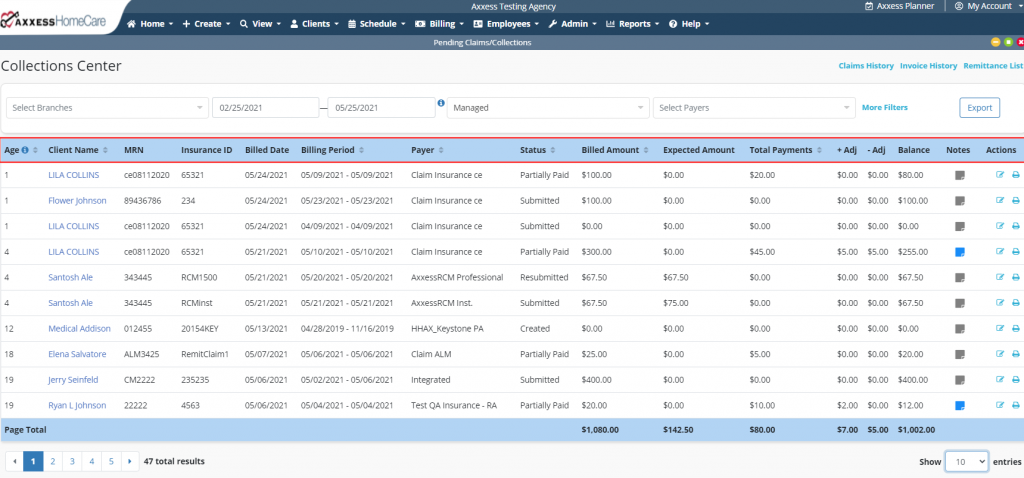
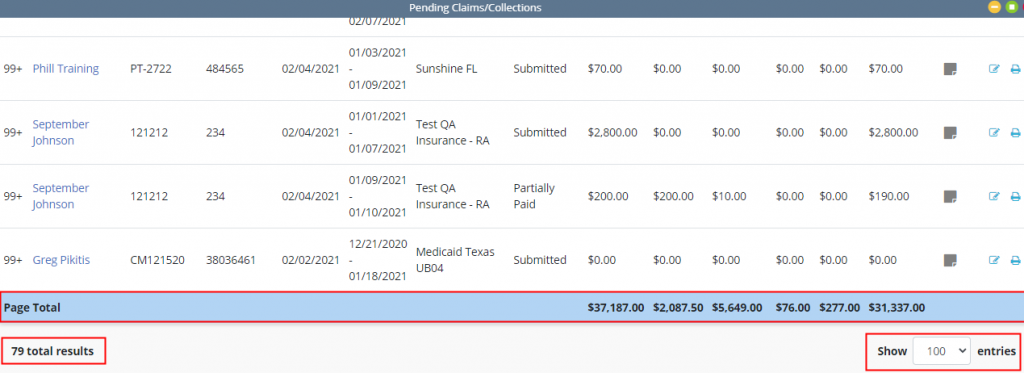
The Collections Center displays the following information for each claim/invoice:
|
Age – The number of days since the claim/invoice was billed. |
|
|
Client Name |
|
|
MRN |
|
|
Insurance ID |
|
|
Billed Date – The date the claim or invoice was sent/submitted. |
|
|
Billing Period – The date range the claim or invoice covers. |
|
|
Payer |
|
|
Claim/Invoice Status |
|
|
Billed Amount – The amount of the claim/invoice. |
|
|
Expected Amount – The amount that is expected from the payer. |
|
|
Total Payments – The total amount of any payments made. |
|
|
Negative and Positive Adjustments – The amount of any adjustments. |
|
|
Balance – The remaining balance. |
|
|
Notes – Enables users to add/edit/resolve notes (permission-based). |
|
|
Actions – Edit/print based on permissions. |
Users can select the edit icon ( ![]() ) next to a claim or invoice to enter an EFT check number and amount associated to the payments/adjustments. The date field is required when entering these components.
) next to a claim or invoice to enter an EFT check number and amount associated to the payments/adjustments. The date field is required when entering these components.
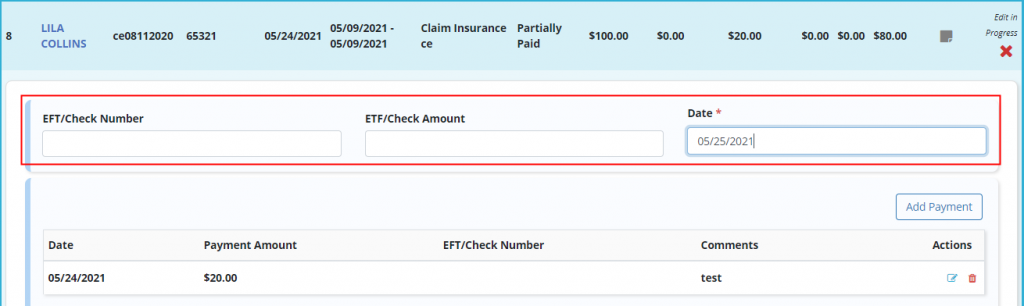
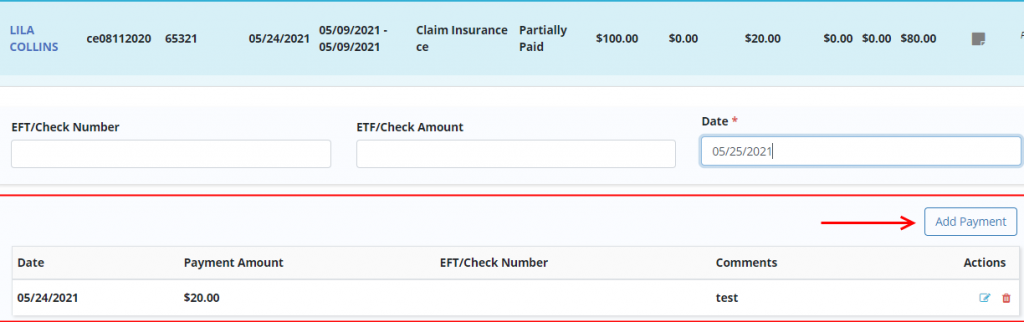
Under the EFT information, select Add Payment to enter the payment amount and any associated comments.
Any previously posted adjustments appear in the adjustments section under the payments section. Click Add Adjustment to add an adjustment.

When adding an adjustment, the date entered in the EFT/Check Number line will be used as the adjustment date. Enter the adjustment amount, code and any associated comments. All entries will populate to the History page of the associated claim or invoice.
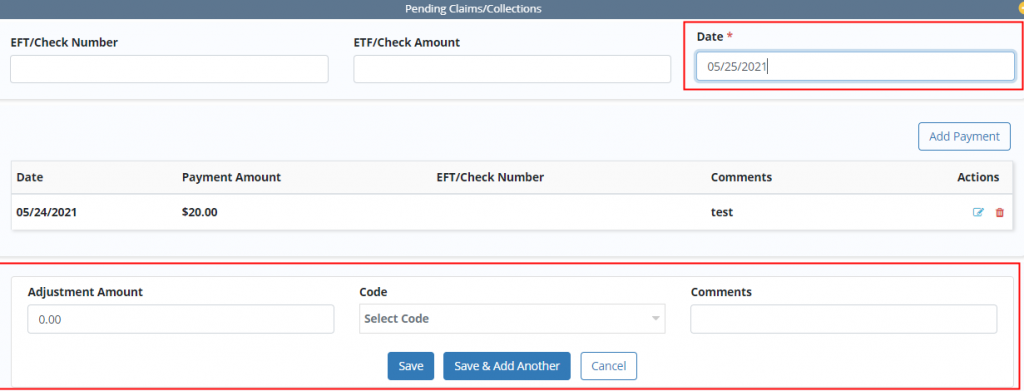
If the remittance advice feature is enabled, users will have the ability to link the remittance advice to post payments and adjustments. Posted payments and adjustments will display the associated Remittance Link button.

Users can add and edit claims/invoices in the Notes section.

Page totals display at the bottom of the screen.
Updated on 06/02/2021
