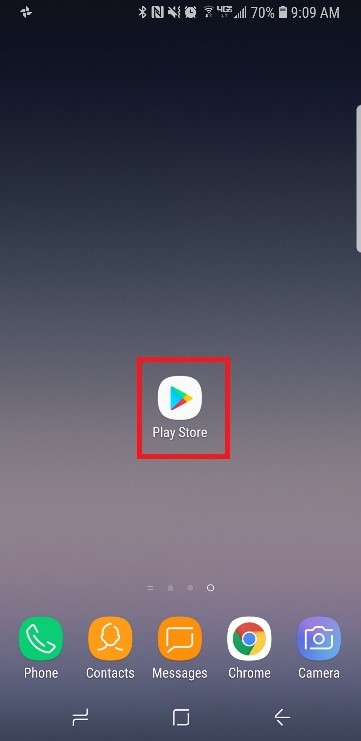
Go to the Google Play Store.
Tap on the search bar at the top of the page (where it says Google Play).
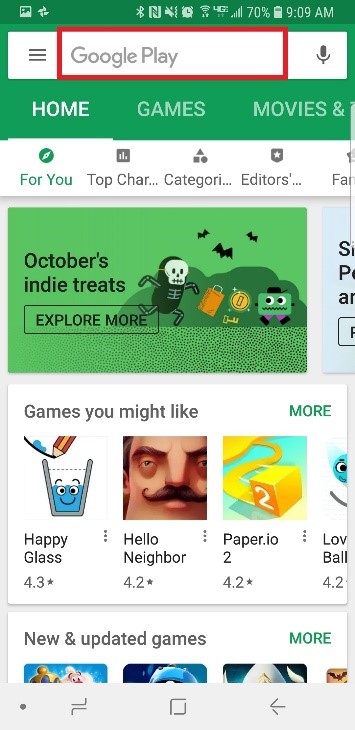
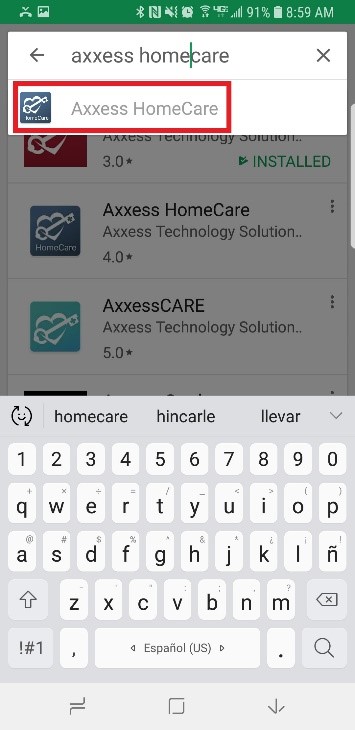
Search for "Axxess HomeCare." The app is blue and says HomeCare at the bottom of the Axxess logo (heart & key). Tap the search result.
Tap on the green "Install" button.
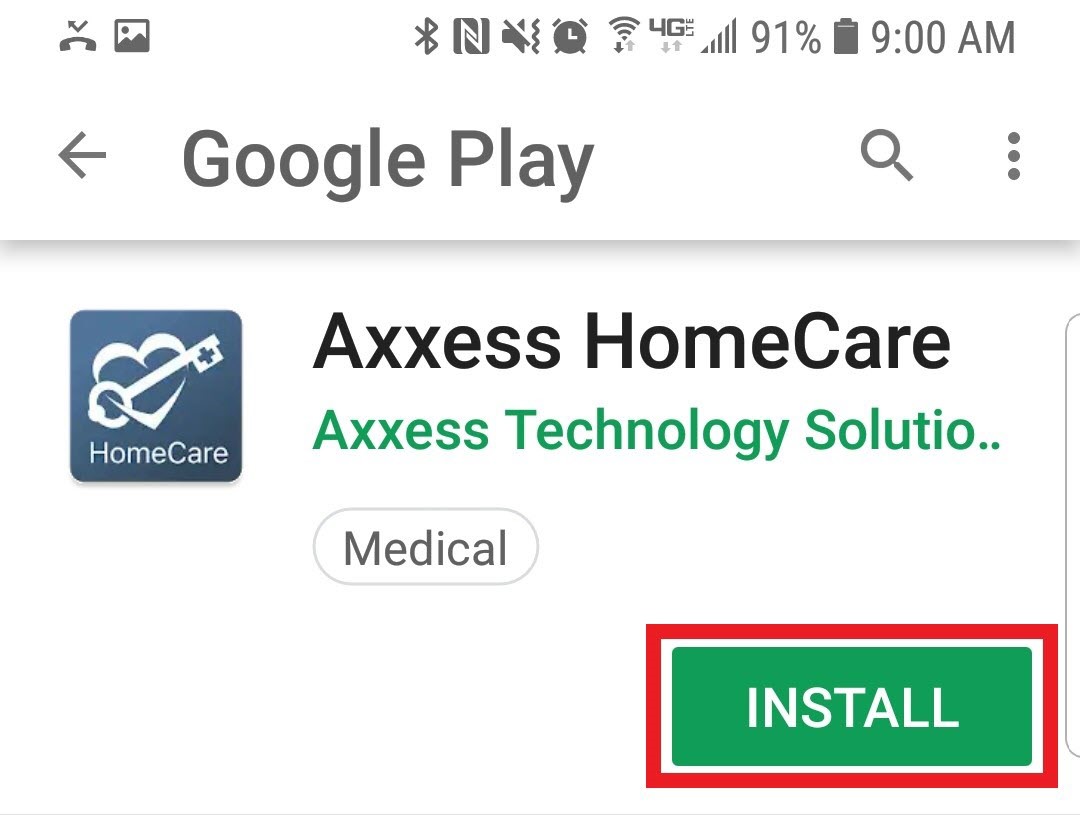
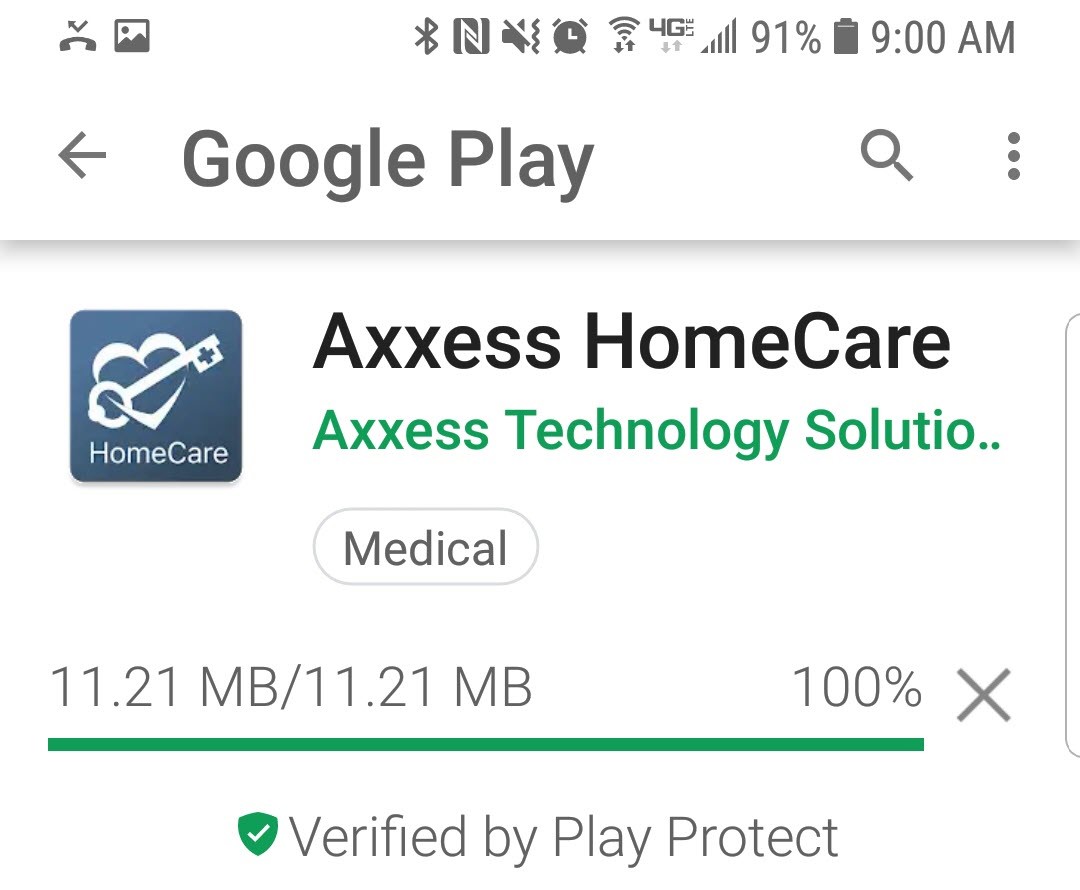
Then the download process will begin.
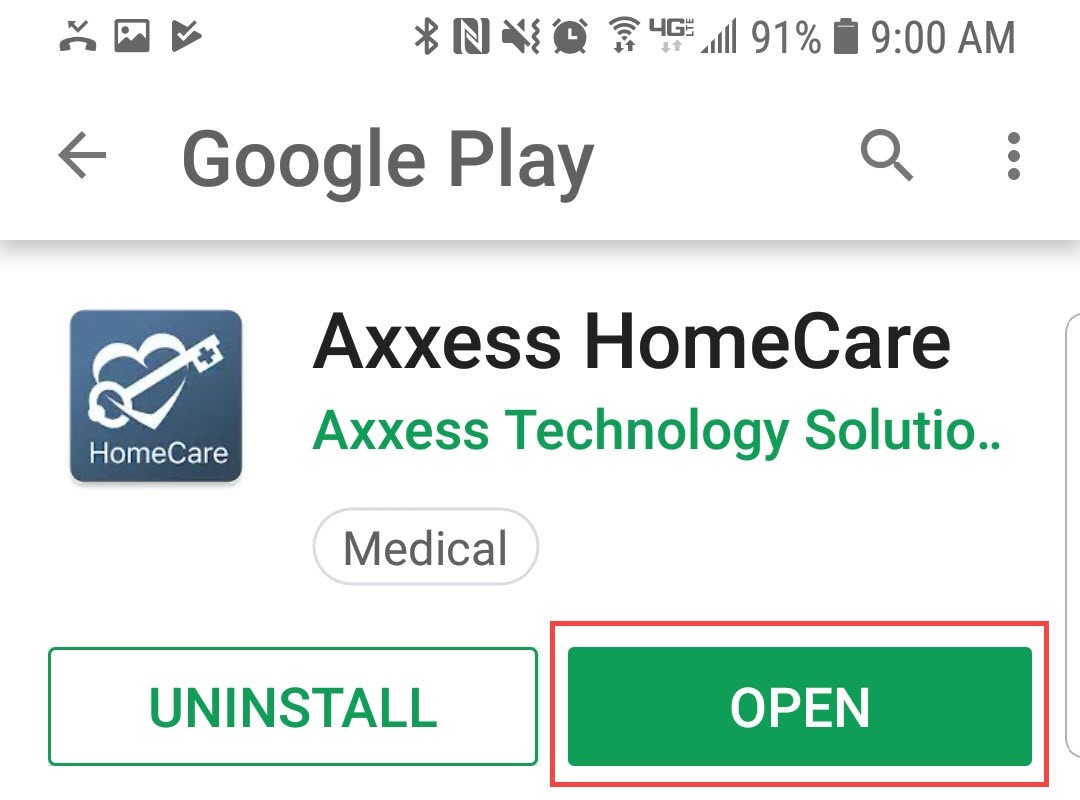
Once downloaded, tap the "OPEN" button to start the app or "UNINSTALL" to remove.
The app will now be located with the rest of the apps. Always download the latest update from the Google Play Store for free.
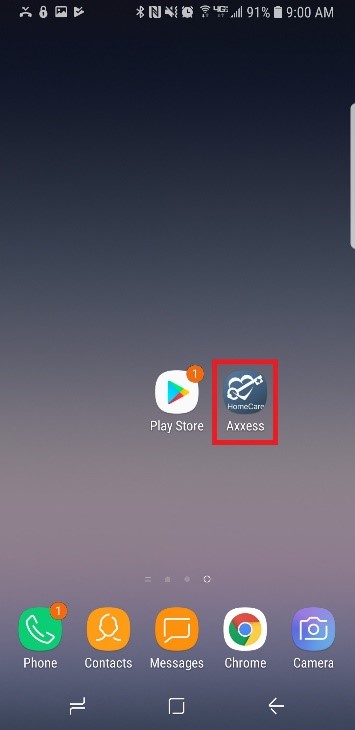
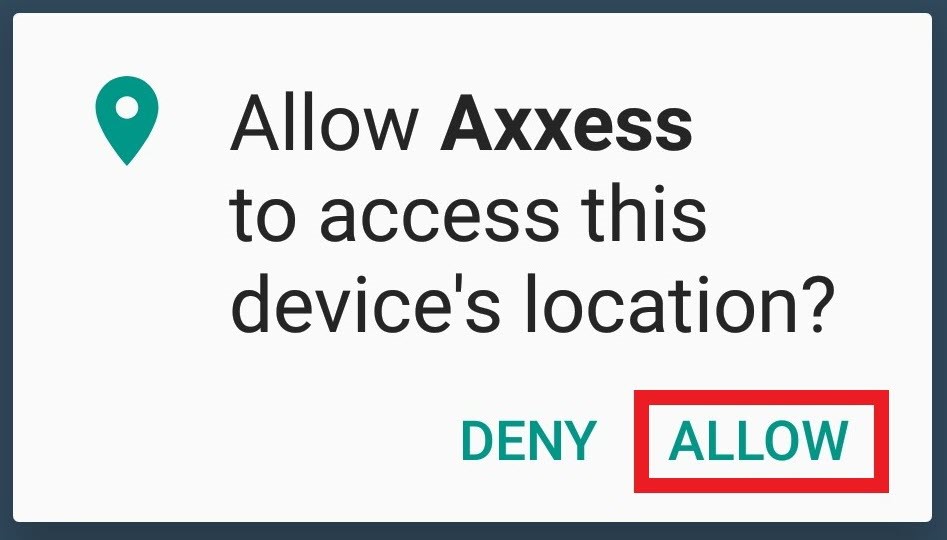
Tap on the HomeCare app to open. "ALLOW" Axxess to have access to the location. Allowing this feature is critical for the app to pinpoint the location accurately for Electronic Visit Verification (EVV), which will be covered later.
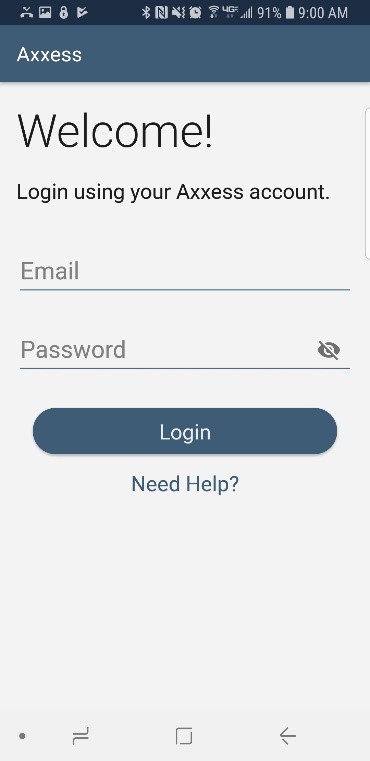
The following is the login screen. Enter the email that was provided to the organization and the password that was established while logging into the desktop version of HomeCare. If the password was forgotten, then tap the "Need Help?" hyperlink. Enter the email address associated with the account and then tap on the "Reset Password" button which will send the password reset instructions to the email.
Enter the email address and password, then tap on "Login."
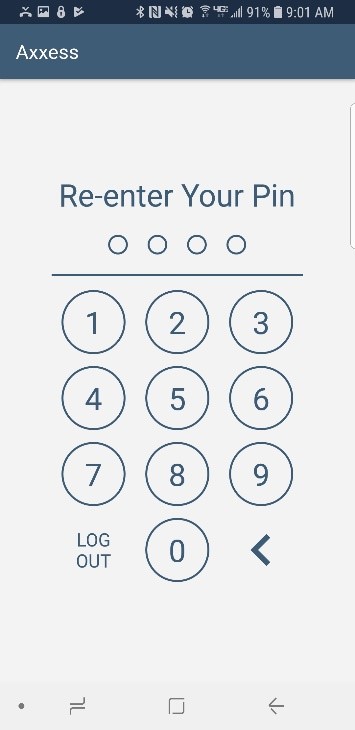
The organization name will come up as a disappearing notification. The user will then be required to create a 4-digit PIN code.

Once a 4-digit PIN code has been entered, confirm the PIN code by entering it one more time. Any time the user leaves the app or the app times out due to inactivity, the PIN code must be reentered.
NOTE: After five incorrect attempts, the user will be prompted to log back into the app and create a new PIN.
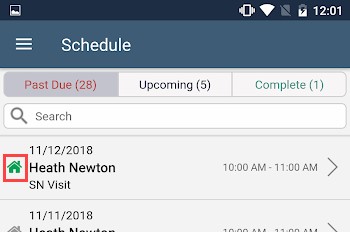
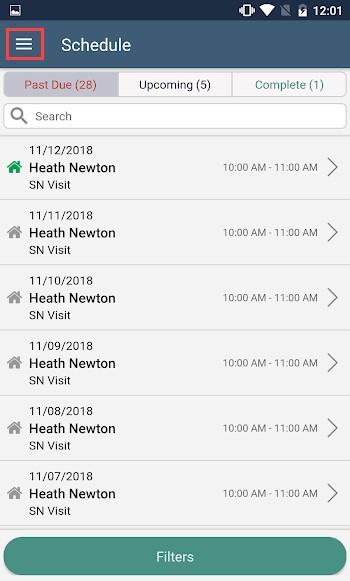
The following is the Schedule. The Schedule is split up between three tabs at the top of the page: Past Due, Upcoming and Completed. The tab being viewed is grayed out. The number in parentheses next to the tab title is how many tasks/visits are in each category.
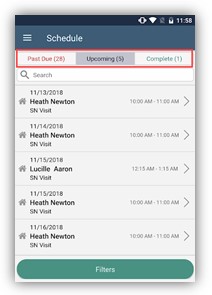
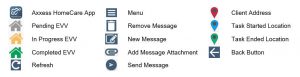
Visits will be listed one by one. It will show the visit date at the top and the planned visit time to the right. Below is the client name in bold. Below is the type of visit and to the left is the EVV status. These are the three different EVV statuses:
![]()
To narrow down the list, use the Search bar below the schedule tabs. Tap inside the search and start typing the name of the client.
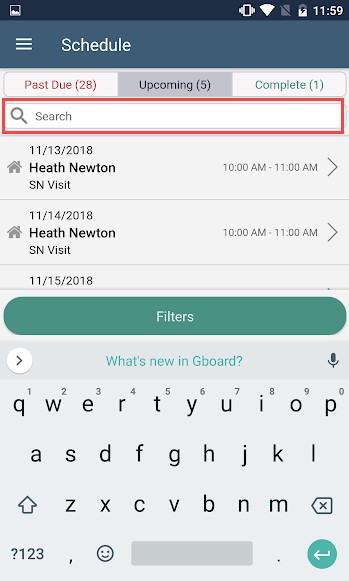
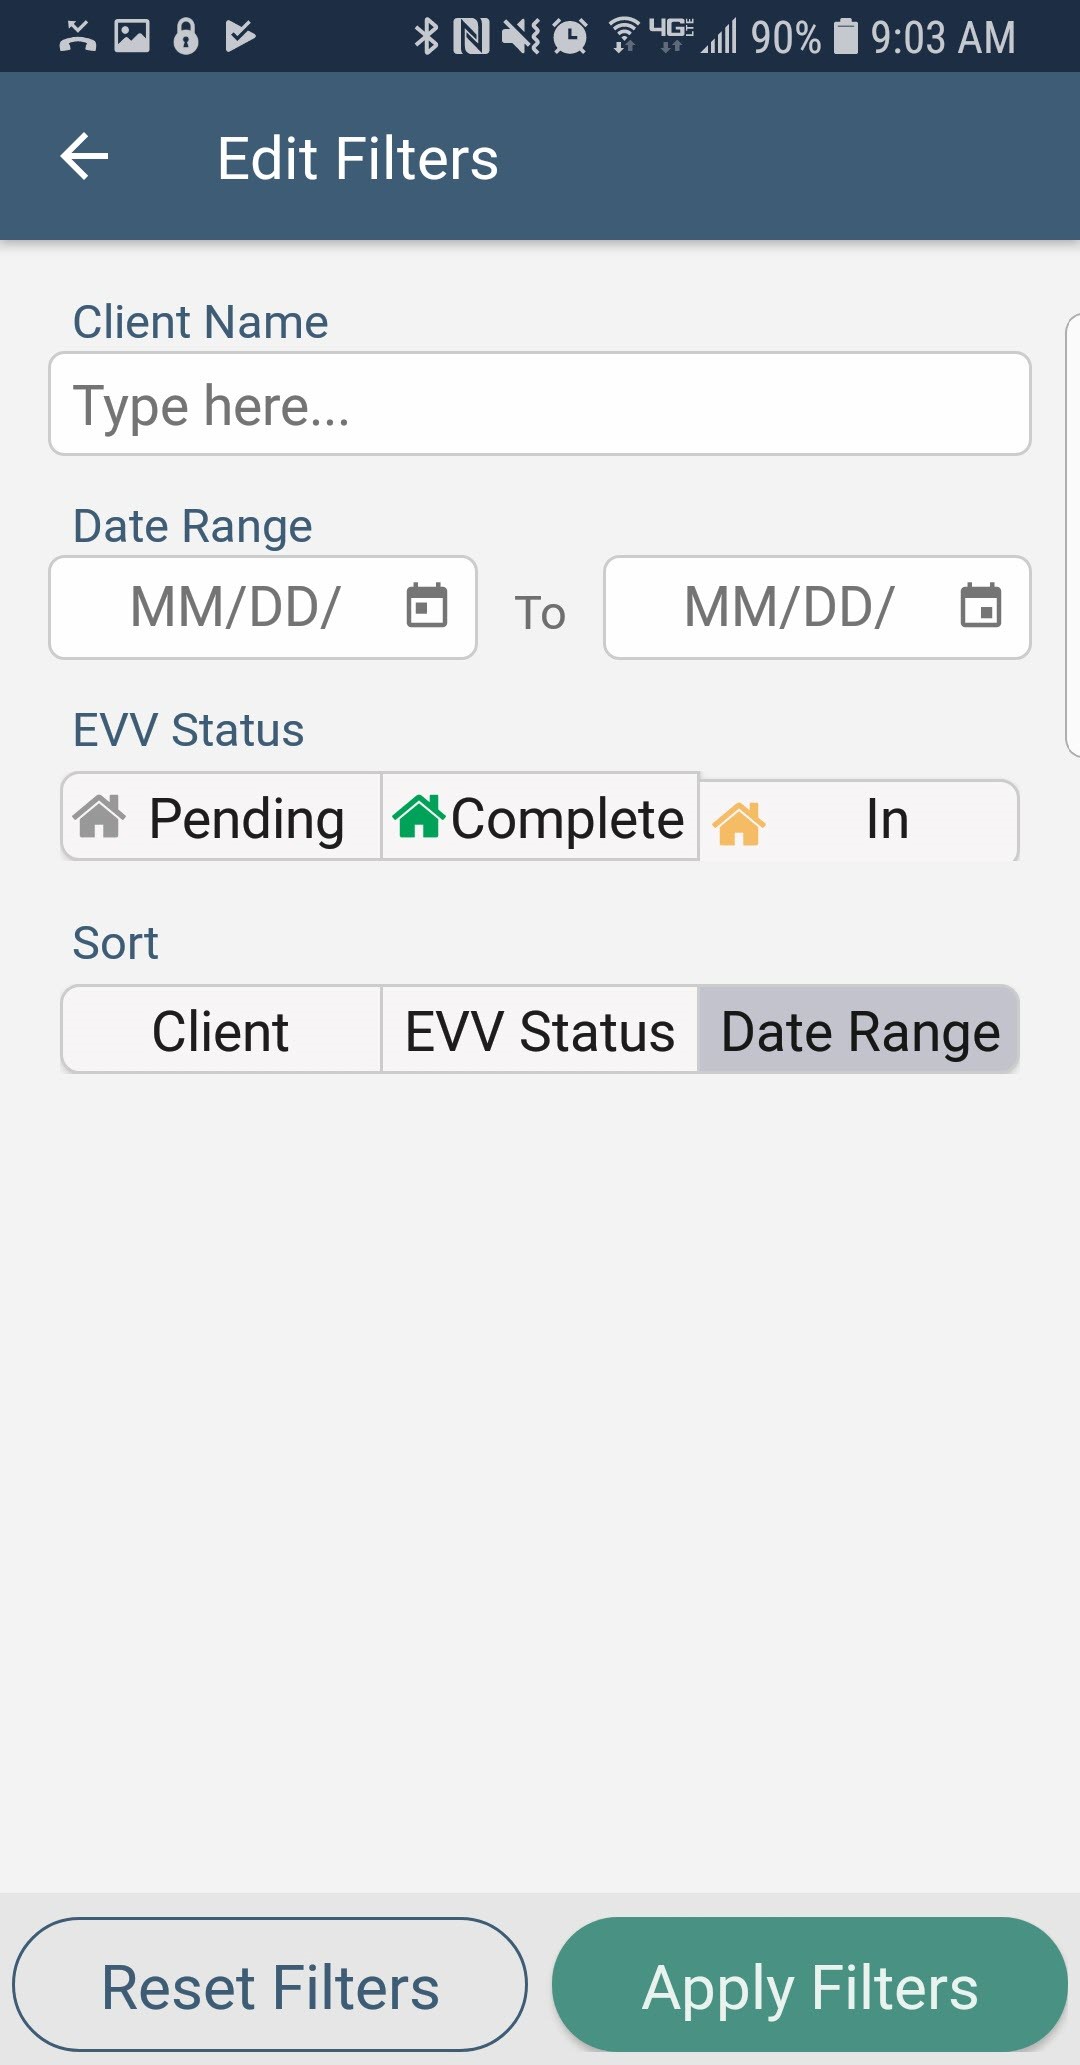
Another way to narrow down the list of clients is by the "Filter" button at the bottom of the page. Search by Client Name, Date Range, EVV Status or Sort the schedule by Client Name, EVV Status or Date Range. Once a filter has been chosen, tap the "Apply Filters" button on the bottom right.
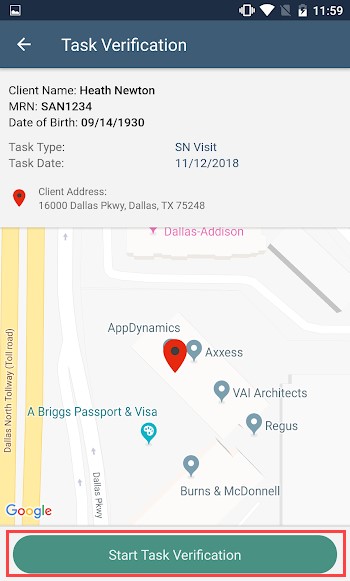
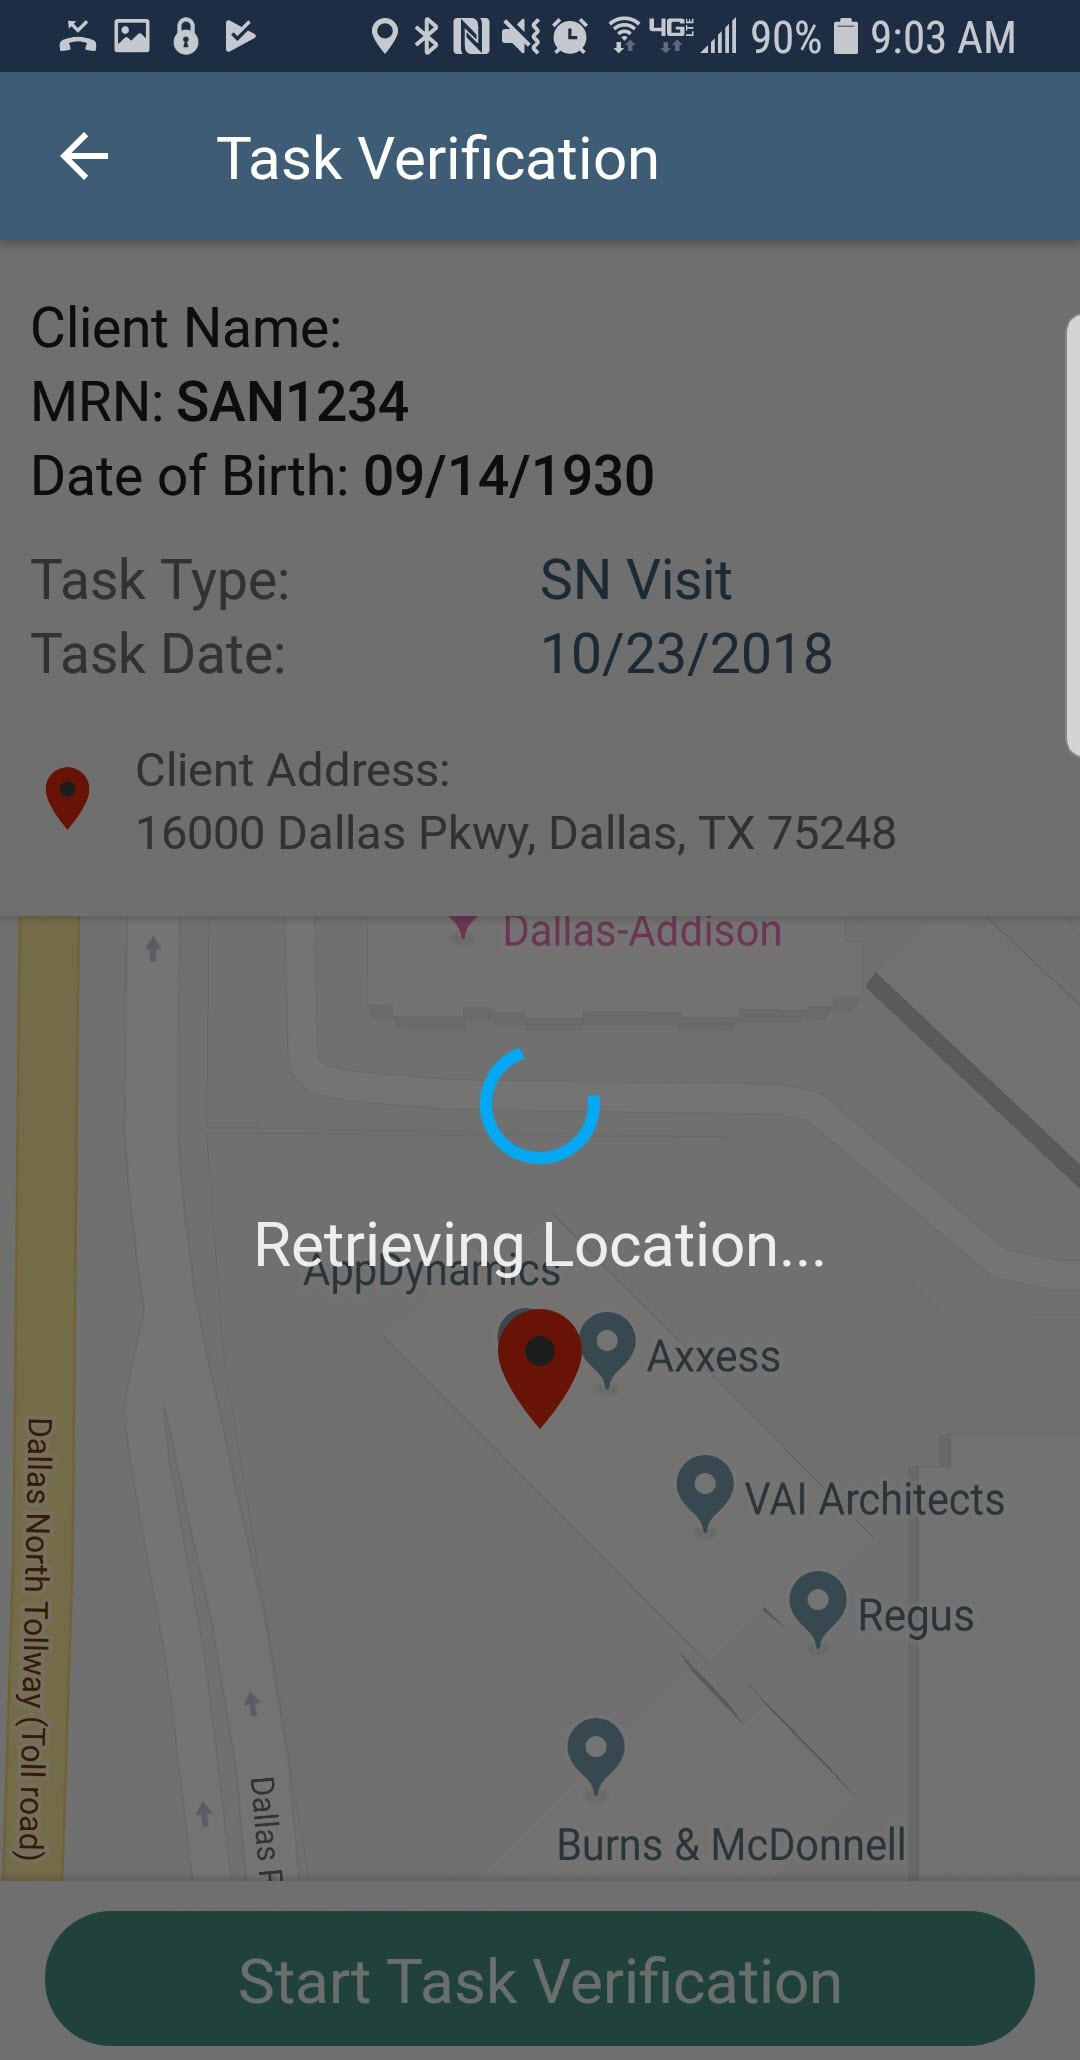
To start the Task Verification process, tap on a visit from the Schedule. It will show the Client Name, MRN, DOB, Task Type & Date and where the client is located on the Google map marked by the red push PIN ![]() icon. Tap "Start Task Verification."
icon. Tap "Start Task Verification."
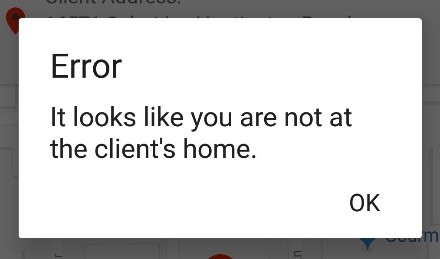
If the user is not located within a reasonable distance to the client's home, the following error will display:
If the user is in range of the client home, the app will begin retrieving the location.
Once retrieved, the client's name is listed at the top of the page followed by the type of visit. Tap on the Time In & Out calendars and clocks to update. Enter any optional Associated Mileage or Surcharge. Then tap "Collect Client Signature."
NOTE: This setting is chosen in Manage Company Information. Users may or may not have access to change the time in/out depending on setting choice.
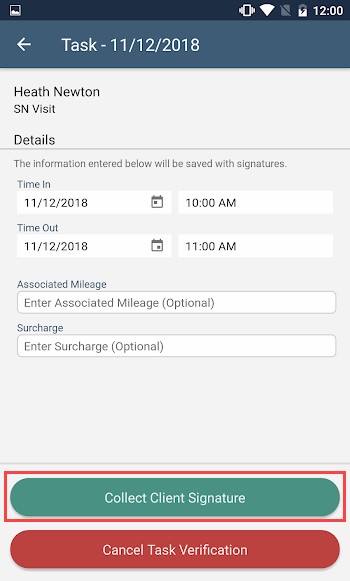
NOTE: Only collect a signature if the user is ready to close the visit.
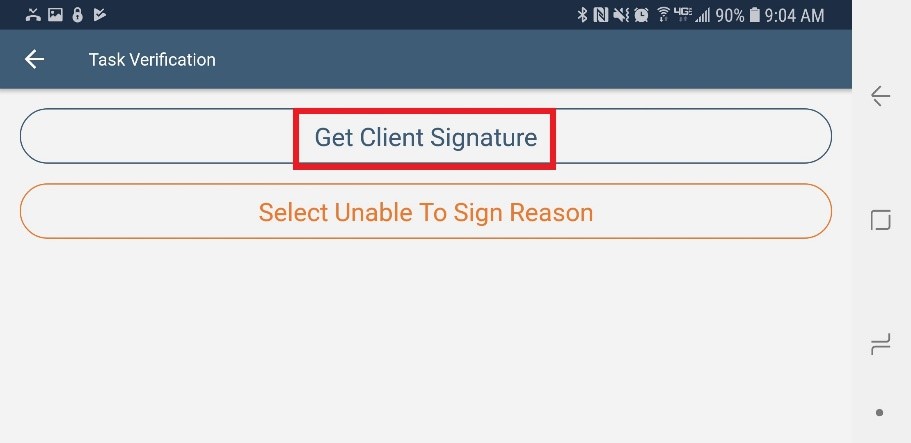
Tap on "Get Client Signature."
Use a finger or stylus to enter Client Signature and tap "Submit" in the bottom right.
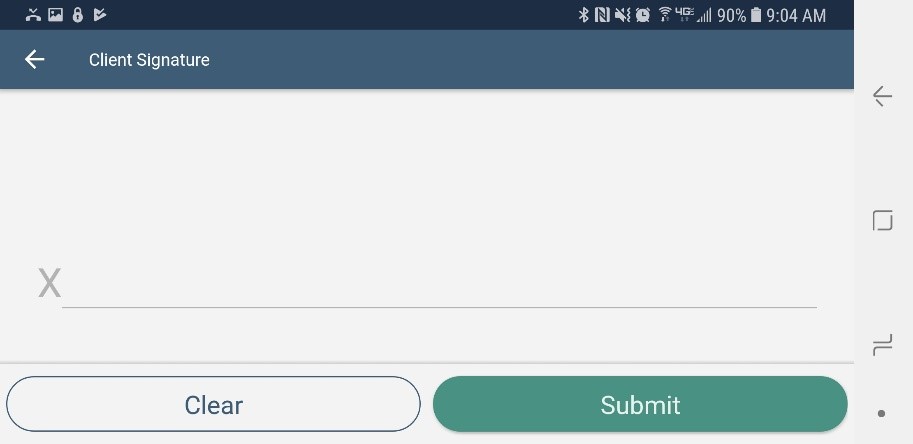
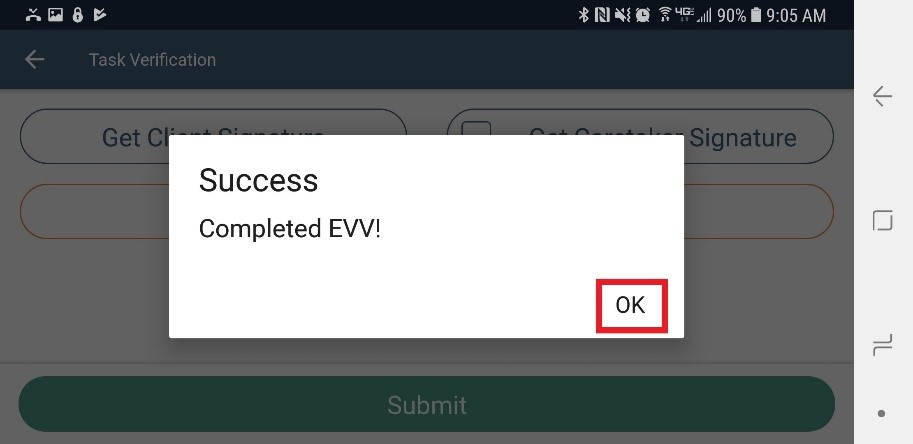
Tap "Redo Client Signature" to try again or tap "Submit" to continue. There will be a confirmation that the EVV process is completed. Tap "OK" to continue.
The Task Verification page from before displays but now includes the Verified Time In & Out and the Signature, along with the Task Started Location ![]() icon and the Task Ended Location
icon and the Task Ended Location ![]() icon. Tap on back arrow
icon. Tap on back arrow ![]() icon in the top left or the system back button to get back to the schedule.
icon in the top left or the system back button to get back to the schedule.
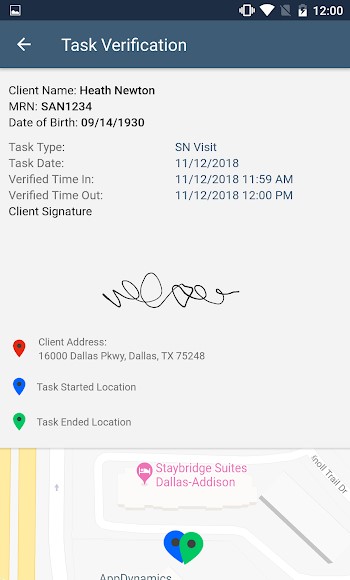
The EVV Status icon next to the client's name will update to green.
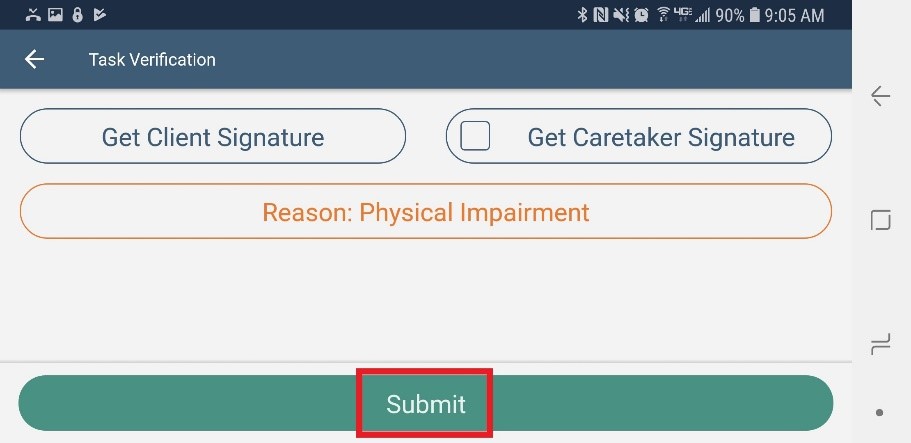
If the client is not able to sign the verification, tap "Select Unable To Sign Reason."
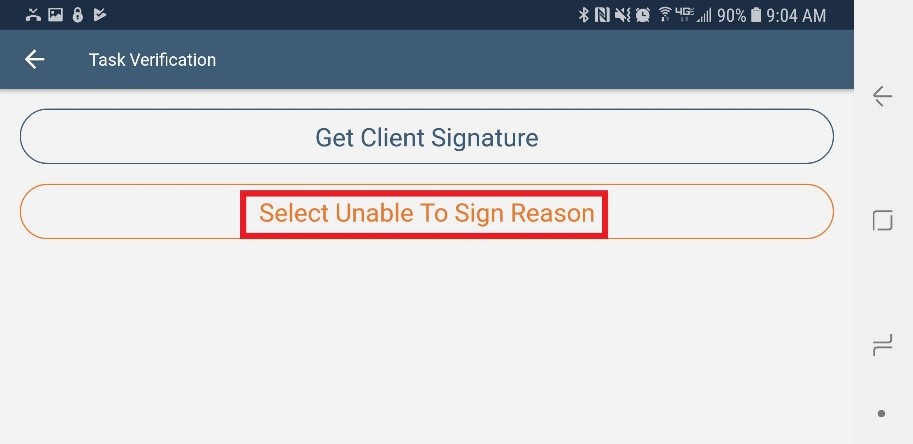
Choose from the following options:
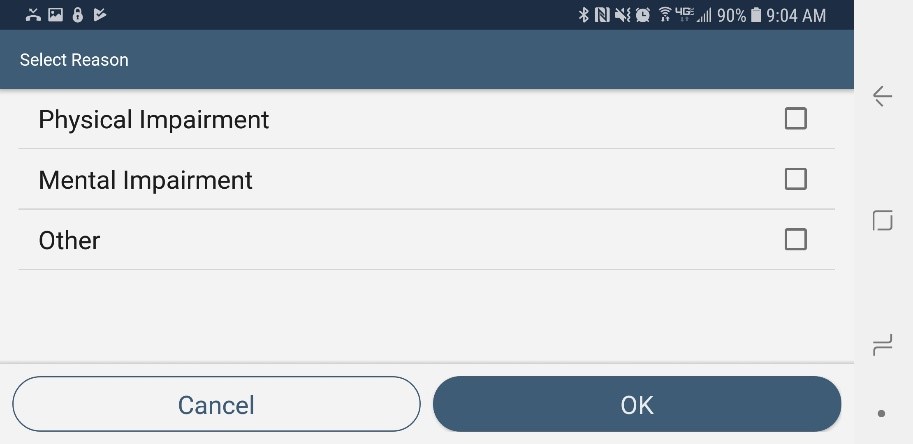
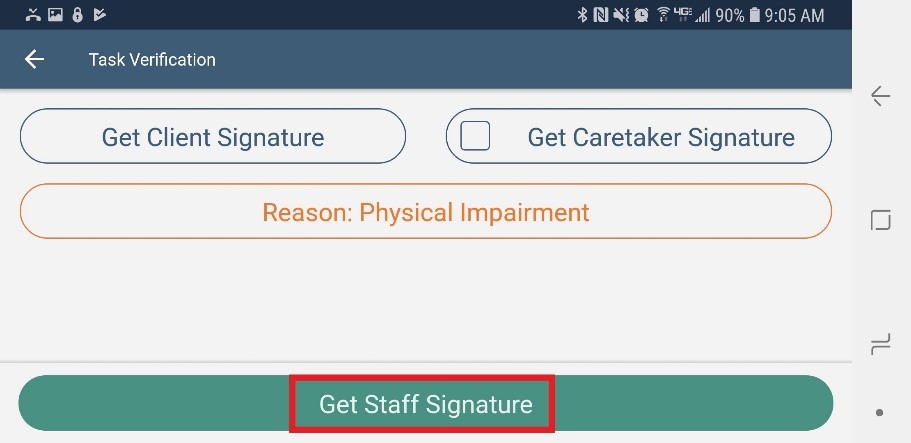
If Other is selected, the user must enter the Reason in the free text space. If the caretaker will sign on behalf of the client, tap "Get Caretaker Signature."
Then the staff/user performing the visit will sign, tap "Get Staff Signature."
The staff will then sign with a finger or stylus and tap "Submit" in the bottom right.
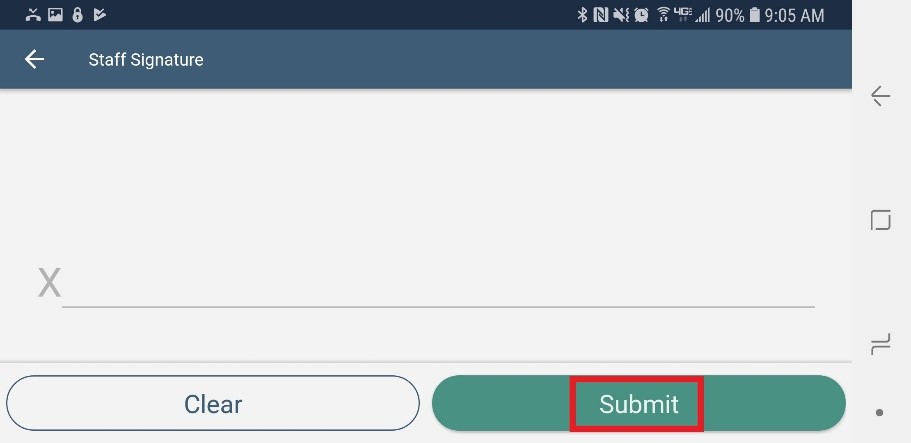
After staff has signed, then tap "Submit."
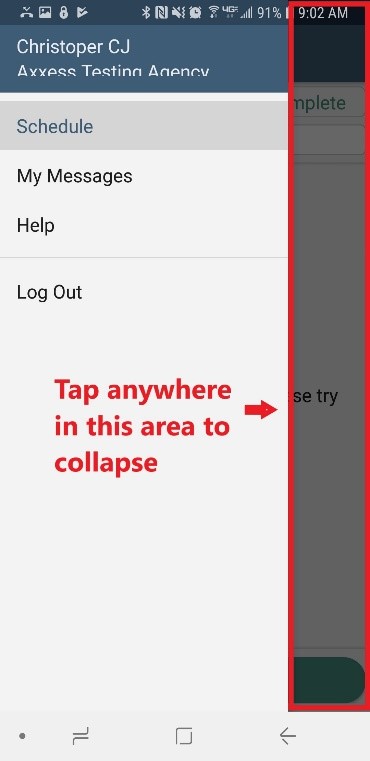
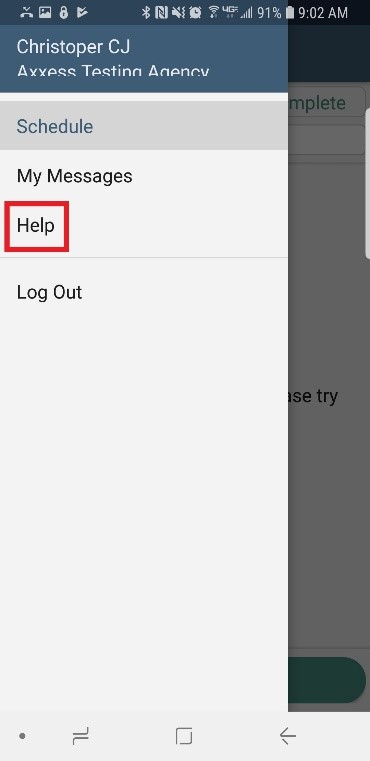
Tap the three-line Menu button in the top left.
There are 4 options: Schedule, My Messages, Help and Logout. Logout will leave the app. A login will be required to get back in. Tapping outside of the side menu will collapse the menu.
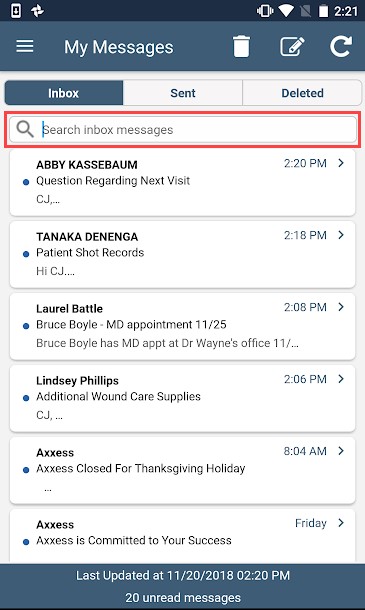
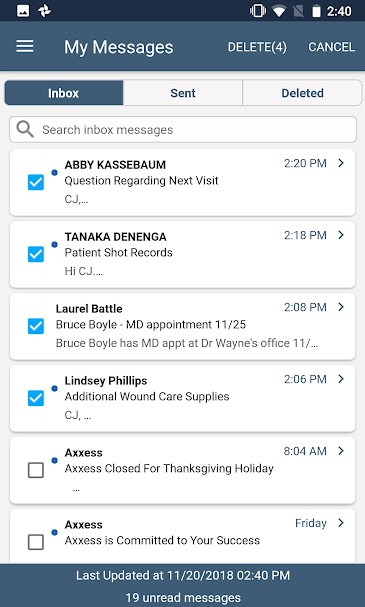
Tap on "My Messages." This is the HIPAA-compliant, intra-organization messaging feature. Messages are separated into three tabs: Inbox, Sent and Deleted (blue tab when viewing). The bottom of the page will show the last time the messages were up to date along with the total number of unread messages. Unread messages have a blue dot to the left. Swipe down to refresh the screen. To search through the messages, start typing in the text space below the tabs.
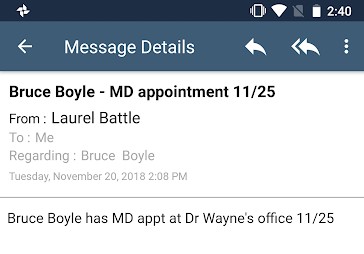
Tap on a message to view. Tap on the trash ![]() icon in the top right to remove the message. After deleting, a notification will say the message is being deleted. Tap on the back arrow in the top left to get back to the message list.
icon in the top right to remove the message. After deleting, a notification will say the message is being deleted. Tap on the back arrow in the top left to get back to the message list.
From My Messages, users can delete multiple visits at the same time. Tap on the trash icon at the top. Then select one or more messages by tapping on them (tap to unselect), they will have blue check marks to the left. Choose all messages to be removed, then tap "DELETE(_)" at the bottom of the page. The number in parentheses is how many messages are selected. The messages will then move to the "Deleted" tab.
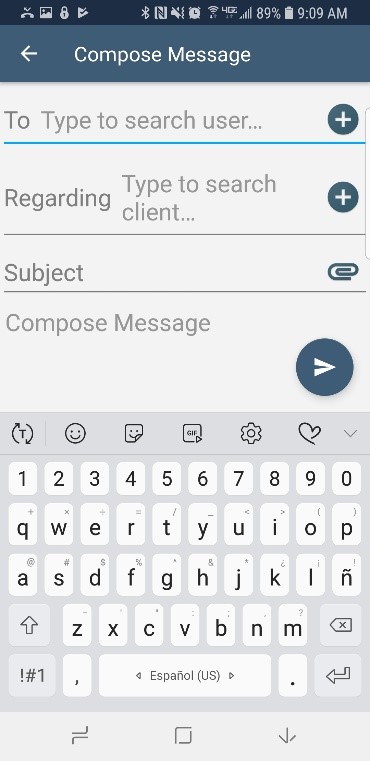
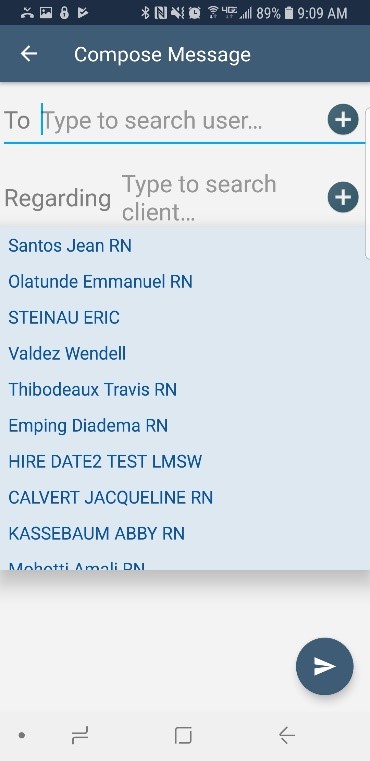
To compose a new message tap on the message ![]() icon. Start typing the name of the user(s) the message is for in the "To" section. To search through the list of users, tap the blue plus icon on the right.
icon. Start typing the name of the user(s) the message is for in the "To" section. To search through the list of users, tap the blue plus icon on the right.
Search through the list by users or tags, tap on the users/tags to be included in the message.
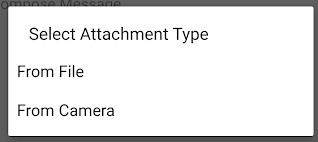
The Regarding field lets you indicate if the message relates to a specific client. This is accomplished by typing their name in the Regarding section or tapping the blue plus sign to the right to search for one. Type in a Subject then continue on with the body text of the message where it says "Type your message here…" Attachments can also be added by tapping the attachments ![]() icon in the top right. Choose to either take a photo on the app "From Camera" or use an image already on the device, "From File."
icon in the top right. Choose to either take a photo on the app "From Camera" or use an image already on the device, "From File."
When the message is complete, tap the send ![]() icon.
icon.
The Help area is found on the side menu.
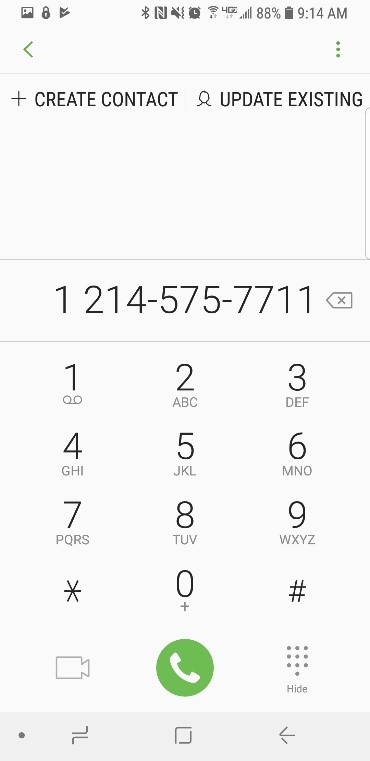
The top section is for resetting the password. Enter the email address associated with the account and tap "Reset Password." To call Axxess Support, we are available Monday - Friday from 7:00 am - 7:00 pm CST.
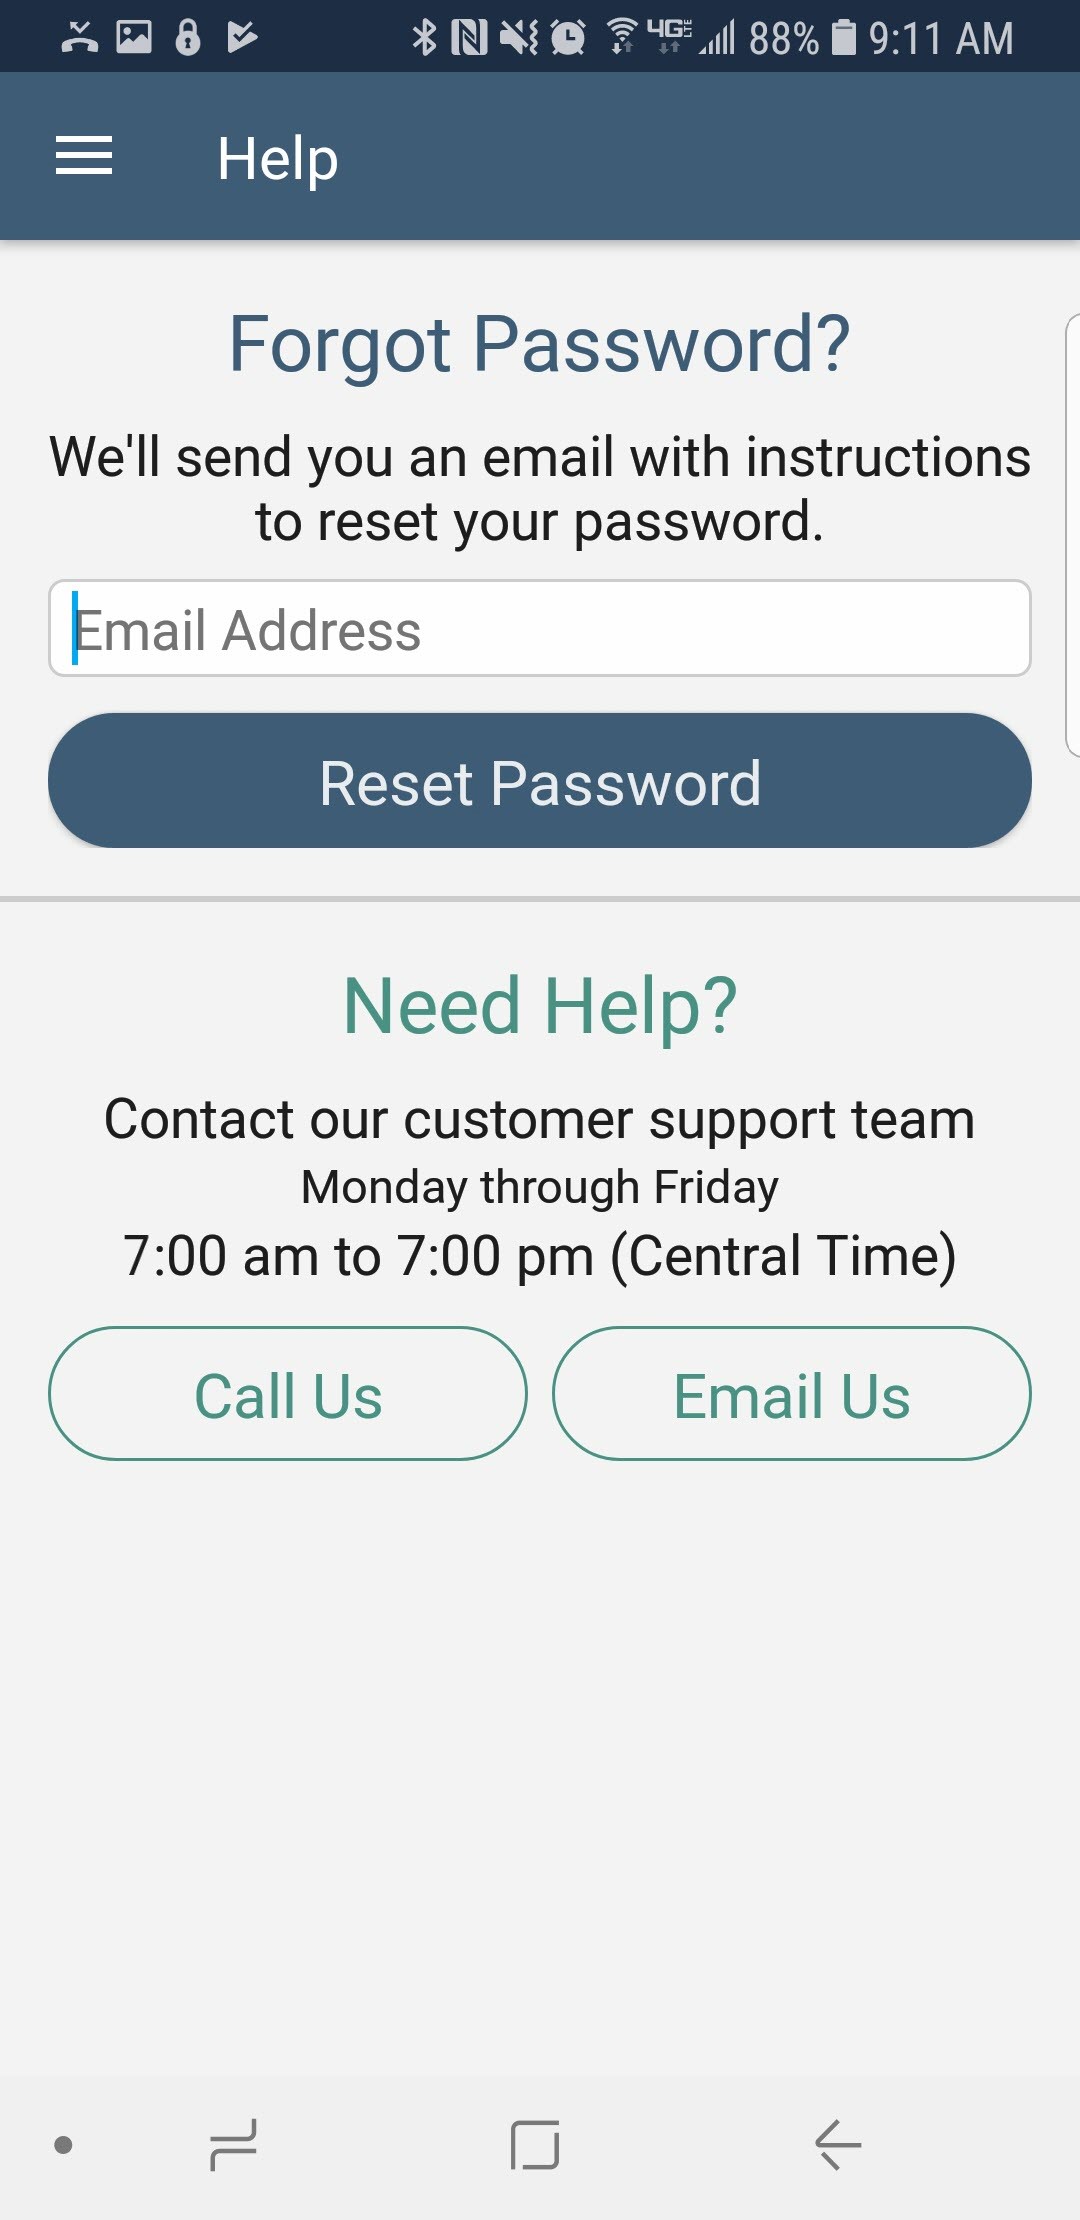
Tap on "Call Us" to auto-populate the Axxess support phone number.