Axxess Palliative Care now enables quality assurance staff to include comments on items returned to clinicians from the QA Center. This feature facilitates compliance and accountability as users can now receive direct communication on the reasons their items have been returned.
To leave comments on QA items, users must have permission to access the QA Center and view tasks in Axxess Palliative Care.
To give a user permission to access the QA Center, edit the user’s profile and navigate to the Permissions tab. In the Administration section, select View next to QA Center. Only users who need to approve tasks will need permission for the QA Center.
People tab ➜ People Center ➜ Edit ➜ Permissions tab ➜ Administration section ➜ QA Center ➜ View

To give a user permission to view tasks, navigate to the Clinical section and select View next to the Tasks permission.
People tab ➜ People Center ➜ Edit ➜ Permissions tab ➜ Clinical section ➜ Tasks ➜ View
Once the appropriate permissions have been selected, click Save.

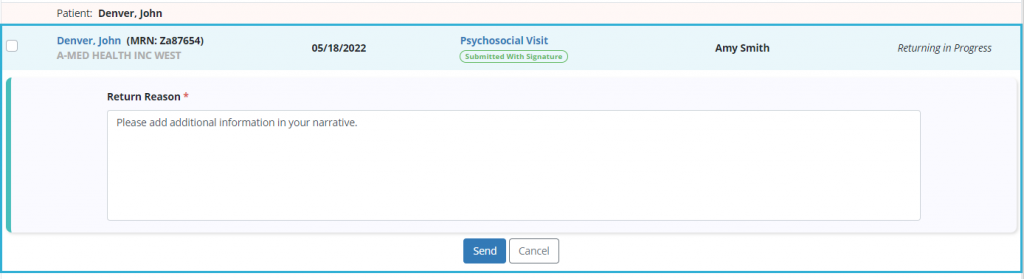
When returning a task in the QA Center, a Return Reason box will appear under the task. In the Return Reason box, QA staff can enter details on why the item is being returned to the user who completed the visit.
Once the appropriate information has been entered in the Return Reason box, click Send to finish returning the task to the user.
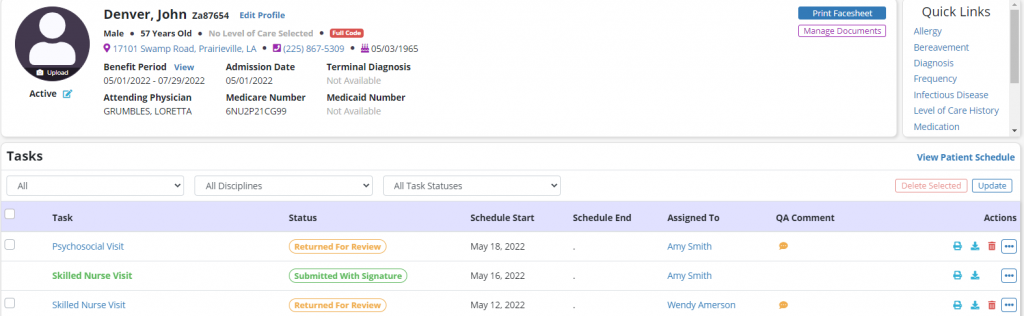
Once the task has been returned, comments entered in the Return Reason box can be viewed through the Patient Chart, Employee Schedule and Patient Schedule screens.
On the Patient Chart, Employee Schedule and Patient Schedule screens, a new QA Comment column displays an orange chat bubble icon next to tasks that have comments from QA.
Select the chat bubble icon to view comments entered in the Return Reason box.
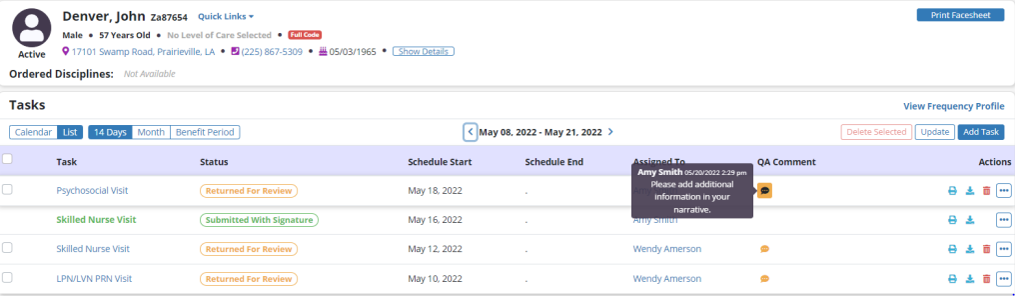
If you need additional clarification on why the task was returned, add a new comment by selecting Add Comment. Enter the comment in the Comment box and click Send. The comment will be sent to the user who returned the task in QA.
To complete the task, select Complete and the visit will return to the QA Center for approval. Once the visit has been approved, the chat bubble icon will no longer appear in the QA Comment column.
Updated on 12/07/2022
