Interdisciplinary Group (IDG) meetings are helpful to ensure good communication and team communication between the palliative team ensuring optimal patient care. Axxess Palliative Care enables agencies to utilize IDG operations and seamlessly conduct IDG meetings from start to finish within the platform.
To start an IDG meeting, a user must:
To give a user permission to start meetings:
People tab -> People Center -> Edit -> Permissions -> Administration section -> Start IDG Meeting

In the IDG Center, users can access the meeting page by clicking View Meeting on the right side of the Meetings tab.

At the top of the IDG Meeting Details page, tiles display the meeting attendees. Users who are not listed as attendees cannot start the meeting. To add an attendee, click the Add Attendee button in the top right corner, enter the user’s name and click Save.
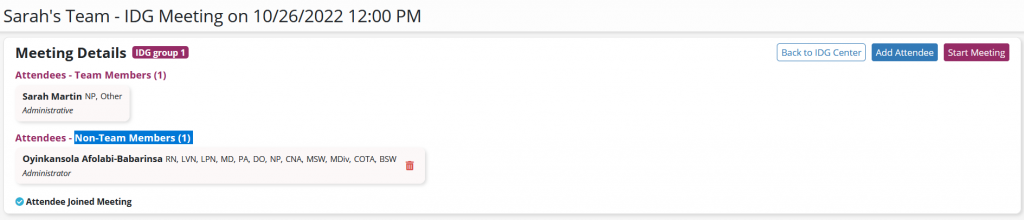
Once you are ready to begin the meeting, click Start Meeting in the top right corner. The meeting will start and your attendance will be recorded. Once the meeting has been started, other attendees can click Join Meeting to join and record their attendance.
Circle icons at the top of the IDG Meeting page show attendees who are logged in to the meeting.
Click Manage Attendees to collapse or expand the attendees section.

Below each header, all patients on the meeting agenda are listed on the left-side menu. By default, the first patient on the agenda is selected and his/her IDG summary is displayed for review.
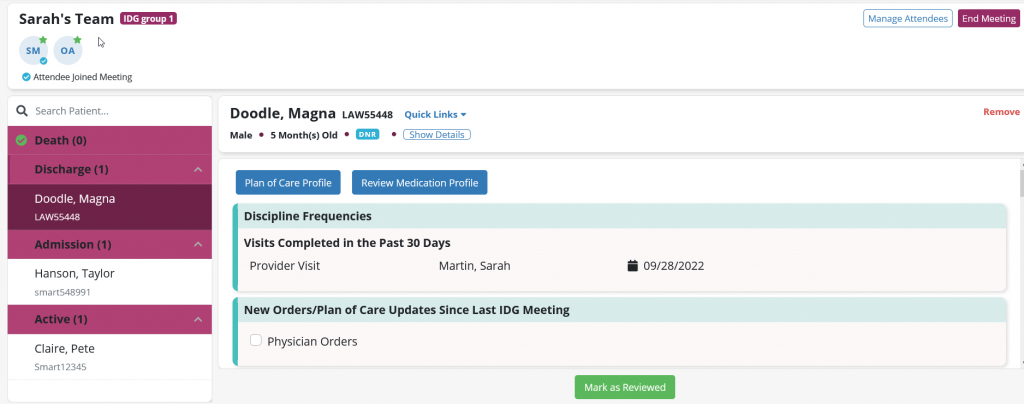
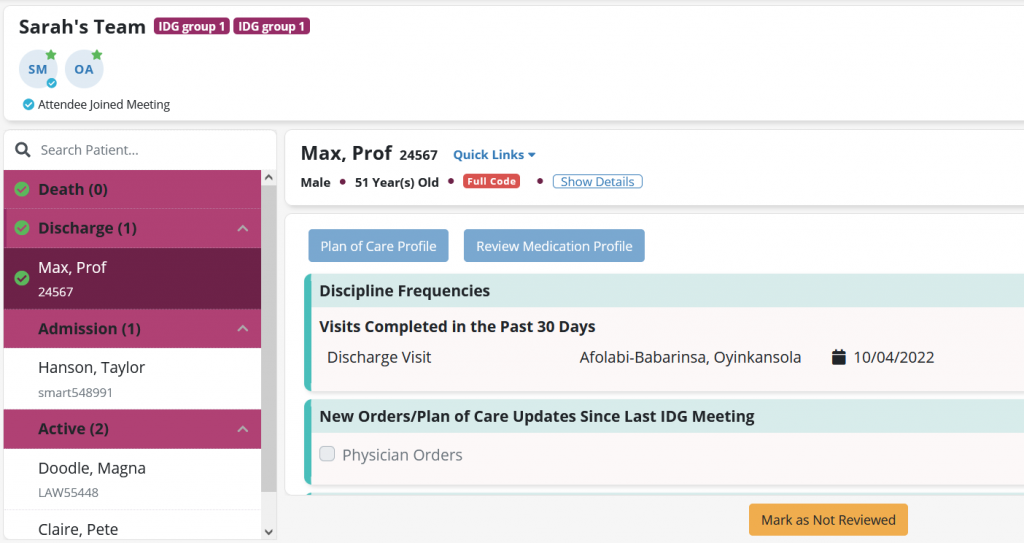
Once the team is finished discussing the patient and documenting discussion, selecting the green Mark as Reviewed button will identify the patient as reviewed and a green check mark will appear next to the patient’s name on the left-side menu. The button will turn orange and say Mark as Not Reviewed to enable any additional last-minute discussion to be documented if necessary. Use the left-side menu to move to the next patient.
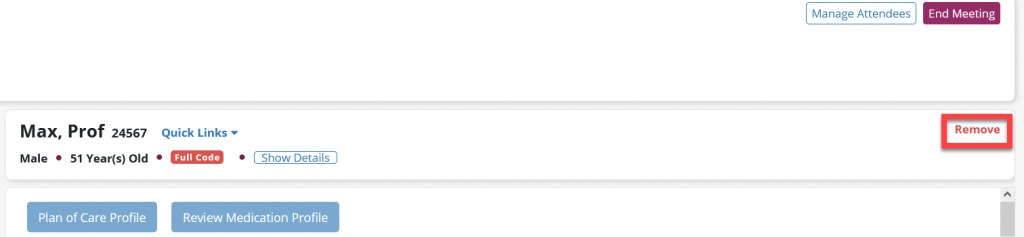
To remove a patient from the meeting click Remove to the right of the patient’s name.
Once all patients on the agenda have been discussed and marked as reviewed, green check marks will appear on each section of the agenda.

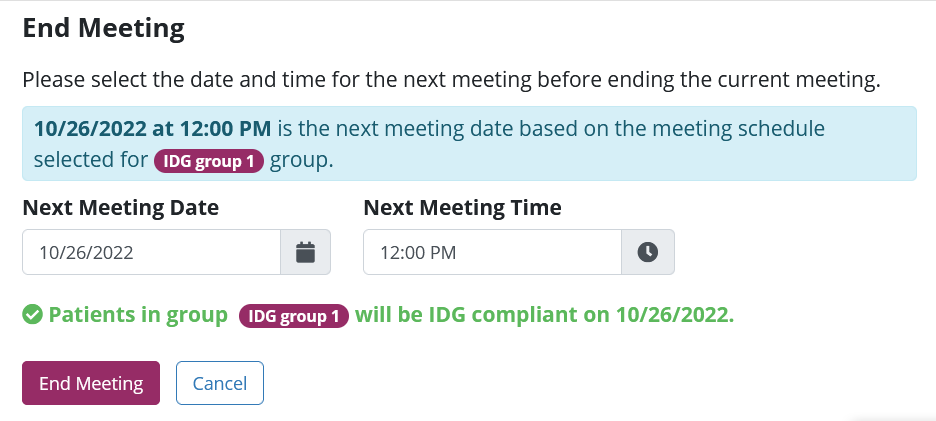
Select the purple End Meeting button to end the meeting and create the next meeting, agenda and IDG summaries. You will be prompted to confirm the next meeting date and time, which will default according to your team’s meeting schedule but can be edited as needed.