Pending Admissions are clients that have been entered into the system as a New->Client (Medical or Non-Medical) or have transitioned from existing referrals. This occurs when an existing referral has been selected to Admit but then opted to save the information instead of Admitting.
This tutorial will cover:
The Pending Client Admission list is a great tool for monitoring clients currently waiting for admission to your agency.
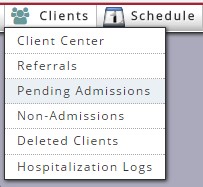
The quickest way to view pending clients is through Clients->Pending Admissions
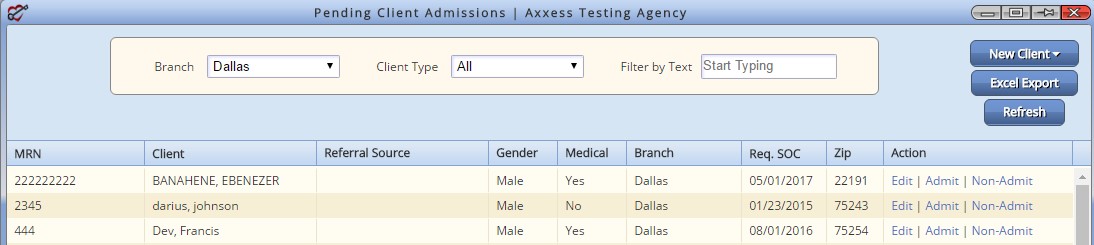
Client specific Actions available within the Client list screen are Edit, Admit and Non-Admit.
Selecting Edit will open the client chart and allow the user to update applicable information. Remember to Save information prior to Exiting.

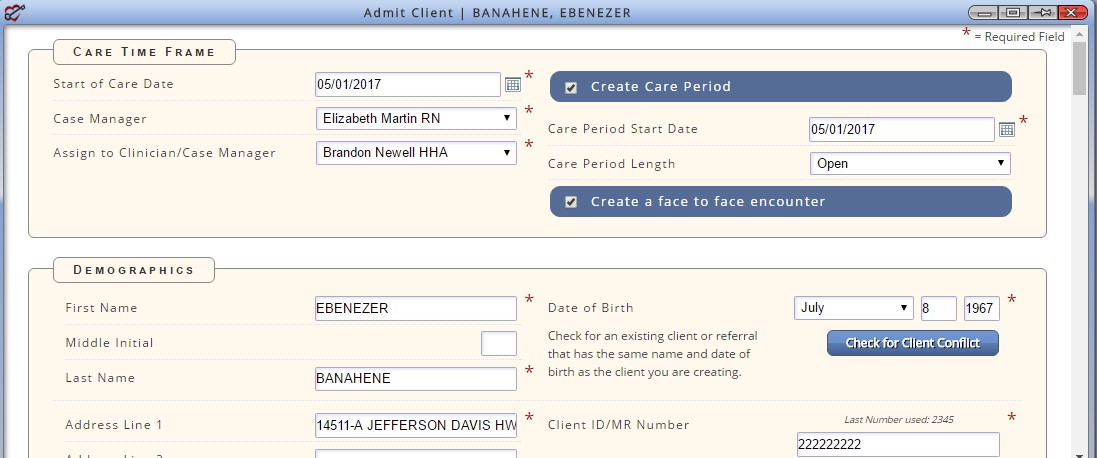
Selecting the action to Admit opens the Client Information page where information may be reviewed/updated. Once the Admit choice is selected the client will move off the pending list over to the active list.
NOTE: Update the Start of Care Date, and Care Period Start Date to match the admission information as needed.
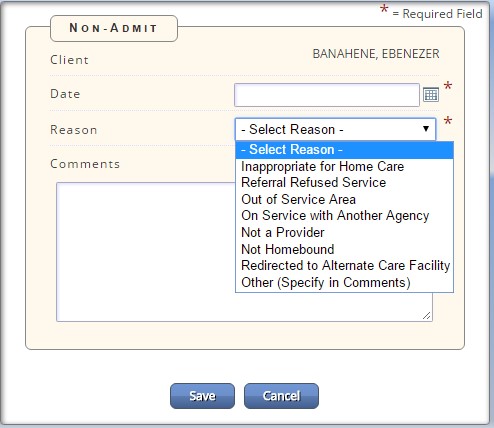
The Non-Admit feature allows the agency to mark the client as a non-admission if they are not coming on service. Once selected the "Non-Admission Details" window will display allowing the user to update necessary information. Once saved the client moves to the Non-Admit Client List.
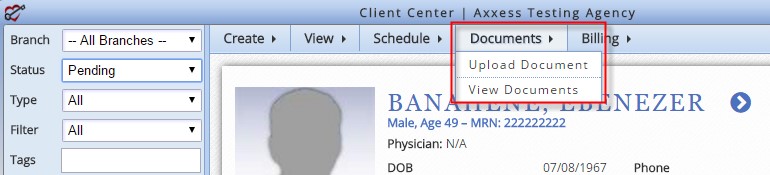
To Upload Documents to a Pending Client (for example: hospital discharge records)
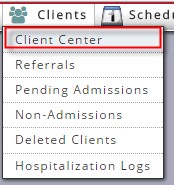
Clients -> Client Center
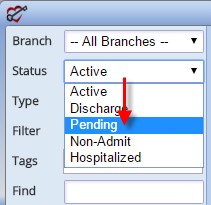
Select Pending from the status drop down list on the left hand side of the page
Locate and select the client from the Pending Client List

Once the client is selected choose Documents-Upload Document to upload documents to the client chart
To View uploaded client documents select Documents-View Documents.
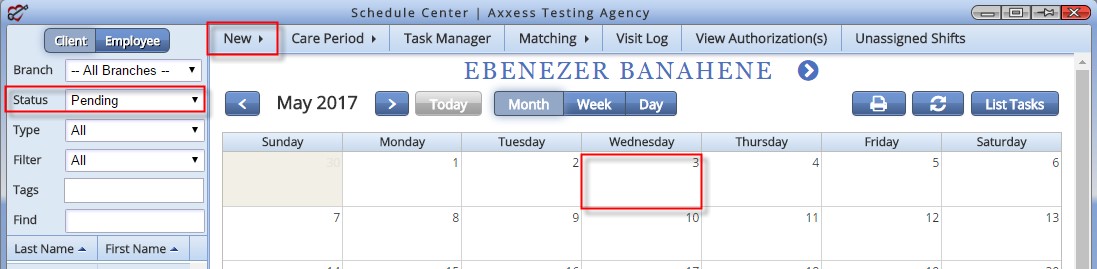
Scheduling Tasks to a Pending Client:
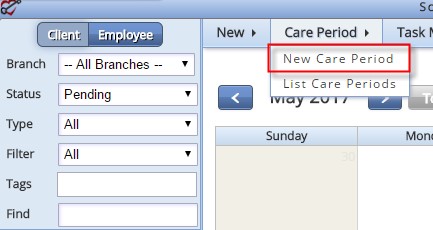
Schedule-Schedule Center-Status (Pending)
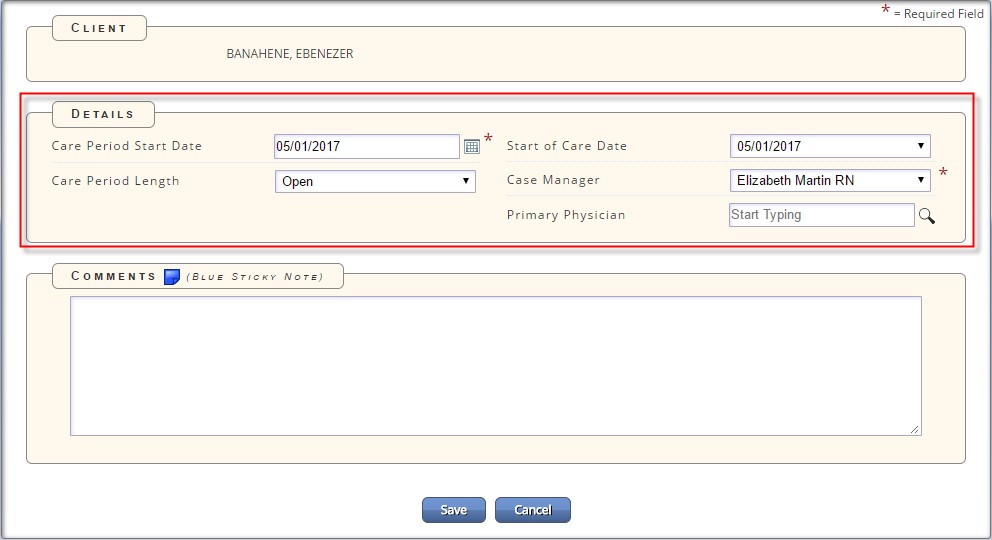
Pre-Requisite: A Care Period must be established for the client. To create a care period, select Care Period-New Care Period.
Complete the fields within the Details section. Comments related to the care period may also be entered. These comments appear as a blue sticky note on every task associated to the care period
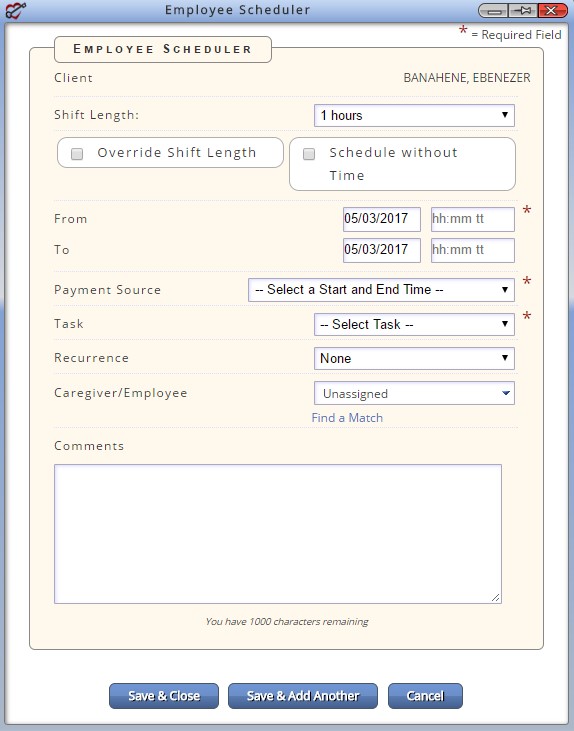
To schedule one of more tasks:
This concludes the Managing Pending Clients Tutorial.