x
Join our new Axxess User Community to connect, share, learn and grow together.Learn More
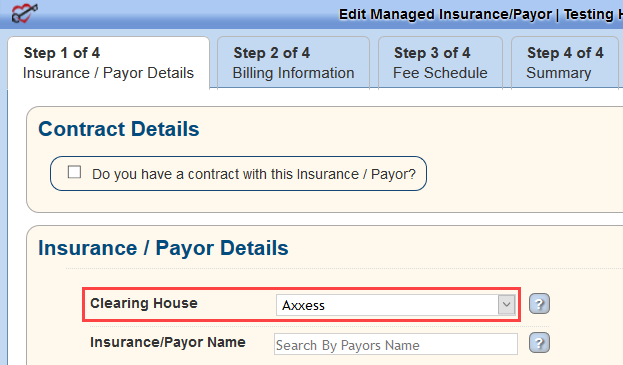
Super-users should open a ticket with Axxess to set up the payers to route via Axxess. Log in to Axxess AgencyCore and go to View/Lists/Insurances_Payers/Edit or Admin/Lists/Insurances_Payers/Edit. If Axxess is listed as the payer’s clearinghouse in the Insurance/Payer Details section, the payer was set up correctly.
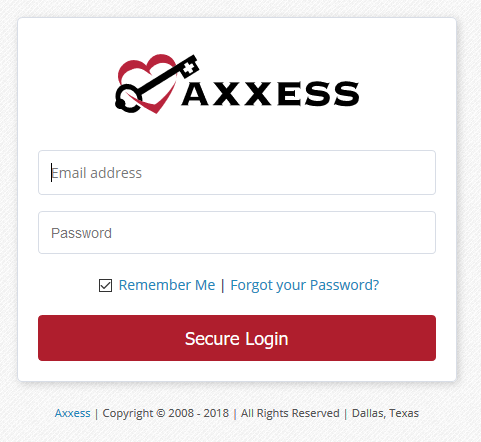
Navigate to www.axxess.com. Select CLIENT LOGIN.

Enter user credentials and select Secure Login.
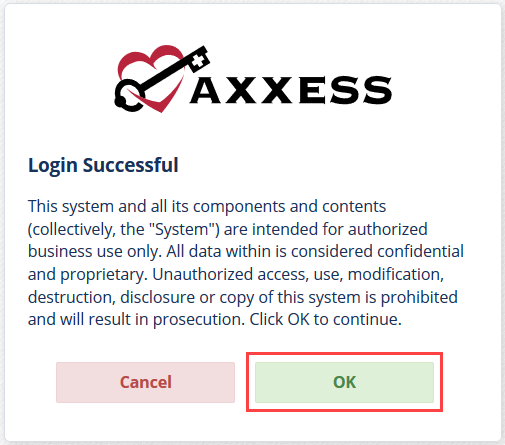
A Login Successful confirmation shows. Select OK.
The Axxess Planner displays pertinent information specific to a user. Shortcuts have been placed on the left side of the page to allow for easy access to the Axxess applications the agency is using. To access AxxessRCM, select the name of the agency below AxxessRCM on the left side of the page.
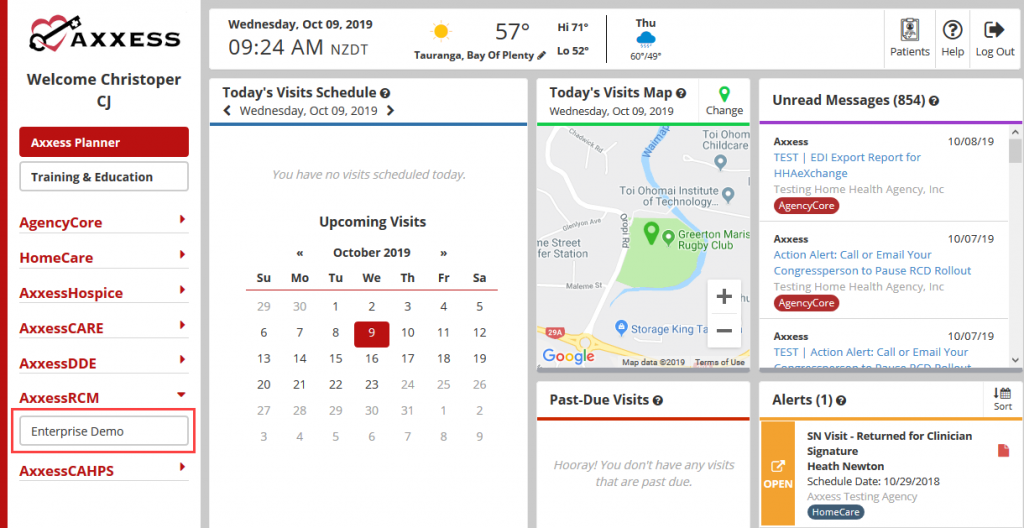
Once inside AxxessRCM, select the  menu button to go back to the previous screen.
The landing page of AxxessRCM is the Dashboard. It shows at a glance EFTs, Claims, Submissions, Pass Rate, Edit/Error Management Aging and Top 10 Error Reason Codes.
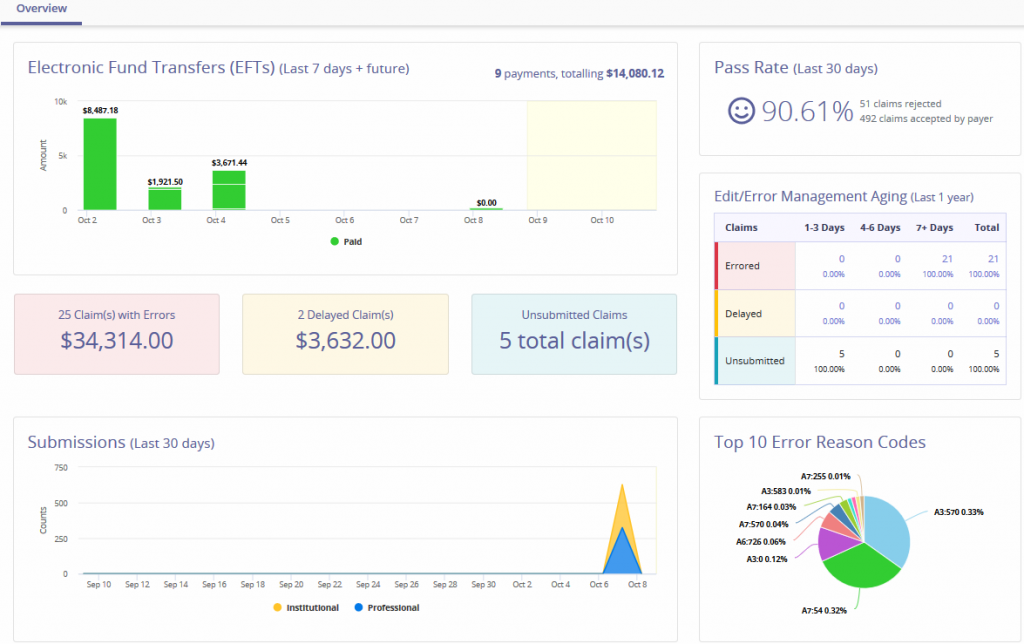
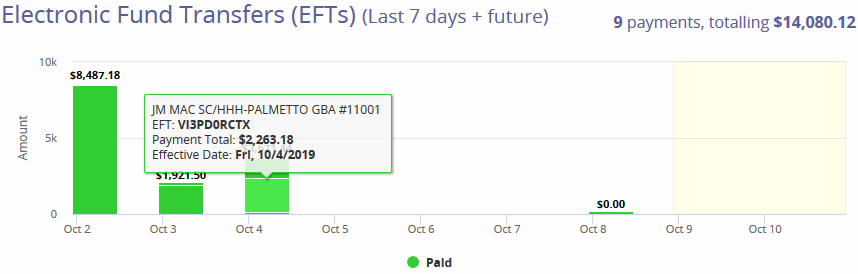
EFT – The Electronic Funds Transfers section displays agency checks in a bar graph form for the previous seven days and future dates. Hover over the bar graph to see the specifics of the payments including the payer, EFT number, amount and date.
Claim Statuses

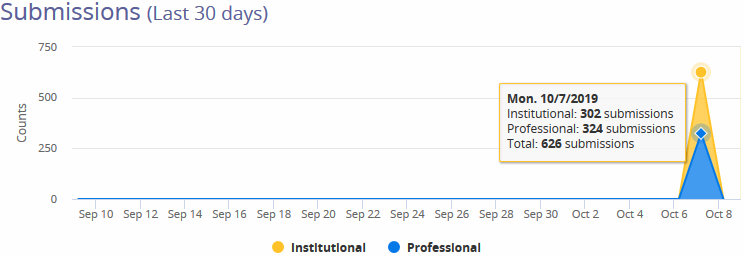
Submissions (Last 30 Days) – Shows a line graph with the total count of submitted claims within the previous 30 days. Hovering over the graph specifies how many claims were Institutional versus Professional claims.
Pass Rate (Last 30 Days) -A percentage calculated from the number of claims Rejected versus Accepted by the payers. The smiley face icon will adjust according to the rate percentage.

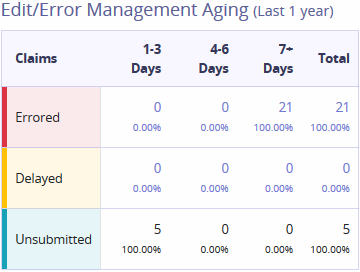
Edit/Error Management Aging (Last 1 Year) -Shows claim statuses which are categorized into aging buckets. Totals of each claim status is available on the last column.
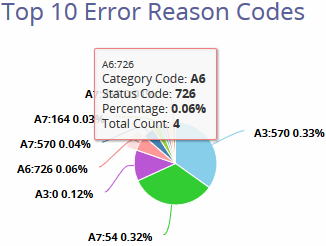
Top 10 Error Reason Codes – A pie chart that displays statistical data of the most common error codes. Hovering over the graph displays the following details:

The Claims menu consists of two tabs: Ready to Work and History.
Ready to Work is the extended version of the Dashboard line items, Claim with Errors, Delayed Claims and Unsubmitted Claims.

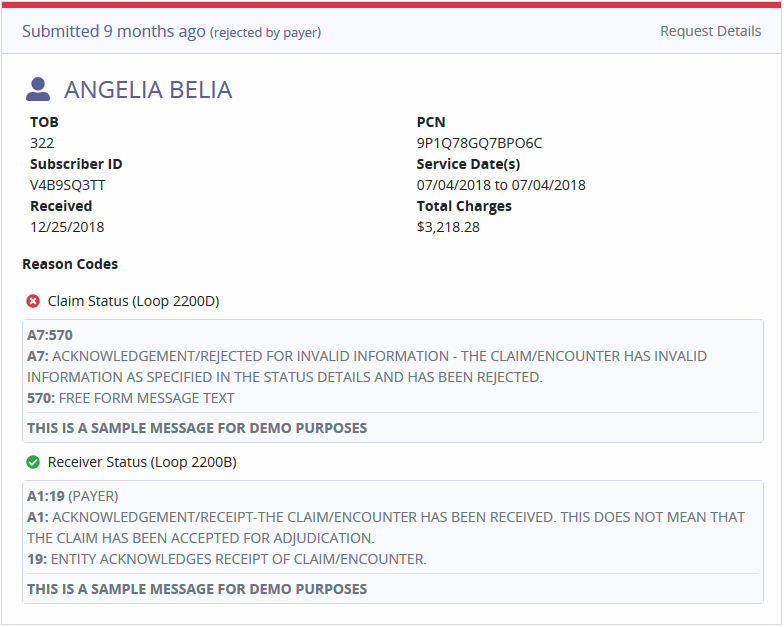
Each claim status category displays the Age of Claim, Patient Name/Subscriber ID, Payer/Payer ID, Date Range and Total Charges. Selecting a claim will generate a synopsis on the right side of the page. The claim shows details, Validation Message and Reason Codes.
Claims with Errors/Delayed Claims
Claim Buttons
 |
– Gives the option to add a new Professional or Institutional claim. |
 |
– Provides the option to edit, save and submit the claim. General claim details, patient data, payer information and more can be modified. |
 |
– Gives options to suppress for 24 Hours, 48 Hours and Indefinitely. Choosing to suppress Indefinitely will completely remove the claim from the Delayed Claims window, without reappearing in the future. Claims suppressed for an indefinite time frame can be found in the History tab. This option is recommended when a claim requires no further action and needs to be removed from the Ready to Work queue. |
 |
– Displays a new window with the Type of Bill code and Claim type shown in the top left side of the page. Below is a line graph of the claims’ Life Cycle. Each point represents the claim version with the date of correction listed below. Selecting the point will display details of the changes inside each claim version. |

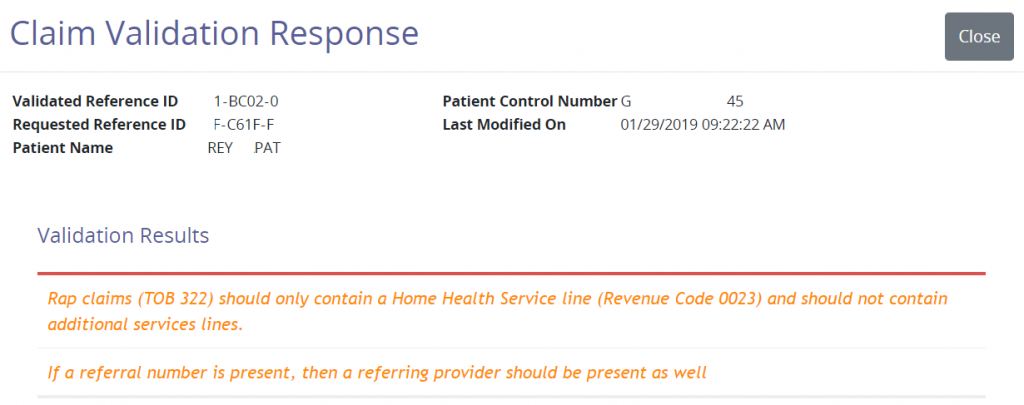
Request Details
The bottom left section of the page shows a synopsis of the claim, shows the time frame since the claim was submitted and Request Details. Selecting Request Details provides in-depth details about the claim.
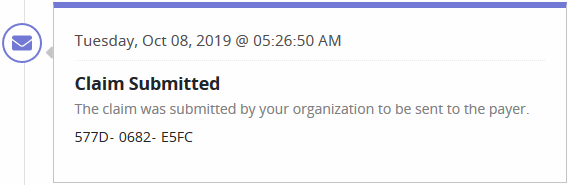
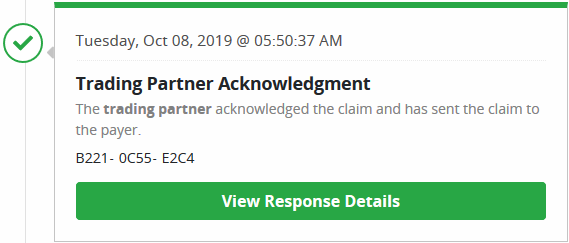
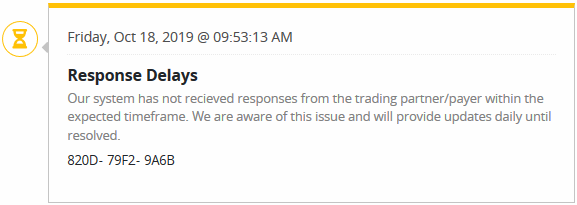
Claim Stages
Shows the various stages the claim has been through. Each status will have a date, time and a unique reference number assigned.

Unsubmitted Claims
These claims were created, but not completed. They are saved as a draft. This window displays general claim data including the age of the claim, payer name and date range.
 – Once deleted, a claim will be removed from the Ready to Work tab. Deleted claims are completely removed from the system and will have to be recreated.
 – Provides the option to edit, save and submit the claim. General claim details, patient data, payer information and more can be modified.
This section displays all content submitted to a Payer. The filter options include searching by Subscriber/Patient Name, Provider, Payer, Status, Date Type or Date Range.
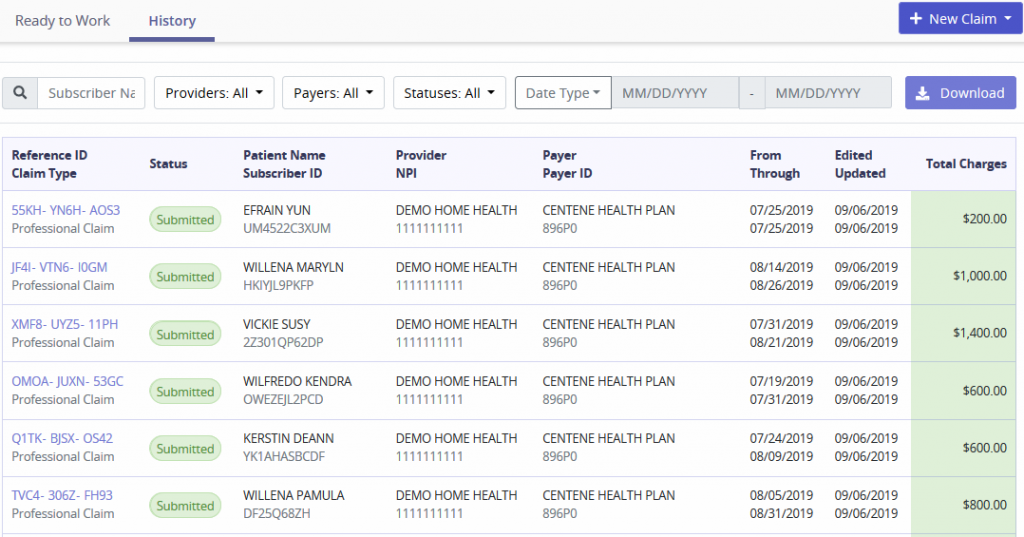
The columns provide information on the following:
 – Selecting the Download button will generate an Excel file to be saved based off the filters chosen.
Requests
This tab will show claims sent, which are also visible from the History tab. The top of the tab will show a bar graph of requests submitted during a specified date range. Search for submissions by entering Submission Time and then select the magnifying glass button.
Columns are displayed by Reference ID (select hyperlink to see the request), Status, Submission Time, TOB/Claim Type, Patient Name/PCN, Subscriber ID, Payer/Payer ID, Provider and Total Charges.
Acknowledgments
This tab will show claims received, which are also visible from the History tab. The top of the tab will show a bar graph of requests received during a specified date range. Search for submissions by entering Time of Receipt and then select the magnifying glass button.
Columns are displayed by Reference ID (select hyperlink to see request), Status, Time of Receipt, Acknowledgment Source, Patient Name/PCN, Subscriber ID and Provider.
Remittances
The top of the tab will show a bar graph of remittance received during a specified date range. Search for remittances by entering the EFT Number, Effective Date range and then select the magnifying glass button.
Below the graph lists remittances received and details tied to those payments:

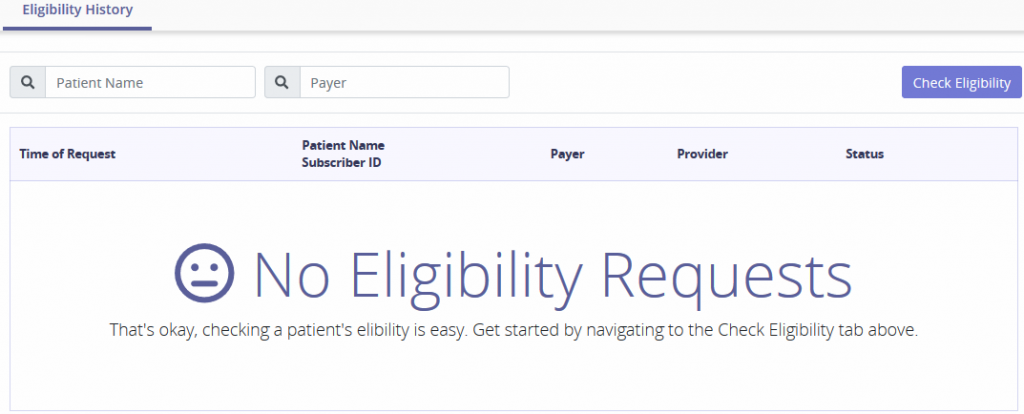
It is essential to confirm that a patient is eligible to receive services from the agency when providing patient care. Search for Eligibility Requests by entering the Patient Name or Payer. The tab provides details of the Time of Request, Patient Name/Subscriber ID, Payer, Provider and Status of the request. If there are no requests the following message will show:
Select the Check Eligibility button and the top part of the screen will expand with the following form:
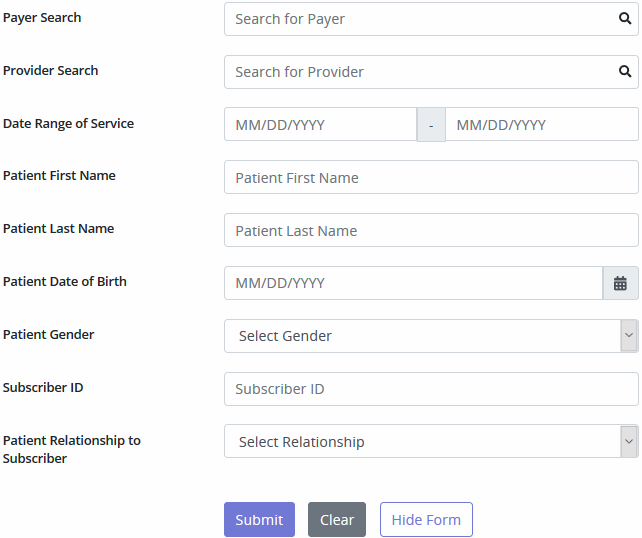
To generate a patient’s eligibility details, all sections provided must be completed. Eligibility data will appear within 24 hours of the request. The Payer list will show all payers Axxess bills out to, even if Axxess is not assigned as the Clearinghouse. A message indicating Unknown Status will generate when the payer is not set up to support eligibility.

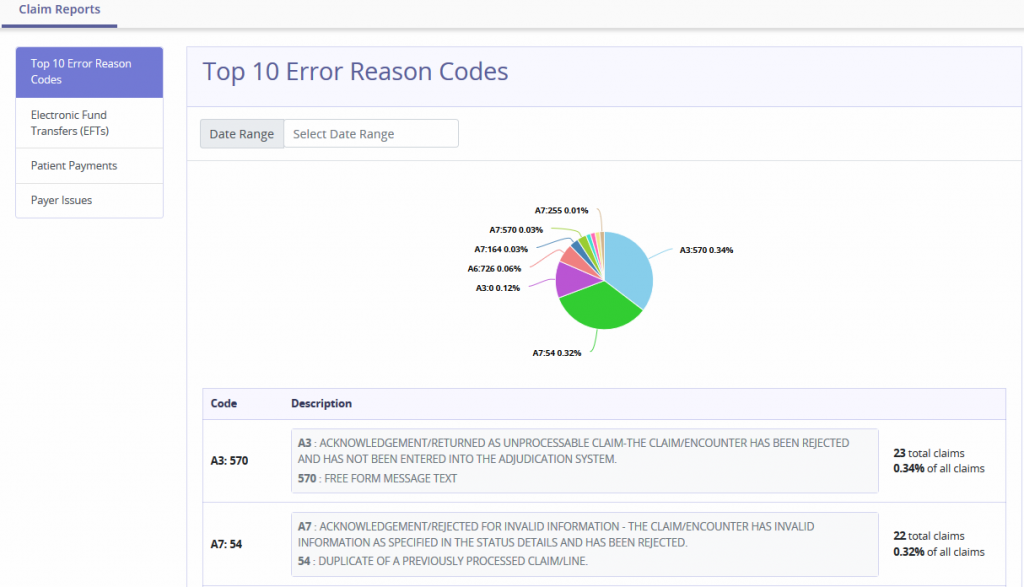
Top 10 Error Reason Codes
The pie chart displays statistical data of the most common error codes. Hovering over the graph displays the following details:
Electronic Fund Transfers (EFTs)
Displays Electronic Funds Transfers that have been paid for the previous seven days and future dates.
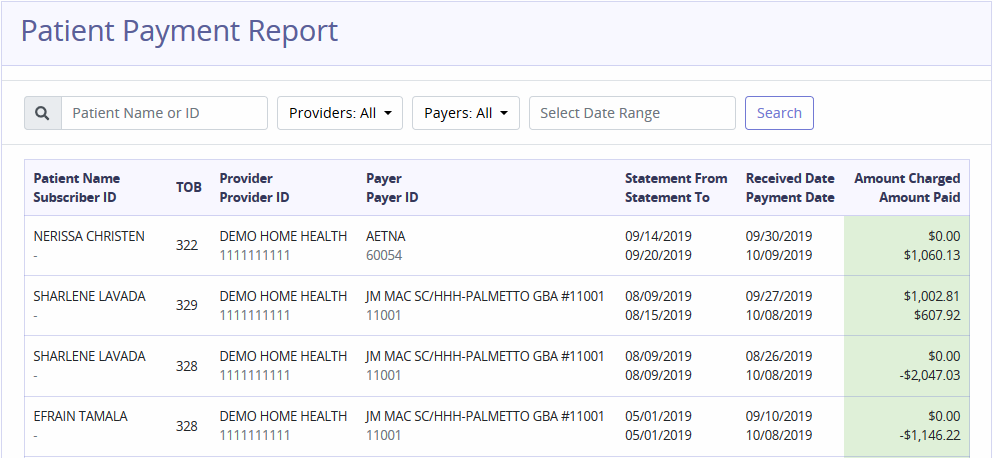
Patient Payments
The report shows patient payment advices. Filter by entering Patient Name/ID, choosing Providers, Payers and/or Date Range.
Payer Issues
This report shows issues of payers. To filter, choose Payers/Statuses and enter the Date Range.

Users
Houses all users with access to AxxessRCM. Search for users by Name or Email. Delete users by selecting the Remove button. Select the <, > or number buttons to move through the entire list of users. Select Cancel Invite to remove the pending new user.
Select Invite User to add an additional user. Enter the user email that the employee uses to log into Axxess AgencyCore. Set Permissions provides the ability to set system functions/limitations for the new user. Select View Only to select all View checkboxes. Select Reports Only to select all Reports checkboxes. Select Full Access to select all checkboxes. Select Invite User and the user will be emailed setup instructions.

NOTE: Removing a service user removes the ability to communicate between applications.
Payers
The Payers list names all the insurances inside the agency’s Axxess AgencyCore database. Search for payers by Name or ID. Select <, > or number buttons to move through the entire list of payers.
Providers
Linked Providers
This section lists the branches/Provider numbers linked to the agency. Search for providers by Name. Select the <, > or number buttons to move between pages. Each page contains up to 10 providers.
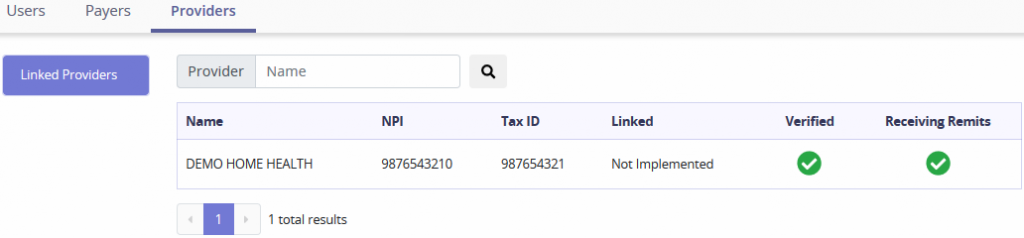
This section will link different Providers with AxxessRCM.
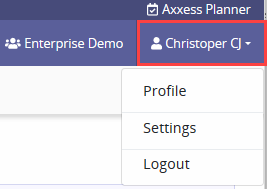
The User Menu displays the Users name, select the name to see the menu.
Profile
While managing their profile, users can:
The user can then choose to go Back to AxxessRCM or Log Out.
Settings – General Settings provides the option to turn on Clearinghouse functionality. Selecting the checkbox will also remove the Inbound and Outbound file break down. It will also however hide the Remittance tab.
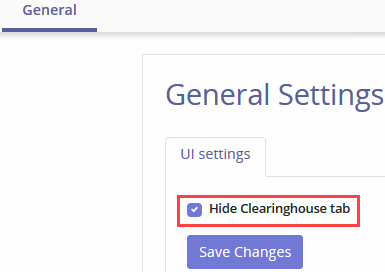
NOTE: Removing the Remittance tab takes away the only way to see Remittances.
Log Out – Select Log Out to leave the AxxessRCM software.
